
Imagine you're standing in front of a striking tower and want to fly the drone in a smooth semicircle while the subject always stays neatly in the frame. Doing this alone is almost impossible, because flying and camera operation each demand your full attention at the same time. This is exactly where Dual mode comes in: two people share the tasks, and you get smoother, more dynamic shots.
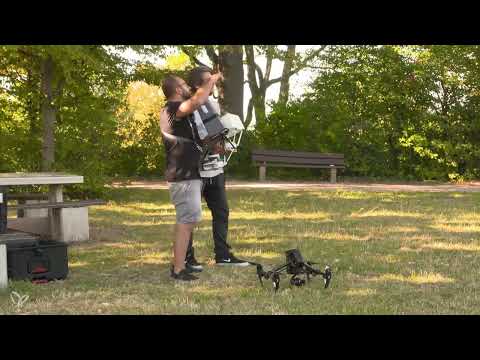
The video is only loaded from YouTube when you play it – data (including your IP address) is then transmitted to YouTube/Google. More in the privacy policy
In this guide, I'll walk you step by step through the entire process, from preparing at the launch site and setting up the camera and the second controller to the actual flight. You'll also learn why Free mode is so helpful for camera movements and what to pay attention to when setting up so that nobody trips over equipment.
Key Takeaways
Dual mode divides the work: One person flies, the other controls only the camera. This way, the camera operator can focus fully on composition.
Free mode decouples the gimbal from the flight direction. The camera keeps its orientation even when the drone rotates, and you can easily track a subject during sideways movements.
The landing gear should be retracted before the flight. This clears the camera's view and gives you a nearly complete 360-degree view.
A clean launch site prevents accidents. Place cases and accessories away from the flight area so that nobody trips over them during takeoff and landing.
Coordination before the flight pays off. Agree together on the flight path, the distance to the subject and the speed before the propellers are running.
Step-by-Step Guide
Step 1: Unpack the equipment and check the systems
Start by unpacking the Inspire One RAW. The drone is suitable for Dual mode, so for this use you should take the time to check every part for completeness and condition. Check the batteries, propellers and camera for visible damage before you continue.

Step 2: Mount the propellers
Now mount the propellers. Make sure you put each propeller on the correct motor side, because incorrectly mounted propellers lead to uncontrollable flight behavior. Your colleague Daniel is happy to take care of the last propellers, so you can work in parallel.

Step 3: Attach the camera to the mount
Place the camera on the camera mount and secure it using the provided adjustment flaps. The camera should sit firmly, but be locked in without force. Then check whether the gimbal can move freely, because a blockage would ruin the entire shot later.

Step 4: Set up the work area safely
Before you start, put all cases and accessories in a place where nobody can trip over them. This sounds trivial, but it is one of the most common causes of accidents at the launch site. Anyone looking up rarely pays attention to the ground, and a case in the wrong place can quickly become dangerous during takeoff or landing.

Step 5: Insert the memory card and SSD
Now insert the SD card into the X5R and connect the SSD so that the footage can be saved directly. Before the flight, check that both media are recognized. Missing storage after a successful sequence is annoying and can easily be avoided with a quick check.

Step 6: Connect the second controller
Connect the second controller, which the camera operator uses. Later, this controller will exclusively handle the control of the gimbal and camera, while the pilot flies the drone with the first controller. Wait until both controllers report a stable connection before you continue.

Step 7: Use a focus unit
In the video, a focus unit is also used. It makes it possible to pull focus precisely, since the camera system is set up so that the focus can be adjusted manually. Set the focus roughly before the flight so that you don't have to struggle with the focus during the flight.

Step 8: Use manual instead of automatic flight modes
The drone can also fly automatically, but in the professional field it is usually flown manually. Here too, the drone is not automated but controlled by hand. You also deliberately set the aperture, ISO, and shutter speed yourself so that you control the exposure.

Step 9: Start the app and check the connection
Start the app on the tablet or smartphone. Make sure the drone is connected to the app and all status indicators are green. Then check with your colleague whether he is ready before you initiate the takeoff.

Step 10: Activate Free mode
Select the appropriate flight mode in the menu. In practice, you usually work in Free mode. In this mode, the gimbal is decoupled from the drone's flight direction. This means: if the drone turns, the camera stays in its set direction. This very effect makes camera movements around a subject much more predictable.

Step 11: Understand and test the decoupling of the gimbal
The decoupling shows its usefulness when the pilot moves sideways. An example: the pilot flies to the right, and the subject would move out of the frame. With the gimbal, you can simply pan the camera to follow and keep the subject in the frame. Test this effect on the ground before you take off so that you internalize the behavior of the system.

Step 12: Determine the flight path together
Determine the flight path before the drone takes off. In the video, those involved decide on a semicircle around the tower. The camera operator focuses on the tower and keeps it in the center of the frame while the pilot flies the arc. Clear communication prevents misunderstandings in the air.

Step 13: Take off and retract the landing gear
After takeoff, you raise the landing gear. The advantage is clear: the legs are no longer in the frame, and the camera can look in all directions. In this way, a nearly complete all-around view is created, which would not be possible with a drone with the landing gear extended.

Step 14: Explore the surroundings and check for obstacles
First fly a bit higher and explore the area. Check whether there are branches, cables, or other obstacles nearby that the drone could get caught on. This reconnaissance is a simple but important safety measure before every shot.

Step 15: Adjust the aperture to the lighting conditions
Now set the aperture to suit the lighting conditions. In bright sunlight, you would often use an ND filter outdoors to reduce the amount of light. In the video, adjusting the aperture is sufficient, which shows that you can react flexibly to the situation.

Step 16: Find the position relative to the subject
Ask your pilot to fly further out step by step until the distance to the tower is right. You can tell the distance is right when the subject appears in the frame at the desired size. Once the position is right, give the pilot the signal to stop.

Step 17: Start the Sequence and Maintain Speed
Now start the camera sequence and have the pilot fly at the intended speed. A smooth movement looks significantly more professional in the result than jerky maneuvers. If necessary, ask the pilot to maintain the pace so that the arc stays clean and steady.

Step 18: Take Photos and Readjust Focus
Once the sequence works well, you can also take still images. To do this, the pilot flies back to the center so that the subject is positioned correctly again. Check the focus in between and readjust it if necessary.

Step 19: Land Safely
Give the pilot the signal to land as soon as the shots are in the can. Thank them for the cooperation and make sure that the area remains free of tripping hazards during landing as well. A calm landing neatly completes the flight.

Step 20: Understand the Division of Roles in Dual Mode
At the end of the flight, it becomes clear where the great advantage of Dual Mode lies. One person concentrates exclusively on the image, while the other watches your back and flies the required paths. For professional, dynamic, and impressive shots, this division is crucial.

Summary ??? Drone Photography in Dual Mode: How to Control the Drone as a Team of Two
Dual Mode allows you to create professional-level drone footage by dividing flying and camera operation between two people. Prepare the equipment and launch site carefully, activate Free Mode, and agree on the flight path together. The retracted landing gear ensures a clear view, and a check of the aperture and surroundings rounds off the preparation. With a little practice, calm, smooth, and impressive shots are the result.
FAQ
What does Dual Mode mean in drone photography?In Dual Mode, two people share the tasks. One person flies the drone, while the other exclusively controls the camera. This way, each person can concentrate on their task.
Why should you fly in Free Mode?In Free Mode, the gimbal is decoupled from the flight direction. The camera maintains its orientation even when the drone rotates. This makes it easier to keep a subject in the frame.
Why should the landing gear be retracted?Retracted landing gear prevents the legs from protruding into the image. This makes an almost complete all-round view of the camera possible.
How do you avoid accidents at the launch site?Place cases and accessories in a spot where no one can trip over them. Pay particular attention to the ground when taking off and landing, as your gaze is usually directed upward.
Why is coordination before the flight important?Clear coordination on flight path, distance, speed, and subject prevents misunderstandings. As a result, the pilot flies exactly the path that the camera operator needs for the shot.


