

Imagine a questionnaire is in front of you as a scan, and you need it as a text file. Retyping it costs time and nerves. The built-in OCR function (Optical Character Recognition) of Adobe Acrobat recognizes the characters on the scan and lays an editable, searchable text layer over it. The typeface is based on the original, and you can replace words, adjust fields, or process the result further in Word. This guide takes you from the JPEG scan to the finished Word document.
The video is only loaded from YouTube when you play it – data (including your IP address) is then transmitted to YouTube/Google. More in the privacy policy
Key Takeaways
- OCR converts images of text into real, editable text.
- A JPEG scan is first converted into a PDF via "Tools" and "Create PDF".
- Text recognition starts automatically via "Edit PDF".
- Individual words, colors, and text fields can be changed afterwards.
- Via "Export PDF" you get to a Word document in DOCX format.
Step-by-Step Guide
Step 1: Create the scan as a PDF
Open Adobe Acrobat and click "Tools" in the top menu. Select "Create PDF" there. In the dialog, find your scan file. In the example, it is a JPEG scan of a questionnaire that comes directly from the scanner. Confirm the selection, and Acrobat creates a PDF from it. Make sure the file actually contains an image of the document, because exactly this image will be analyzed later.

Step 2: Check the scan result
After opening it, you see the typical scan with image noise, edges, and artifacts. This is exactly how you can tell that it is not yet editable text. The PDF is initially just an image of the page. Briefly check the quality before you continue. The cleaner the scan, the more reliably the text recognition works.

Step 3: Start the text recognition
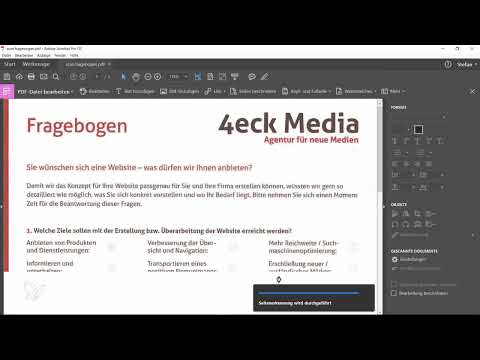
Go to "Tools" again and this time select "Edit PDF". Acrobat now begins page recognition, the progress of which you can follow at the bottom of the window. After a few seconds, the OCR is complete. Acrobat has generated a custom font that matches the typeface of the original. An asterisk in front of the font name shows you that it is a font generated by Acrobat. A font like Calibri was only recognized as similar, not adopted one-to-one. The text can now be clicked on and edited directly.

Step 4: Replace individual words
Click on the spot you want to change. In the example, the word "Webseite" appears in the concept and is to be replaced by "Homepage". Select the word, type in the new term, and check the result. The typeface is preserved, so the change is barely noticeable in the document.

Step 5: Adjust colors
Design elements can also be changed. If, for example, a brick-red element bothers you, you can swap the color. In the example, all shades of red are converted to green. This step shows that not only the text but also the layout remains flexible.
Step 6: Change terms using Find and Replace
If a term occurs multiple times, a targeted approach is worthwhile. Press Ctrl+F to open the search and enter the term you are looking for, in the example "Website". Then enter "Homepage" in the replacement field. With "Replace" you change one hit at a time. Go through it hit by hit until the entire document has been adjusted. With multi-page documents, you save a lot of time this way.
Step 7: Remove or enlarge text fields
Entire fields can also be edited. Select a field and remove it if it is no longer needed. If you want to create additional space, enlarge the field and insert a paragraph. Editing works directly in the document, without detours through other programs.

Step 8: Export the document to Word
When you are satisfied with the result, switch to "Export PDF". Select "Microsoft Word Document" as the target format. Acrobat saves the file in the current Word format DOCX. The export engine runs in the background. Afterwards, you have an editable Word document available that you can continue to use like any other text file.

Step 9: Searching and Copying
The finished PDF is now searchable. With Ctrl+F, you can instantly find terms like "Dienstleistung" or "Dienstleistungen". This is especially handy when you are archiving larger volumes of documents. Select passages of text, copy them with Ctrl+C, and paste them into other documents. This way, the content of the original is preserved and can still be used flexibly.

Summary – OCR in Acrobat: Making Scanned Documents Editable
With the OCR function of Adobe Acrobat, you turn paper documents into text that you can edit, search, and copy. The process is straightforward: first you create a PDF from the scan, start text recognition via "Edit PDF," adjust the content, and, if needed, export the result to Word. This method is a great relief, especially for archiving and for working with government agencies or administrations.
FAQ
Do I have to convert the scan into a PDF first?Yes, a JPEG scan is first converted into a PDF via "Tools" and "Create PDF" before text recognition can start.
Why does the font look different after OCR?Acrobat generates its own font that is modeled on the original. Fonts such as Calibri are only recognized as similar, so there may be minimal differences.
Can I also use the result without Word?Yes, the PDF remains editable and searchable. Exporting to Word is only an option if you want to process the text further.
Which format do I get when exporting?You get a Microsoft Word document in the current DOCX format.
Can colors in the document also be changed?Yes, design elements such as colored fields can also be adjusted afterwards.
Why is the quality of the scan important?The cleaner the scan, the more accurately Acrobat recognizes the text. Artifacts and image noise can impair recognition.


