With Luminar 4, you have the opportunity to edit your images in a professional manner. In addition to filter applications, Luminar offers powerful tools to rotate, crop, and remove unwanted objects from images. In this guide, you will learn how to make the most of these tools.
Key Insights
- Effectively rotate and crop photos
- Erase or clone image areas
- Easily perform lens corrections
Steps for Editing Images with Luminar 4
Rotate and Crop Image
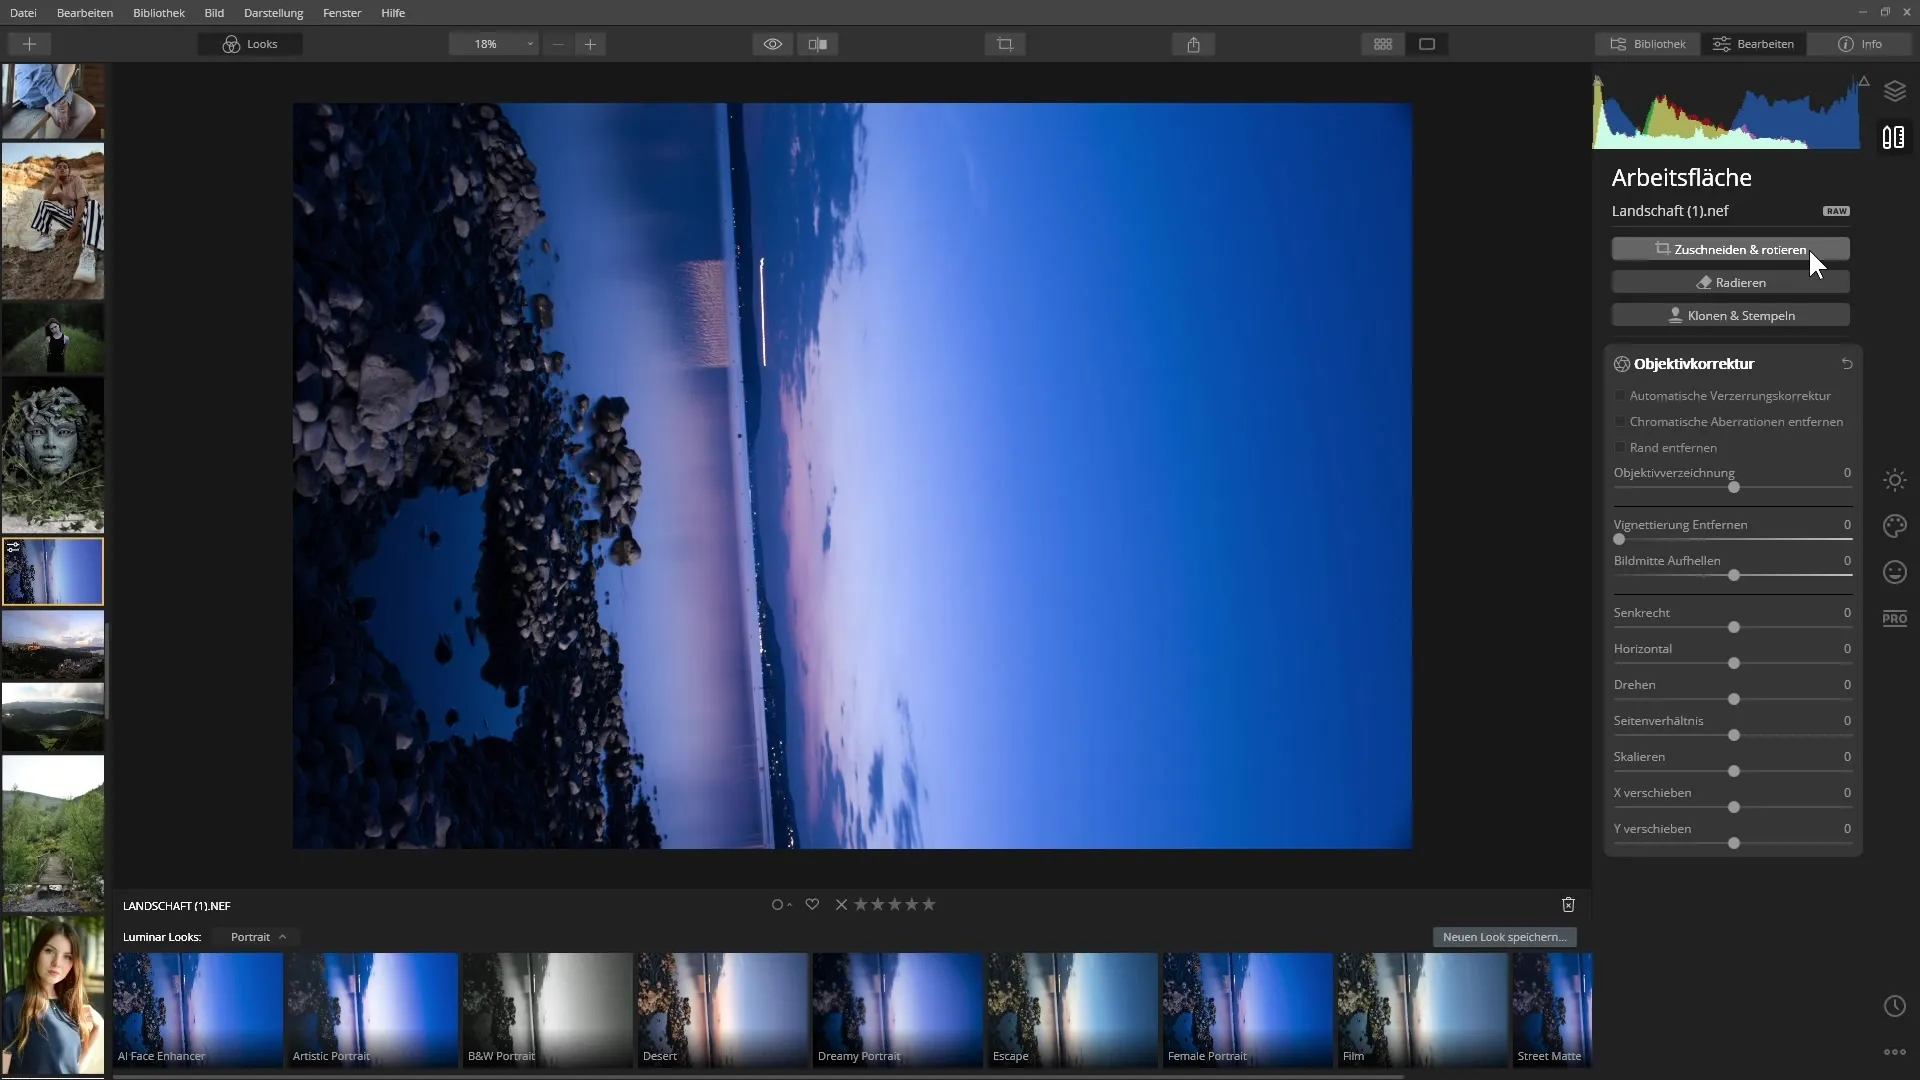
To rotate an image, right-click on it in fullscreen or in the multiple view and open the context menu. Select the option "Rotate" and choose the direction in which you want to rotate the image. In this view, you can ensure that your image is properly aligned. Let's say your image is tilted to the right. With this simple rotation, you quickly and effectively straighten the horizon.

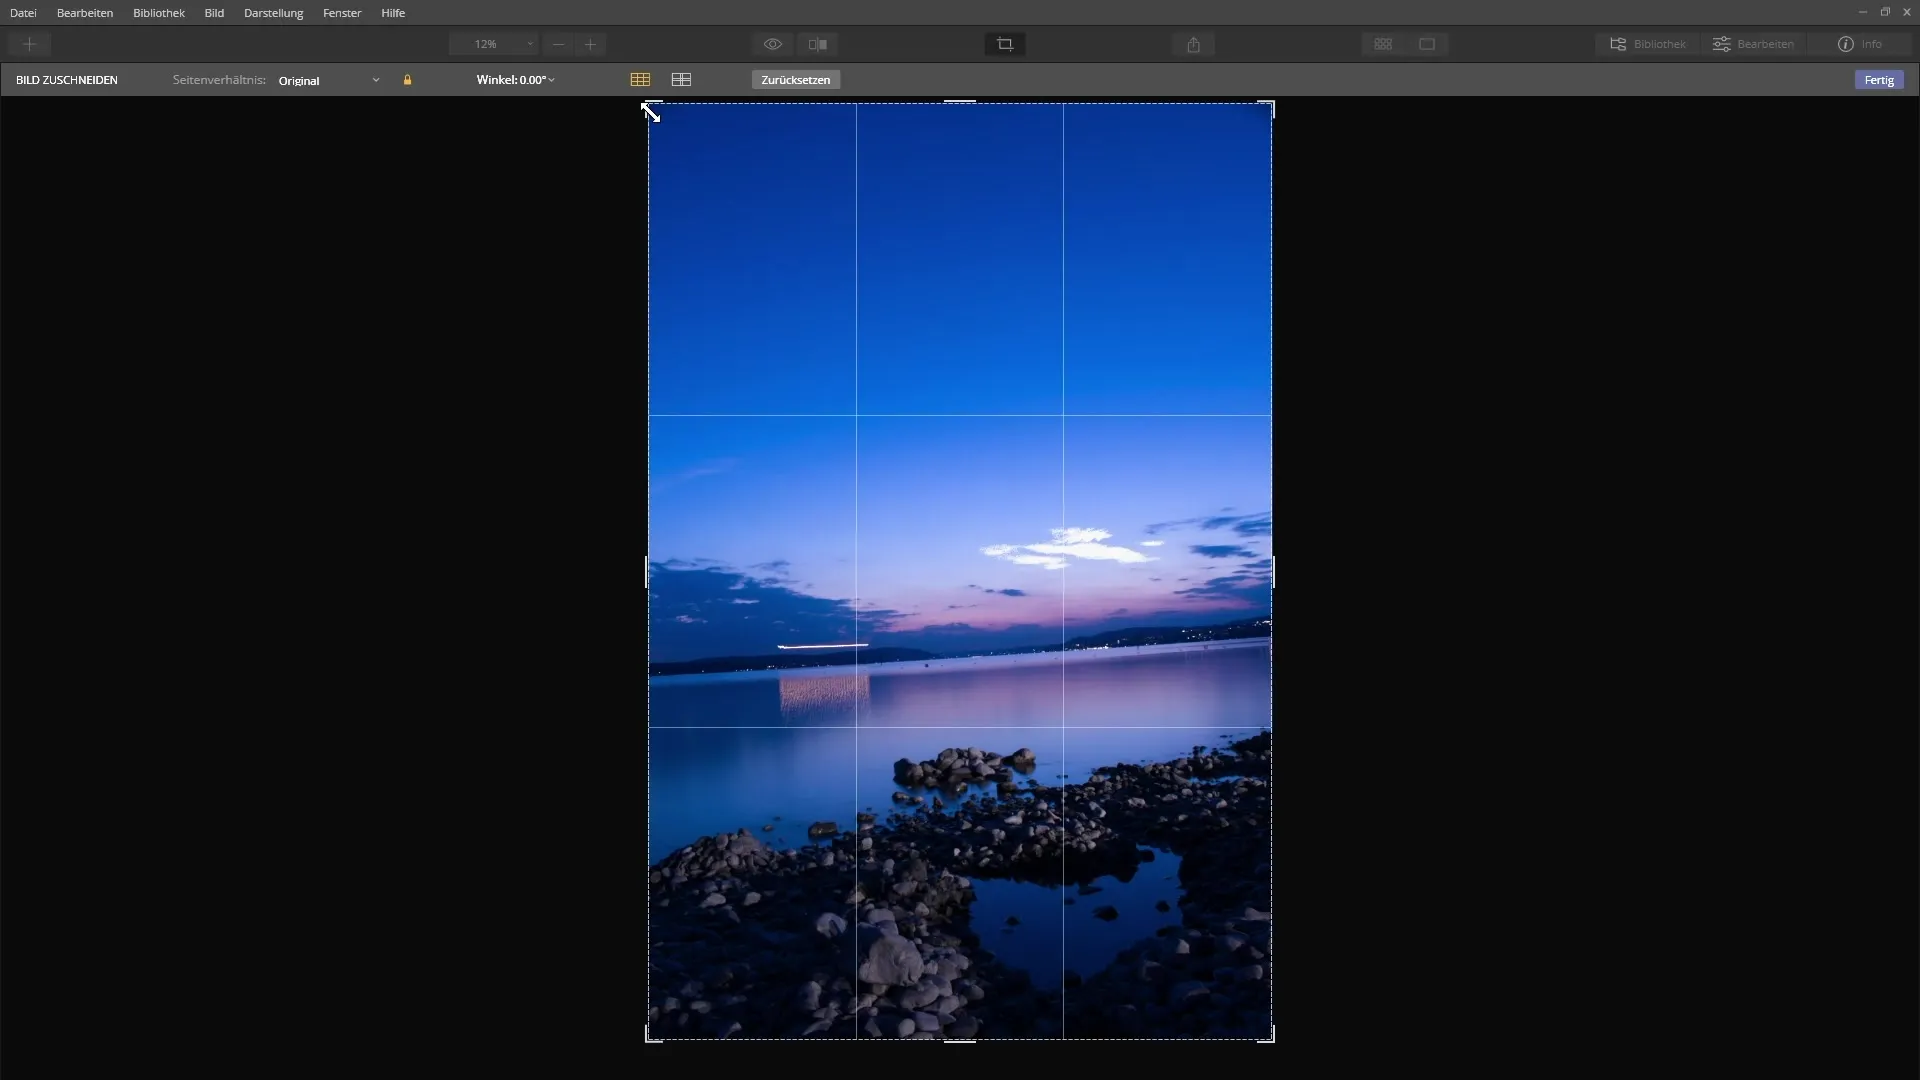
Next, you can also crop the image. Go to the "Edit" area for this. Here, you will find the handles with which you can select the image crop. You have the option to crop the image in its original aspect ratio or in a square. When you're done cropping, you can also straighten the horizon by using the "Angle" function. A grid will be displayed that you can use to align the lines horizontally.

Remove Unwanted Image Areas
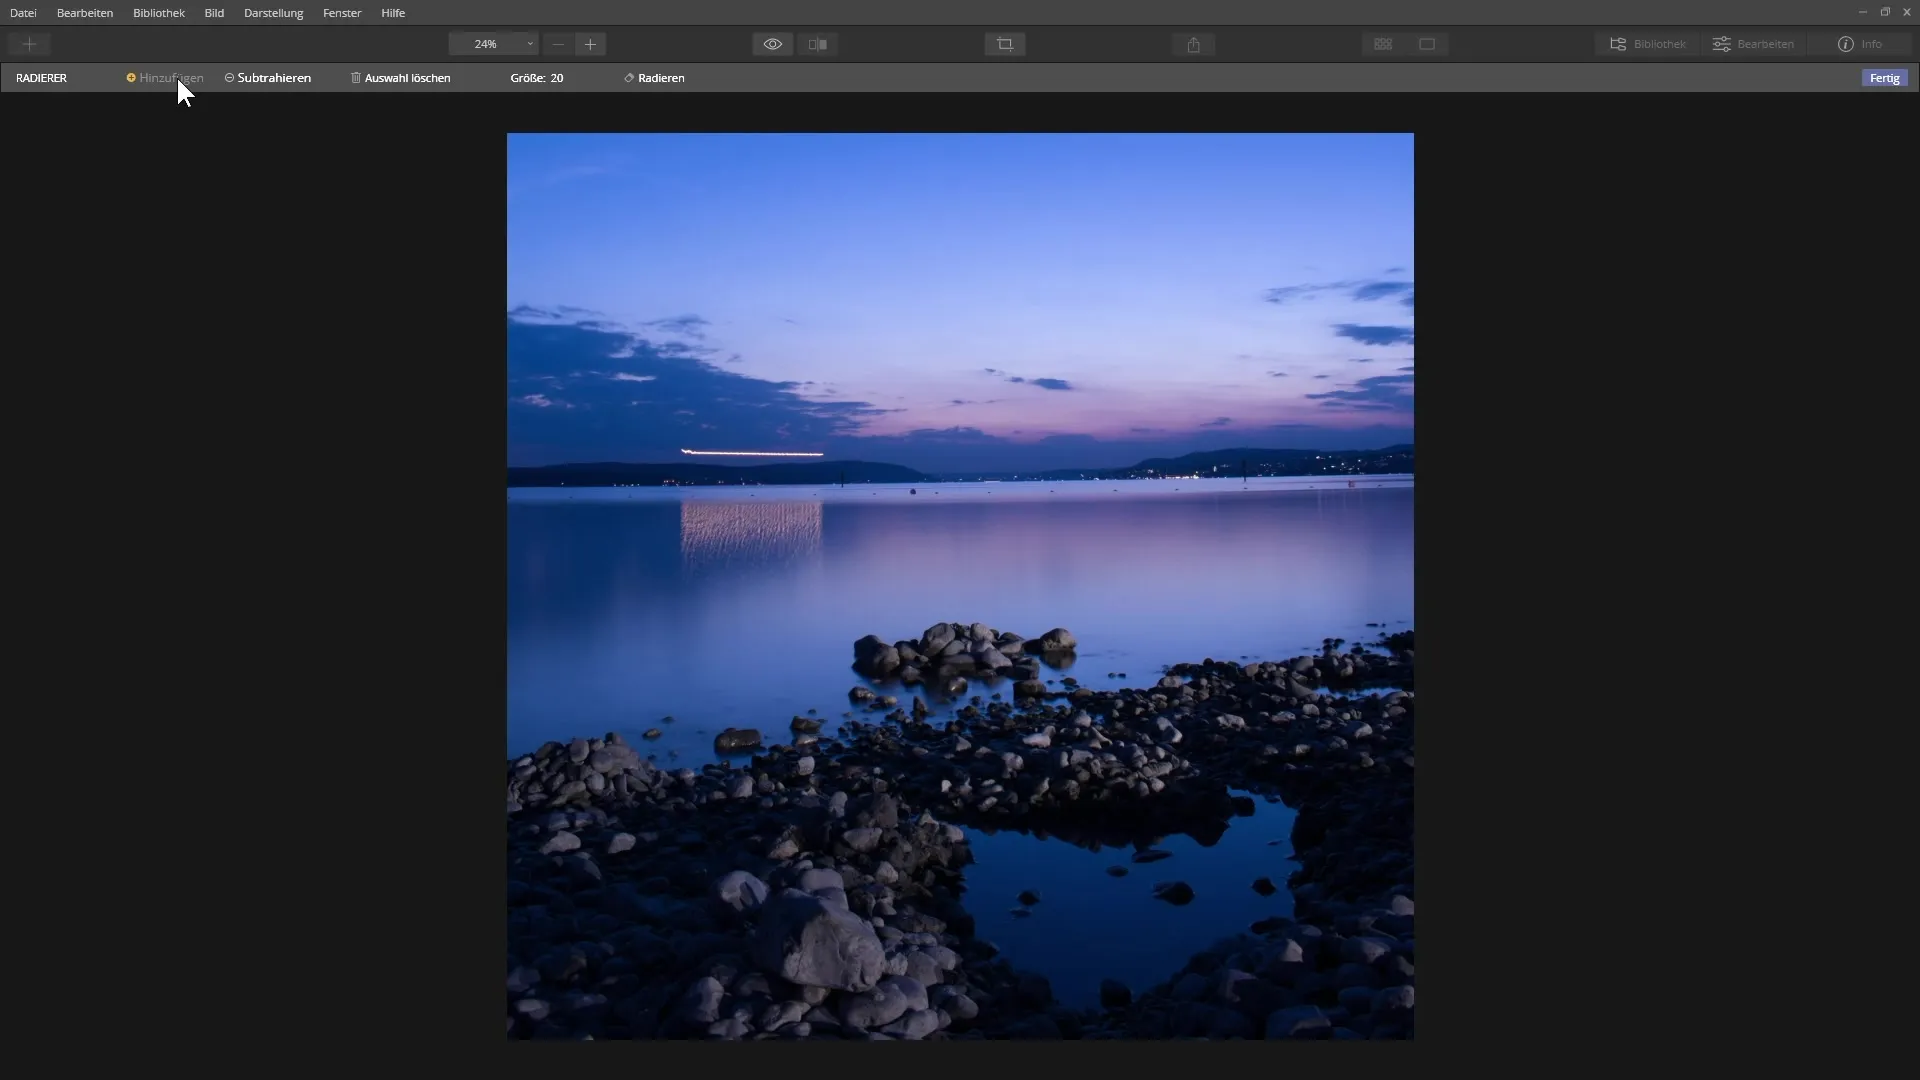
To remove unwanted elements from your image, use the Eraser function. Select the "Add" mode and mark the areas you want to erase. Make sure to adjust the brush size for precise working possibilities. Paint over the parts of the image you wish to remove, and then Luminar will intelligently fill in the areas with other image content and delete the unwanted elements.

If you accidentally painted in an area where you didn't want to, you can go back with the "Subtract" function. This function allows you to make corrections before you click "Done." Luminar will then automatically calculate the changes and show you the result.
Clone and Stamp Image Areas
The Clone and Stamp function allows you to transfer image areas one-to-one to another location. Hold down the Alt key to define an area of the image as a source. You can adjust the brush size and softness to transfer the selected image material to the desired location without overlap. However, there is no undo function in this mode, so you need to be sure before you click "Done." If you want to undo it, select the "Undo" editing function.
Perform Lens Correction
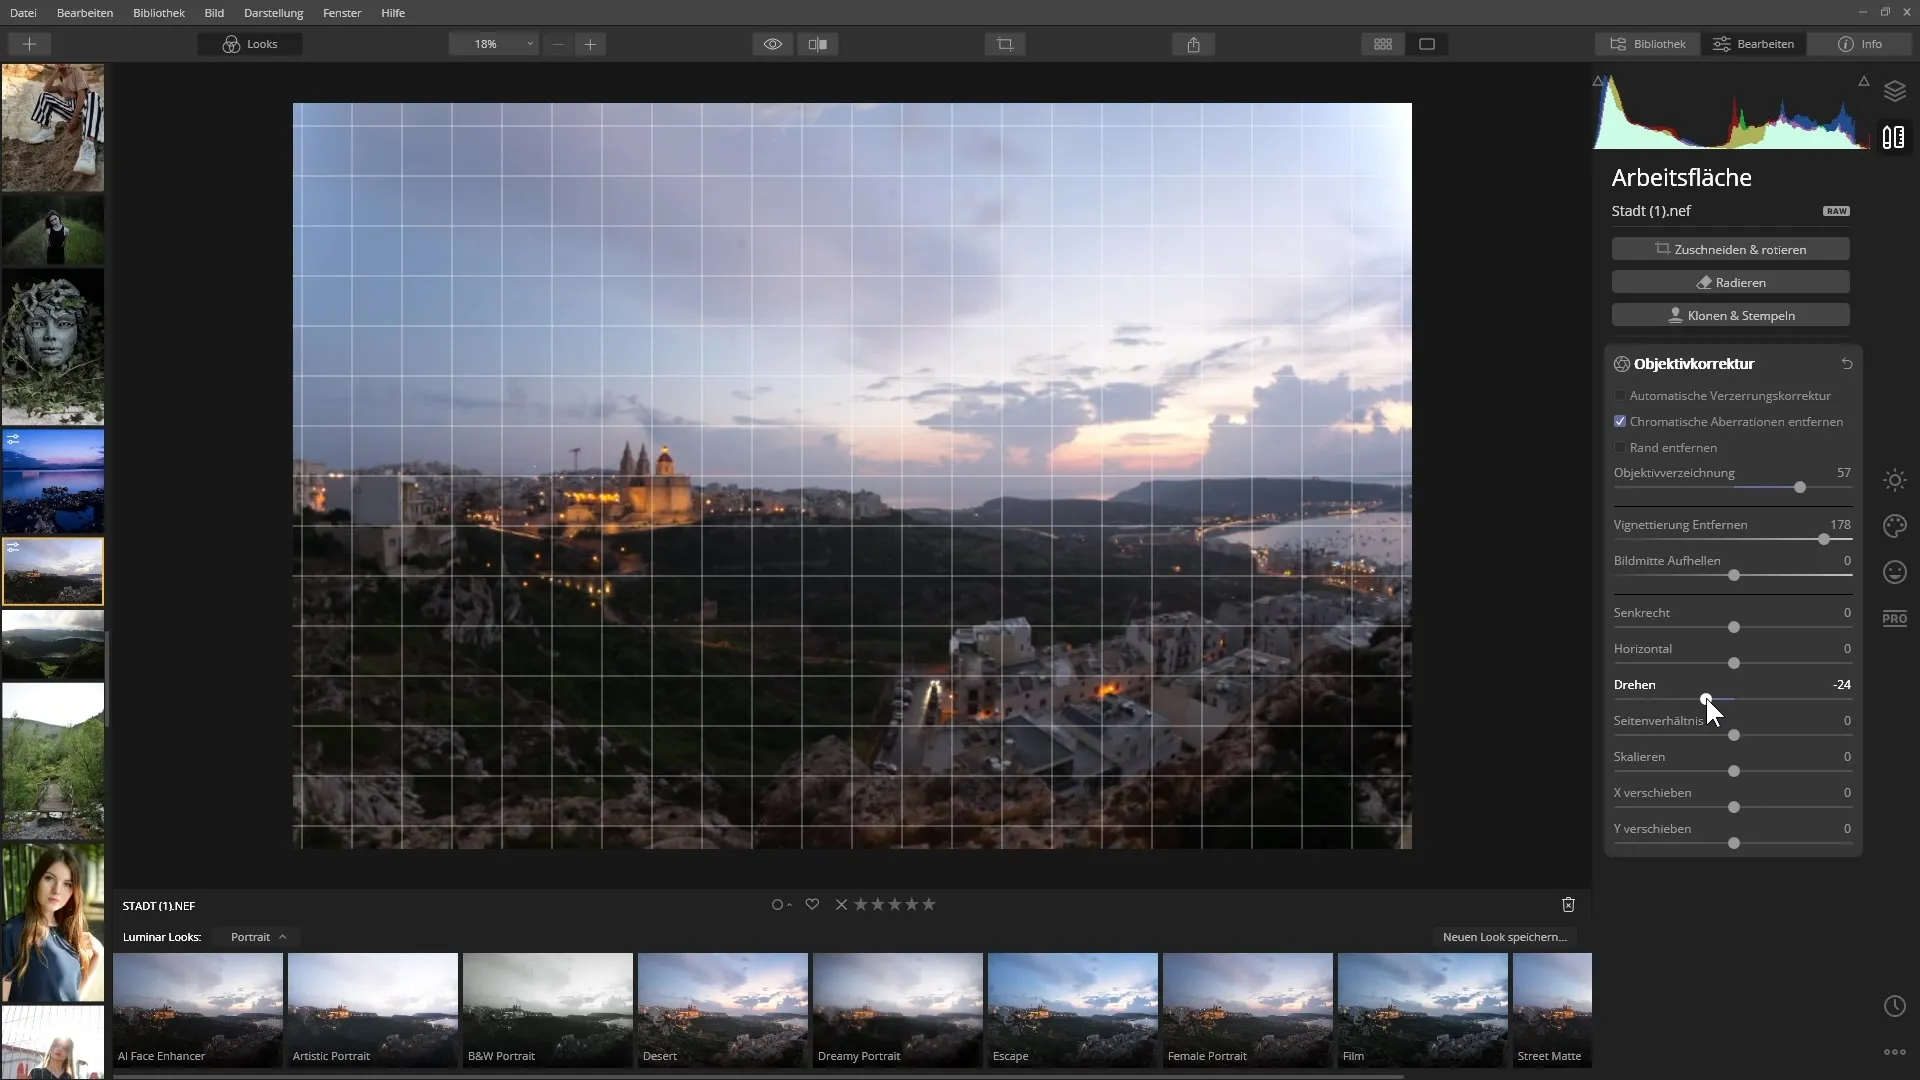
With Luminar 4, you can also effectively implement lens corrections. Select an image taken with a wide-angle lens. You will clearly see distortions and chromatic aberrations. To remove the chromatic aberrations, select the corresponding function and let Luminar perform the calculations. This will eliminate unwanted color fringes and make the image clearer.

Additionally, you have the option to adjust the lens distortion. Slide the slider to correct the distortion. This is especially useful if your images exhibit vignetting that often occurs with certain lenses.

You can also correct the horizon by using the "Rotate" function at the top of the window. The grid will help you ensure that your image is properly aligned.

Summary - Luminar 4: Optimal Tools for Image Editing
With the tools presented in Luminar 4, you are now able to edit your images effortlessly. Whether rotating, cropping, retouching, or correcting lens errors – you have control over every editing step to take your photos to the next level.
Frequently Asked Questions
How can I rotate an image in Luminar 4?Right-click on the image and select the "Rotate" option from the context menu.
Can I easily remove unwanted image areas?Yes, use the Eraser function for effective removal of unwanted objects.
How does cloning and stamping work in Luminar 4?Hold down the Alt key to select an image area as a source and place it in a different location.
How do I correct lens distortions in my images?Use the lens correction function to remove chromatic aberrations and distortions.
What can I do if I want to undo an editing step?You can use the "Undo" command in the editing menu.


