Correcting a photo uniformly is quickly done. Often, though, you only need a specific area of the image, such as a face that can take a little more light while the background should remain unchanged. That is exactly what masks in Affinity Pixel are for. They determine where an adjustment takes effect and where it doesn't.
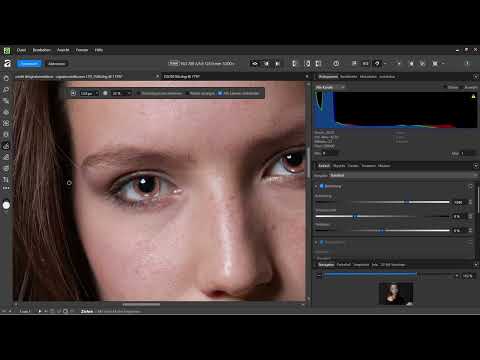
The video is only loaded from YouTube when you play it – data (including your IP address) is then transmitted to YouTube/Google. More in the privacy policy
In this tutorial, I'll show you how to return to the development, how to distinguish the master mask from the pixel mask, how to select individual areas with the brush, and how to correct mistakes with the eraser. We'll also look at object selection masks and gradient masks. By the end, you'll know how to work precisely and without loss of quality using just a few tools.
Key Takeaways
- The master mask affects the entire image. As soon as you want to edit only a part, you need a pixel mask.
- With the brush (key B), you paint the area that should be adjusted. You adjust the brush size to suit the subject.
- Light and dark areas can be edited separately via overlays, for example white eyes versus brown iris areas.
- With the eraser (key E), you remove mask areas that you don't want to adjust.
- Gradient masks (key G) are suitable for smooth transitions, for example when darkening or brightening the sky.
Step-by-Step Guide
Step 1: Switch Back to Develop
You're in Pixel mode but want to edit the RAW image once more. To do this, click on "Develop". Your previous changes are already saved once you click on "Develop" (finish developing). So you can switch between the modes at any time without losing anything.

Step 2: Open the Masks Tab
In the right sidebar, switch to the "Masks" tab. You'll notice that you are in the master mask there by default. Every adjustment you make now, such as exposure, affects the entire image. That's why the whole photo gets brighter when you move the slider.

Step 3: Create a Pixel Mask with the Brush
Select the brush with the B key. Before you get started, reduce the size of the brush. For this portrait, a size of about 200 pixels has proven effective, because 500 pixels is too coarse for the fine contours of the face. Now paint over the face, specifically everything you want to edit later. Make sure to paint the inner areas as well so that the mask has no gaps.

In the example, you only want to brighten the forehead. That's why you paint the area exactly there. The contours can still be corrected later.

Step 4: Activate and Adjust the Pixel Mask
Go back to the "Masks" tab. There you now see a new pixel mask. You can choose between the master mask and the pixel mask. Click on the pixel mask so that your changes apply only to the marked area. If you now move the exposure up or down, it affects only the forehead. In this way, you brighten a section selectively while the background remains unchanged.

This approach is especially useful if you want to treat individual parts of a face, such as the eyes, forehead, or cheeks.

Step 5: Add More Masks via the Menu
Via the "Add Mask" button at the bottom right of the Masks tab, you open a menu. There you can choose between an object selection mask, a pixel mask, and a gradient mask. For the current task, you need another pixel mask. It allows you to edit other areas independently of the first mask.

Step 6: Brighten the Eyes Selectively
Now select, for example, the brown iris of both eyes. Paint over it with the brush and then open the exposure. Increase it carefully. This requires a lot of sensitivity, because the neighboring white areas of the eye must not be affected. If you zoom deep into the image and work very precisely, you can make eyes look very vivid or selectively darken them. Darkening the pupils to almost black is just as possible as emphasizing light reflections in the iris.

Make sure you check the adjustment in detail before you continue working. Especially with eyes, small exaggerations are immediately noticeable.

Step 7: Correct Mistakes with the Eraser
If your mask has captured too much in one spot, open the mask and select the eraser using the E key. Reduce the size of the brush so that you only remove the desired area. In this example, the white areas in the eye should remain untouched, while only the brown is brightened. Simply erase the disruptive areas again. With a little patience, the transitions look much more natural from a distance, even if they may still show slight edges in close-up view.

Step 8: Use an Object Selection Mask
The Object Selection Mask is an alternative if you want to edit entire parts of a subject such as the sky or individual objects. It works with machine learning. However, for this you need an additional segmentation model, which you must install first. In the video, this is deliberately skipped. The important thing is just to know that this tool exists and is intended for more complex selections.

Step 9: Work with the Gradient Mask
You access gradient masks via the G key. They create a soft transition that makes the adjustment strongly effective only on one side of the image. For example, drag the mask from top left to bottom right. If you now increase the exposure, it has a much stronger effect at the top left than at the bottom right. This is well suited when light comes from a certain direction and you want to enhance that impression. You can move the gradient afterwards and change its direction. The effect can also be placed precisely vertically or in the middle of an image. It is used rather rarely, but can be useful for backgrounds.

Here the effect is particularly clear with an exposure adjustment. The strength decreases continuously along the gradient.

Step 10: Save the Image
When you are satisfied with your adjustments, open the develop mode again. Afterwards you can confirm or cancel the process. You then end up back in the Pixel Persona. There, the image is now available as a DNG file and no longer in the original RAW format. In develop mode, however, the RAW can still be edited, as long as you do not convert it again.

Summary ??? Affinity Pixel Local Adjustments: Brightening Faces with Masks and Gradients
You have seen that masks are the central method for selectively editing image areas. The master mask affects the entire image, the pixel mask the area you have marked. With the brush and eraser you define the area, and with the exposure you determine the effect. Gradient masks and Object Selection Masks complement these possibilities for larger or uniform areas. With a little practice, you will achieve precise results in which the rest of the photo remains untouched.
FAQ
Why does the whole image change with my adjustment?You are probably still working in the master mask. Switch to your pixel mask in the Masks tab so that the adjustment only affects the marked area.
How large should the brush be for fine facial areas?For portraits, a size of about 200 pixels has proven effective. For larger areas you can increase the value; for eyes and contours you should rather reduce it.
How do I remove areas from a mask without repainting it completely?Select the eraser using the E key and paint over the spots that should not be adjusted. With a smaller brush this works more precisely.
What is the difference between a pixel mask and a gradient mask?A pixel mask is created by painting with the brush and follows your contours. A gradient mask creates a soft transition that weakens the effect from one side to the other.
Why do I need an additional model for the Object Selection Mask?The Object Selection Mask works with machine learning. For this, the segmentation model must be installed first.
Can I still change something in the RAW after saving?Yes, as long as you work in develop mode, the adjustments can still be changed. After developing, the image is available as a DNG file.


