
Imagine a long hotel corridor with bright daylight falling through its windows, while the wall in the corridor is lit only by subtle artificial light. Martin takes exactly this situation as the starting point in this practical video. The result should not only look good, but also be useful to the graphic designer in the layout. You will learn how to use an on-camera flash to distribute the tonal values so that there is room for text, logos or banners.
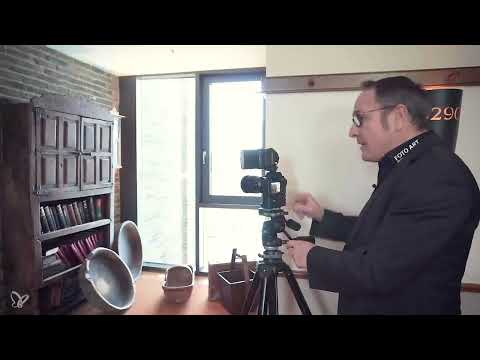
The video is only loaded from YouTube when you play it – data (including your IP address) is then transmitted to YouTube/Google. More in the privacy policy
At first, the task sounds like a problem with too many variables. With a clear sequence, however, it can be solved well: first analyze the subject, then take test shots step by step and carefully dose the flash.
Key Takeaways
- Harsh contrasts between daylight and artificial light can only be brought under control by deliberately lighting individual areas.
- An on-camera flash should only brighten the dark areas, not the entire image. You should therefore reduce the flash power significantly.
- You avoid reflections of the flash in glass panes by changing the camera position slightly.
- Empty areas in bright parts of the image, such as windows or walls, offer the graphic designer space for text and logos.
Step-by-Step Guide
Step 1: Analyze the Subject and Lighting Situation
Before you touch the camera, take a calm look at the subject. In the video there are two light sources: daylight from the side and artificial light in the long corridor. This mixed lighting situation creates harsh contrasts, because the differences in brightness can hardly be balanced with a single exposure. Make a note beforehand of which areas you want to show and which parts of the image you can leave darker. It is precisely in this step that it is decided whether you can later counteract sensibly.

Step 2: Define the Frame and Take a Base Shot
Define the image frame and take a first shot without flash. Pay attention to the highlights: in the video they are correctly exposed, and there is detail in the bright areas. The midtones also look consistent. However, the corridor remains clearly too dark. This base shot is your reference, because it shows you exactly which area you need to brighten with additional light.

Step 3: Mount and Aim the On-Camera Flash
Put the on-camera flash on the camera. Most models can be tilted vertically and horizontally. This function is crucial, because you only want to light the dark corridor and leave the rest of the image as untouched as possible. Therefore, aim the flash so that the light falls specifically into the corridor and does not hit the areas that are already well exposed.

Step 4: Check the First Flash Shot in Automatic Mode
Now take a shot with the flash in automatic mode. In the video, the result shows a typical problem: the left half of the image is brightened, but looks far too bright and blown out by the flash. The mood of the room is lost in the process. This result is not a mistake, but an important insight. It shows you that the automatic mode sets the power too high.

Step 5: Reduce the Flash Power Step by Step
Now reduce the power of the flash on the flash unit. The correction is made using the flash exposure compensation control, which you adjust in the plus or minus direction. Martin first tries one stop less. This result is still too strong, because the flash still lights the corner area too much. Therefore, proceed in small steps and check each level on the display. In the video, Martin finally ends up at minus 2.7 stops. This looks very subtle and brings the mood in the corridor back.


Step 6: Use a Long Exposure for the Artificial Light
With reduced flash power, you can make the existing artificial light in the corridor visible again. For this, you use a long exposure time. The flash then delivers only a subtle pulse, while the ambient light takes care of the rest of the exposure. This creates a balanced mood instead of a harsh flash image. Try out the setting with several test shots until you like the result.

Step 7: Avoid Reflections in Glass Surfaces
In the video, Martin discovers that the flash is reflected in the glass pane at the front of the image. This so-called total reflection is distracting and should be avoided. To do this, change the camera position slightly until the reflection disappears. Often a small step to the side or a slight change in height is enough. Check the result with a new test shot.

Step 8: Record the Final Settings
When the image looks coherent, note down all the values. In the video, the settings are approximately an exposure time of one second, aperture 6.3 at ISO 100, and a flash correction of minus 2.7 stops. Record these values so that you can reuse or adjust them for other subjects in the same room.

Step 9: Check the Composition Using the Rule of Thirds
The finished image follows a clear division into thirds. The first third contains the corridor, the second third contains the actual subject that was originally on the list. The last third contains the window, which is visually rather unimportant. Pay attention to this division when taking photos, because it helps you cleanly separate subject and background.

Step 10: Plan Free Space for Graphic Designers
The bright areas of the image near the window are excellent as space for text or logos. Think not only of your own subject, but also of everyone who will work with the image later. Deliberately leave a little more space in the image so that a graphic designer can place text or create a banner in a strict landscape format. This preparatory work is especially valuable for hotel brochures or websites, because it offers the layout more design possibilities.

Summary – Tonal Value Distribution in Hotel Photography: Using Flash Purposefully for Layouts
With well-planned tonal value distribution, even difficult lighting situations such as mixed light and harsh contrasts can be mastered. You start with a base shot, reduce the on-camera flash significantly, and use the existing artificial light through a long exposure time. You avoid reflections by changing your position. Additionally, pay attention to free areas in the image so that your photo can later also be used for layouts, logos, and banners.
FAQ
Why was the flash shot in automatic mode too bright?Automatic mode often sets the flash power too high, causing bright areas to be overexposed and the room's atmosphere to be lost.
How much flash power should I reduce?There is no fixed rule, but in the video a correction of minus 2.7 stops proved to be suitable. Approach the result slowly with test shots.
What is the long exposure time for?It brings the existing artificial light in the corridor into the image, while the flash acts only as a subtle supplement.
How do I avoid reflections of the flash in glass panes?Change the camera position slightly until the reflection disappears from the image, and check the result with a new test shot.
Why should I leave space for graphics in the image?Free areas, such as in bright parts of the image, give graphic designers the opportunity to place text, logos, or banners sensibly.


