
At first glance, a stairwell often looks unremarkable, but between the steps there are design elements that reveal a lot about a hotel's character. This is exactly where this guide comes in. You will learn how to showcase designer lamps with deliberately used depth of field, what difficulties can arise in the process, and how to get them under control. In the end, you will have a selection of shots with which you can offer the client different visual effects.
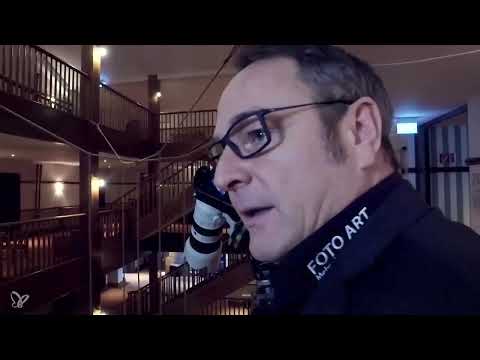
The video is only loaded from YouTube when you play it – data (including your IP address) is then transmitted to YouTube/Google. More in the privacy policy
Key Takeaways
- The style of the hotel and the owner's taste determine which elements you put at the center.
- A telephoto lens allows you to get close to details like pendant lamps without having to move closer to the drop yourself.
- An aperture series (f/2.8, f/4, f/5.6, f/11) shows you how the sharp area changes with each stop.
- Passersby can be kept out of the picture with multiple shots or long exposure times.
- The self-timer prevents camera shake during long exposure times.
- Different variants give the client the choice between targeted emphasis and overall impression.
Step-by-Step Guide
Step 1: Grasping the Character of the Stairwell
Before you set up the camera, take time to read the space. Every hotel has its own style, which is reflected in materials, colors, and artworks. A modern building may work with cool surfaces, while a classic one relies more on wood and warm brown tones. Ask yourself who chose this design. Often the owner's personal taste is behind it. If you recognize and appreciate their favorite elements, your photography becomes significantly more valuable to the client.

Step 2: Ensuring Safety and Stability Before Shooting
The pendant lamps hang above the stairwell drop, and for good shots the lens is often pushed far over the railing. This is no joke, but a real risk. Rely on a sturdy tripod that reliably carries your equipment. Before every shot, check that it stands securely, that all clamps are locked, and the position of the camera. A tripod that has accompanied you for years builds trust, but it does not replace your diligence.

Step 3: Choosing the Framing and Moving Close with the Telephoto Lens
Define your framing deliberately. Decide which lamp or which detail should be the focus. Use the telephoto lens for this, because it lets you get close to the lights without needlessly changing the camera position. Zoom in until the shape and materiality of the lamps are clearly visible. Make sure that only the elements that tell your story end up in the picture.

Step 4: Starting the Aperture Series and Checking the First Shot
Begin with the widest aperture, that is f/2.8. With an open aperture, the sharp area is very small, so ideally only one lamp appears truly sharp. Adjust the exposure time so that the image is correctly exposed. Take the shot and examine it critically on the display. Pay attention to which areas look soft and which elements are razor sharp. This assessment forms the basis for all further decisions.

Step 5: Planning for Passersby and Keeping Disturbances Out of the Picture
People repeatedly move through the frame in the stairwell. This can only be prevented to a limited extent, but you can deal with it. With short exposure times, take several shots of the same setting and later select the version without disruptive people. With long exposure times the effect is different, because people who are only briefly in the frame then largely disappear. Plan these repetitions from the start so that you do not come under time pressure.

Step 6: Gaining More Depth of Field with Aperture 4
Now stop down one stop to f/4. The area of sharpness becomes larger as a result, and the sense of depth in the space comes through more strongly. Note, however, that the second lamp is still not completely sharp at this stage. This is exactly where the trade-off of depth of field shows: more depth does not automatically mean that all parts of the image are optimally sharp. Depending on the subject, decide how much blur you want to allow.

Step 7: Check the Intermediate Stop f/5.6 as a Compromise
The next shot is taken at an aperture of f/5.6. In many cases, this stop delivers a good balance between a calm background and a sufficiently large sharp area. Compare the result with the previous shots. Ask yourself whether the lamps are clearly recognizable enough and whether the room still remains understandable. This intermediate stop is often worthwhile for client images in particular, because it doesn't overwhelm the viewer.

Step 8: Achieve Maximum Depth of Field with Aperture 11 and Self-Timer
For the greatest possible depth of field, you choose aperture 11. You can skip aperture 8 here, because the difference to aperture 11 is decisive for the overall image. Due to the heavily stopped-down setting, the exposure time increases significantly, in the video it is around 15 seconds. Therefore, activate the self-timer so that pressing the shutter itself doesn't cause camera shake. In addition: with exposure times beyond one second, passersby in the image usually are no longer visible, so you also reduce distractions.

Step 9: Evaluate the Aperture Series and Put Together Variants for the Client
After the four shots at apertures f/2.8, f/4, f/5.6 and f/11, you have a range of image effects. The open aperture emphasizes individual lamps and creates a calm, special atmosphere. The heavily stopped-down variant, on the other hand, shows the entire context of the lights in the room. Present both directions to the client, because that way they can decide for themselves which message they prefer for the website, brochure or presentation.

Step 10: Wrap Up the Staircase and Secure the Series
When all the shots are in the can, check the series once more for sharpness, exposure and distracting elements. Back up the best shots and make a note of which aperture suits which image message. With this approach, you have fully documented the staircase and done justice to the hotel's design.

Summary – Hotel Photography Staircase: Using Depth of Field Deliberately
Photography in the staircase requires more than a nice angle. You begin by understanding the hotel's style, secure your equipment and choose a precise framing with the telephoto lens. With an aperture series from f/2.8 to f/11, you control which areas appear sharp. You master passersby, camera shake and long exposure times with repeated shots and the self-timer. In the end, the client has various variants available, from which they can choose the suitable visual language.
FAQ
Why should I start with an open aperture in the staircase?The open aperture shows you the smallest sharp area and helps you deliberately place the focus on a detail such as a lamp.
How do I know whether my sharpness is sufficient?View the shot enlarged on the display and check the most important parts of the image, such as the lamps, for clear edges and details.
What do I do if passersby keep walking into the frame?Take several shots with the same settings and later select the image without disturbances. With long exposure times, people usually disappear from the image anyway.
Why is the self-timer so important at aperture 11?The long exposure time increases the risk of camera shake, and the self-timer prevents the camera from being moved by pressing the shutter button itself.
Do I always have to choose the maximum depth of field?No, the right aperture depends on what message the subject should convey. A large depth of field shows the context, a small one emphasizes individual elements.
How do I take the hotel owner's taste into account?Research the style of the house and, if necessary, ask which design elements are especially important to the owner. Use this as a guide when choosing your subjects.


