

A green shimmer on the tips of the hair immediately gives away every cutout. In this tutorial, I'll show you step by step how to cleanly cut out people in front of a green screen or blue screen and remove the color fringe at the same time. For this you need Photoshop and a photo with a solid-color background.
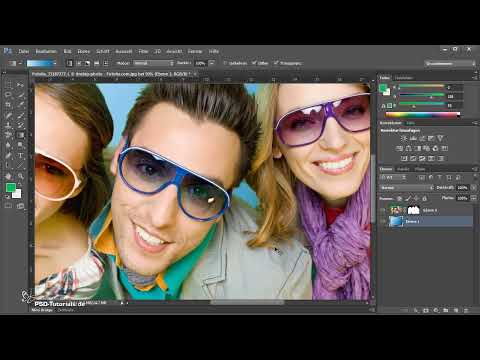
The video is only loaded from YouTube when you play it – data (including your IP address) is then transmitted to YouTube/Google. More in the privacy policy
Introduction
Solid-color backgrounds make cutting out much easier. Whether a green or blue canvas, neutral gray, or the colored wall in a TV studio: the background can later be quickly separated from the person. It becomes problematic with hair that picks up colored reflections from the background. There are tools for exactly this that let you remove this color fringe in seconds.
The tutorial shows two ways. The first works with a Hue/Saturation adjustment layer and is also available in older Photoshop versions. The second uses the "Decontaminate Colors" function and delivers the better result in less time, but requires Photoshop CS5 or newer.
Key Takeaways
- A solid-color, evenly lit background is the foundation for every quick cutout.
- Selecting via "Color Range" with high tolerance and a click on the green tone reliably separates the person and the background.
- You then have to refine the mask with a white brush so that no parts of the person disappear.
- "Decontaminate Colors" via "Refine Mask" removes the color fringe particularly quickly, but changes the pixels of the original image.
- With a Hue/Saturation adjustment layer, your image stays completely non-destructive.
Step-by-Step Guide
Step 1: Prepare the Background Properly
Before you start in Photoshop, pay attention to two things when shooting. The background should be a solid color, without patterns, walls, or stones. In addition, the person must not wear anything green or blue, such as a scarf in the same color. Otherwise, the affected area becomes transparent during cutout and the background shines through.
In the video, the instructor describes this problem in the first few minutes. It's worth keeping this in mind in the studio, because fixing things afterward costs significantly more time than good preparation.

Step 2: Select the Color Range
Open the photo and go to "Select" in the menu and then "Color Range". Set the tolerance high, in the video well above the default value. You'll see that everything bright is selected. This is intended, because at first you want to capture the entire background.
Then click in the preview on the green tone you want to remove. While holding the Shift key, you can add further areas that weren't captured by the first click.

You should keep an eye on the tolerance. If it's too low, background remnants remain. If it's too high, parts of the person disappear from the selection. The instructor recommends adjusting the tolerance until the background is completely marked.

Step 3: Check the Selection Preview
In the options, activate the masking mode. This way you immediately see which areas are marked. Alternatively, you can switch the preview to grayscale, in which case everything bright is selected and the person stays dark. This view helps you quickly spot gaps in the selection.

If you mark only green or red tones in the color selection, that saves you the eyedropper click. However, the preset doesn't always hit the exact tone of your background. That's why clicking directly in the image is often more reliable.

Step 4: Mark Overlooked Areas Afterward
Sometimes areas aren't captured, such as spots lying in shadow. You can click on these afterward while holding the Shift key. The instructor uses the "Localized Color Clusters" option for this. It mainly captures the colors you click directly.
He only mentions the "Detect Faces" function in passing, because it wasn't necessary in his example. Therefore, remove unnecessary additional options before you continue, and select the green color again with full tolerance.

Confirm the selection with "OK". Then click the layer mask icon in the Layers panel to create the selection as a mask.

Step 5: Invert the mask
With the first selection, the background is often masked and not the person. With the keyboard shortcut Ctrl + I (Mac: Cmd + I) you invert the mask. Now the person remains visible and the background disappears.

Take a close look at the result. In the example, it turns out that too much was cut out and, for example, a blue fabric on the person has become transparent.

Step 6: Correct the mask with the brush
Take a brush with a large size and white foreground color. Click in the layer mask and paint over the areas that were cut out too much. White restores the person. Work in small movements and zoom in regularly to check the edges. If you reduce the brush size, the hair edges become more precise.

To make the color fringe visible, place a new layer underneath and fill it with a gradient, for example from blue to dark blue. Then zoom in on the hair. There you can see whether any green shimmer from the original background is left.

Step 7: Remove the color fringe with an adjustment layer (Method 1)
This method also works in older Photoshop versions and does not change the original image. Via Layer > New Adjustment Layer, create a Hue/Saturation layer. Reduce the saturation significantly until the green disappears.

So that you don't desaturate only the hair but also the clothing, the layer must be attached to the person as a clipping mask. To do this, hold down the Alt key and click between the two layers. The adjustment then affects only the layer below.

Then you invert the mask of the adjustment layer with Ctrl + I. Paint with a white brush over the hair affected by the color fringe. This way the desaturation only takes effect where it is needed. The instructor emphasizes that this method works well with black hair, but with blond hair you have to look more closely and sometimes work with lower opacity.

Also watch out for areas that look too gray after the desaturation. There you can work with a reduced opacity of the adjustment layer so that the result looks more natural.

Step 8: Decontaminate colors (Method 2)
This method is faster and, according to the instructor, delivers the better result. In the properties of the layer mask, right-click and choose "Select and Mask" ("Refine Mask"). There you can refine the edges, for example with the Refine Edge Brush on the hair tips.

Then, in the "Output To" section, activate the "Decontaminate Colors" option. Photoshop thereby removes the color fringes from the image. The result is visible after just one click.

For the output, choose "New Layer with Layer Mask". This way your original layer is preserved unchanged. You can also reduce the strength of the effect. The instructor is satisfied with 50 percent.

Compare the result with the original image by toggling the visibility of the extended layers on and off. The difference is usually immediately visible.

Step 9: Insert the new background
Drag and drop a background photo into the document. Hold down the Shift key while scaling so that the proportions are preserved. Place the layer below the cut-out person. Make sure that the layer with the cut-out is on top and the old green layer is hidden.

A quick look at the hair shows you whether the cut-out fits cleanly. If the background matches the lighting mood of the person well, the composite looks convincing.

Step 10: Summarizing the work in under a minute
Once you have internalized the workflow, you'll be fast. Select "Select" and "Color Range" again, click on the green color, and set the tolerance to 200. If the wrong area is selected, press Ctrl + I to invert. Then open "Refine Mask," activate "Decontaminate Colors," and confirm.

After confirming, usually only minor corrections with the brush are needed where too much was erased. This way, the instructor gets down to under a minute of editing time.

Step 11: Checking the change to the original
If you hide the layer mask by holding down the Shift key and clicking, you'll see that the green canvas has been altered. "Decontaminate Colors" adds pixels and thereby changes the original image. This is not a mistake, but you should know it if you want to continue working with the original photo. If you need to remain non-destructive, use the method with the adjustment layer.

Step 12: Quickly inserting your own photos
Finally, you can use any image as a background. Simply drag and drop the photo into Photoshop. It will be created as a Smart Object. Drag the layer below the cut-out person and check the result.

Summary ??? Keying out a green screen: people without color fringes in under 60 seconds
With a solid-color background and a clean workflow in Photoshop, cutting out succeeds quickly. You select the background via "Color Range," invert the mask, and correct it with the white brush. Then you remove the color fringe either via a Hue/Saturation adjustment layer, which leaves the original image untouched, or via "Decontaminate Colors," which leads more quickly to a very good result. You insert the background as its own layer at the end.
FAQ
Which Photoshop version do I need for "Decontaminate Colors"?The "Decontaminate Colors" function is only available from Photoshop CS5 onwards.
Can I also achieve the cut-out without Decontaminate Colors?Yes, with a Hue/Saturation adjustment layer created as a clipping mask, you can also remove the color fringe. The original image remains unchanged.
Why should I invert the mask?When selecting the color range, the background is usually what gets selected. With Ctrl + I you invert the selection so that the person remains visible.
What do I do if the person becomes transparent during the cut-out?Paint over the affected areas with a white brush in the layer mask. This restores the person.
Which hair color works best with the adjustment layer?The instructor reports that the method works very well with black hair. With blonde hair, you should work with lower opacity and check the results carefully.
Does the background really have to be solid-colored?Yes. Patterns, walls, or stones make the selection considerably more difficult. A uniform background in green or blue is ideal.

