Do you want to take your digital illustrations in Procreateto the next level? Clipping-masksare an invaluable tool that helps you effectively control the display of graphics. They allow you to work with numerous layers without having to manually edit each layer. This way, you can fully unleash your creative potential and design your projects more clearly and precisely. Let's dive in together and find out how you can use clipping masks to optimize your designs.
Key Insights
- Clipping masks are helpful to restrict content to specific areas of a layer.
- They allow for separate editing of overlapping and underlying layers.
- You can also use different layer modes and transparencies with clipping masks.
Step-by-Step Guide
To use clipping masks correctly in Procreate, follow these steps:
Step 1: Prepare the Layers
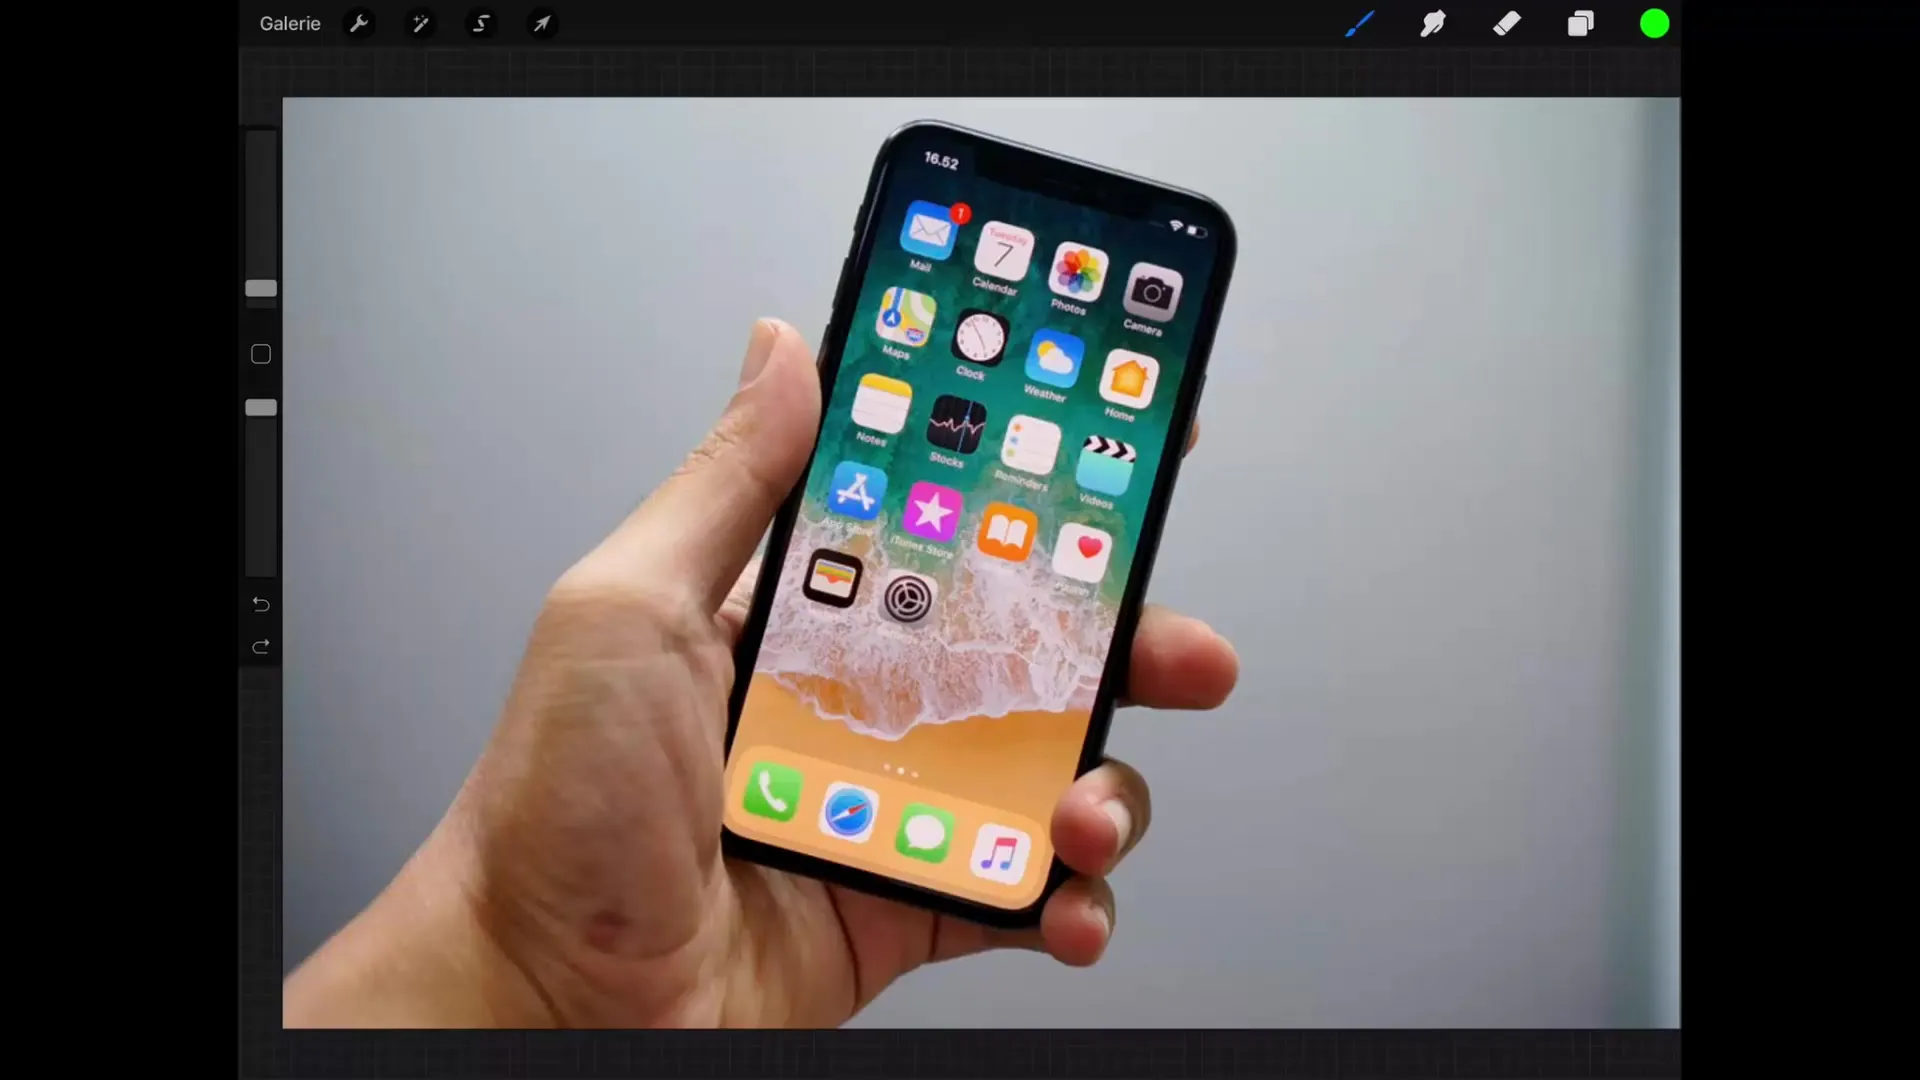
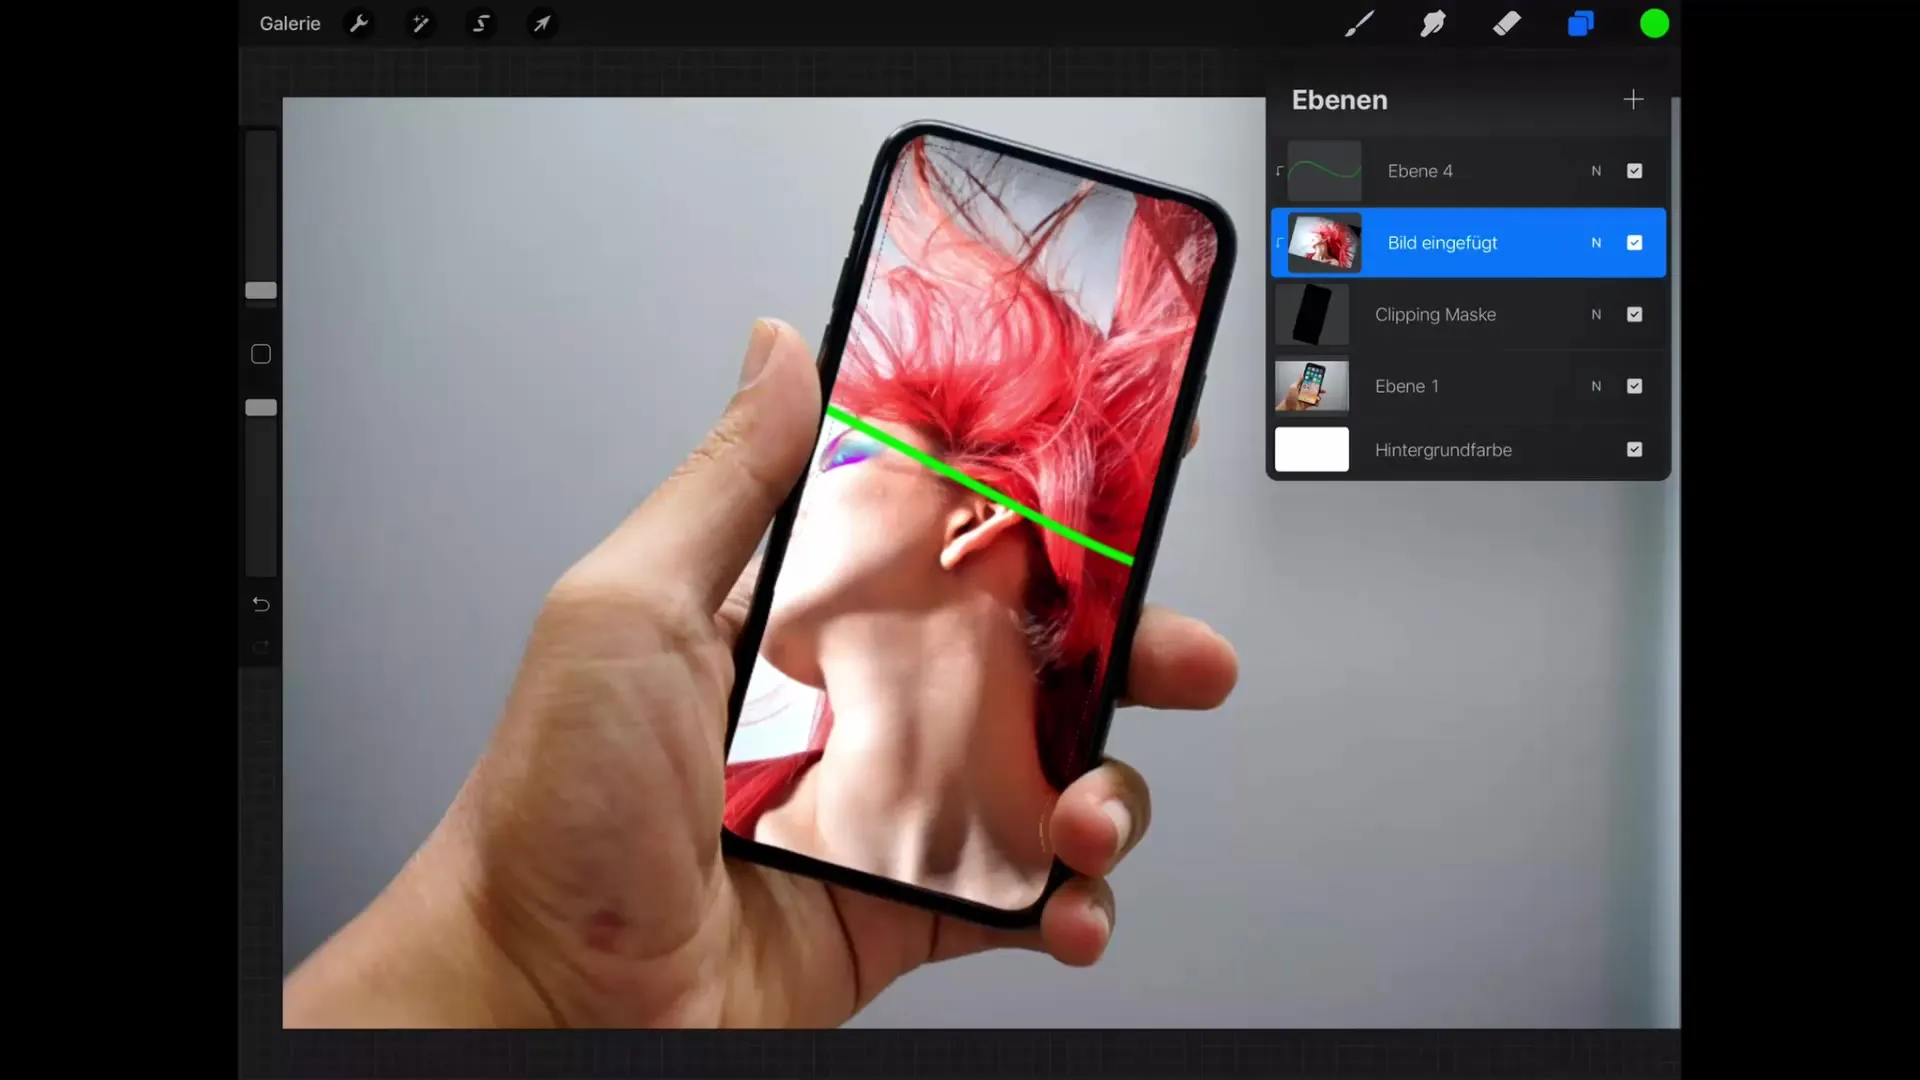
Start by opening an image in Procreate that you want to edit. In this example, we will use an image of a phone being held in hand. The goal is to display a different graphic on the phone's screen, such as a woman in motion. To begin editing, you need a new layer that sits above the base layer.
Step 2: Add a New Layer
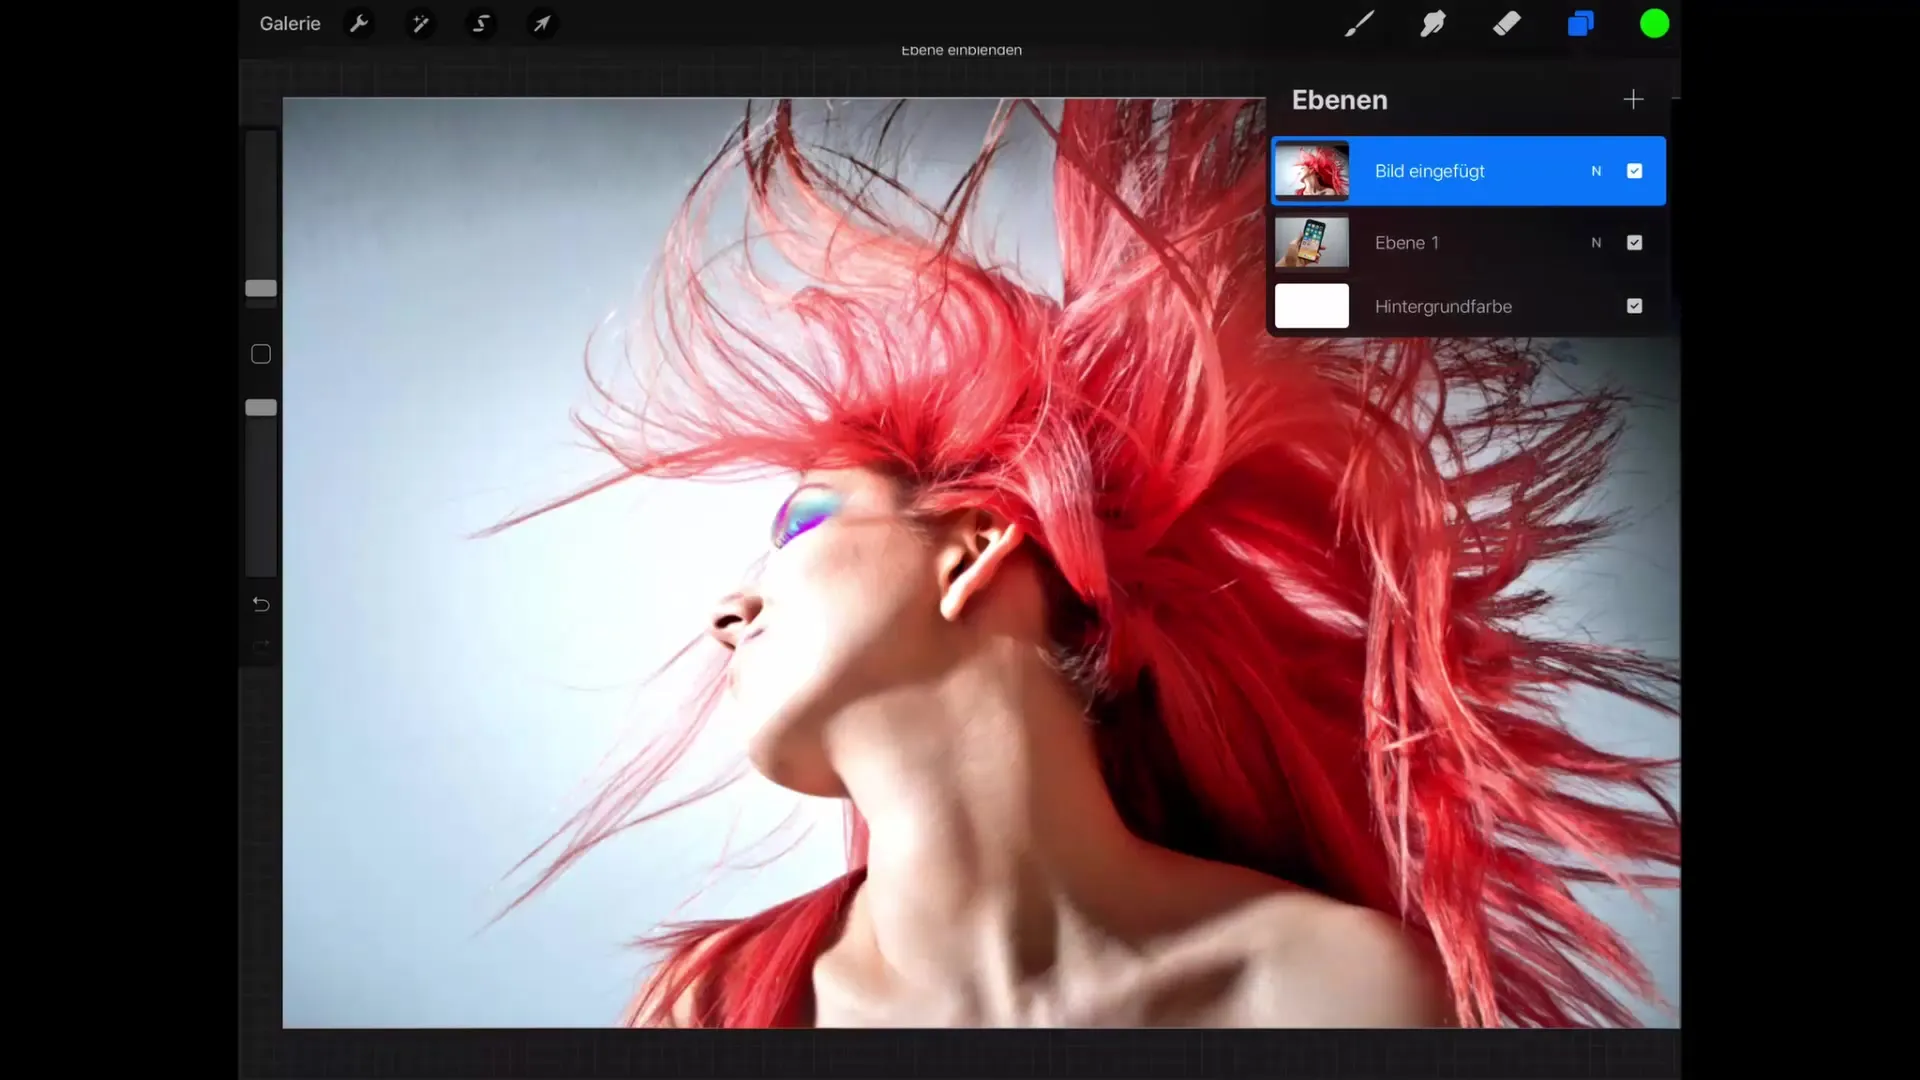
Create a new layer where you want to design the desired content. Position the new layer directly above the image of the base layer. This is important because the clipping mask will only display the contents of the layer above and retain the layers below.
Step 3: Fill the New Layer
Now it's time to fill the new layer with any color. Roughly draw a line around the phone's display. This line defines which area of the image should be visible. It doesn't matter how accurately you draw the line; you can make adjustments at any time.
Step 4: Work with the Clipping Mask
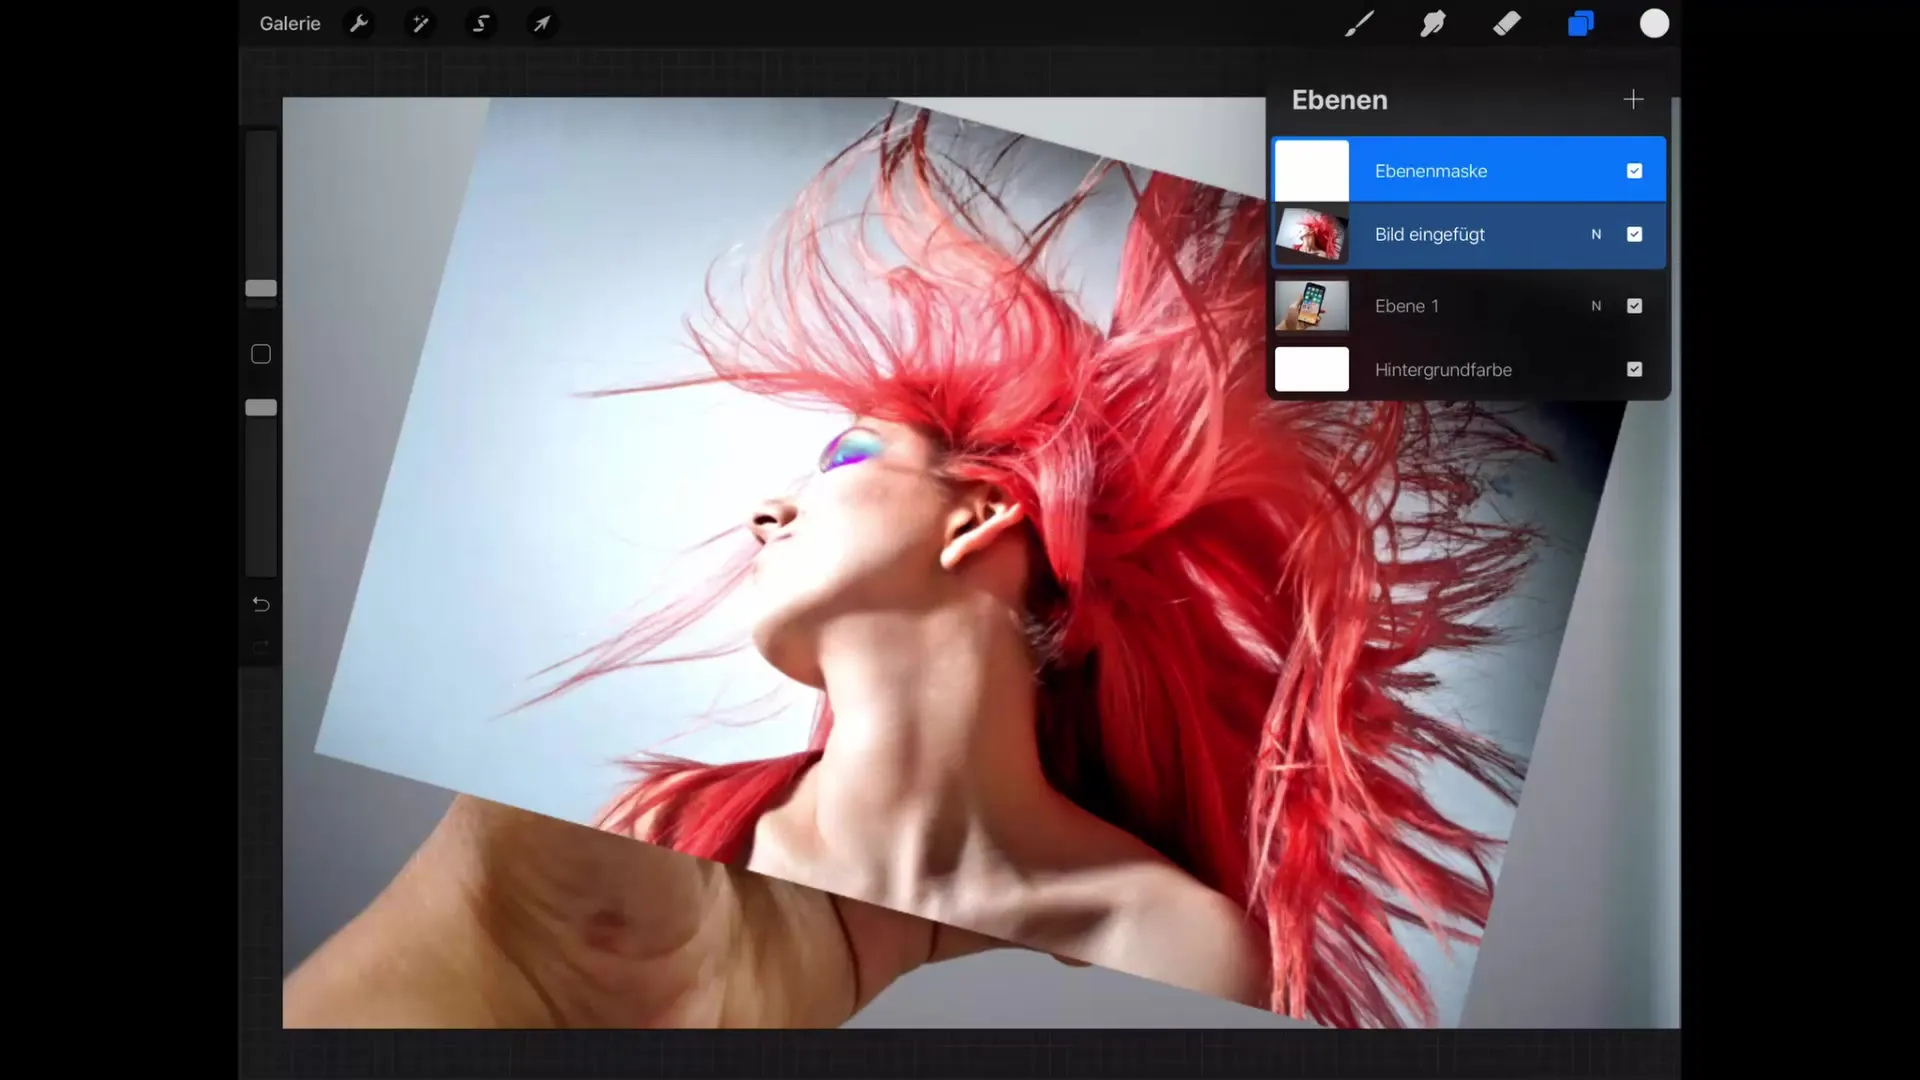
Once the area is filled, you can apply the clipping mask. Tap on the layer of the new graphic and select “Apply Mask.” This action means that the contents of the new layer will only be displayed in the area that matches the black area of the previous layer.
Step 5: Make Adjustments
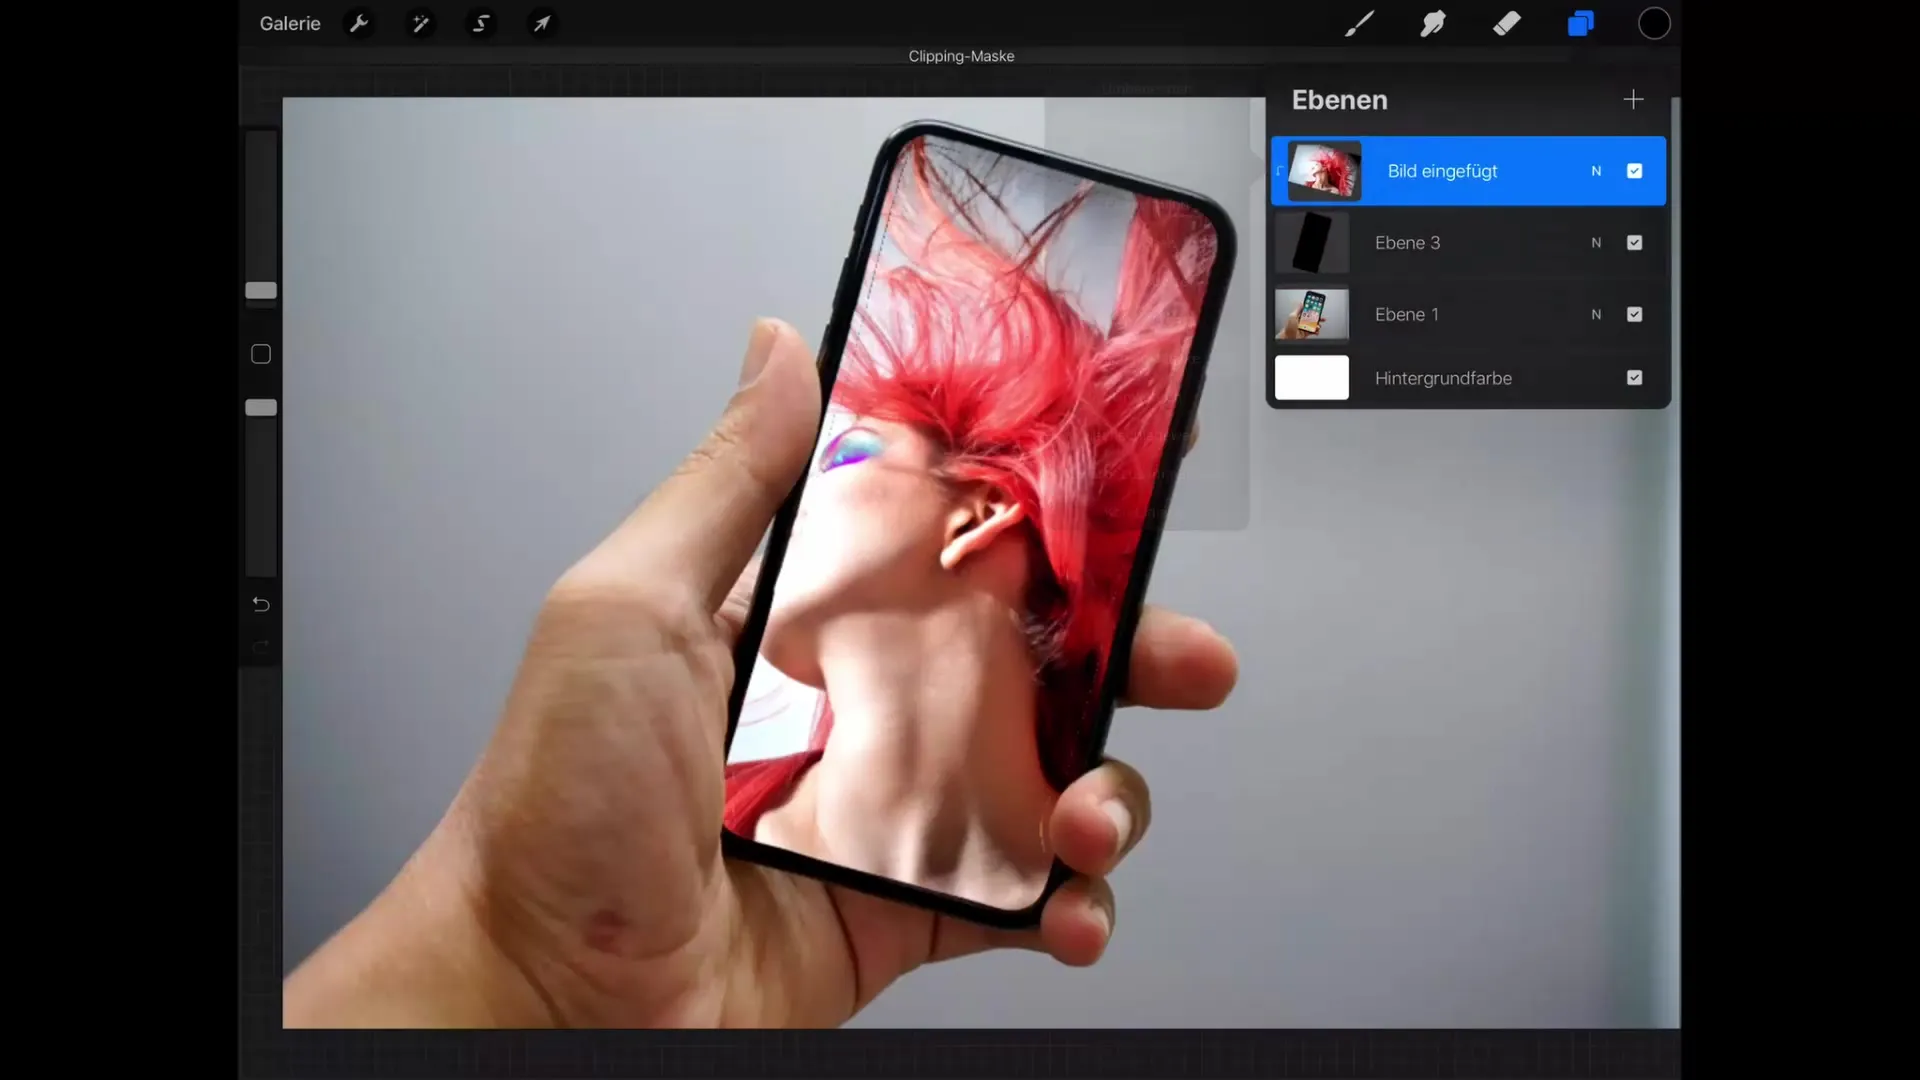
Now that the clipping mask is active, you can edit the overlaying graphic without affecting the background. You can add or remove elements to shape the graphic according to your wishes. This flexibility is one of the biggest advantages of clipping masks.
Step 6: Refine Corners and Edges
Take advantage of the option to change the edges of the clipping mask. You can now adjust the corners of the graphic to perfect visibility. If needed, you can also manipulate masked areas more easily using the selection tools.
Step 7: Use Layer Modes and Transparency
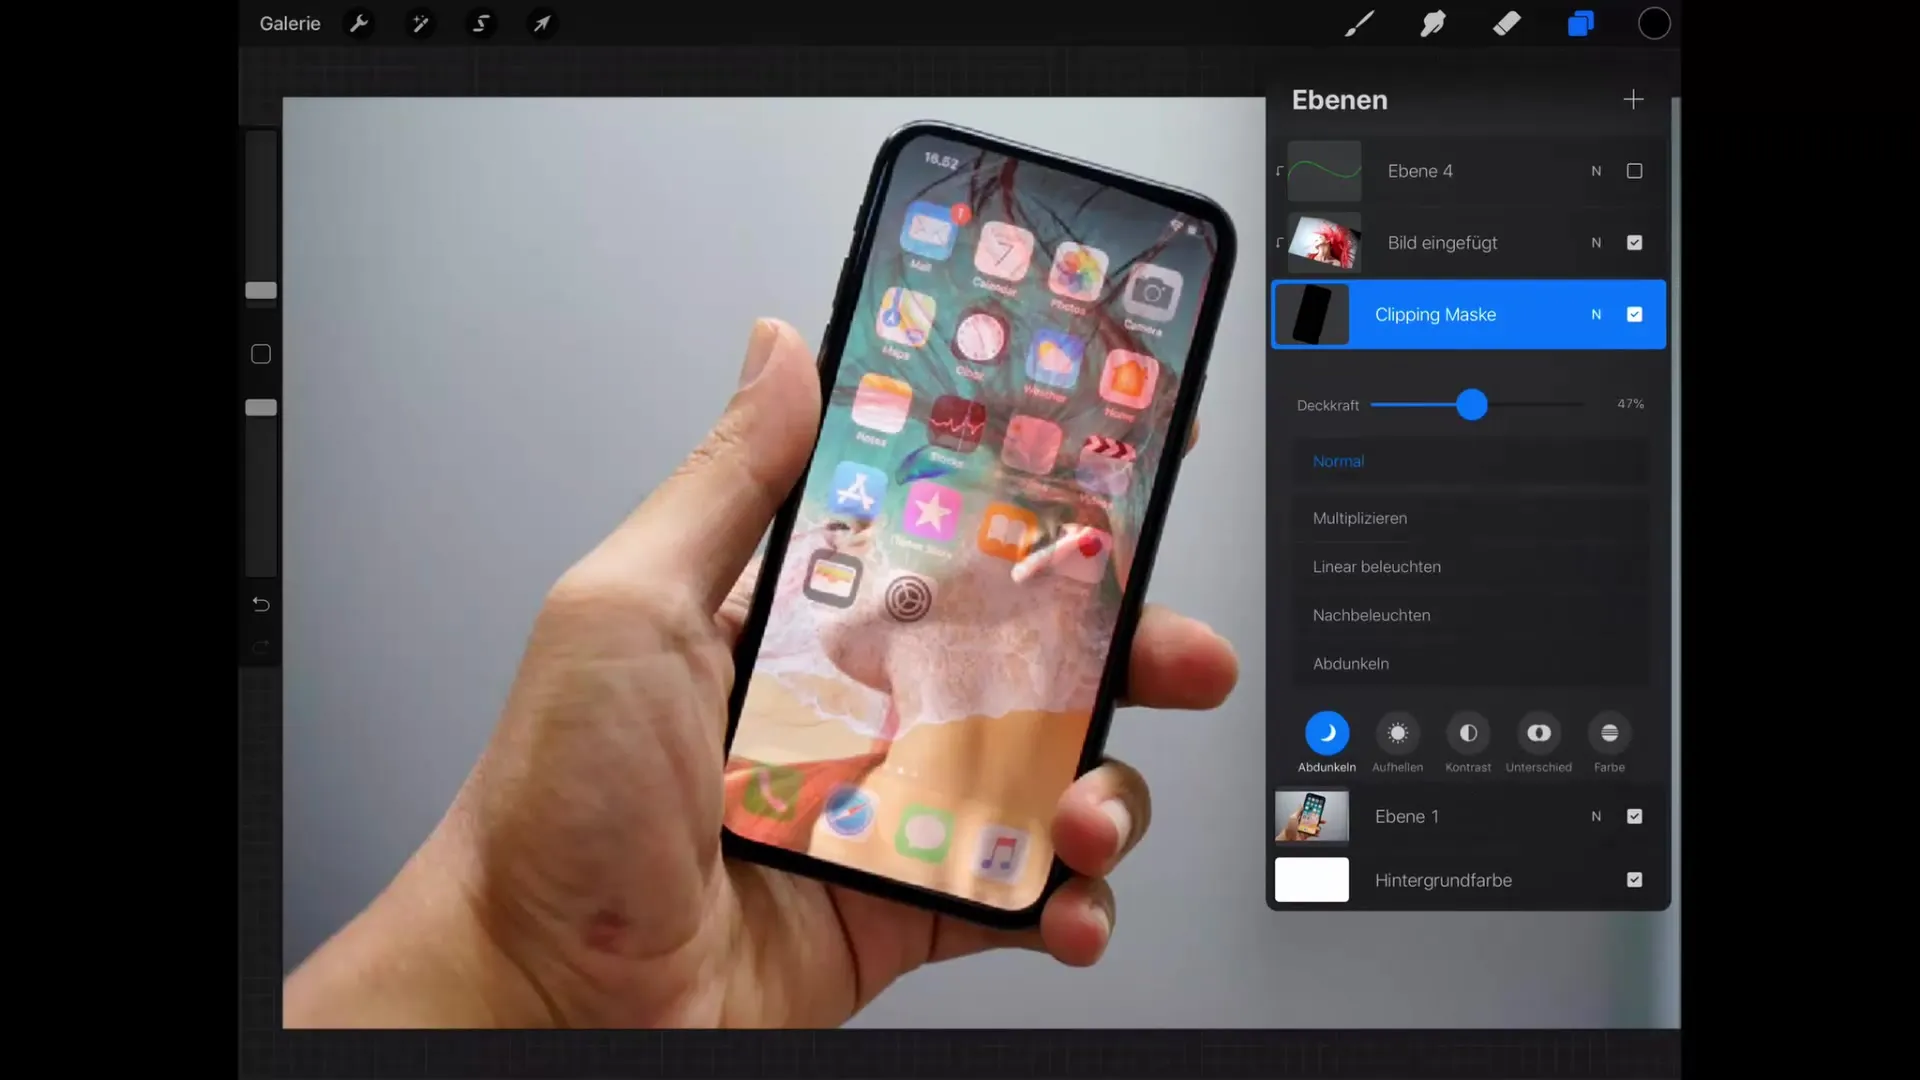
Another powerful feature is the ability to apply different layer modes and change the transparency of the clipping mask. This way, you can create a creative atmosphere that makes your design even more appealing.
Summary – Mastering Clipping Masks in Procreate
Clipping masks offer you the opportunity to explore your creative potential in Procreate. You can work efficiently with multiple layers and make adjustments at any time to achieve impressive results. Use this technique to maintain control over your graphics and present your illustrations on the next level.
FAQ
How do I apply a clipping mask in Procreate?Tap on the layer you want to mask and select “Apply Mask.”
Can I adjust the visibility of the clipping mask?Yes, you can change the transparency and layer modes of the clipping mask.
Can I edit the masking afterwards?Yes, the masking can be adjusted or manipulated at any time.


