
Procreate tutorial - the basics of digital drawing on the iPad

- Procreate tutorial: Find your way around the software quickly right from the start.
- All functions at a glance: Find out where to find the tools and how to use them.
- Ideal for getting started with Procreate - create your own drawings on the iPad.
- Ludmila Blum sums up the software's range of functions for you in 2.5 hours.
Why go through the hassle of exploring the Procreate functions yourself when you can get to grips with them in no time with this tutorial? - Start training and draw away!
32 Videos, 160 minutes
Introduction to Procreate
Procreate tutorial - Basics of digital drawing on the iPad: 1.1 | Introduction
A warm welcome to you!
Procreate tutorial - the basics of digital drawing on the iPad: 1.2 | Pairing the Pencil and installing Procreate
Setting up your iPad is very easy!
Procreate tutorial - Basics of digital drawing on the iPad: 1.3 | Organize gallery
Your gallery will fill up over time - to keep an overview, you should organize it properly from the start. Name your pictures, put them in folders and name and sort them. You can also export or delete several images at the same time from the gallery.
Procreate tutorial - the basics of digital drawing on the iPad: 1.4 | Creating a Procreate canvas
What is the right size and resolution for printing and how do you get an image into the right format? Here I show you all the details about creating a canvas.
Procreate tutorial - Basics of digital drawing on the iPad: 1.5 | User interface
Procreate's user interface is kept very simple. The functions are hidden behind small icons. In this video, I'll show you where to find what. This is a general overview of the user interface, we will go into more depth later in individual videos.
Procreate tutorial - Basics of digital drawing on the iPad: 1.6 | Actions menu item
You will find many important Procreate functions in the Actions menu. From importing and exporting image material to video functions and drawing help, you can control many basic work processes from here.
Procreate tutorial - Basics of digital drawing on the iPad: 1.7 | Working with the canvas
You can drag the canvas larger and smaller - both in the view and with regard to the actual dimensions of your drawing area.
Procreate tutorial - Basics of digital drawing on the iPad: 1.8 | Color management
Select, save and organize colors efficiently for a smooth workflow.
Procreate tutorial - Basics of digital drawing on the iPad: 1.9 | Gestures
The basics of digital drawing on the iPad: gestures.
Procreate tutorial - the basics of digital drawing on the iPad: 1.2 | Pairing the Pencil and installing Procreate
2 min OpenProcreate tutorial - Basics of digital drawing on the iPad: 1.3 | Organize gallery
7 min OpenProcreate tutorial - the basics of digital drawing on the iPad: 1.4 | Creating a Procreate canvas
4 min OpenProcreate tutorial - Basics of digital drawing on the iPad: 1.5 | User interface
5 min OpenProcreate tutorial - Basics of digital drawing on the iPad: 1.6 | Actions menu item
11 min OpenProcreate tutorial - Basics of digital drawing on the iPad: 1.7 | Working with the canvas
5 min OpenProcreate tutorial - Basics of digital drawing on the iPad: 1.8 | Color management
5 min OpenThe most important tool in Procreate: brush
Procreate tutorial - Basics of digital drawing on the iPad: 2.1 | Brush menu
You can adjust the Procreate brushes to your needs in the brush menu.
Procreate tutorial - Basics of digital drawing on the iPad: 2.2 | Create your own brushes
If the extensive set of Procreate brushes is not enough for you, you can create your own brushes. To do this, you must first specify a shape and a grain source. In this lesson, you will learn what this is all about.
Procreate tutorial - Basics of digital drawing on the iPad: 2.3 | Exporting and importing brushes
You can import and export brushes individually or in groups, i.e. as a brush set. This allows you to use your own creations on different iPads or load brushes from the Internet.
Procreate tutorial - Basics of digital drawing on the iPad: 2.4 | Wipe finger and eraser
Erasing - but with which brush? And what do you need the wiping finger for anyway?
Procreate tutorial - Basics of digital drawing on the iPad: 2.2 | Create your own brushes
5 min OpenProcreate tutorial - Basics of digital drawing on the iPad: 2.3 | Exporting and importing brushes
3 min OpenProcreate tutorial - Basics of digital drawing on the iPad: 2.4 | Wipe finger and eraser
3 min OpenLayers: far more than just transparent foils
Procreate tutorial - Basics of digital drawing on the iPad: 3.1 | Layer menu
The layers menu offers a lot of sub-items - most of them are very useful for every project.
Procreate tutorial - Basics of digital drawing on the iPad: 3.2 | Moving elements
Selected elements or even entire layers can not only be moved freely, but can also be moved or even aligned using guidelines.
Procreate Tutorial - Basics of digital drawing on the iPad: 3.3 | ColorDrop
Coloring doesn't have to be time-consuming - with ColorDrop you can fill areas in no time at all.
Procreate tutorial - Basics of digital drawing on the iPad: 3.4 | Reference level
The reference layer helps you immensely when illustrating with outlines, with colored areas and also when shading.
Procreate tutorial - Basics of digital drawing on the iPad: 3.5 | Layer masks
The layer mask allows you to make things disappear without having to erase them permanently. This allows you to repeat parts of the image later if necessary.
Procreate tutorial - Basics of digital drawing on the iPad: 3.6 | Clipping mask
Get to know how clipping masks work - this results in many new workflows that can make illustrating and working with multiple graphics much easier.
Procreate tutorial - Basics of digital drawing on the iPad: 3.7 | Layer blending modes: darkening
This is the first part of a detailed explanation of how blending modes work. This is about different ways of darkening an image with an additional layer.
Procreate Tutorial - Basics of digital drawing on the iPad: 3.8 | Layer blending modes: Lighten and Contrast
A layer can also be used to brighten an image or manipulate the contrast. In this section, you will learn how the corresponding "Lighten" and "Contrast" blending modes work.
Procreate Tutorial - Basics of digital drawing on the iPad: 3.9 | Layer blending modes: difference and color
The last section on blending modes in Procreate covers the color manipulation that can be done using layers.
Procreate tutorial - Basics of digital drawing on the iPad: 3.2 | Moving elements
3 min OpenProcreate tutorial - Basics of digital drawing on the iPad: 3.4 | Reference level
5 min OpenProcreate tutorial - Basics of digital drawing on the iPad: 3.7 | Layer blending modes: darkening
5 min OpenProcreate Tutorial - Basics of digital drawing on the iPad: 3.8 | Layer blending modes: Lighten and Contrast
4 min OpenProcreate Tutorial - Basics of digital drawing on the iPad: 3.9 | Layer blending modes: difference and color
6 min OpenImage manipulation
Procreate tutorial - Basics of digital drawing on the iPad: 4.1 | Selection tool
You use the selection tool to define parts of the image that you want to transform, color or distort.
Procreate tutorial - Basics of digital drawing on the iPad: 4.2 | Transformation
Transformation means moving, rotating, scaling as well as distorting and deforming image information.
Procreate tutorial - Basics of digital drawing on the iPad: 4.3 | Liquefy
As a stand-alone tool, Liquefy offers several different tools for manipulating image parts - from fluffing and squeezing to twirling.
Procreate tutorial - Basics of digital drawing on the iPad: 4.4 | Filters
Procreate offers various filters for sharpening, blurring and adding noise. Here you will learn how to adapt these filters to your needs.
Procreate Tutorial - Basics of digital drawing on the iPad: 4.5 | Color manipulation
You can use these tools to manipulate all the colors of your image, layer or selection together. The manipulation of individual color channels is also explained here.
Procreate Tutorial - Basics of digital drawing on the iPad: 4.6 | Recolor
You can use this tool to replace all occurrences of a specific color or color range with a different color.
Procreate tutorial - Basics of digital drawing on the iPad: 4.1 | Selection tool
6 min OpenProcreate tutorial - Basics of digital drawing on the iPad: 4.2 | Transformation
5 min OpenProcreate Tutorial - Basics of digital drawing on the iPad: 4.5 | Color manipulation
6 min OpenDrawing aid and QuickShapes
Procreate tutorial - Basics of digital drawing on the iPad: 5.1 | Drawing help
The drawing aid supports you in all work that requires straight lines, reflections or symmetries.
Procreate Tutorial - Basics of digital drawing on the iPad: 5.2 | QuickShapes
Whether you need straight lines, perfect circles or straight-edged polygons, creating QuickShapes in Procreate is easy and intuitive - and you can manipulate the size and orientation of your shapes.
Practical examples
Procreate tutorial - Basics of digital drawing on the iPad: 6.1 | Lettering on flatlay
A mediocre photo of a lettering on a beautiful, free flatlay image really sets off the lettering. Here I show you how you can easily place a scanned or photographed graphic on a mockup or any photo so that it looks as if the two belong together from the start.
Procreate Tutorial - Basics of digital drawing on the iPad: 6.2 | Coloring and shading watercolor illustrations
Here I will show you how you can create an illustration that is reminiscent of hand-painted watercolor with a possible brush selection. We'll also make use of the layer function to add a drop shadow.
Examples of use
-
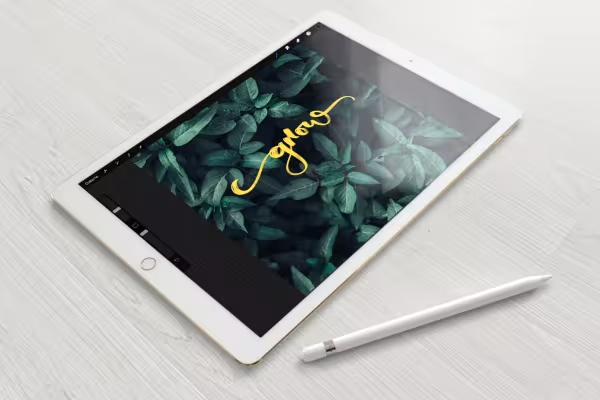 Example: Learn techniques for beautiful hand lettering, image manipulation and digital drawing in the Procreate tutorial.
You might also like

More style, more power, more templates!

Full power, more inspirations, maximum WOW effect!
Live your layout now!

Save time with artificial intelligence
Comment now „Procreate tutorial - the basics of digital drawing on the iPad“