
A good newsletter doesn't have to start from scratch. With a template, you take over a ready-made design and only adjust what fits your message. In this guide, I walk you through Mailchimp step by step: You choose a template, edit the logo, texts, images, and buttons, and send the finished email to your recipients. You'll also learn what to pay attention to regarding spacing and alignment so that your email stays clear and easy to read.
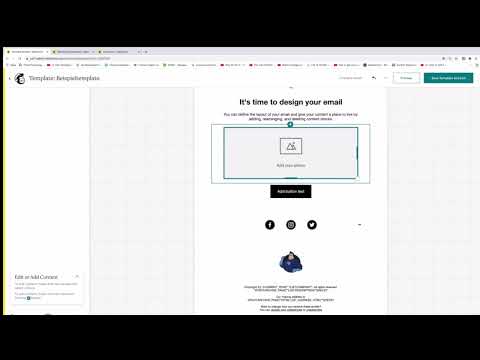
The video is only loaded from YouTube when you play it – data (including your IP address) is then transmitted to YouTube/Google. More in the privacy policy
Key Takeaways
- A template is a pre-made layout that you adapt to your own newsletter.
- Important content belongs in the upper area of the email so that readers see it immediately.
- You edit texts, images, and buttons directly in the editor by clicking on the respective element.
- Before sending, you check the recipients, sender, subject line, and preview text, and look out for the green checkmarks.
Step-by-Step Guide
Step 1: Start a New Campaign
Log in to your Mailchimp account and open the area where you create new content. You start the process with the "Create" button. This button is the starting point for everything else, because from here you create both campaigns and templates.

Step 2: Open the Area for Emails and Templates
Next, click on "Email". Then select the "Template" option at the bottom. Here you'll find pre-made layouts that you can use as a foundation. As soon as you click "Get started", you'll reach the selection of available templates.

Step 3: Choose and Save a Suitable Template
Now you see the typical Mailchimp templates. You can also create your own template there, but to begin with, a template from the selection is a good fit. Choose a design you like and click "Select". Then you assign a name, for example "Example Template", and save the selection with "Save". The template is now available for you to edit.

Step 4: Understand the Template Editor
After saving, you can edit the template directly. Mailchimp offers several areas in the editor, and the terms can seem confusing at first. When you create a new email, you can choose between Plain Text, Regular, and the Templates. You'll find the somewhat more complex layouts in the "Templates" option. Self-created designs can also be used there. For this example, you stick with one of the simple Mailchimp templates. Whether the structure of the editor will change in the future may become apparent over time, so it's worth checking the options regularly.
Step 5: Adjust the Logo and Spacing
Now it's time for the design. Click on your logo and drag it at the corners to the desired size. You can then move it further up so that the header area looks tidy. You remove unnecessary spacers, which Mailchimp calls "Spacer", by clicking on them and deleting them. Make sure the email doesn't look too stretched out. Many readers open an email and decide within a few seconds whether to keep reading. Therefore, place the most important information in the upper area if possible, so that nobody has to scroll unnecessarily far.

Step 6: Edit Texts Directly in the Editor
One advantage of the editor: You click on a text block and change the content directly in the document. No separate window opens on the page. For example, write a meaningful headline like "Staying Healthy in Winter" and below it a short note, such as "The five best tips for every day". You can add more text at any time. Keep sentences short and precise, because concise wording is grasped more quickly.

Step 7: Set Line Spacing and Alignment
When you select a text block, you can adjust the line height. Larger spacing makes the text airier, but it isn't strictly necessary. A value of about 1.25 looks easily readable in many cases. You can also align texts left, centered, or right. Centered texts often look more appealing and suit friendly newsletters well. For a more formal appearance, such as for companies or public authorities, left alignment is often the better choice. Decide here according to the style of your brand.
Step 8: Replacing and linking images
You can replace a photo at any time. You also decide whether it is displayed on the left, on the right, centered, or across the full width. If you want a click on the image to open a web page, enter an address in the image settings, for example "www.example.com". Below that, you can add a short descriptive text that explains what can be seen in the image. Alternatively, this space is suitable for a price, so readers can see at a glance what a product costs.

Step 9: Designing a button
Now add a button that leads readers to an action, such as making a purchase or signing up. Mailchimp offers various shapes, including "Round", "Pill", and "Square". In this example, the angular "Square" variant fits well with the overall look. Below the style selection, you can change colors and font. A bolder font looks more striking and makes the button stand out more. Feel free to try out different combinations until the result matches your design.
Step 10: Finalizing font, social buttons, and logo
With a clear font such as Helvetica, you achieve a clean, easily readable result. Next, you check the social media buttons at the bottom of the email and adjust their size and position if necessary. The logo should also be checked once more at the end. If everything is right, click "Save & Exit" at the top. This saves the template and takes you back to the next step.

Step 11: Setting the recipient, sender, and name
Now it's about sending. Start a campaign and select under "To" who the email should go to. In this example, that would be an audience with the topic "healthy eating". You can also personalize the field, for example with the recipients' first names. Under "From", you enter who the email comes from. Additions such as "Entrepreneur and Lecturer" are also possible. Save your entries each time with "Save".
Step 12: Writing the subject line and preview text
The subject line often determines whether an email gets opened at all. Phrase it specifically and usefully, for example "Five tips for getting through the winter more healthily". The preview text appears in the inbox right next to or below the subject. A curiosity-inducing sentence like "You won't believe which tips are waiting for you" can increase the open rate. Make sure that the subject and preview text fit together and don't promise anything the content later doesn't deliver.
Step 13: Checking the checklist and sending the newsletter
Before you send, look at the checklist on the right side. All items should be marked with a green checkmark. This shows you that recipient, sender, subject, and content are complete. In the example, a button text and an image are still missing, so you should close such gaps before sending. When all checkmarks are green, click "Send" at the top. The newsletter is then sent directly to the recipients.

Summary – Customizing and sending a Mailchimp newsletter template
With an existing template, you can quickly create a professional-looking newsletter. You have learned how to start a campaign, choose a design, customize the logo, texts, images, and buttons, and prepare the email via recipient, sender, subject, and preview text. If you follow the checklist, you can reliably send your first own newsletter. With each further issue, you will become more confident in using the editor.
FAQ
Can I also change a template afterwards?Yes, you can reopen a saved template at any time and customize all elements.
Do I have to use a Mailchimp template?No, you can also create an email with plain text or design your own template.
What happens if there are still red markers in the checklist?Then information is still missing, such as recipient, sender, or subject, and you should add it before sending.
Why should I remove spacers?Unnecessary spacers make the email needlessly long and force readers to scroll, so removing them is usually worthwhile.
Can I send the newsletter to people using their first name?Yes, in the recipient field you can personalize the first name so that each email addresses the reader individually.


