
A simple landing page usually collects only an email address. As soon as you want to learn more about your subscribers, you quickly run into limits. This is exactly where this guide comes in. You will learn how to customize a more extensive template in Mailchimp, design a sign-up form sensibly, and work with interest groups so that you can send content in a more targeted way.
The video is only loaded from YouTube when you play it – data (including your IP address) is then transmitted to YouTube/Google. More in the privacy policy
The starting point is Mailchimp's Create tool. There you select the Landing Page area, define an audience, and open a more complex template. I will show you the process step by step, including typical pitfalls.
Key Takeaways
A sign-up form should only ask for the fields you really need. Long forms significantly lower the conversion rate. You control required fields deliberately, and privacy options (GDPR fields) belong directly in the form. Interest groups help you find out at sign-up which content your subscribers expect. All elements can be moved and edited at any time before you publish the page.
Step-by-Step Guide
Choosing the Right Landing Page
Start in Mailchimp's Create tool. Click on the Landing Page area in the left sidebar. You already know this type from the last video, where you created a simple opt-in page. This time you deliberately choose a variant that offers more design options.

Defining the Audience and Starting the Landing Page
Next, you select the appropriate audience. In this example, you use the audience "Healthy Eating". Confirm the selection by clicking Begin. After that, you can start designing right away without having to make any further settings.


Choosing a Complex Template
In the next step, you pick a template that already contains several sections, such as logo, heading, text, form, interest groups, and social media buttons. One click on the desired template is enough, and then the editor opens. You can then customize all areas as you like.

Adjusting the Logo
The logo in the template is often too large. Click on it and reduce its size until it looks subtle but is still easily recognizable. A logo that is too large distracts from the actual sign-up offer. Keep in mind that the focus should be on the heading and the form.

Writing the Heading and Introductory Text
In the upper area, you will find fields for the heading and text. Click on the text area and write a statement that describes exactly what the reader gets. For example, write "Newsletter Opt-in" as the heading and below it a short explanation of which newsletter it is and what content it offers. Be specific and avoid generic phrases.

Describing the Benefits of the Newsletter
In the next text area, you explain the added value. Think from the reader's perspective: What do they get if they sign up? You could, for example, write that subscribers get access to interesting topics, free downloads, and discount codes every week. Such a text directly answers the most important question, namely why someone should sign up.

Communicating Privacy Clearly
Add a note about privacy. Write that you do not pass the data on to third parties, that it is stored securely, and that the reader can unsubscribe at any time. This section builds trust and reduces uncertainty, especially for forms that ask for personal information.
Setting the Form Heading
Above the form there is a separate heading. Adjust it, for example with the sentence "Sign up for the newsletter now:". The heading leads the reader directly to the form and makes clear that the following fields are intended for the sign-up.
Define form fields and set required fields
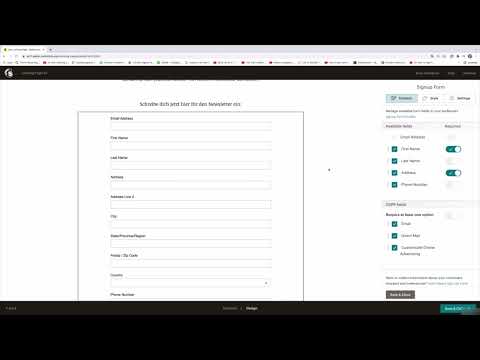
Now it's time to work on the form's fields. By default, you will find various input fields, for example for first name or email address. To edit a field, click on it and open the settings on the right-hand side. There you can specify whether the field is marked as a required field (required). A required field must be filled out before someone can sign up. Set this option deliberately, because with a required field, signing up is not possible without this information.

Keep the form short
A long form scares off many prospects. If you ask for fields such as first name, last name, address, and phone number all at once, only a few people will fill out the form. You will then get fewer leads and less information than you theoretically could have gained. Therefore, limit yourself to the fields you absolutely need, for example first name and email address.

Move fields and adjust the order
The sections within the form can be moved. So you can, for example, drag the email address field to the top or place the first name field further down. The order influences how natural filling out the form feels. Try out different variants until the flow seems logical.

Ask for additional data step by step
If you need a phone number later, for example because your sales team calls prospects, then don't ask for it right away. Instead, start with a few details. You can ask for the missing information in a second step, for example by email. There you could offer a small incentive, such as a voucher or additional content, if the recipient provides their phone number. This keeps the hurdle for the first sign-up low.
Set up privacy options (GDPR fields)
Below the form you will find the GDPR fields. Here you specify which consent the reader must agree to. You can, for example, choose the option "Require at least one option". Then the reader must click at least one consent before they can sign up. Alternatively, you can remove individual options or leave only one consent that you actually want to use. One example would be consent to "Customized Online Advertising". Choose the combination so that it fits your later mailings.

Create interest groups
With interest groups, you capture which topics your subscribers are particularly interested in. To do this, click on the Interest Group section and create a new group. You can, for example, ask which topics the reader would like to receive the most information about. As options, you could add nutrition, sports, and mindset. Confirm with Submit. The groups then appear in the form, and readers must answer the question if you set it up that way. This is a valuable basis for targeted content later.


Design the lower section
Further down, you can customize the section with an image, GIF, or another element. Upload a new image, adjust the text below it, and make sure the design is consistent with the rest of the page. This section often acts as an additional trust anchor at the end of the page.

Set up social media buttons
The social media buttons lead the reader to your channels, such as Twitter, Facebook, Instagram, or LinkedIn. You can also link your own website. You should rather not use link text here, as it is usually not displayed. The buttons alone are generally sufficient. Then confirm your entries with Save and Close.

Publish the landing page
When all sections are right, click on Publish at the top. With that, the landing page is online, and prospects can sign up. Before that, check once more whether all required fields are set correctly and the privacy text is clearly worded.

Summary ??? Creating a Mailchimp Landing Page: Guide to Complex Signup Pages
With a more complex template in Mailchimp, you create a landing page that does far more than a simple email query. You customize the logo, headline, and texts, define the signup form, and make deliberate decisions about required fields and privacy options. A short form increases the signup rate, while interest groups help you tailor content to your subscribers' wishes. Finally, you publish the page with a click on Publish.
FAQ
Do I have to adopt the template completely?No, you can move, edit, or remove any section. The template is only a starting point.
How many fields should my signup form have?As few as possible. As a rule, first name and email address are enough. You can ask for further information later.
What does a required field in the form mean?A required field (required) must be filled out before the reader can submit the form.
Can I change something on the landing page afterwards?Yes, all elements can be edited at any time, even after publication.
What are interest groups for?They show you which topics your subscribers are interested in, so that you can send content more specifically.
Should I use link text for social media buttons?This is rather discouraged, as it is usually not displayed. The buttons themselves are generally sufficient.


