
A sheet of paper, a pen and a rough idea are enough to create a design that will later end up on T-shirts, jackets or bags. The path there leads through three stages: the hand sketch, the image editing in Photoshop and the vectorization in Illustrator. In the end you have a clean file that is suitable for printing at Spreadshirt. I will show you what matters in each step and where you can easily lose time. Adobe Illustrator CS6 serves as the example. Newer versions work the same way, although quite a few things may shift in the menus.
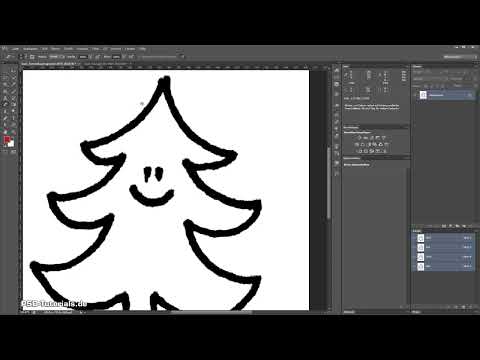
The video is only loaded from YouTube when you play it – data (including your IP address) is then transmitted to YouTube/Google. More in the privacy policy
Key Takeaways
- A clear sketch with distinct contours is the foundation for every good design.
- A high-contrast black-and-white image makes vectorization considerably easier.
- The Image Trace function in Illustrator only delivers clean paths if the threshold and paths are set appropriately.
- You should reduce superfluous anchor points so that the plotter can cut out the design cleanly.
- You must convert fonts to outlines before exporting, otherwise text editing is lost during printing.
Step 1: Sketching and selecting the idea
Ideas often come up while you are on the go, so it is worth keeping notepads within reach. As soon as you have a thought, sketch it roughly on paper. Draw the design in several variations until you say: That's exactly what I like. Afterwards, mark the version you like best. You may also combine parts of different drafts. A tree from one sketch and a smiley from another often make a stronger design than any single variation alone. The same applies to lettering: rewrite the text as often as needed until the letters harmonize.

Step 2: Scanning and desaturating
If possible, scan your drawing in grayscale mode. To do so, check in the scanner options whether a grayscale mode is available. If you scanned in color, the contour often shows a color cast. You remove it in Photoshop with Ctrl + Shift + U. Alternatively, you will find the command Desaturate under Image, Adjustments. Both ways produce a pure black-and-white image, which you need for vectorization.

Step 3: Removing disruptive spots
Choose the Eraser and remove everything that does not belong to the design, such as dirt particles or pencil marks at the edge. With a pure black-and-white design you can work destructively here, because you will definitely not need these spots later.

Step 4: Using the Levels adjustment
Open the Levels adjustment with Ctrl + L. In the histogram you see the distribution of brightness values. The shadows are on the left, the highlights on the right, and the grayscale values in the middle. Drag the white slider to the left until the background becomes completely white. Drag the black slider to the right until the lines appear deep black. With the preview you can compare before and after. This creates a clear black-and-white image that Illustrator can later interpret cleanly.

Step 5: Cleaning up the contour
After the Levels adjustment, the edges often look frayed. Make the eraser smaller, set the hardness to the maximum value and erase the frayed bits piece by piece. Feel free to take your time with this. The cleaner the contour is here, the less rework is needed in Illustrator. With the History panel you can also compare a snapshot of the original image with the edited state. To do so, click the camera icon at the bottom. The comparison quickly shows you whether your corrections are actually working.

Step 6: Saving the image
Save the optimized image as a JPEG or BMP in high quality. With JPEG you should choose quality level 12 out of 12. Give the file a unique name, for example Scan_Tannenbaum_final, so that you can quickly find it again in Illustrator.

Step 7: Preparing the artboard in Illustrator
In Illustrator, create a new A4 artboard via File, New. Then place your image via File, Place. When scaling, hold down the Alt and Shift keys so that the aspect ratio is preserved. The size does not matter for vectorization, because a vector image can later be enlarged as much as you like without becoming blurry. The lettering can be edited in the same way and then placed beneath the design.

Step 8: Setting Up Image Trace Correctly
Select your design and open Image Trace via Window. Under Advanced, click the small filter icon so that all options are visible. Then enable the preview. There is no universal setting that suits every design. In the View setting, choose Tracing Result, and choose the Black and White mode.
The Threshold determines which pixels become black. If you drag the slider to the left, the lines become thinner. If you drag it to the right, they become thicker. A middle setting is a good starting point for most designs.
With Paths, you determine how many anchor points Image Trace sets. More paths mean more detail, but also more points for the plotter. With Corners, make sure that curves actually look round. With the Corners slider, you determine whether edges are displayed as more rounded or more angular. For designs without desired corners, a round representation is usually the better choice.
I usually don't need the Noise option for such designs. However, enable the Ignore White option so that the white background becomes transparent and does not appear as a separate color area.

Step 9: Tracing and Removing the Frame
Click Trace at the top to convert the image into a vector. Image Trace often creates an unwanted frame around the design. Therefore, ungroup via Object, click on the frame, and remove it with the Delete key. After ungrouping, you can edit eyes, mouth, and outline separately, which gives you many options later.

Step 10: Retracing Lines with the Smooth Tool
If curves look uneven, the Smooth tool helps. Select it via the Pencil tool and, holding down the mouse button, trace along the outline the way it should look. Illustrator adjusts the path stroke by stroke to your movements. You can make lines thicker or thinner by moving the tool over the relevant spot. A tip: Work on the outer outline with the tool, because that is where irregularities are most noticeable.

Step 11: Editing Path Points
With the white arrow tool, you can see all anchor points. If you click on a point, handles appear with which you shape the Bézier curve. If you drag a blue corner point, you lengthen or shorten an edge. With the arrow keys, you move selected points with millimeter precision. With the Selection tool, you can also rotate the entire design so that a crooked tree stands straight again.

Step 12: Simplifying the Paths
A vector with a great many anchor points causes problems for the plotter, because the knife has to move to each point individually. Therefore, select the outline, choose Object, Path, Simplify, and enable the preview. With the curve precision slider, you find a compromise between the number of points and appearance. Then confirm with OK. For most designs, the change is barely noticeable, but the file becomes significantly leaner.

Step 13: Converting Text to Paths
If you write text, you use the Type tool and a font in Illustrator. Before you hand the design over to Spreadshirt, you must convert every font to paths. To do this, select the text and click Type, Create Outlines. Spreadshirt does not have many fonts, and then the font would be replaced or displayed incorrectly when printing. Afterwards, you can edit the letters individually like any other vector element. Here too, the Simplify command is worthwhile if a letter has an unnecessarily large number of points.

Step 14: Coloring the Design
Select the design and choose a color. The template is deliberately kept black and white, because that way you can recolor it into any desired color with one click at Spreadshirt. This applies equally to brown, pink, orange, or green. For the example, I colored the design green. If you want to work with multiple colors, you should create each color area separately.

Step 15: The Plotter Check
Before you upload, you need to check whether your design is suitable for plotter printing. In plotter printing, a foil is cut out by a plotter and transferred onto the shirt. For this, the thinnest line in the design must be at least 1.5 mm. The distance between two lines must be at least 1 mm. If a line is too thin or a gap is too narrow, the plotter cuts incorrectly or the foil tears. In this case, adjust the design before you export it.

Summary – Creating a Spreadshirt Design: From Sketch to Print-Ready Vector
You have now learned the complete path from hand sketch to print-ready vector. At every step, pay attention to clean outlines and clear black and white. Use Image Trace with good judgment, simplify the paths, and check the line widths for plotter printing. With this workflow, you create designs that can be reliably produced at Spreadshirt and can be turned into any color you want.
FAQ
Do I absolutely need Photoshop for the preparation?No, you can also make image corrections in other image editing programs. The only important thing is that the image ends up as a clear black-and-white design.
Which Illustrator version is required?The example comes from Illustrator CS6, newer versions work just as well. However, details in menus and panels may differ.
Why should the design be black and white at first?A black-and-white design can be recolored into any color with one click at Spreadshirt, which makes you flexible.
Do I really have to convert every font to paths?Yes, you should always do this whenever text appears in the design. Otherwise, Spreadshirt may not have the font and the print will differ.
How can I tell if the lines are too thin for the plotter?Check the thinnest line in the design. It should be at least 1.5 mm, and gaps should be at least 1 mm wide.
Why should I reduce the path points?Many points make it harder for the plotter to cut and can lead to technical problems. The Simplify command helps without noticeably changing the appearance.


