

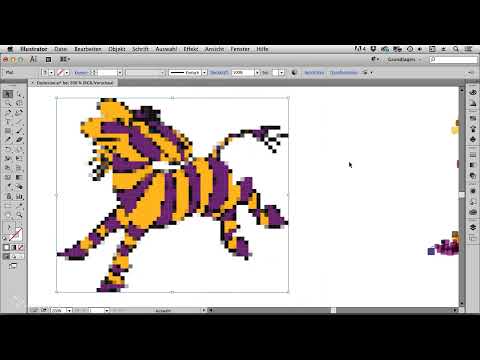
A zebra that breaks apart into hundreds of colorful squares and scatters as if blown apart by an explosion: at first, the vector graphic seems out of place for an effect like this, because Illustrator loves order, grids, and clean alignment. That is exactly why the topic is appealing. You bring disorder into a program that is designed for precision. You can achieve the result from practically any template that you can draw or embed in Illustrator. In this tutorial, I'll show you how to use a few older but very useful functions to turn a shape into a mosaic and then dissolve it piece by piece into chaos.
The video is only loaded from YouTube when you play it – data (including your IP address) is then transmitted to YouTube/Google. More in the privacy policy
Key Takeaways
- The Symbol tool is hardly suitable for controllable chaos, because you can hardly control the distribution.
- The Pathfinder is unsuitable for splitting into squares, because its lines are retained. The Object Mosaic delivers the clean division.
- The Object Mosaic works with pixel images. The template must therefore be present as an embedded image, and you must convert it into a pixel image beforehand.
- The "Transform Each" function is the key to disorder. It scales, rotates, and moves each object around its own center, and a random value provides the desired scatter.
- The "Multiply" blend mode lets the tiles run into each other transparently. Fine-tuning with the "Round Corners" stylize filter gives the result the final polish.
Step-by-Step Guide
Step 1: Preparing the Template
Start with a template that shows your shape clearly. In my example, I drew a zebra and set it up as a Live Paint group. Make sure the silhouette is unambiguous, because in the end your motif should still be legible despite the chaos. A simple shape with bold outlines works much better than fine details.

The template is the basis for everything that follows. You can even hide it later; in my case it stays visible at first so that you keep the silhouette in view while dividing.
Step 2: Why the Pathfinder Doesn't Help Here
My first thought would often be the Pathfinder to break the shape into squares. The problem: the results retain lines and structures that you don't want. But you need solid-colored squares without residual outlines. For that, you use the Object Mosaic. It is a very old function that you can still find in Illustrator and that was built exactly for this purpose.
Step 3: Converting the Object into a Pixel Image
The Object Mosaic does not work on a vector basis, but on a pixel basis. That's why you first convert your template via "Object" and "Rasterize". For coarse tiles, a resolution of 72 ppi is completely sufficient, because you don't need fine details for this motif. Then confirm the setting with OK.

By the way, you can also create the effect with a placed pixel image. However, it must be embedded, otherwise the Object Mosaic won't work. So check this in the panel beforehand before you continue.

Step 4: Creating the Object Mosaic
Now select "Object" and then "Create Object Mosaic". The most important setting is the number of tiles. I entered 58. To make the tiles square, you have to keep the proportions. Illustrator then adjusts the values automatically. Confirm with OK.

Be careful with the number here. The Object Mosaic is very old and computationally intensive. If you choose too many tiles, Illustrator can noticeably stall. The calculation takes a short moment for me, and if the number of tiles is too high, the program quickly reaches its limits.

Step 5: Removing the White Tiles
After creating it, you see many white squares next to the colored tiles. You don't need them. Select the Magic Wand tool and double-click to open its options. Set the tolerance to zero so that really only the white tiles are selected. Then click on a white tile and delete all selected objects.

The result may still look odd at the edges. This is because the template underneath is still there. You can delete it via the "Layers" panel. There you will find the image, which you simply remove. After that, only the little tiles remain.

Step 6: Ungroup and hide the corners
Before you can modify the tiles, check whether they are still grouped. A group does not work with the following transformations. Therefore, ungroup it via "Object" and "Ungroup".
So that you can see what your settings do while experimenting, hide the corners via "View". This way you can see the effects more quickly without being distracted by the bounding boxes.

Step 7: Transform the tiles individually
Now comes the actual moment of chaos. Select "Object", then "Transform" and "Transform Each". In this dialog you can set scaling, movement, and rotation. The crucial point: the transformation applies to each individual object and its own center point. So the tiles are not rotated or scaled as a group, but each one on its own.
The random value is particularly handy. With it, you distribute the values irregularly. I first tried it without and then with the random value. With randomness, the image quickly becomes noticeably more restless.

Step 8: Scale uniformly and preserve the shape
One detail is important when scaling: always use the same values for width and height. Only then do your tiles remain squares. Set the values so that the motif gets jumbled but is still recognizable. The preview helps you with this, because you see the changes live. In my case the shape was distorted, but the zebra was still easy to recognize.

Step 9: Push the dark tiles into the background
Perhaps some very dark squares bother you because they catch the eye too much. They can easily be pushed back by making them smaller. To do this, select the Magic Wand tool again, this time with a tolerance of 10, so that you also catch similarly dark tiles. Click on one of the tiles and show the corners again to see which objects you have selected.
Then open "Transform Each" again and significantly reduce the size of the selection. You can adjust the values several times until the tiles recede into the background and still add some structure to the image.

Step 10: Overlapping with the "Multiply" blend mode
So that the tiles overlap transparently, switch the blend mode of the objects to "Multiply". The colors then blend into one another, and the image looks much more vibrant. This already comes very close to your goal.

At this stage you can still intervene freely. You can select individual color groups with the Magic Wand and enlarge or reduce them in a targeted way using Transform Each. You can make the yellow tiles a little larger, and the purple ones a little smaller. You simply enter your own values in the dialog.
Step 11: Round the corners
Finally, you can make the tiles look softer. Select the objects and go via "Effect" to "Stylize" and then to "Round Corners". Activate the preview and try out different values. In my case the squares quickly became almost circles, so I had to reduce the value. This way the tiles remain angular enough to work as a mosaic, and still get a softer character.

You are far from done with this effect. You can experiment with other stylizations and design your logo explosion as individually as you like.
Step 12: Conclusion and outlook
The functions described are older tools that you can also use in earlier Illustrator versions. That is precisely why it is worth knowing them, because they allow surprisingly precise control of chaos. The result is vector graphics, even though the path to get there leads through pixel images.

Summary ??? Chaos with a System: Logo Explosion from a Template with the Object Mosaic in Illustrator
You have seen how you can create a lively logo explosion from a template with just a few functions. You draw or place your shape, convert it into a pixel image, and create an object mosaic from it. Then you remove the unwanted white tiles, transform each tile individually, and work with random values until the chaos looks exactly the way you want it. The blend mode "Multiply" and the filter "Round Corners" round off the design. The result shows that even precise software can be used for controlled disorder.
FAQ
Question: Can I also use the object mosaic with a placed image?Answer: Yes, but the image must be embedded. An image that is only linked does not work.
Question: Why shouldn't I use the Pathfinder?Answer: The Pathfinder retains lines and structures. For solid-colored squares without residual outlines, the object mosaic is better suited.
Question: What resolution do I need when converting to a pixel image?Answer: For coarse tiles, 72 ppi is sufficient, because fine details are not necessary for this motif.
Question: Why are white tiles left over after the object mosaic?Answer: The object mosaic also creates white fields. You remove them with the Magic Wand tool at a tolerance of zero.
Question: Why do I still see edges after deleting the white tiles?Answer: The template is still underneath. Delete it via the "Layers" panel.
Question: Why doesn't the transformation work?Answer: The tiles are probably still grouped. Ungroup them via "Object" and "Ungroup".
Question: How do the tiles stay square when I scale them?Answer: When scaling, always use the same values for width and height.
Question: What does the option "Transform Each" do?Answer: Each object is scaled, moved, or rotated around its own center point. With a random value, you create the desired disorder.
Question: How do I achieve the transparent overlay of the tiles?Answer: Change the blend mode of the objects to "Multiply".
Question: Why do my squares turn into circles when rounding?Answer: The value in the "Round Corners" filter is too large. Reduce it until the tiles still look angular.

