
A colored veil acts like a soft haze of light over a subject, and you don't need any complicated techniques for it. With the Pencil tool, you simply draw a few curved lines, which can then be joined into a smooth gradient with the "Blend" tool. In this tutorial, I'll guide you step by step through the entire process, from the new file to the fine adjustment of the shape. Everything stays flexible: you can correct, reorder, or recolor curves at any time.
The video is only loaded from YouTube when you play it – data (including your IP address) is then transmitted to YouTube/Google. More in the privacy policy
Key Takeaways
- The Pencil tool initially creates a pure outline, whose color you adjust with a double-click.
- A graphics tablet makes curved lines much easier than a mouse.
- Blending several lines creates a color gradient, whose fineness you control via the Blend options.
- You remove superfluous anchor points with the Direct Selection tool, and the Smooth tool helps with subsequent corrections.
Step-by-Step Guide
Step 1: Create a New File
Open a new document via File > New and give it a meaningful name, for example "colored veils". The format hardly matters for this effect. A4 landscape is a good starting point, and you can easily adjust the artboard later. For the color mode, choose RGB if you will mainly use the graphic on screen or on the web. If, on the other hand, you want to have it printed by a print shop, CMYK is often the right choice. In that case, ask beforehand, as the requirements differ depending on the print shop.

Step 2: Rename the Layer
A layer was automatically created with the new artboard. If it isn't visible, open it via Window > Layers. Double-click the name of the layer and rename it, for example, to "colored veil 1". Since you will build a second veil later, this clear naming is worthwhile from the start.

Step 3: Set the Stroke Color
Select the Pencil tool. The line initially appears as a black stroke, and the fill is crossed out because you are only drawing a line at the moment. You change the color with a double-click on the color swatch. In the color picker, you first choose the base hue, for example red. Then you decide whether the tone should lean toward white (lighter), black (darker), or be mixed with shades of gray. For the first line, you take a vivid orange.
Step 4: Draw the First Curve
Now you draw the first line freely in the image. Let the stroke flow organically and feel free to try out different courses, because the shape later largely determines the result. A graphics tablet makes this step much more comfortable than the mouse, which is why purchasing one is especially worthwhile if you work regularly.
Step 5: Correct Errors in the Path
Take a close look at the curve you drew. At the end of the line, it may run a bit untidily. With the Direct Selection tool, select the disruptive anchor point and press the Delete key. The path is cleaned up immediately, without you having to redraw the rest of the curve.

Step 6: Navigate the View
To keep details in view, you often need to move or enlarge the view. Hold down the spacebar and drag with the mouse to move the visible area. In doing so, you only change the view of the artboard, not the position of the object. With the Alt key held down and the scroll wheel, you zoom in and out. A double-click on the Hand icon in the toolbar centers the view on the entire document again.

Step 7: Check the Path in the Layers Panel
In the Layers panel, expand the small triangle next to your layer. There you see the individual path, and a small preview appears next to it. With thin lines, however, you can often barely make out anything in this preview. This is normal and no cause for concern, because the effect only unfolds through the interplay of several paths.
Step 8: Create the Second Line in Yellow
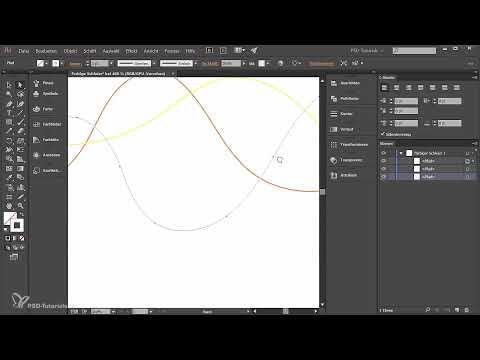
Double-click the color swatch of the Pencil tool again and choose a strong, slightly squeaky yellow. Then draw a second curve that follows the course of the first one but takes its own direction. The same applies here: experiment with the shape. Every change to the line will affect the veil later.

Step 9: Define the order of the paths
By default, the yellow line lies above the orange one. You can change the order at any time. To do so, take the upper path in the Layers panel and drag it down until it lies below the other one. This arrangement later determines which color is visibly in the foreground.
Step 10: Draw the third line in white
Set the Pencil tool to white and draw a third curve. It may be somewhat more curved than the other lines so that the veil looks lively. A mistake can occur here as well. Remove messy anchor points again with the Direct Selection tool and the Delete key.
Step 11: Select all curves
Before you can blend the paths, you have to select all curves together. You have several options for this. You can drag a rectangle around all lines with the Selection tool. But you can also hold down the Shift key and click the individual paths one after another. The fastest way is via the Layers panel: a click on the layer selects all contents.

Step 12: Blend the paths
With the curves selected, now choose Object > Blend > Make. This creates a transition between the lines. For the gradient to become visible, the arrangement of the paths is crucial.

Step 13: Set the blend options
Then open Object > Blend > Blend Options. There you determine how the gradient should be displayed. With the "Smooth Color" option, very fine transitions between the lines are created. Alternatively, you can choose "Specified Steps" and enter a number, for example ten. Activate the preview to assess the result directly. With ten steps, the individual intermediate lines are clearly recognizable and set a graphic accent.

Step 14: Adjust the fineness and spacing of the steps
If you increase the steps to 20, the gradient becomes noticeably finer. With a value of 200, the difference from the "Smooth Color" option can hardly be seen anymore. Try out different values and decide by feel. A somewhat visible spacing between the intermediate lines looks particularly appealing in many designs, which is why the coarser stepping can be a good alternative.
Step 15: Optimize the order in the result
After blending, you can still move or swap individual paths. Drag a path down or up in the Layers panel and watch how the veil changes. This way you find out which arrangement suits your design best.
Step 16: Correct individual curves afterwards
Not every line sits perfectly right away. Select a path with the Direct Selection tool and move it or individual anchor points. If you want to move several anchor points at the same time, hold down the Shift key, click the desired points, and drag them together to the new position.

Step 17: Redraw with the Smooth tool
The Smooth tool offers another option. To do this, hold down the mouse button in the Pencil tool's menu until the submenu opens, and select the Smooth tool there. Then move along close to the existing path and redraw the desired shape. This usually reduces the number of anchor points, which makes the path clearer. For individual corrections, this is a quick solution. If you don't like a path at all, you can also simply draw a new one.

Step 18: Assess the overall result
Now you see the first veil: the gradient goes from orange through yellow to white. What works especially well is that the white seems to disappear into the background. If needed, move the layer up or down until the composition looks harmonious. You can continue to change the shape, add new paths, connect them via Blend, and adjust the order.

Step 19: Changing the Color of a Path Afterwards
You can change the color of an individual path at any time. Select the desired path, double-click the color swatch, and choose the new color, such as a blue. Feel free to try out several variations until you are satisfied with the result. With that, you have understood the basic principle, and according to the title, the second veil follows in another part of the series.

Summary ??? Creating a Color Veil with Curves in Adobe Illustrator
You have learned how to draw individual curves with the Pencil tool, set their colors, and connect them into a harmonious gradient with the "Blend" tool. With anchor points, the Smooth tool, and the Layers panel, you can correct the veil at any time. The more you experiment with shape, order, and colors, the more varied your results will become.
FAQ
Do I absolutely need a graphics tablet for this effect?No, you can also draw the curves with the mouse, but flowing lines can be created much more naturally and precisely with a graphics tablet.
Why is my drawn line not visible after painting?The Pencil tool initially only creates an outline without a fill, and thin lines often look very faint in the preview. In combination with several paths, the effect unfolds much better.
What is the difference between "Smooth Color" and "Specified Steps"?With "Smooth Color," extremely fine, flowing transitions between the lines are created. With "Specified Steps," you set a number of intermediate lines yourself, which makes the gradient look coarser and visibly stepped.
Can I still change the order of the paths after blending?Yes, you simply move individual paths up or down in the Layers panel and directly observe how the veil changes.
How do I remove messy anchor points from a line?Select the problematic anchor point with the Direct Selection tool and press the Delete key. Afterwards, you can redraw the path with the Smooth tool if needed.


