
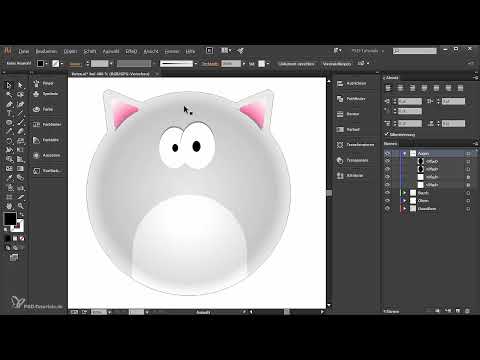
Your cat already has a recognizable shape, but still looks smooth and hard. In this third part, you turn the basic shapes into soft fur. To do this, you roughen the edges with a filter without changing the original paths. Then you design the eyes, nose, and mouth and add more structure to the fur with stripes. Keep an eye on the Appearance panel, because almost all steps run through it and can be readjusted at any time.
The video is only loaded from YouTube when you play it – data (including your IP address) is then transmitted to YouTube/Google. More in the privacy policy
Key Takeaways
- Roughening works via the filter "Distort & Transform > Roughen" in the Appearance panel and can be changed at any time.
- With a small size of about 0.5 to 2 percent and a detail value of around 84 to 95 per inch, you get subtle, natural fur.
- Eyes, nose, and mouth are created from simple basic shapes that you combine with the Pathfinder.
- A clipping path via a clipping mask ensures that the stripes do not extend beyond the body.
- The "Multiply" mode in the Transparency panel is well suited for soft transitions.
Step-by-Step Guide
Roughen the edges of the basic shape
First, activate the cat's basic shape and open the Appearance panel so you can see the fill with its gradient and opacity. The stroke is empty in this case, so you only work with the fill. In the Appearance panel, click "FX", choose "Distort & Transform" and then "Roughen". Activate the preview. Set the size to relative and the value to 0.5 percent, the detail to 84 per inch, and choose "Smooth". With too high a value, the cat looks like an electrically charged creature, so the rule here is: better to start conservatively.

Refine the belly and underside
After the first filter, the belly still looks relatively hard. Therefore, apply the same filter again, this time also with 0.5 percent relative, 84 per inch, and "Smooth" activated. At the lower edge, a bit of the basic shape still peeks out. To fix this, move the belly shape down a little so that it covers the basic shape. This creates a soft, fluffy underside.

Roughen the inner areas
The inner shapes need somewhat stronger treatment. Select both inner shapes together, holding down the Shift key, and open the "Roughen" filter again. This time, choose a size of 2 percent and about 95 per inch with "Smooth". Check the preview and, if necessary, move individual lines slightly inward so that small gaps disappear. Here too: the settings can be changed at any time later in the Appearance panel.

Create eyes with ellipses
Create a new layer and name it "Eyes". With the Ellipse tool, draw two ellipses without a stroke and with a white fill. Hold down the Alt key to duplicate an ellipse, and enlarge it slightly so the cat gets an alert look. Use the arrow keys to place the eyes precisely. Select both eyes and check the position in the overall view.

Add shadows above the eyes
For a more striking expression, add a kind of eyebrow or shadow to the eyes. Select both eyes and open the Appearance panel. There you see the white fill. Create a new fill below it in a medium gray and drag it beneath the white fill. To shift it, click "Opacity" in the Appearance panel, choose "Effect > Distort & Transform > Transform" and set the "Vertical" value to -0.5 mm. The minus sign is important, because otherwise the fill would move downward. This creates a comic-style outline above the white eye.

Design the pupils
Copy one of the dark fills with Control-C and Control-F, bring the copy to the front, and color it black. Enlarge or reduce it to taste and place it in the eye. For the highlight, stack the pupil and a smaller white shape on top of each other, select both, and apply the "Minus Front" option in the Pathfinder. This creates a highlight that you then position.

Shape the nose from a triangle
Create a new layer named "Nose". With the Star tool, draw a triangle by setting the number of points to three. Remove the stroke, fill the triangle with black, and make it smaller. Squash the shape by pulling the bottom handle upward. So that the nose doesn't look angular, round off the corners with the Direct Selection tool and the active anchor points.

Add a highlight to the nose
A small light reflection makes the nose look more lively. To do this, draw a small rectangle, fill it with white, and round off the corners until a dot is created. If the rectangle suddenly disappears after drawing, select the nose shape again and create the rectangle once more. Then place the dot on the upper half of the nose. If the nose is too small overall, enlarge both shapes together.

Design the mouth with brush strokes
Create a new layer named "Mouth". Select the Brush tool, fill it with a medium gray, and use the brush you created earlier. Draw a stroke in the image. Make sure that roughening or a gradient is not active, otherwise unwanted effects will occur. If you duplicate the stroke by holding down the Alt key, you mirror it via "Object > Transform > Reflect". Push the two halves together so that they touch in the middle. If necessary, you can squash them a bit more. Afterwards, convert the strokes into full-fledged shapes via "Object > Expand Appearance".

Add a cheeky tongue
Create a new layer named "Tongue" and copy the two mouth shapes there. Draw a rectangle, fill it with a green (approximately R 196, G 0, B 121 according to the video) and drag it under the mouth. Round off the bottom anchor points with the Direct Selection tool and move the top points with the arrow keys until the tongue has the right shape. Then select the tongue and mouth shapes and apply the "Divide" option in the Pathfinder. Afterwards, remove the superfluous areas. For the center line, draw another rectangle in a darker red tone, round it off, and divide it in the Pathfinder as well.

Apply stripes via a clipping mask
The stripes should only appear inside the body. To do this, create a new layer named "Stripes" that sits above the base shape but below the belly layer. Copy the base shape into this layer and click "Make Clipping Mask" at the bottom of the Layers panel. The base shape now becomes the clipping path, and everything you draw on the stripes layer stays within the cat.

Create your own stripe brush
On a helper layer, draw a flat ellipse and sharpen the ends with the Anchor Point tool. Then drag the shape into the Brushes panel, choose "New Brush", and select an Art Brush. Name it, for example "Stripe brush", and set pressure and method as you like. Afterwards, you can delete the default brush and the helper layer. On the stripes layer, select the Brush tool, take the new brush, and draw short strokes with a black fill color. Lift off again and again so that the stripes look natural.

Mirror and soften the stripes
So that the drawing looks symmetrical, select all stripe paths, hold down the Alt key, and drag them to the other side. Then mirror them via "Transform > Reflect". Fine-tune the position with the arrow keys. Since the stripes initially look too harsh, open the Transparency panel via "Window > Transparency", set the mode to "Multiply" and the opacity to 20 percent. This gives you a soft gray tone.

Convert stripes into shapes and roughen them
So that you can continue editing the stripes, convert the brush strokes into full-fledged shapes via "Object > Expand Appearance". Then apply the "Roughen" filter via the Appearance panel, this time with 1 percent relative and about 89 per inch with Smooth. The advantage: you can reopen and adjust the settings at any time without destroying the original shape.

Preview of the Next Step
In the video, the instructor announces that the paws, the tail, and a shadow under the cat will follow in the next part. Until then, you can already try out the design now and think about which details your cat still needs.

Summary ??? Cat in Illustrator: Roughening Fur, Designing Eyes, Nose, and Mouth
With the "Roughen" filter from the Appearance panel, you turn smooth shapes into soft fur, and the great thing about it is that you can undo all settings at any time. Next, you create eyes with highlights, a nose from a rounded triangle, a mouth with a tongue, and stripes that stay neatly within the body thanks to a clipping mask. With Pathfinder, transparency in Multiply mode, and mirroring functions, you design everything quickly and precisely. The next part adds paws, tail, and shadow.
FAQ
Do I have to apply the Roughen filter to each shape individually?No, you can select multiple shapes at the same time and apply the filter together. For different intensities, such as for the belly and inner areas, separate settings are worthwhile, though.
Why does a rectangle suddenly disappear after drawing it?This often happens when the wrong layer or shape is active. Select the desired layer and draw the rectangle again.
What does the clipping path do via the clipping mask?It limits everything you draw on the layer to the shape of the cat. As a result, stripes do not extend beyond the body.
Why should stripes be created in Multiply mode?The mode ensures that the dark stripes blend with the background. With an opacity of about 20 percent, they look soft instead of harsh.
Can I still change the "Roughen" filter later?Yes, since the filter is located in the Appearance panel, you can open it at any time and adjust the values. This is a non-destructive way of working.


