
A lens viewed from the front looks like a stack of rings of different widths. In this tutorial in Adobe Illustrator, you will recreate exactly this look, in such a way that you can still adjust each ring easily later on. Instead of drawing each circle individually, you work with colored strokes that lie on top of one another and thus combine to form a lens.
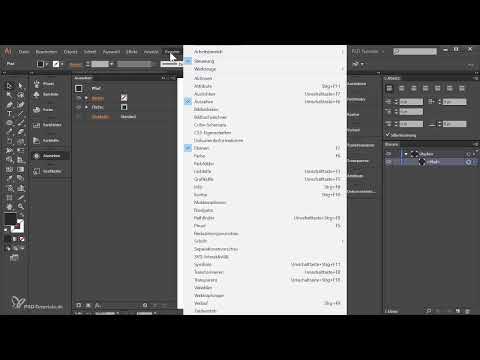
The video is only loaded from YouTube when you play it – data (including your IP address) is then transmitted to YouTube/Google. More in the privacy policy
Key Takeaways
You work with a single circle whose appearance you control via strokes. The Appearance panel describes how the object is actually displayed. If you change strokes there, the basic shape remains untouched.
The order of the strokes determines the result. Each new stroke must lie below the previous one so that the larger stroke remains visible.
You stay in control by duplicating and scaling. With the Alt key you create copies, with the Shift key you scale proportionally. This way the rings are created without shifting.
Always check whether you are editing the fill or the stroke. Many supposed errors occur because the wrong property is in the foreground.
Step-by-Step Guide
Step 1: Create a New Document
Go to "File" and "New" to open a new document and give it a meaningful name, for example "Lens". In the example you choose the A4 format, which is set to landscape by default. Of course, you can also use any other format.

Step 2: Set the Color Mode and Resolution
The color mode depends on what you plan to do with your graphic. If you are planning to print through a professional print shop, you should choose CMYK, but you must first clarify with the print shop which specifications apply. For screen, internet or purely digital use, RGB is the right choice. For raster effects, a resolution of 300 PPI remains a good standard. Then confirm your settings with "OK".
Step 3: Rename the Layer
After creating the document, you will find Layer 1 in the Layers panel. If the panel is not visible, open it via "Window" and "Layers". A double-click on the layer allows you to rename it to "Lens". This helps you keep track later when you create more layers.

Step 4: Draw the Ellipse
Select the Ellipse tool, which is hidden behind the Rectangle tool. Alternatively, simply press the L key. If you drag out a shape while holding down the mouse button, an ellipse is created. If you also hold down the Shift key, it becomes a perfect circle. If you need the shape in a different place, you can hold down the spacebar while dragging and move the object.
Step 5: Set the Size Precisely
To check the actual size, open the Transform panel via the menu. There you see the width and height of the circle. In the tutorial, you set both values to 12 mm so that the circle stays round. To zoom, hold down the Alt key and scroll with the mouse wheel, or use the Zoom tool.

Step 6: Remove the Stroke and Set the Fill
After drawing, the ellipse has a white fill and a black stroke. For the construction you initially don't need a stroke, so in the control panel you select the stroke and set it to "None". Then you click on the fill and set it to black. Always pay attention to whether you are currently editing the fill or the stroke, because otherwise nothing seems to happen when you change colors.

Step 7: Duplicate and Scale the Circle
To create another ring, hold down the Alt key and drag the circle to a different spot so that a copy is created. Then drag a corner anchor while holding down the Shift key. This scales the duplicate proportionally from the center. With this method, however, you would create many objects that can easily be shifted. Therefore, a more elegant solution follows in the next step.

Step 8: Working with the Appearance Panel
Remove the duplicate again and click on the black circle. Now open the Appearance panel via "Window" and "Appearance". There you can see all the properties of the object, i.e. fill, stroke, and opacity. Leave the opacity at 100 percent if you don't want any transparency. The special thing is that in this panel you can add strokes without creating additional objects.

Step 9: Aligning the First Stroke to the Outside
In the Appearance panel, click on "Stroke" and set a red stroke with a weight of 4 points. By default, the stroke is centered on the circle's outline. To make it start completely outside the circle, select the option for outside alignment. Zoom in closer to see how the stroke sits.

Step 10: Duplicating Strokes and Differentiating Them by Color
In the next step, you build up the rings. To do this, you duplicate the stroke within the Appearance panel by dragging it onto the New Item icon or copying it via the menu. It is important that each new stroke sits below the previous one so that the wider stroke remains visible on the outside. Then you change the color and weight. In the example, the red is followed by a yellow stroke with 5 points, then a green one with 10 points. The values are not fixed, but are based on the lens you want to recreate.

Step 11: Adding the Remaining Rings
Continue like this until you have created all the rings you want. In the tutorial, among others, a pink shade with 19 points, a red shade with 23 points, an orange shade with 28 points, and later a blue shade with 72 to 80 points are added. Make sure the widths are chosen the way you will need the rings later. In particular, the stroke on which the text is later supposed to sit needs sufficient space.

Step 12: Watching Out for a Quirk in Illustrator
When copying strokes, it can happen that strokes you have already finished open up again or change their order. This seems confusing at first. In such cases, check the order in the Appearance panel and correct it before you continue. This way you keep track of all the rings.

Step 13: Checking the Result
With "View" and "Outline", you can see that basically only a single object exists, namely a circle. If you activate the GPU preview, you can see the effect that results from the many strokes. The big advantage of this method is that you can later adjust the color of each stroke or give it a gradient. That is exactly the next step, which is covered in the following video.

Summary ??? Creating a Lens in Illustrator: Non-Destructive Rings with Strokes
You have learned how to create a document in Illustrator, draw an ellipse precisely, and give it multiple strokes in the Appearance panel. Each stroke forms a ring of the lens, and the order and width create the typical structure of a zoom lens. Since everything is controlled via strokes, your design remains flexible. You can change colors and weights at any time without redrawing the base object.
FAQ
Which color mode should I choose?CMYK is suitable for printing via a print shop, RGB for screen and internet. Clarify the requirements with your print shop beforehand.
Why don't I see any change after changing the color?You are probably editing the stroke instead of the fill, or vice versa. Check in the panel which property is currently active.
How do I draw a perfect circle?Hold down the Shift key while dragging out the ellipse.
How do I move an ellipse while drawing?Hold down the spacebar while you drag, and move the object as you do so.
Why isn't the stroke on the outside of the circle?By default, the stroke is center-aligned. Select the option for outside alignment so that it starts on the outside.
Why does each new stroke have to be below the previous one?Only this way does the wider stroke lying further out remain visible. If it is above, it covers the other rings.
Can I change the rings afterwards?Yes, since all rings are listed in the Appearance panel, you can adjust colors, weights, and order at any time.
How can I move the view without moving the object?Hold down the spacebar and drag with the mouse. This way you only move the view.


