
Imagine you open Illustrator and want to draw a lip that doesn't look like rough pencil strokes. Starting with a simple rectangle, this works much faster than you might think. In this second part of the tutorial, you shape the basic form of the upper lip. You work with the anchor points, with smart guides, and with the Pathfinder, which removes the unnecessary areas.
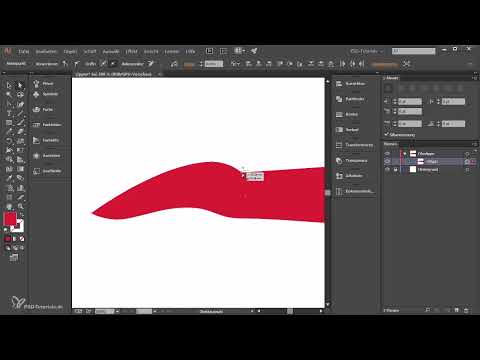
The video is only loaded from YouTube when you play it – data (including your IP address) is then transmitted to YouTube/Google. More in the privacy policy
Key Takeaways
- A rectangle can be transformed into a lip shape using the anchor points, without you having to draw freehand.
- Smart guides (View > Smart Guides) ensure that anchor points meet exactly.
- With the Pathfinder and the "Minus Front" option, you cleanly cut away unwanted areas.
- After mirroring and merging the two lip halves, you get a single, cohesive object.
- The lower lip is created using the same principle with a new rectangle, which you trim with the upper lip.
Step-by-Step Guide
Step 1: Make the starting rectangle narrower
Start with the Rectangle tool and adjust the shape. In the video, the rectangle is first made slightly narrower so that it better matches the proportions of an upper lip. As a reference, you can use a photo or a drawing from the internet, which you use as a guide for the width, height, and curvature of the lip.

Step 2: Start with the left side
You can initially ignore the right side of the upper lip completely, since it will be cut off later anyway. Therefore, focus only on the left half. Zoom in close to the object so that you can edit the anchor points precisely.

Step 3: Move anchor points with the Direct Selection tool
Select the Direct Selection tool and click on an anchor point, for example the top point of the left side. Drag it downward. Hold down the Shift key so that the point moves only along a straight line and does not float freely in space. You repeat this process with the bottom anchor point, except that this time you drag it upward.
Step 4: Activate smart guides
So that the anchor points align automatically when moving them, go to the View menu and activate the Smart Guides option. As soon as you drag the anchor point upward, it snaps to the opposite point. The two points then lie exactly on top of each other, which is indispensable for a clean construction.

Step 5: Add additional anchor points
Now you need more anchor points to shape the form more precisely. Select the Pen tool and click on the edge at a suitable spot to add a new anchor point. Then move this point a bit to the left and the next one downward. This already creates a first hint of the lip contour.

Step 6: Shape the edges
At this point, the upper lip still looks quite angular. But that is exactly normal, because the shape becomes softer in the next step. Therefore, keep moving individual points until the progression from the center to the side looks harmonious. Make sure that the line runs evenly and that no unwanted peaks appear.
Step 7: Prepare the lip contour on the opposite side
You now apply the same procedure to the other side of the rectangle. Here too, the smart guides help you, not always, but in many cases. Place new anchor points at the appropriate spots and drag them into the desired position. As you add more points, the shape gradually becomes more detailed.
Step 8: Turn edges into curves with the Anchor Point tool
Now the hard edges become softer. Hold down the spacebar to temporarily activate the Anchor Point tool. Click on a point and drag to the left or right, depending on how the curve should run. With the Shift key held down, the movement stays in the desired direction. This is how you turn an edge into a gentle curve.
Step 9: Fine-tuning with the handles
With the Direct Selection tool, you can grab the handles of the anchor points and fine-tune the curves. Drag one handle to the left and another downward until the lip looks harmonious. Make sure to always select the right anchor point, because an incorrectly selected point will change the shape unexpectedly.
Step 10: Check the interim result
Before you continue, take a calm look at your current progress. Edit the anchor points and handles a little more until the left side of the upper lip is convincing. This intermediate step requires some patience, because small corrections have a strong effect on the overall impression.
Step 11: Place a rectangle over the right side
The right side of the upper lip is still unusable and will therefore be cut off. To do this, select the Rectangle tool again and draw a rectangle that covers the entire right side. To make it easier to see, you can give the rectangle a different color. Place it at the point where the lip goes down and rises again shortly before that.

Step 12: Select both objects together
To prepare the objects for the Pathfinder, you need to select both. To do this, first click on the lip, hold down the Shift key, and then click on the rectangle. Alternatively, you can click on an empty area, hold down the Shift key, and click on both objects. In the Layers panel, you can see whether both elements are active.

Step 13: Minus Front
Open the Pathfinder via Window and select the Minus Front option there. The rectangle on top is thus subtracted from the shape underneath. The entire right side of the lip, including the rectangle, disappears, and what remains is the left half of the upper lip.

Step 14: Duplicate and mirror the left half
Duplicate the remaining object and move the duplicate to the right while holding down the Shift key. The Shift key ensures that the object moves in a straight line. Then choose the vertical reflection via Object > Transform > Reflect. Activate the preview so you can see the result directly.

Step 15: Align both halves precisely
Zoom in closer again and move the mirrored object until both halves meet cleanly. The smart guides help you with this, as they snap to the edges. This creates a flush connection with no visible gap.

Step 16: Unite the halves into one object
So that the upper lip exists as a single object, select both halves. Open the Pathfinder again and this time choose the Unite option. Afterwards, the lip is a continuous path that you can edit as a whole at any time.
Step 17: View the result in preview
Switch to the preview view to see the upper lip without guides and path outlines. This is the best way to tell whether the shape looks coherent. If you don't like something, you can switch back to outline view at any time and readjust anchor points.

Step 18: Create a rectangle for the lower lip
For the lower lip, you need a new rectangle. Select the Rectangle tool again and start it at the point where the lower lip should begin. Thanks to the smart guides, the starting point on the right side snaps into place automatically. You adjust the lower area, while the upper area will later be determined by the upper lip.
Step 19: Use the upper lip as a cutting shape
To obtain the upper boundary of the lower lip, you duplicate the upper lip. To do this, hold down the Alt key while dragging the upper lip upward in the Layers panel. Then select the duplicate together with the rectangle and apply Minus Front again in the Pathfinder. Now the lower lip is clearly bounded at the top.

Step 20: Add an Anchor Point in the Middle
So that the lower lip gets a nice curve, you need an additional point in the middle of the bottom edge. Place it with the Pen tool. The smart guides show you when you are clicking exactly on the center of the rectangle. Then select the middle point and the neighboring points while holding down the Shift key, drag them upward, and finish the edge flush.

Step 21: Make the Lower Lip Round
To shape the lower lip softly, select the Anchor Point tool. Drag the middle point downward while holding down the Shift key until an even curve forms. If the curve doesn't fit right away, you can readjust the handles with the Direct Selection tool. Simply undo any unsuitable steps and try again.
Step 22: The Final Touches
Finally, look at the upper and lower lip together. The overall shape should look harmonious and be convincing in the style of a simple flat design. Feel free to take your time for small corrections to individual anchor points, because it's precisely the last few percent that decide the impact of the motif.
Summary ??? Drawing Lips in Adobe Illustrator: Creating the Upper Lip with a Rectangle
You have learned how a simple rectangle becomes the foundation of an upper lip. You shaped the left side with the Direct Selection tool, aligned anchor points using smart guides, and created curves with the Anchor Point tool. With the Pathfinder, you removed the right side, mirrored the remaining half, and united both parts. Afterwards, you created the lower lip following the same principle. With a bit of practice, you will master this procedure quickly, and you can apply it to other organic shapes.
FAQ
Why should I hold down the Shift key when moving anchor points?With the Shift key held down, the anchor point moves only along a straight line, so the shape is edited in a controlled and even manner.
What are smart guides good for?They automatically show you alignments while moving, so that anchor points meet exactly and the construction stays clean.
How do I remove the right side of the upper lip?You place a rectangle over the right side, select both objects, and apply the Minus Front option in the Pathfinder.
How do I create a curve instead of an edge?Select the Anchor Point tool, click on the point, and drag the handles until the desired curve forms.
Why should I unite the halves?Uniting turns the two parts into a single object, which you can edit and move more easily later.

