The selection and editing of RAW images opens up a variety of options to bring your photos to life. In this guide, we focus on advanced settings of the RAW editor in Photoshop to make specific adjustments and achieve the desired image look. Here you will learn how to add a personal touch to your images through strategic changes in colors, brightness, and saturations.
Key insights
- Benefit from smart objects to modify your changes at any time.
- Learn to use the tone curve to adjust tonal values.
- Use HSL settings for precise color controls in the image.
- Understand the difference between brightness, saturation, and hue.
Step-by-Step Guide
1. Use Smart Objects
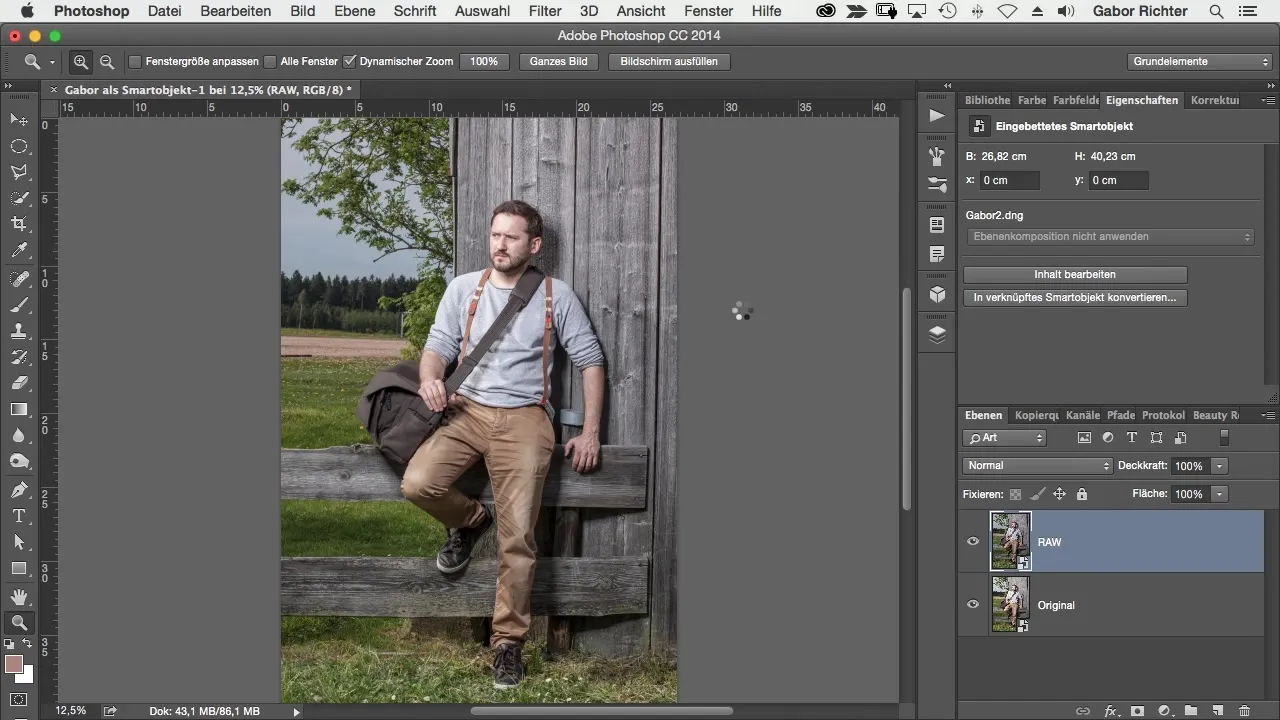
The first step in the RAW converter is to click into your smart object. This feature allows you to make adjustments at any time without affecting the original data. This not only makes editing safer but also more flexible.
2. Tone Curve for Image Look
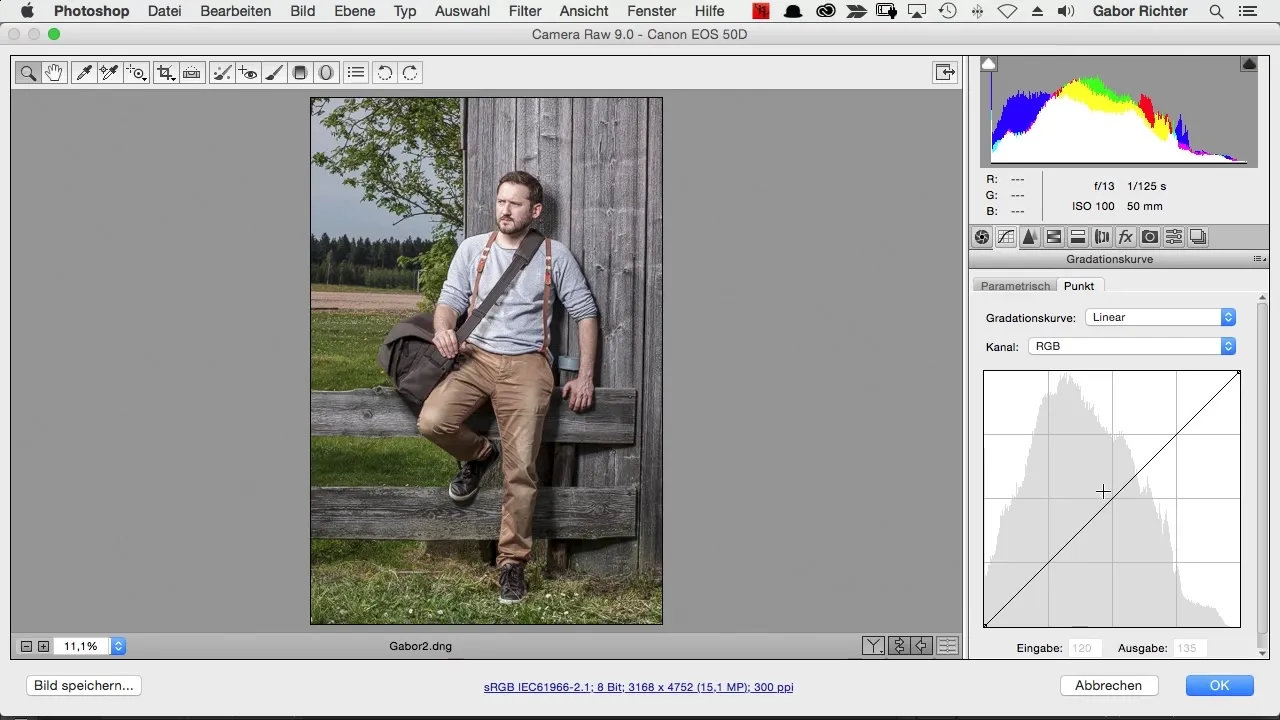
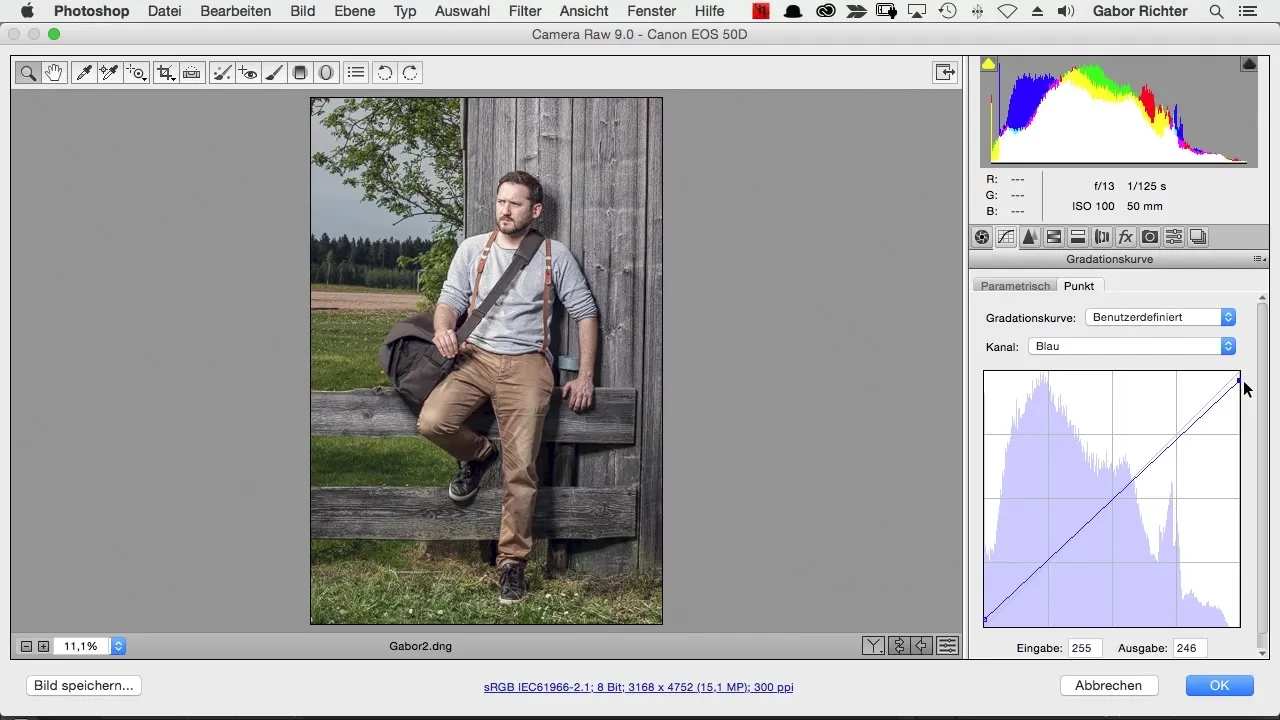
To give your image a special touch, you should use the tone curve. This function allows you to control the brightness distribution of your image precisely. You have the option to adjust individual channels like blue. Pull the lower section of the blue channel up to lightly tint the dark areas bluish, thus creating a soft pastel look.
3. Adjusting Highlights
In the next step, go to the highlights of your image. Highlights can be set towards yellow, which has an appealing effect due to the contrast with the blue tones. Experiment with intensity as needed to achieve the perfect hue.
4. Working with HSL Settings
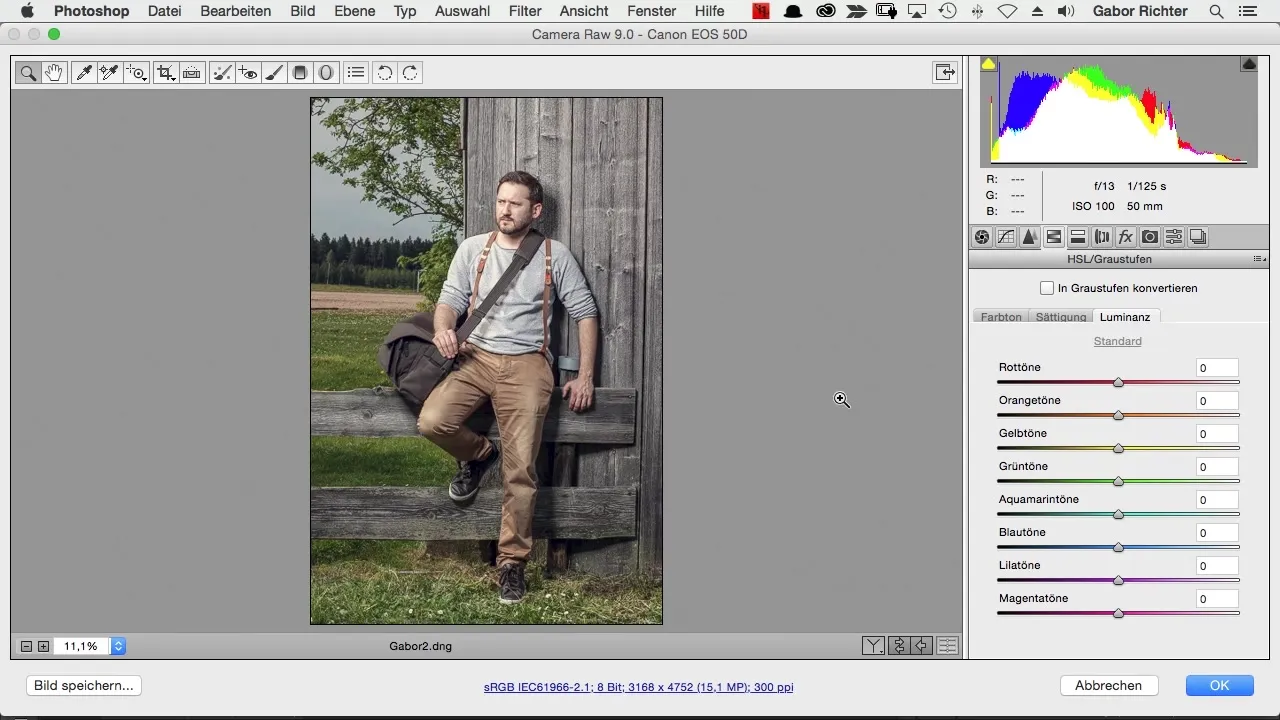
The HSL settings are particularly powerful when it comes to adjusting colors. Start with luminance to change the brightness of specific hues. When you adjust the orange tone, for instance, the brightness of your skin tones, you can significantly influence the character. Move the slider to the right for more brightness or to the left for darker tones.
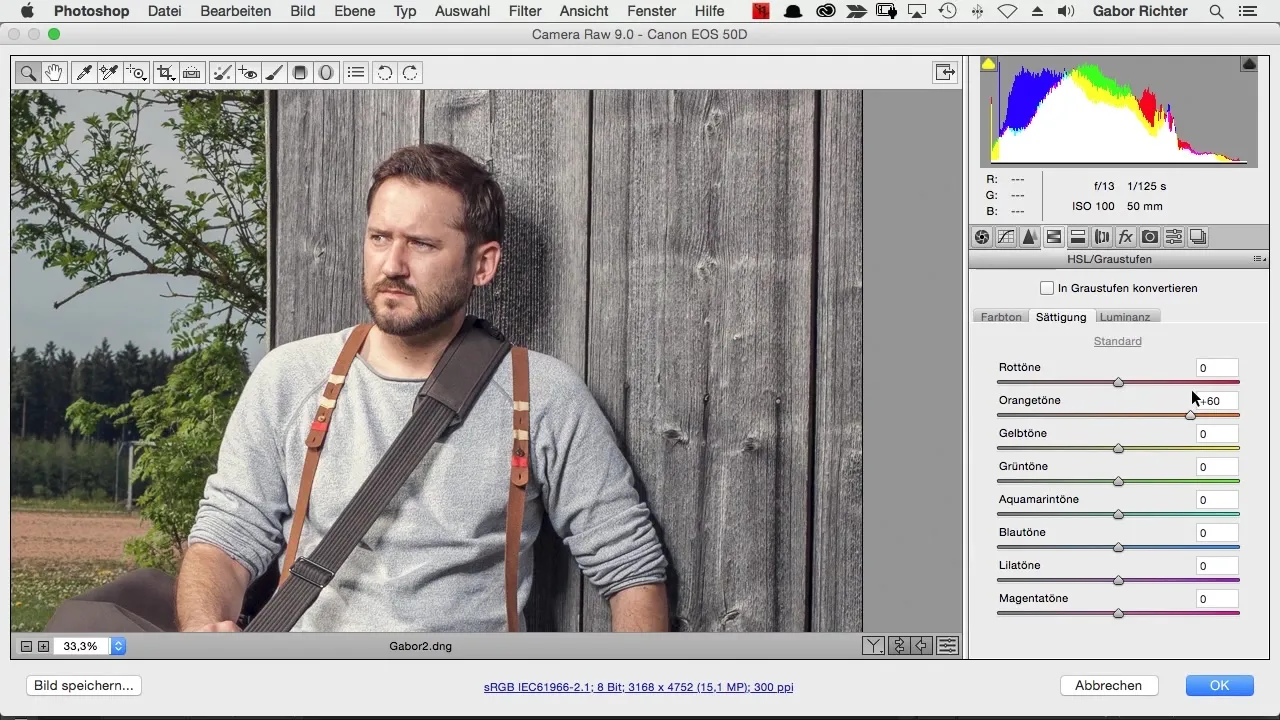
5. Adjusting Saturation
A significant increase in saturation can intensify the color of your face, but only the saturation, not the brightness. By increasing or decreasing saturation in skin tones, you can achieve a whole new look.
6. Changing Hue
You can change the hue of orange tones, but the adjustment is not as pronounced here. You can make subtle corrections to refine your color palette. Note that shifting the hue does not bring about drastic changes.

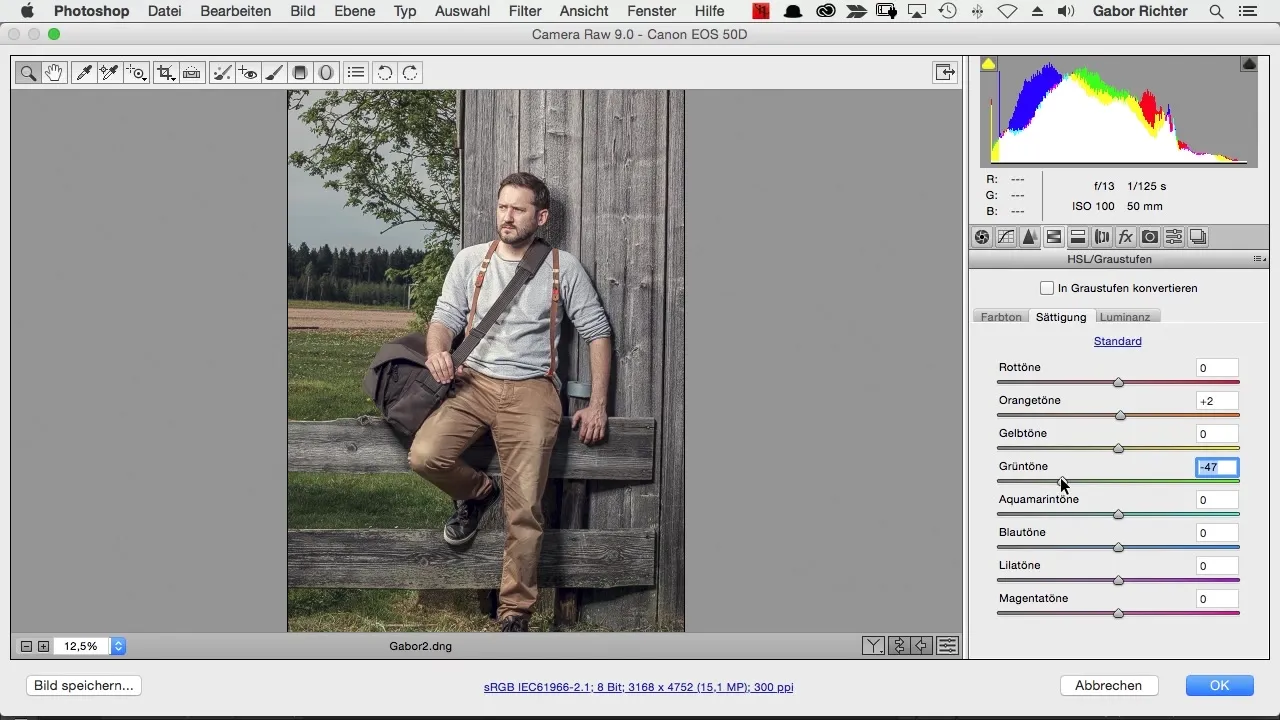
7. Reducing Green Tones
If green tones appear too dominant, you should consider drastically reducing the saturation of these colors. This can reduce pressure in the image and give it a much softer, pastel-like look. Make sure to choose the adjustment so that the overall effect remains harmonious.
8. Completing the Editing
After you've completed all the steps, take a look at the final result. The RAW converter gives you the opportunity to save and test your adjustments before finally saving the image. This way, you can ensure that the image aligns with your vision throughout the editing process.
Summary – RAW Editing in Photoshop: Polishing Your Image
The adjustments you make in the RAW converter in Photoshop significantly influence the look and feel of your images. Use smart objects for flexible changes, play with tone curves and HSL settings to make colors vibrant and appealing.
Frequently Asked Questions
What are smart objects in Photoshop?Smart objects allow you to edit image data non-destructively, so changes can be reverted at any time.
How can I use the tone curve?With the tone curve, you can precisely adjust the brightness and contrast of the image by modifying specific hues.
What is the difference between brightness, saturation, and hue?Brightness changes the lightness of colors, saturation affects the intensity of colors, and hue changes the actual color.
How can I adjust the green tones in my image?Go to the HSL settings and reduce the saturation of the green tones to make them appear less dominant.
Can I change my adjustments in the RAW converter again?Yes, by using smart objects, you can make changes to the image at any time.


