In this tutorial, I will show you how to create a precise cutout using the pen-tool in your graphic editor. We will focus on the craftsmanship needed to achieve sharp edges and smooth contours – aspects that are particularly important for designing impressive movie posters. Let’s get started to give your cutout the perfect look.
Key insights
- Using the pen tool leads to clear, sharp selection edges.
- It is important to take your time to carefully edit the contours.
- With the masking function, you can efficiently hide the background without losing the original layer.
Step-by-Step Guide
Step 1: Tool Selection and Preparation
To effectively create the cutout, first select the pen tool. Make sure that the tool is set correctly. It is important that you have the right presets when making the cutout. If you’re unsure, check the tool options in the top menu.
Step 2: Drawing Initial Contours
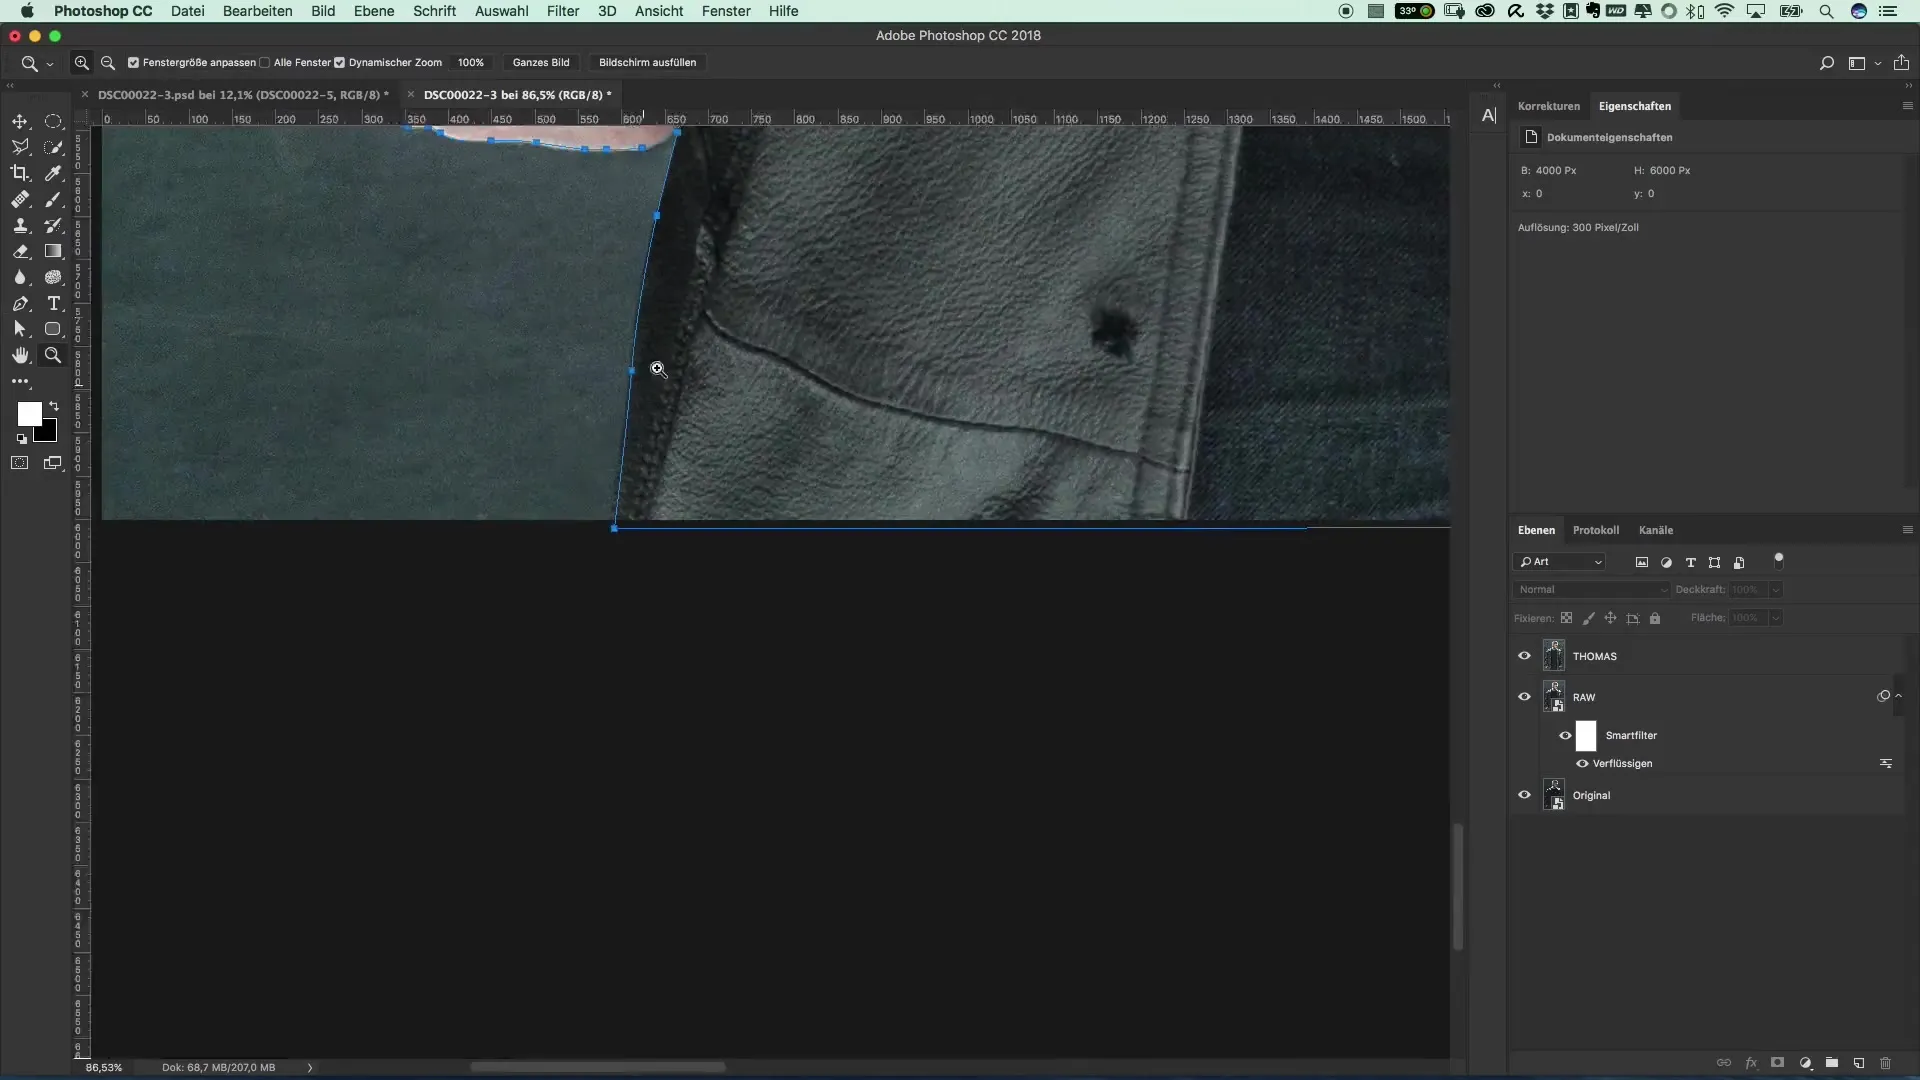
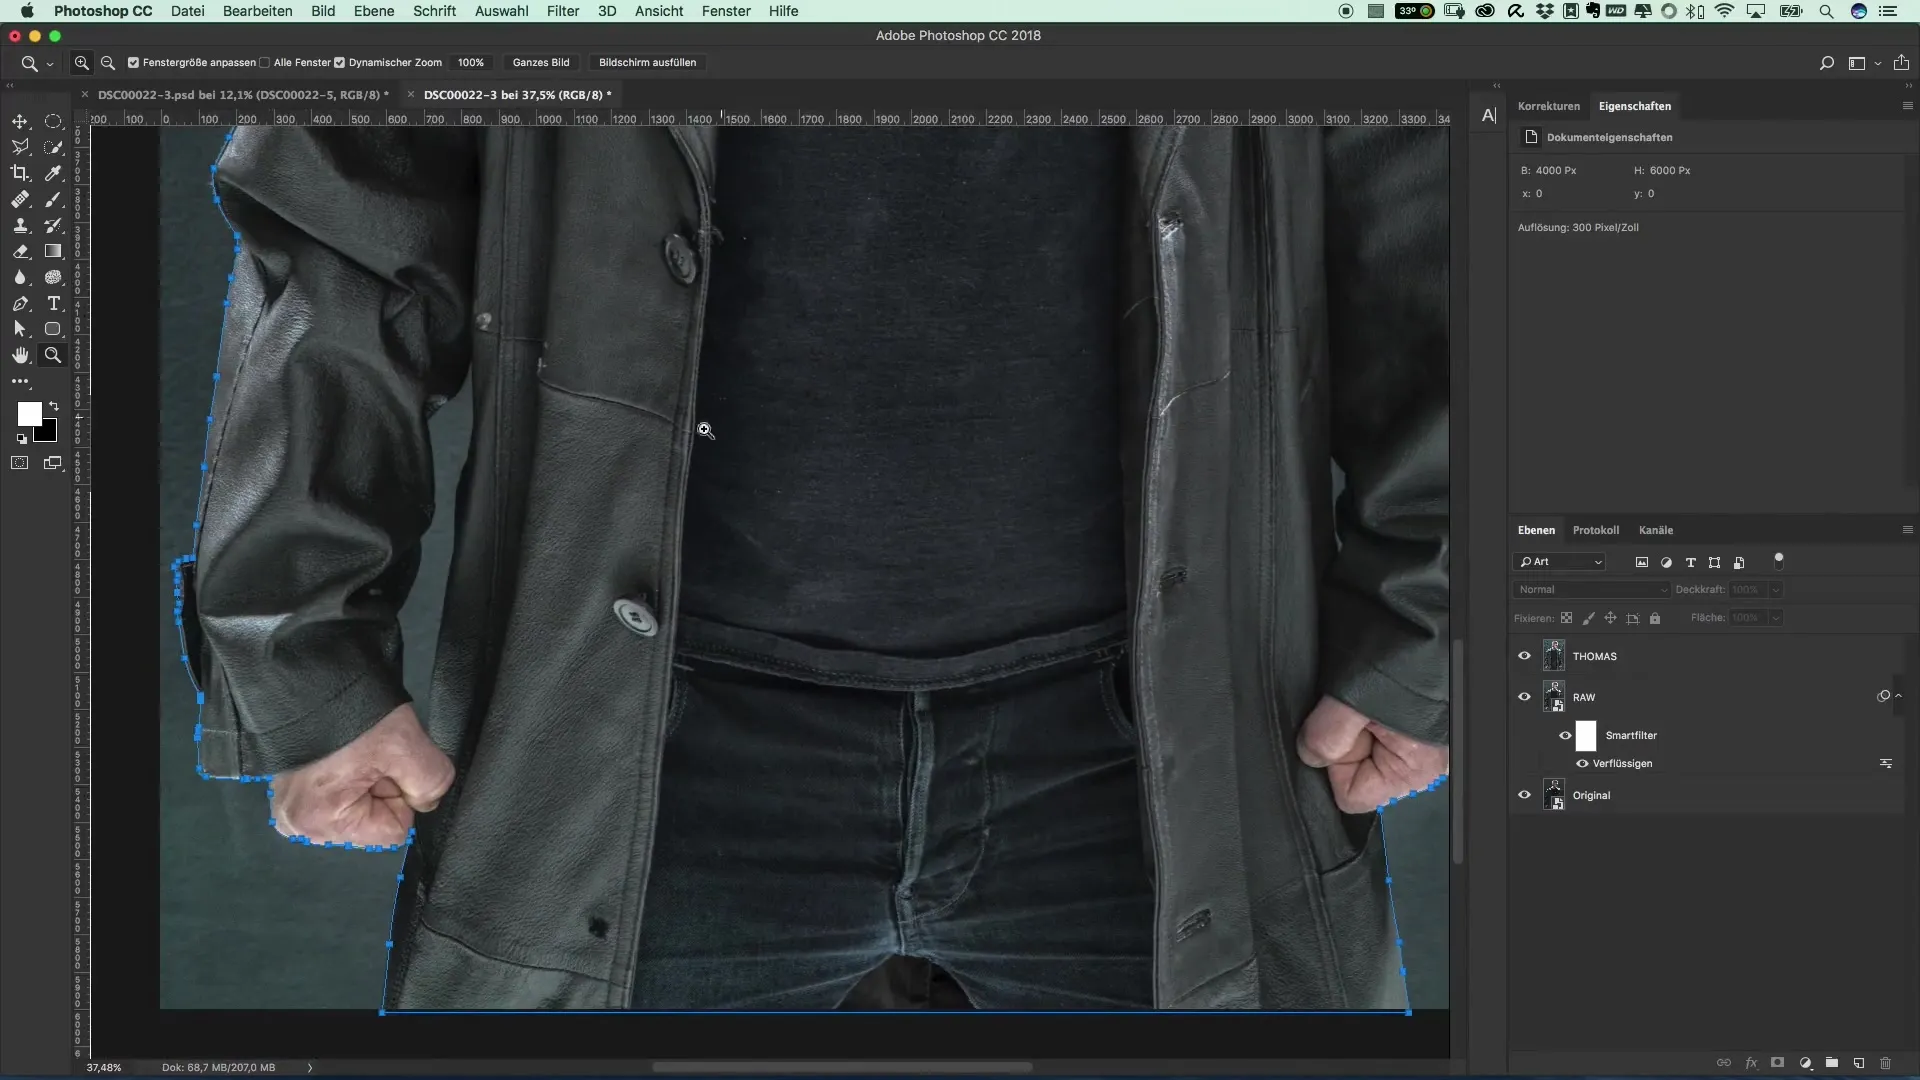
Zoom in on your work image to work more precisely. Now, begin to trace the contours of the object. This initial outline is crucial for obtaining a clean cutout. Move along the edges in smooth strokes and place anchor points regularly to follow the object's shape.

Step 3: Fine Tuning the Selection
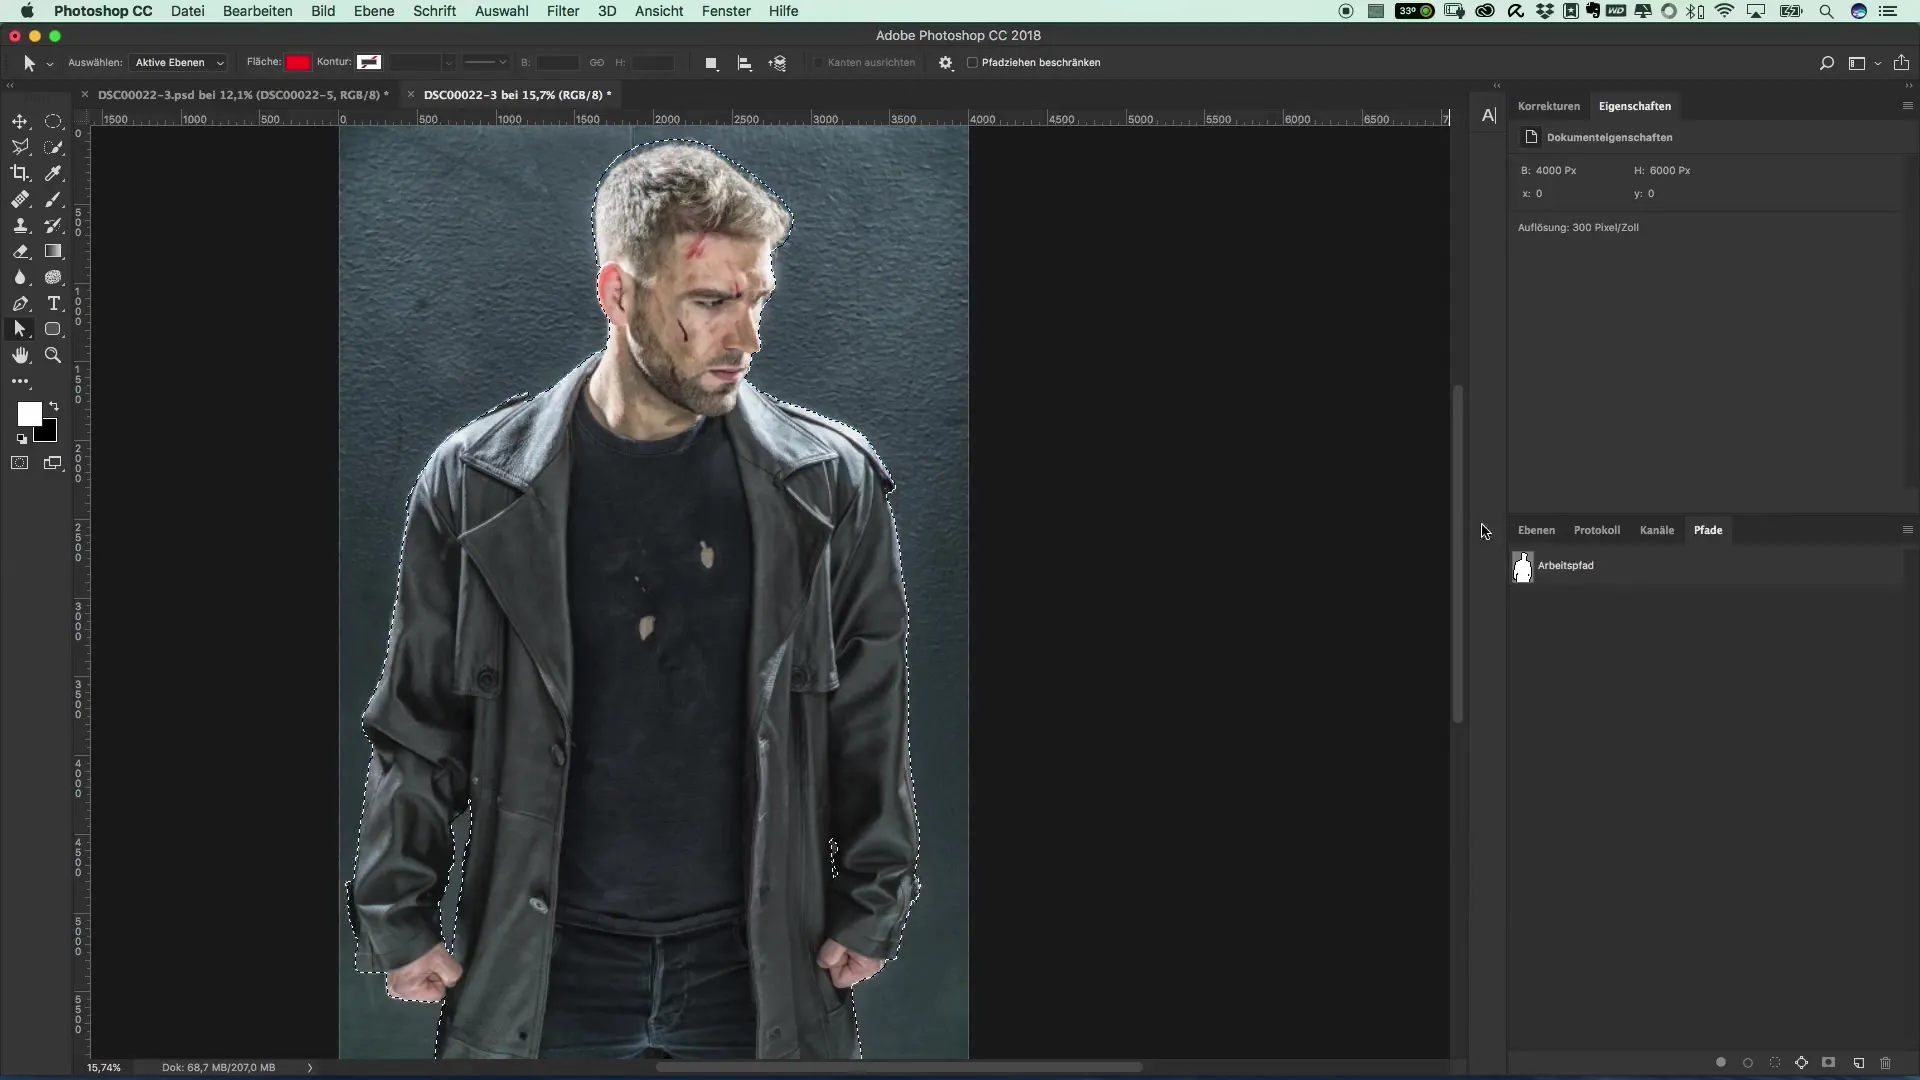
When you reach the more complex areas, such as the hair, pay attention to how you proceed. It is not necessary to cut out each individual hair. Instead, you can roughly trace around the hair and continue working with a larger selection. Close your selection and check if you have achieved a closed path.
Step 4: Closing the Selection
After you have traced the entire object, close the selection by returning to your starting point and clicking on it. When the path is closed, you should see a clear selection that you can edit further later. It can be helpful to check the structure of the object.

Step 5: Cleaning Up the Selection
Now you can edit the unwanted areas. To ensure that the selected area is as clean as possible, continue to use the pen tool to make minor adjustments. Be careful that the paths are clean and sharp, as these give your image a professional look.

Step 6: Converting the Selection
Now it is time to convert the paths into a selection. To do this, hold down the Command or Control key and click on the path. You will notice that a selection is formed that precisely follows the previously drawn contours.

Step 7: Grouping and Mask Function
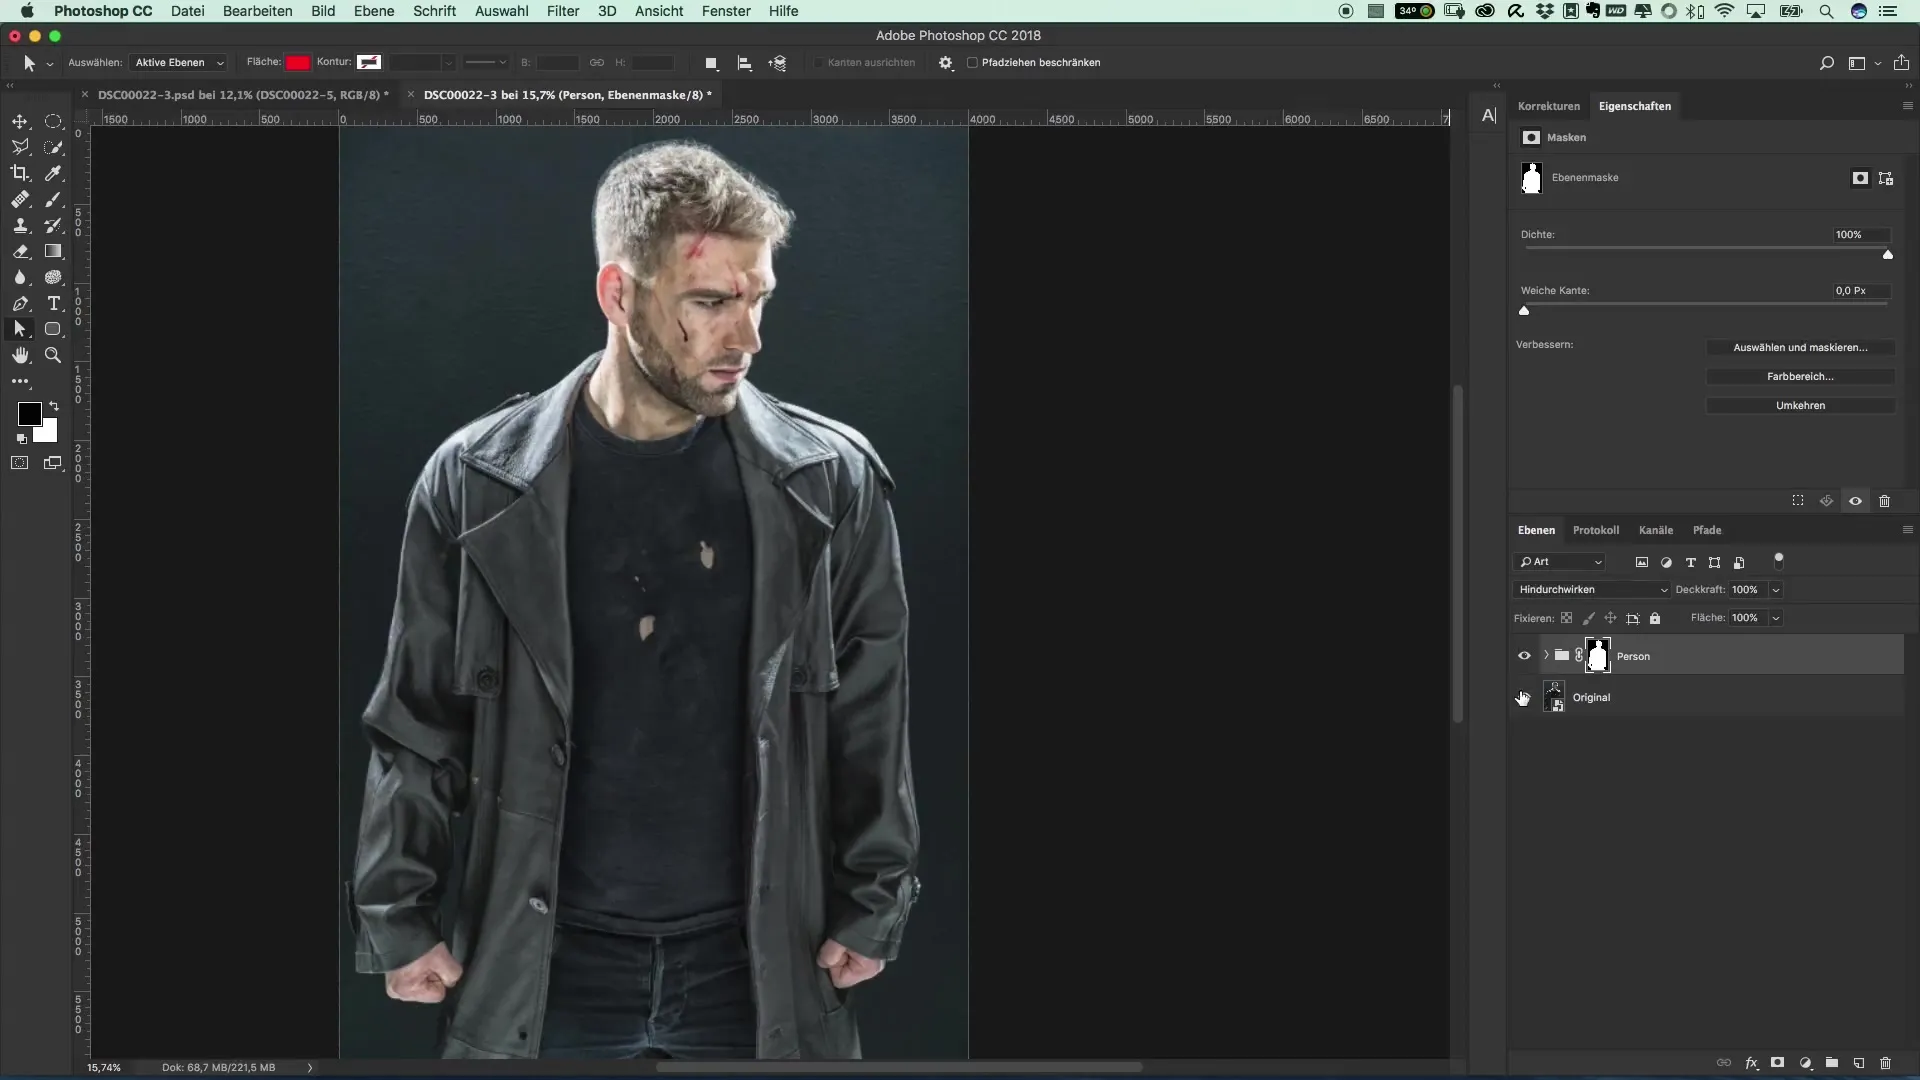
Now draw a group with the layers that should hold your cutout image. You can do this by selecting the desired layers and moving them into a new group that you name accordingly. It is advisable to keep the image and the mask in view simultaneously, so you can make any necessary adjustments.
Step 8: Activating the Cutout
After the masking has occurred, you can deactivate or delete the background layer to see how your cutout looks. It may be helpful to temporarily leave the original layer visible, so you can easily trace back to the previous state.

Step 9: Final Adjustments and Saving
Before you save your image, you can make final adjustments. Check the cutout area and possibly use the brush tool for further fine-tuning. When everything looks perfect, save your project to secure the changes and complete your work.

Summary – Popular Movie Posters and Cinema Effects: The Style of The Punisher – 9 Cutouts with the Pen Tool
In this tutorial, you learned how to create and edit an effective cutout using the pen tool. Starting from the precise drawing of contours to the finished selection and grouping, each step was crucial for a professional result. Keep your original layer for later reference and practice regularly to further refine your skills.
Frequently Asked Questions
How can I smooth the edges of the cutout?You can refine the selection by using the brush tool for small adjustments and retouching the edges.
Is the pen tool difficult to use?It requires some practice, but over time you will become more confident in using the pen tool.
Can I also use other tools for cutouts?Yes, there are various tools like the quick selection tool, but these often do not offer the same precision as the pen tool.


