With CaptureOnePro, powerful tools are available to edit and optimize your images. A common need is to remove distractingelementsfrom your photos, whether it's an unwanted fuel cap or other small blemishes. In this guide, you will learn how to effectively eliminate these distracting areas using clone and repair layers in Capture One Pro.
Key Insights
- Clone and repair layers function similarly, but there are important differences in their application.
- A clone layer transfers pixels one-to-one, while a repair layer allows for a smoother adjustment to the surroundings.
- You can only place one repair point on a repair layer, which can make handling slightly complex.
Step-by-Step Guide
To removedistracting elements from your images, follow these simple steps:
Step 1: Start with the Layers Panel
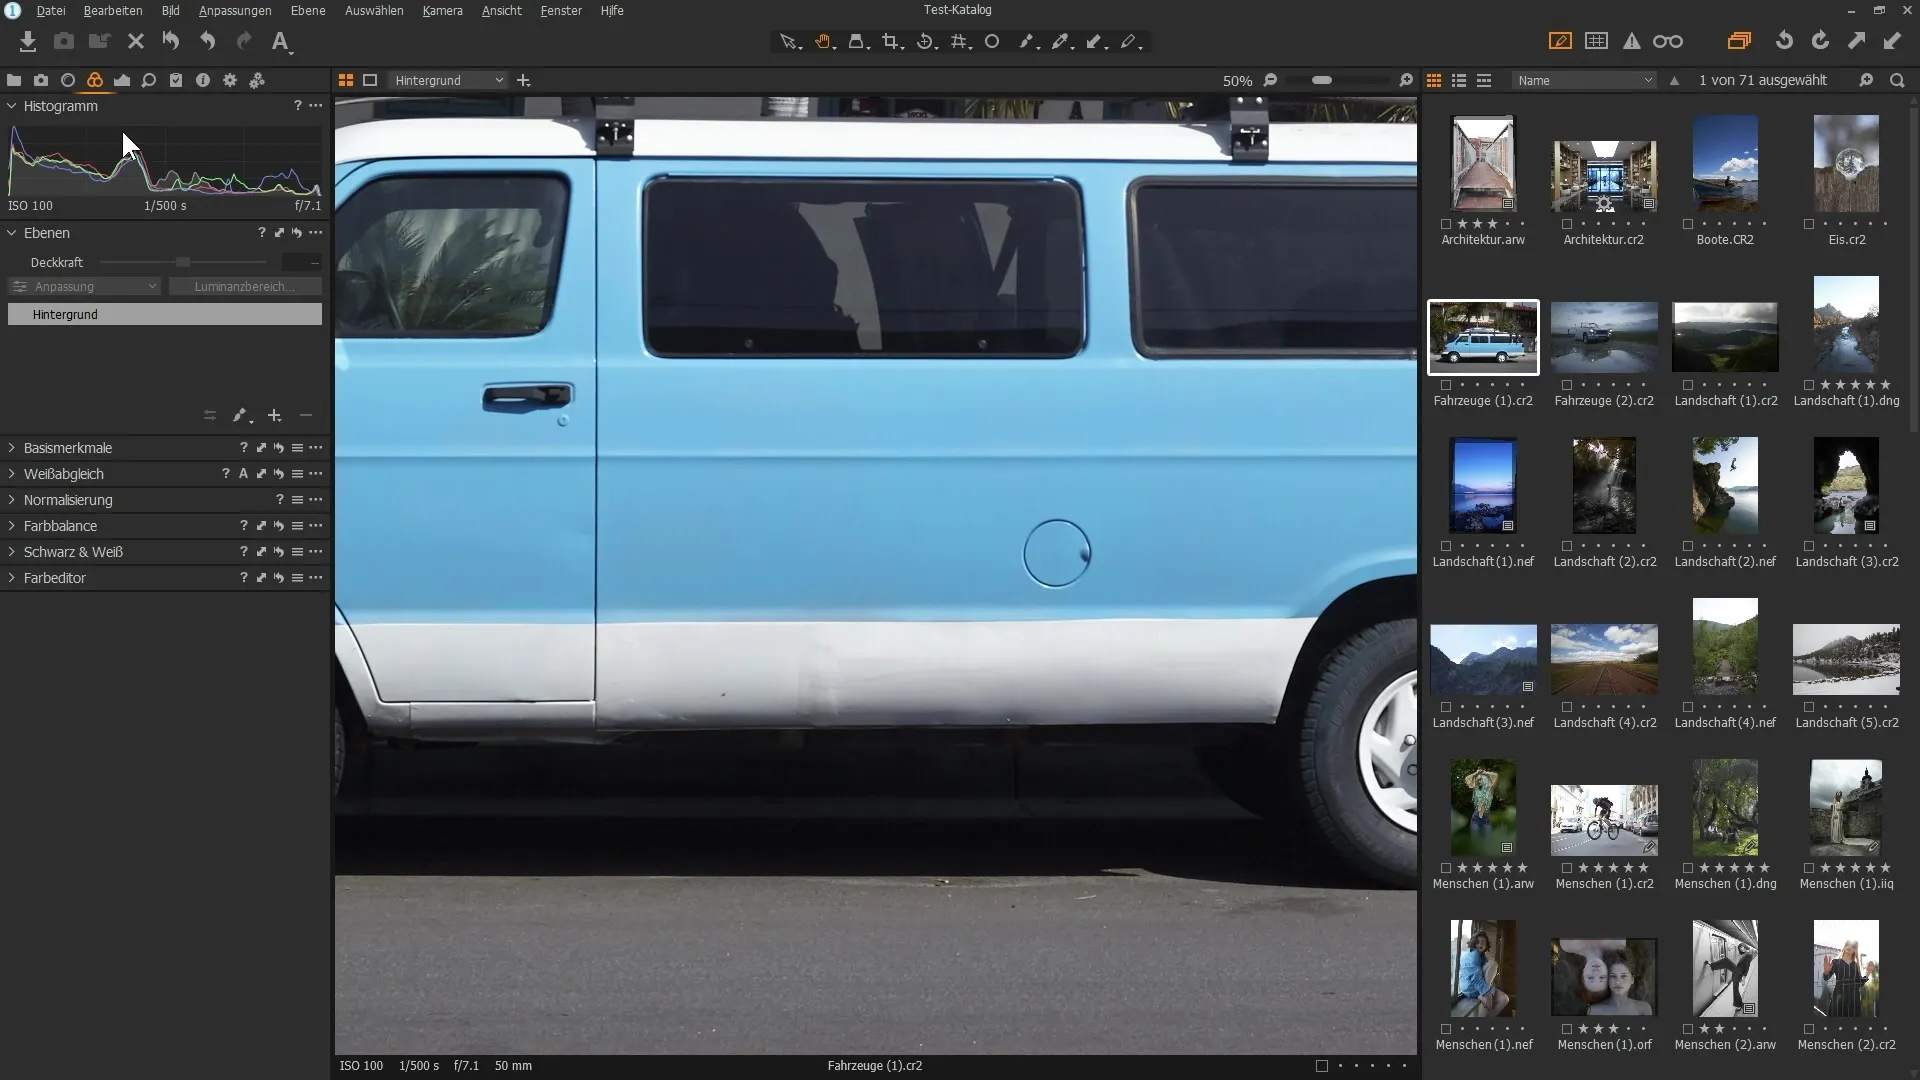
Open your image in Capture One Pro and navigate to the layers panel. You can usually find this in the color area. Here, you will see your current background layer.

Step 2: Add a New Layer
With a right-click on the plus symbol, you can either select a new clone layer or a new repair layer. Let's start with a clone layer; select this to get familiar with the functionality.
Step 3: Set Your Source
Activate the brush tool and hold down the Alt key to set a source. Choose an area that is suitable for removing the unwanted object – in our example, we will choose the door handle.
Step 4: Select Your Target
Now select the spot where the source should be applied. Hold down the left mouse button and paint over the fuel cap you want to remove. You can continue to adjust the brush while painting to achieve better results.
Step 5: Adjusting the Source
You have the option to change the source again. Click on the circle and adjust the area accordingly to better cover the fuel cap. Make sure that no unsightly edges occur since the clone should blend properly with the target.
Step 6: Experimenting with Repair Layer
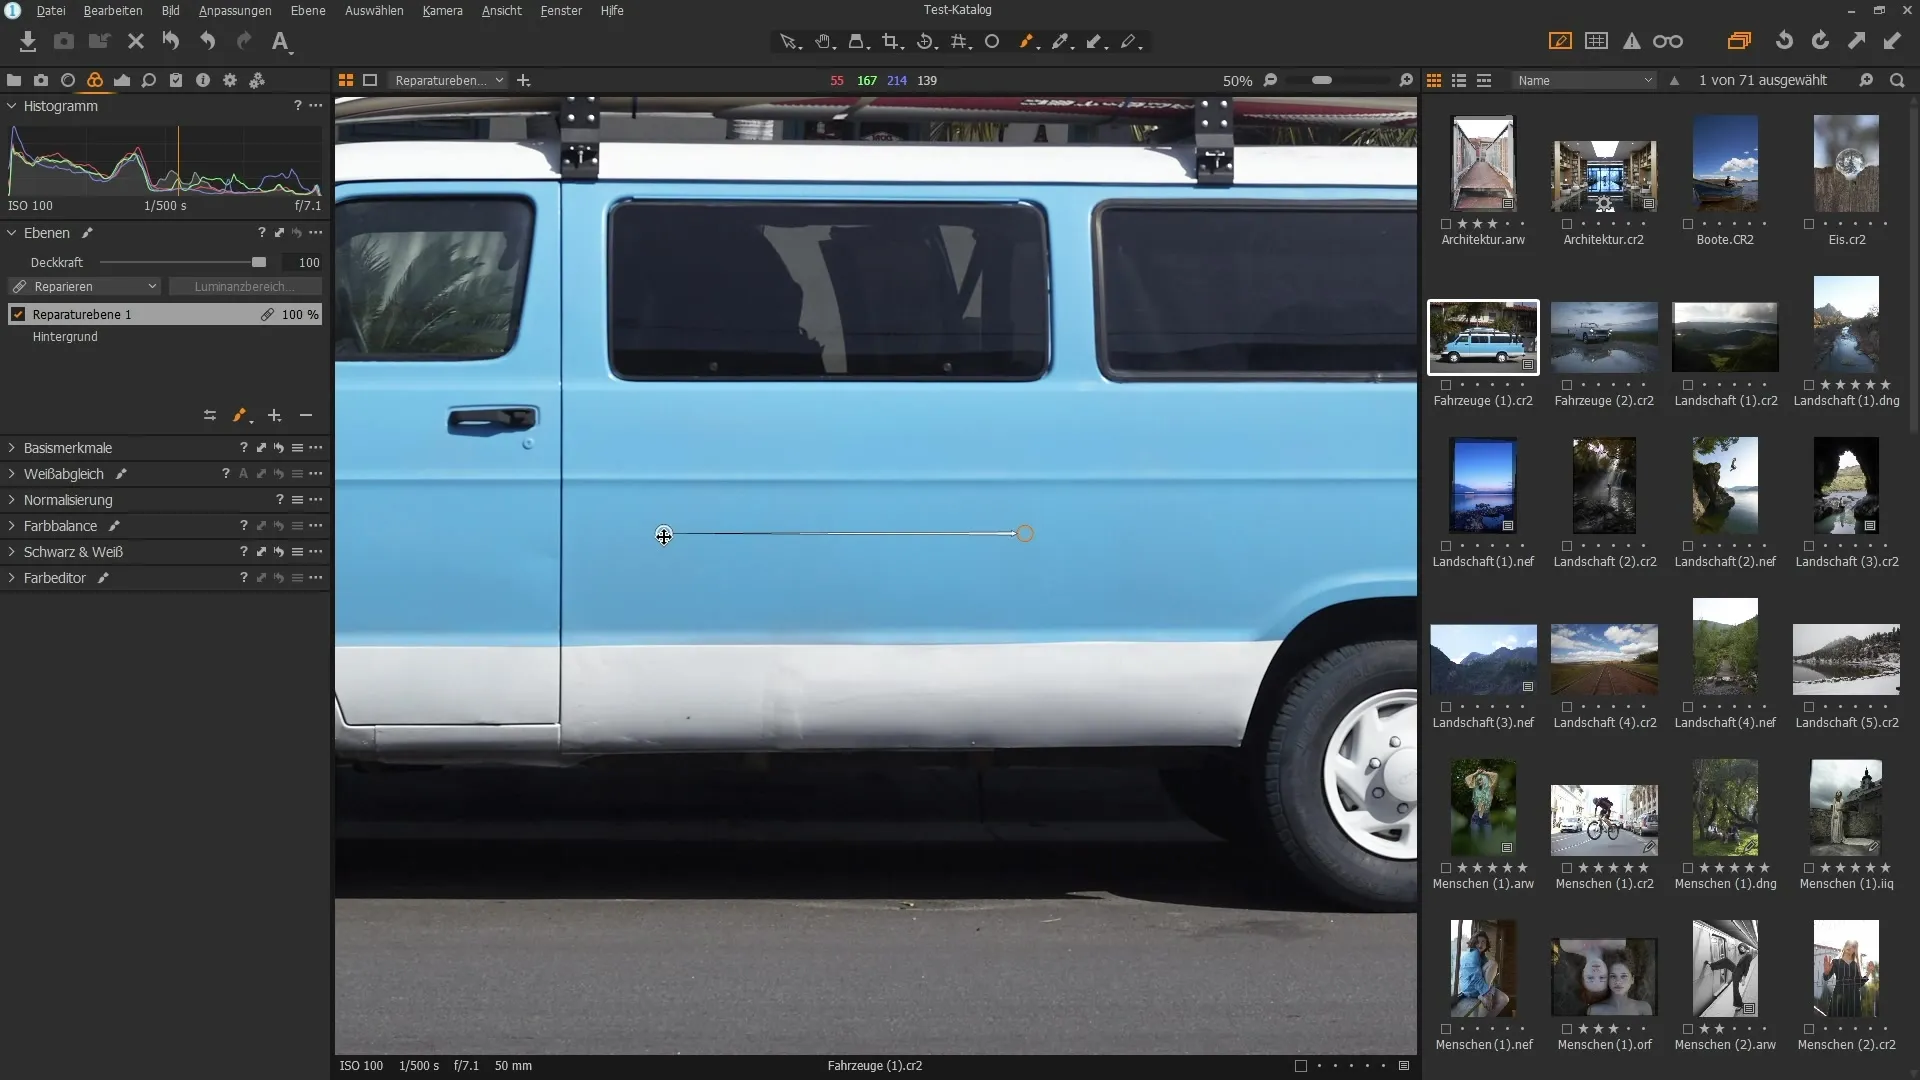
If you are not satisfied with the result of the clone layer, delete this layer by clicking on the minus sign. Go back to the plus symbol and now select the repair layer. Hold down the Alt key and click on a clean area to create a new source.
Step 7: Painting Over the Fuel Cap
Now paint over the fuel cap. At first, you might see strange results, but the image will clarify as soon as you release the mouse button. Use additional brush strokes if needed to further improve the results.
Step 8: Adjusting the Color
If the repair does not look perfect, adjust the source again by moving it or selecting a different area. It’s important to place the color adjustment correctly, as the result may show when zoomed in if the colors do not match.
Step 9: Understanding the Repair Layer
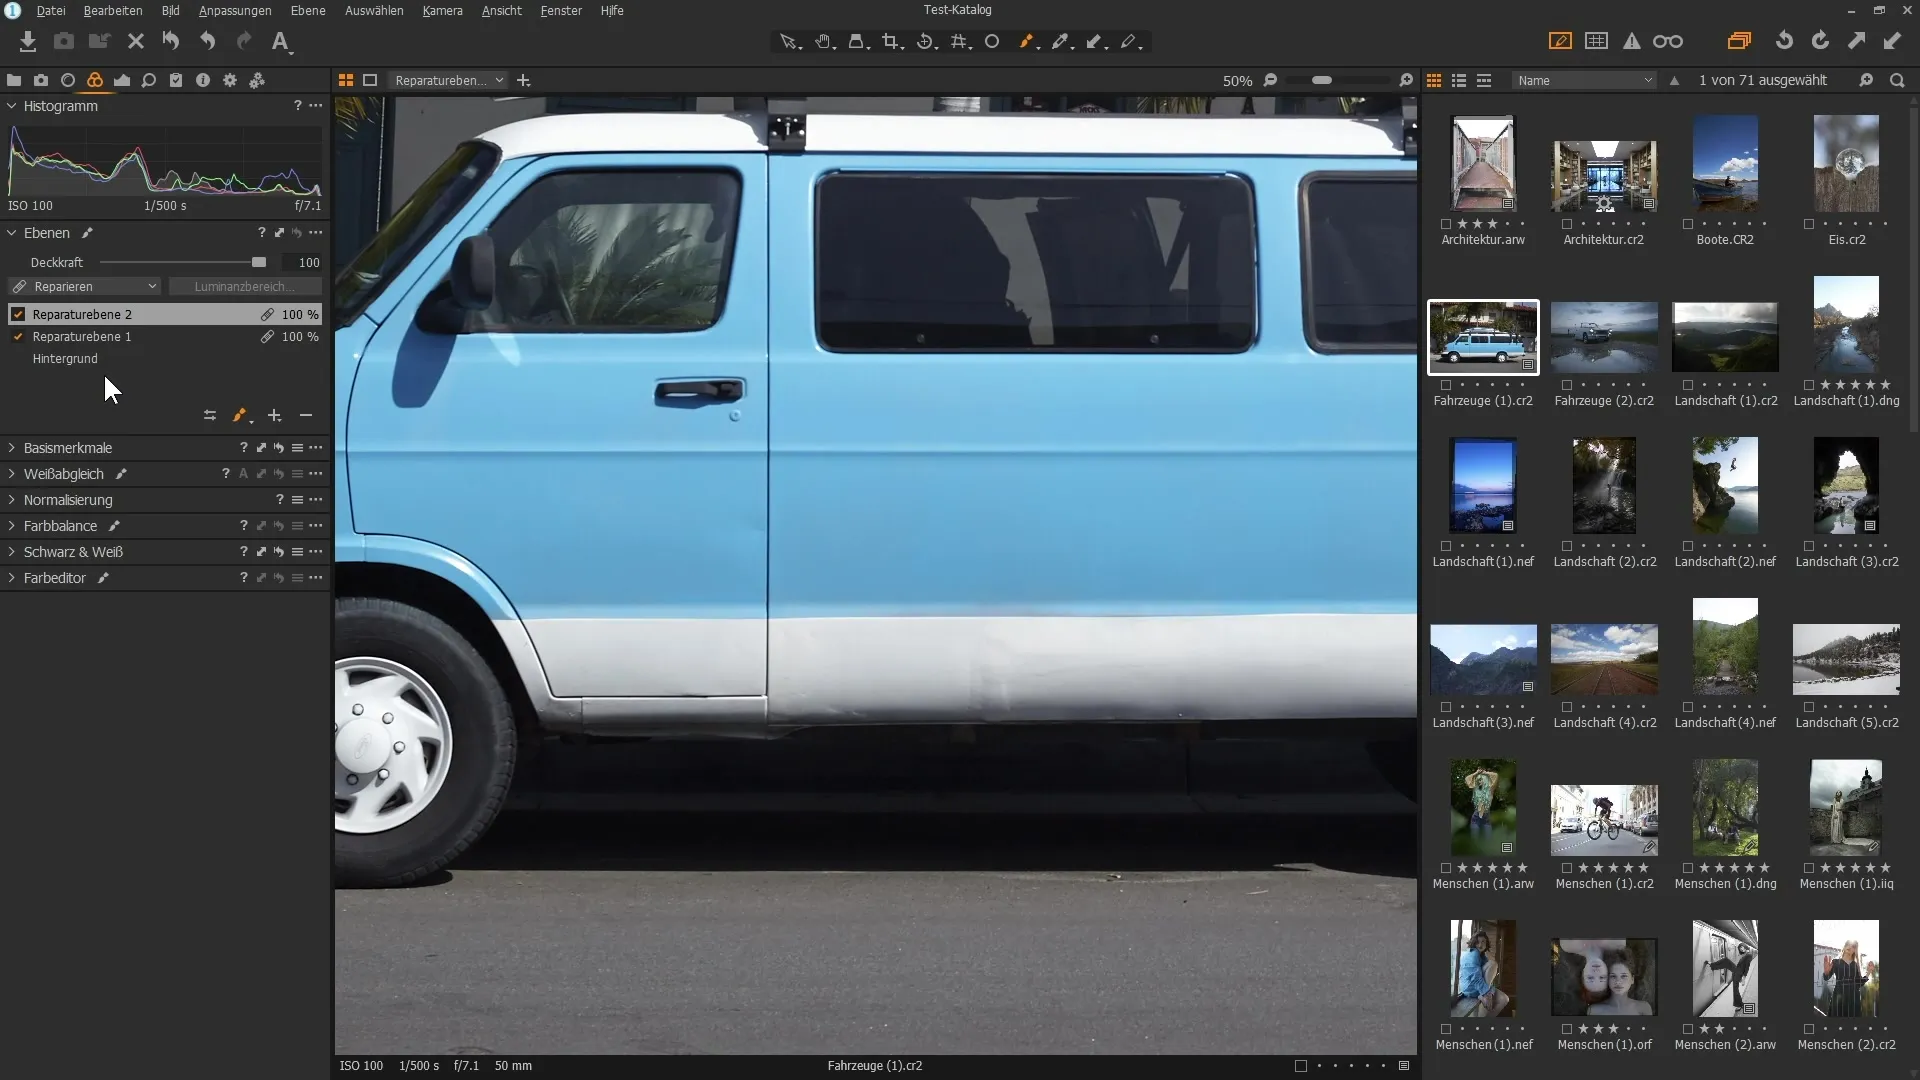
An important limitation when using repair layers is that you can only adjust one point on a single repair layer. If you want to set another point, you need to create a new repair layer.

Step 10: Perform Additional Repairs
If you want to repair areas below, add a new repair layer and set the brush. Set a new source for this specific area and paint over it. Be sure to position the areas well to achieve the best result.

Step 11: Understanding RAW Development
Note that Capture One Pro offers some options for image editing, but for more complex edits – Photoshop is the more powerful tool. Use Capture One Pro for simple color and brightness adjustments, and then edit the image in Photoshop for more detailed work.
Summary - Effectively Repair Areas in Capture One Pro
To remove unwanted elements in your images, Capture One Pro provides effective clone and repair tools. You can work quickly with clone layers, while repair layers allow for smoother adjustments. Once you understand the basics, you can work more specifically with different areas of your image.
FAQ
What is the difference between clone and repair layers?A clone layer transfers pixels one-to-one, while a repair layer adjusts the colors and creates smoother transitions.
Can I set multiple repair points on one layer?No, you can only adjust one repair point on a repair layer. For additional points, you need to use new repair layers.
When should I use Capture One Pro and when Photoshop?Capture One Pro is suitable for simple color and brightness adjustments, while Photoshop is recommended for more complex editing steps.
Can I adjust the source while painting?Yes, you can adjust the source at any time to achieve better results.
What do I do about unsightly edges after using a clone layer?Check your source and choose an area that harmonizes better with the target to avoid unsightly edges.


