
A beam of light moving across the scene, or a spotlight that puts your main actor in the spotlight: such visual effects often decide whether a clip looks professional or just decent. This is exactly where the BCC Lights plugin package, which is included in VEGAS Pro 17, comes in. In this tutorial, I'll show you how to find, apply, and adjust the most important effects, and where you can use them in a targeted way.
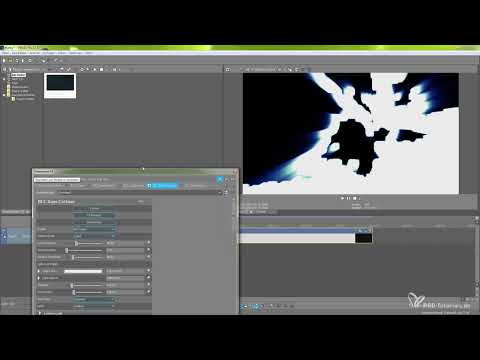
The video is only loaded from YouTube when you play it – data (including your IP address) is then transmitted to YouTube/Google. More in the privacy policy
Key Takeaways
- BCC Lights is added like any other video effect via the "Add Effect" icon in VEGAS Pro 17.
- The effects offer very different looks, from subtle points of light to striking laser beams or a caricature look.
- Each effect has its own controls for intensity, size, color, geometry, and animation, so you can adapt it to your footage.
- Many effects can be used within the footage, for example via the keying segment, or can even be controlled by audio signals.
- Multiple effects can be combined with each other, which gives your visual design additional depth.
Step-by-Step Guide
Step 1: Open the Effects Area
First, select the clip you want to edit and open the effects chain. There you will find the "Add Effect" icon. Clicking it opens a long list of all available plugins, and the effects from the BCC Lights package also appear here. It's best to create a test sequence so you can try out each effect at your leisure.

Step 2: Find BCC Lights in the Plugin Window
In the effect settings window, select the BCC Lights area. There you can choose and apply the desired effects. Effects that have already been applied are displayed at the top of the window so you keep an overview. If you just want to take a look, you can simply close the dialog with "Cancel" after viewing, without changing the clip.

Step 3: Apply the Glare Effect
The BCC Glare effect is a good starting point. After applying it, small points of light and light cones appear that move through the footage. The effect works like tracking: it looks for the brightest spots in the image and gives them a light glow. Especially in scenes with movement, such as drives or walks, this looks very lively.

Step 4: Fine-Tune the Glare Parameters
With the threshold, you determine the brightness at which the effect kicks in at all. A low value reacts sensitively to many light sources, while a higher value limits the effect to the strongest lights. In addition, you can adjust the brightness and the size of the points of light. If you set everything a little smaller and more subtle, the effect looks rather understated. With larger values, it becomes much more dominant.

Step 5: Use the Laserbeam Effect
The BCC Laserbeam effect creates a beam of light that you can position freely in the image. After clicking, the beam appears immediately in the preview window and can be moved by dragging. This way you can place it exactly where it supports the message of the image, for example as a visual highlight on an object.
Step 6: Adjust Laserbeam Intensity and Shape
In the settings area, you determine the intensity of the beam. In addition, you can change the sharpness, lengthen or shorten the beam, and adjust further parameters. You also have options for smoke (Smoke), motion blur (Motion Blur), and light sources (Light Sources) at your disposal. These functions can be edited afterwards, so you can finalize the look at your leisure.

Step 7: Activate the Light Leaks Effect
With BCC Light Leaks, you create those warm, irregular light leaks familiar from analog film footage. After applying it, the entire image changes slightly, creating an interesting, cinematic look. The effect is particularly suitable for nostalgic moods or for transitions between scenes.

Step 8: Changing the Geometry and Scale of the Light Leak
Under the Geometry item, you determine the shape and orientation in which the light leaks appear. The scale acts like a disruptive effect, but you can enlarge it significantly. At high values, distinct, striking patterns emerge. You can also change the scale in the X and Y directions separately, which opens up further creative possibilities for you.

Step 9: Adjusting the Stylization of the Light Leak
In the Styliz section, you set the brightness and strength of the effect. You can also change the colors, slightly blur the effect, or increase and decrease the intensity. This way, the look can be adapted to the color mood of your project without the effect overpowering the scene.

Step 10: Using the Cartoon Effect
The BCC Cartoon effect transforms your footage into a comic or cardboard look. It is fully animated, so you can watch the progression during playback. You can switch to the settings at any time to make changes, and vary the intensity from weak to strong.

Step 11: Using Images as a Color Source
A particularly useful option is the Colorize mode with the Image selection. Here, images from your own footage are used as a color source. In this way, you can create harmonious transitions or further edit the cartoon effect in a targeted way.

Step 12: Using the Ring Effect for Vignettes
With BCC Ring, you create a circular frame of light that acts like a vignette. You can align it horizontally or vertically and use the controls to determine the radius and thickness of the ring. A larger radius makes the ring move further outward, while a smaller radius pulls it toward the center.

Step 13: Using Effects Within the Footage
Many effects can be used directly within the footage. To do this, you work with the Keying segment and adjust the settings so that the effect only applies to certain areas. With the right tuning, very good and harmonious results are achieved that blend seamlessly into the scene.

Step 14: Building the Wedge Effect
BCC Wedge works similarly to the Ring but is limited to a small corner of the image. The settings are divided into several sections, so you can work specifically on intensity and shape. For more depth, you can additionally use textures and audio parameters so that the effect responds to sound signals. This opens up exciting possibilities for music videos or rhythmic cuts.

Step 15: Creating a Spotlight
A spotlight showcases your subject effectively. With the effect, you define the light source (Light Source) and use the target (Target) to determine which point the light cone is aimed at. If you move the light source and the target separately, the cone automatically follows the target point. You can also make the light more diffuse, flatten the cone, increase the intensity, and change the color.

Step 16: Combining the Effects
The last step is to combine the individual effects sensibly. Since all plugins can be combined with one another, you can, for example, link a glare effect with a light leak look and a spotlight. Pay attention to balance: fewer effects often look more elegant, and each layer should fulfill a clear purpose in the image.
Summary ??? Using BCC Lights in VEGAS Pro 17 Effectively
BCC Lights offers you a wide selection of light and color effects in VEGAS Pro 17 that can be adapted to a wide variety of projects. You find the effects via "Add Effect" in the BCC Lights section, adjust them using the respective controls, and combine them with one another. It is important to use each effect deliberately: a subtle glare can enrich a scene, while a striking laser beam or cartoon look works as a targeted stylistic device. Take your time experimenting with the parameters, and you will quickly develop a feel for which effect suits your visual language.
FAQ
Where do I find the BCC Lights effects in VEGAS Pro 17?You can find them via the "Add Effect" icon in the effects area by selecting the BCC Lights section.
Can I remove an effect again if I don't like it?Yes, applied effects are displayed at the top of the window, where you can remove or adjust them at any time.
Can the effects also be used within a scene?Yes, many effects can be used directly in the footage via the keying segment, whereby the settings are decisive for the result.
Can I use multiple BCC Lights effects at the same time?Yes, all effects can be combined with each other, so you can create complex looks.
Do some effects also react to sound?Yes, with the BCC Wedge effect you can set audio parameters so that the effect reacts to audio signals.

