
Fancy an expensive camera? You don't need one for good Instagram pictures. What matters is that you master a few basic rules and consciously apply them to every photo. The instructor has put together eight such rules in this tutorial, and they work together. Even if you only implement a few of them, your pictures will noticeably improve.
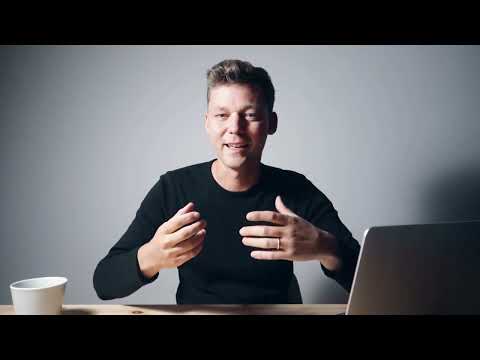
The video is only loaded from YouTube when you play it – data (including your IP address) is then transmitted to YouTube/Google. More in the privacy policy
The following guide takes you step by step through all eight points: from the subject of your picture through framing, focus, perspective, pose and light to file format and image editing.
Key Takeaways
- Your picture needs a clear message and should evoke a specific feeling in your target audience.
- Plan the framing before pressing the shutter, matching the desired aspect ratio.
- With focus, you control what the viewer looks at.
- Perspective changes the effect of a subject more than you might initially expect.
- A good pose usually emerges in dialogue with the model, not through rigid instructions.
- Light is the most important factor for image quality, and the sun is free.
- The RAW format contains significantly more image information than JPEG and gives you more room when editing.
- Your own image editing, for example with Adobe Lightroom, gives your photos an individual style.
Step-by-Step Guide
Step 1: Define the Topic and the Message
Before you press the shutter, ask yourself a simple question: What should your picture convey? Do you want to show a product, showcase a landscape, convey a feeling or motivate someone? Each of these intentions is a message. Once you know it, you can derive which emotion the picture should evoke, and you can work toward it in a targeted way.
It is also important that the topic and niche suit your target audience. Only then does the picture come together, create the desired feelings and get people to engage through likes, comments or saves.

Step 2: Plan the Framing
Consider in which format your picture should appear. Square (1:1), landscape (16:9) or portrait (4:5) are common variants on Instagram. Portrait and square are particularly effective in the feed because they take up more space on the screen.
What matters is that you don't crop the frame afterwards, but plan it already when photographing. Before pressing the shutter, ask yourself what the picture will look like in the end and what it should contain.

Step 3: Use Focus Deliberately
Many cameras allow you to play with focus. If you use a wide-open aperture, a shallow depth of field results. The model then stands sharp in the foreground while the background blurs softly. This creates depth, and the viewer's gaze is directed exactly where you want it.
But you can also deliberately render everything sharp. Then the eye can wander everywhere. This is a good decision if, for example, a landscape is the focus. In any case, decide consciously and think about what people should look at.
Step 4: Vary the Perspective
The same subject looks completely different depending on the viewpoint. The instructor, for example, prefers to photograph his wife slightly from above, because she looks more flattering than when he photographs from below. Therefore, try different heights: ground level, waist level, chest level or eye level. Even a camera that you photograph from above can create a completely new picture.
Just as important is the angle of your camera or lens. If you own several lenses or a good zoom lens, you can photograph the same framing from different distances and with different focal lengths. You will be surprised how different the results look.
Step 5: Find the Right Pose
Everyone has a side that looks better, and many models prefer to show themselves from a certain direction. Find this out together by experimenting with different postures. Experienced models often automatically strike flattering poses anyway.
A practical tip from the instructor: Rather give your counterpart room to move instead of dictating every posture. Say, for example: Sit down comfortably or straighten up. Most people then find a position all by themselves that is comfortable for them and looks good. This approach is especially helpful with people who rarely stand in front of the camera. A casual body posture looks significantly different from a reclined one, and a posture that shows engagement conveys yet another mood.
Step 6: Shaping with Light
Photography means painting with light. So pay attention to where the light comes from and how it falls on your subject. This changes almost everything about the image. Good light makes up for a lot: even with a simple camera or a smartphone, you can create impressive shots that look like professional photos.
Only in poor lighting conditions does the difference in camera quality become apparent. The sun is your free ally here. In the morning, at noon, in the evening, and in the hours in between, it creates very different moods. Once you start paying conscious attention to light, your pictures will stand out clearly from those of most other Instagram users.
Step 7: Choosing the Right File Format
Image format here does not mean the aspect ratio, but the file type. Good cameras save in RAW format by default. These files are larger and contain significantly more light information than a JPEG file. The JPEG file, on the other hand, is only created after the camera has already applied settings and discarded information.
If you later want to change brightness, contrasts, or lighting conditions in post-processing, RAW gives you much more room to work with. So if you want to edit your pictures cleanly, set your camera to RAW whenever possible.
Step 8: Editing the Pictures Yourself
Most cameras save photos as JPEG with the manufacturer's default processing. That's fine, but if you want to develop your own style, you should edit your pictures yourself. Image editing today is what the darkroom used to be. This is where you decide on colors, brightness, contrasts, and the overall mood.
A popular program for this is Adobe Lightroom. With it, you can edit your RAW files precisely, create presets, and thus build a recognizable look for your Instagram feed. This step in particular often improves image quality enormously.

Summary – Photography Rules for Instagram: Eight Steps to Better Pictures
The eight rules build on one another. You start with a clear message and a fitting theme. Then you plan the framing, focus, and perspective. A coherent pose and good light bring out the impact of the picture. Finally, with the RAW format and your own editing in Lightroom, you get the maximum out of it. You don't have to implement all the points perfectly at once. Even if you consistently follow just one or two of them, your photos will noticeably improve.
FAQ
Do I need an expensive professional camera to take good Instagram pictures?No. With good light, you can achieve impressive results even with a smartphone.
Which aspect ratio is best suited for Instagram?Square (1:1) and portrait (4:5) are particularly effective in the feed. Landscape (16:9) is used more for landscapes.
When should I use a wide aperture?A wide aperture is suitable when you want to highlight a main subject and blur the background.
What advantage does the RAW format have over JPEG?RAW files contain significantly more image information and can be modified much more flexibly in post-processing.
Which time of day is best for photos?That depends on the desired mood. In the morning and evening, soft, warm light often occurs, while the midday sun creates harsh shadows.
What can I use to edit my pictures professionally?A popular program is Adobe Lightroom, with which you can edit RAW files and create your own presets.


