
Stories are one of the fastest ways to stay in touch with your community. You don't need video editing software for this, just your smartphone and the Instagram app. In this guide, I'll show you how to record a story directly in Instagram, design it with text, filters, and effects, and then share it.
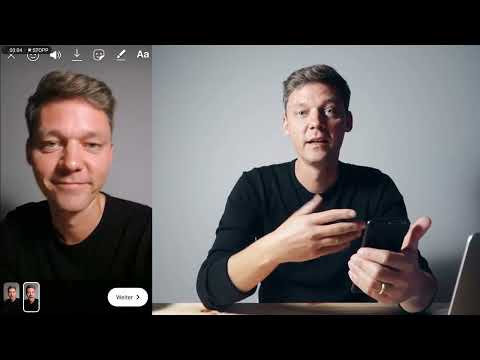
The video is only loaded from YouTube when you play it – data (including your IP address) is then transmitted to YouTube/Google. More in the privacy policy
Introduction
The easiest way to create a story is to record it directly in Instagram. You can take a photo or record a video and immediately add text, stickers, and filters to it. You don't have to prepare anything or install an additional app. All you need is a smartphone with the Instagram app installed and a few minutes of time.
Below, I'll go through the process step by step: from opening the story area, through the different recording modes, to publishing.
Key Takeaways
Stories are created directly in Instagram, without external software. You can record photos and videos, design them with text, filters, and effects, and publish them immediately. Focus on the content of your story, not on the perfect edit. There is one limitation: stories created directly cannot be scheduled in advance.
Step-by-Step Guide
Step 1: Open Instagram and access the story area
First, open the Instagram app on your smartphone and log in to your account. Then swipe from left to right on the home page, or tap your profile picture with the plus icon at the top left. This takes you to the story area, where you start your recording.

Step 2: Understand the available options
In the story window, you'll find various options. At the bottom, you can simply enter a text, start a live broadcast that is shown to your followers, or create a completely normal story with a video or photo. Special modes are also available for recording. These include a Super Zoom, where you zoom in smoothly, Focus mode, where a specific area is emphasized, Rewind, and hands-free recording.

Step 3: Start the story recording
Choose the mode that suits your idea. For getting started, the normal recording is best. Press and hold the shutter button to record a video, or tap it briefly to take a photo. Make sure you stay in the frame and your message comes across clearly. You can cancel the recording at any time and start over if you don't like the first attempt.

Step 4: Switch between stories
After recording, you'll see two stories at the bottom that you can switch back and forth between. This is handy if you create several recordings in one session. This way you can see right away how the individual parts fit together.

Step 5: Choose a filter
With a swipe to the left or right, you change the filter. This way you can quickly try out different looks and make your recording appear different. A filter can significantly change the mood of your story. So feel free to take a few seconds to compare the variations.

Step 6: Add, move, and style text
Tap the screen to insert text. Keep it short and snappy, because lines of text on the screen should be quickly readable. Then you can drag the text with your finger to the desired position. With two fingers, you can rotate the text, which creates a playful look. If you tap the text at the top, you change the font and the display style. Feel free to experiment a bit until the result feels right to you.

Step 7: Insert stickers and effects
With the sticker function, you add elements such as kiss symbols, emojis, or funny characters. Here too, you can use your finger to decide where they should be placed. The selection is large, so it's worth taking a look at the different categories. However, you don't have to use every effect. If you prefer a clear, calm story, a single text or sticker is often enough.

Step 8: Put the content at the center
With Stories, the rule is: don't make it too hard on yourself. You don't have to produce an elaborate film. Focus on your message. Do you want to inform, spark curiosity, ask a question, or share your news? Then a short recording with a clear text is often enough. Elaborate films take a lot of time, and since Stories disappear after 24 hours, the effort is rarely worth it. So use Instagram as a fast channel for direct communication.

Step 9: Share the Story
When you are satisfied with the result, tap "Next" at the bottom. You can now share your Story or send it directly to specific people. If needed, you can also set the Story to be additionally published on Facebook, provided you have linked both accounts. Check the settings briefly before you tap "Share" so that your Story appears exactly where you want it.

Step 10: Know the limits of direct creation
One disadvantage of creating directly in Instagram is that you can't schedule Stories or prepare them for later. They are created in the moment and are published immediately or not at all. If you want to post content regularly at fixed times, you need a different approach. How to plan Stories in advance and publish them automatically later, I will show you in the next lesson.

Summary – Creating Instagram Stories directly in the app: Step-by-step guide
The fastest way to create Instagram Stories is directly in the app. You open the Story area, choose the appropriate recording mode, design your recording with filters, text, stickers, and effects, and share it with a few clicks. The most important principle is: concentrate on your message and not on elaborate production. Also note that Stories created directly cannot be scheduled in advance. For scheduled publications, you need a different method, which I will show you in the next lesson.
FAQ
Can I also start live broadcasts on Instagram?Yes, in the Story area you will find the option for a live broadcast, which is shown to your followers.
How do I change the filter on my Story?You swipe left or right on the screen until you like the desired filter.
Can I rotate or move text in my Story?Yes, you move the text with your finger and rotate it with two fingers. By tapping the text, you can also change the font.
Can I plan Stories in advance?No, Stories that you create directly in Instagram cannot be scheduled. I cover scheduling in the next lesson.
How long are Stories visible?Stories are usually online for 24 hours and then disappear automatically.
Can I share my Story on Facebook at the same time?Yes, if you activate the option in the settings, the Story will additionally be published on Facebook.
Do I have to produce elaborate videos?No, short, clear recordings with an understandable message are completely sufficient for Stories.


