The development of mobile applications requires not only creative designs but also well-thought-out functionalities. An effective element that gives many apps a professional touch is the action sheet. In this tutorial, you will learn how to create an action sheet using the iOS library to enhance the user experience. The focus is not only on design but also on practical implementation.
Main insights
An action sheet is an important element to provide users with various options without overwhelming the user interface. It allows for easy interaction, especially for legal information or sign-in options.
Step-by-step guide
1. Establish foundations
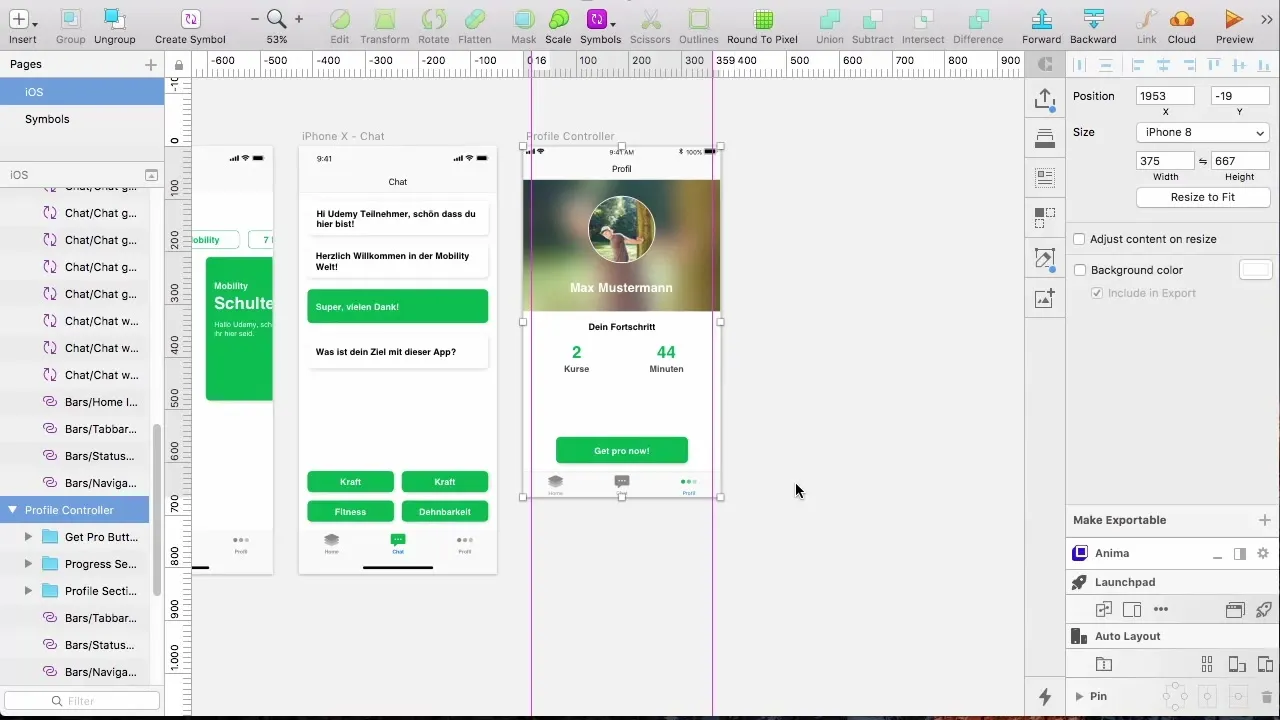
Before you get to the specific designs and functionalities, you need to create the prerequisites for users to log in and log out. This also includes legal aspects such as displaying terms and conditions or privacy policies.
2. Create a new button
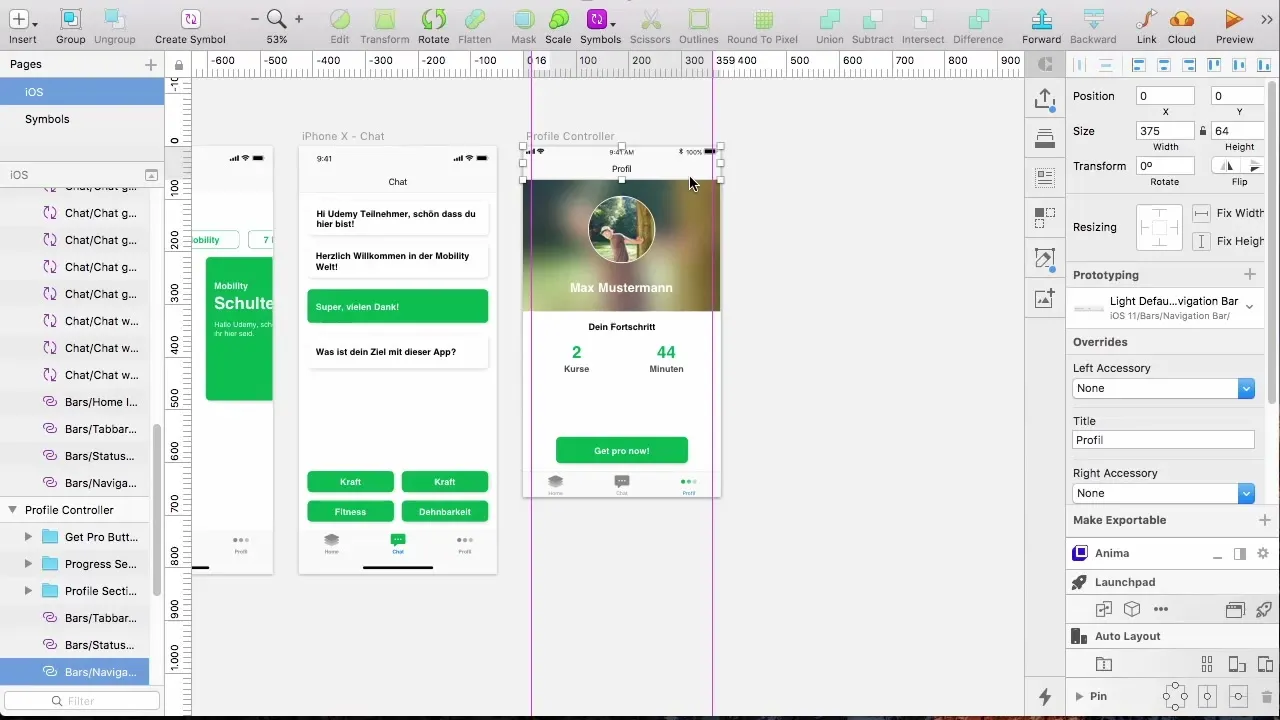
Position a button in the top right corner of your controller. This button will be used to open the action sheet. You can label it with a somewhat neutral label that attracts users.
3. Adjust interface elements
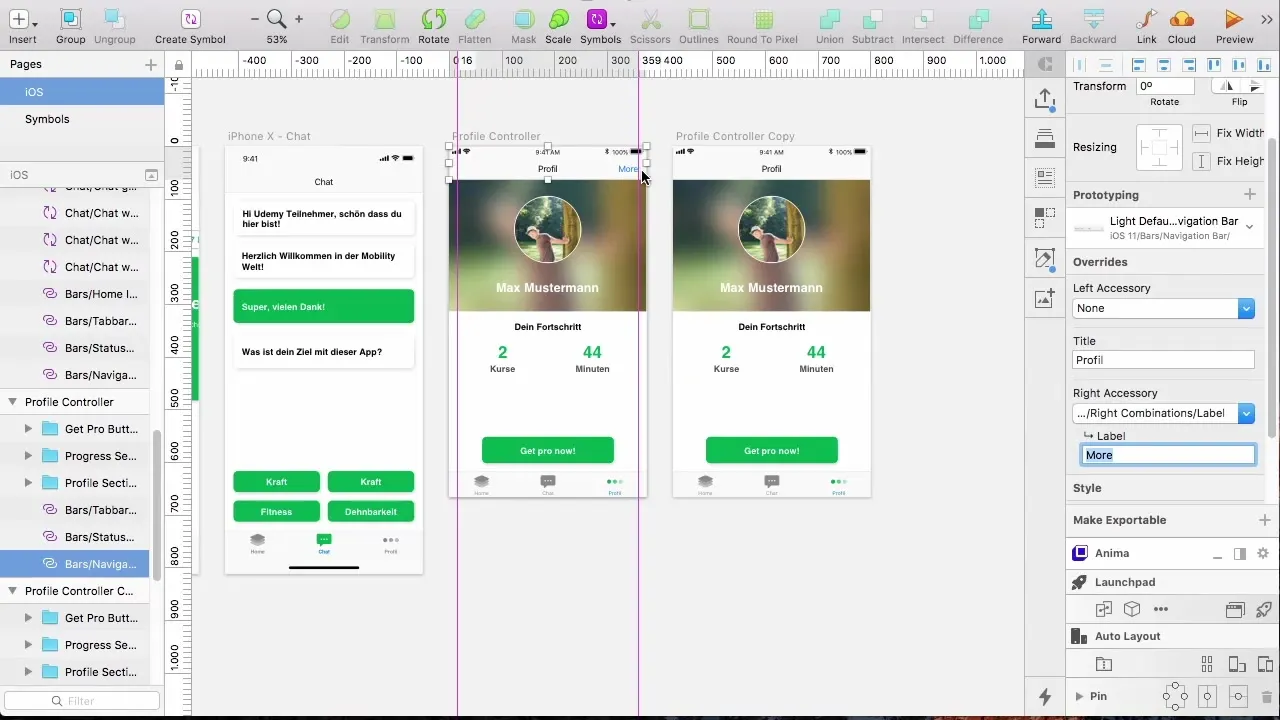
To make the user's selection clearer, you should add a label with the word "more." Of course, you can also use three dots instead to make it visually more appealing.
4. Change the design of the controller
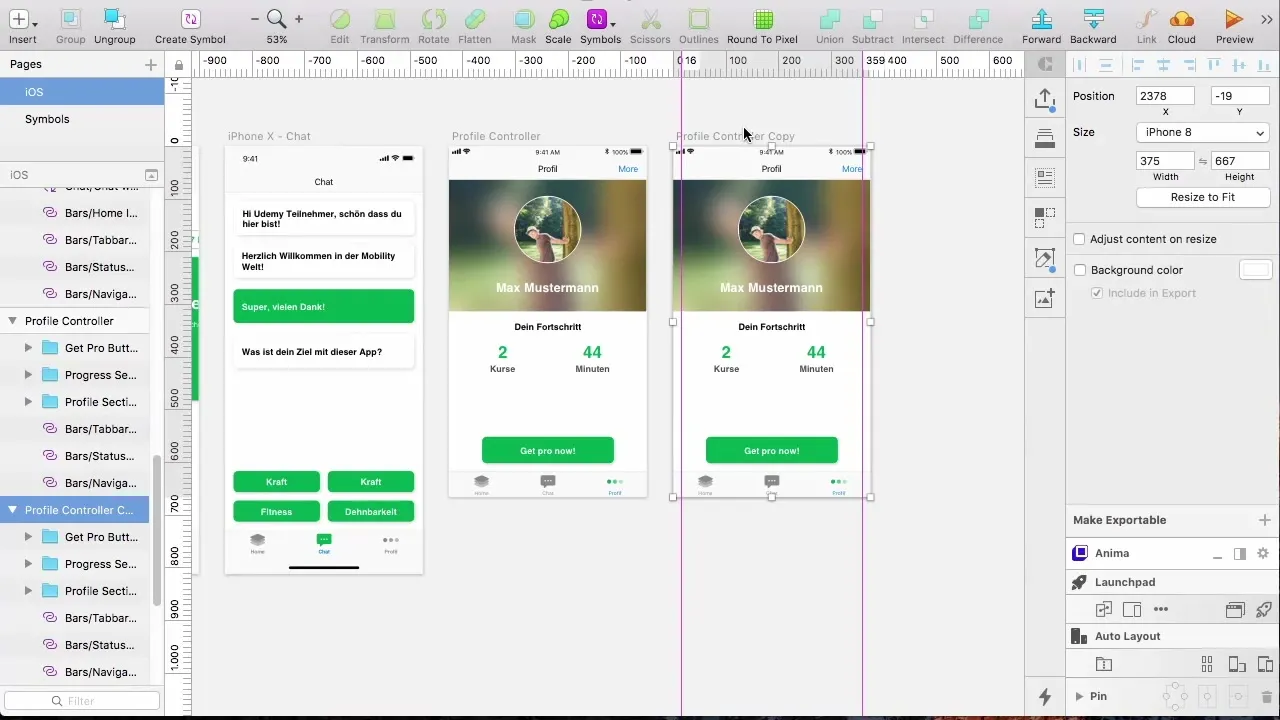
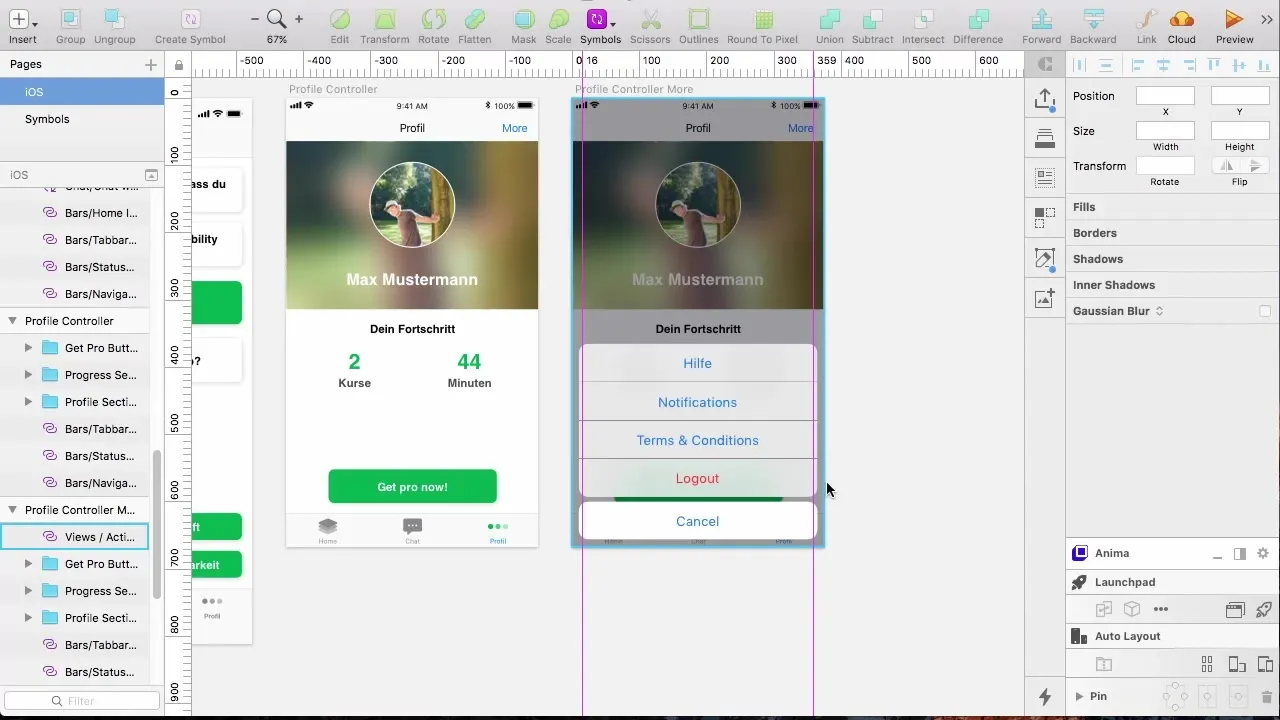
Now it is important to adjust the interface accordingly. Change the name of your controller and make sure it stands out clearly in the design. For example, you could call it “Profile Controller More.”
5. Create a rectangle for the menu
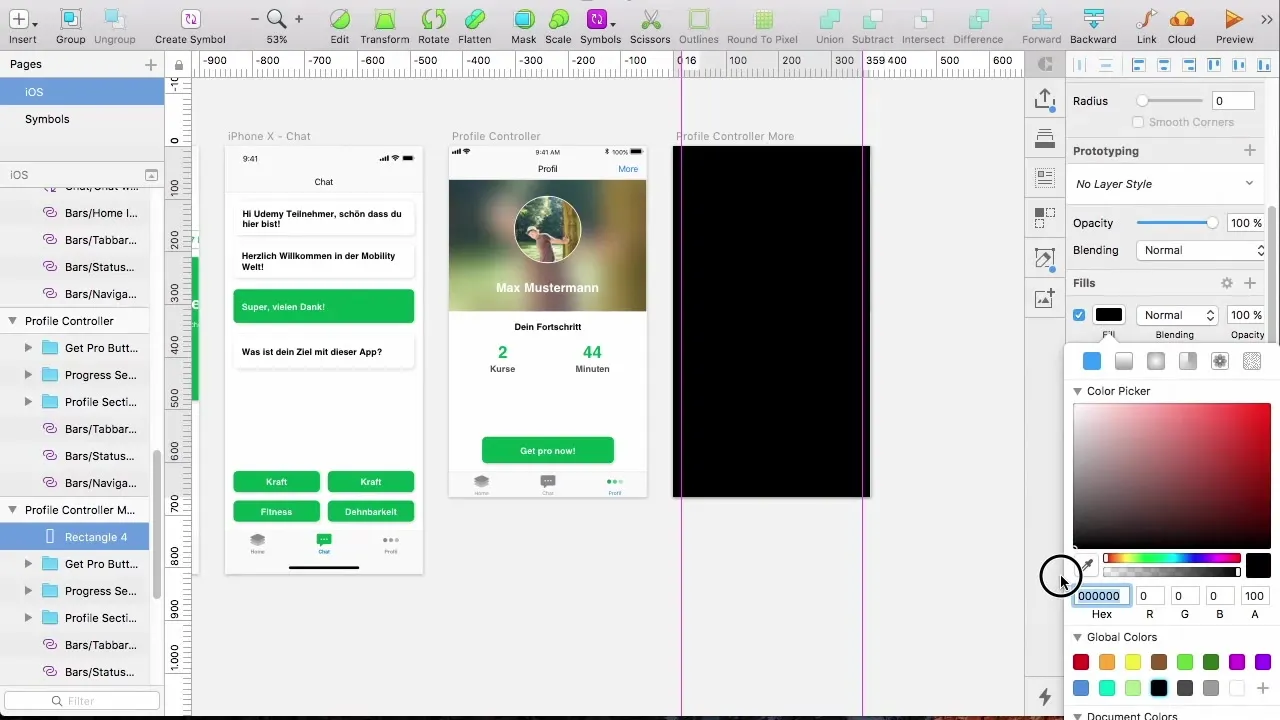
To create a clear distinction between your action sheet and the rest of the app, create a rectangle that overlays the entire controller. Give the rectangle a black color with 50% transparency to achieve a soft background.
6. Prepare the action sheet
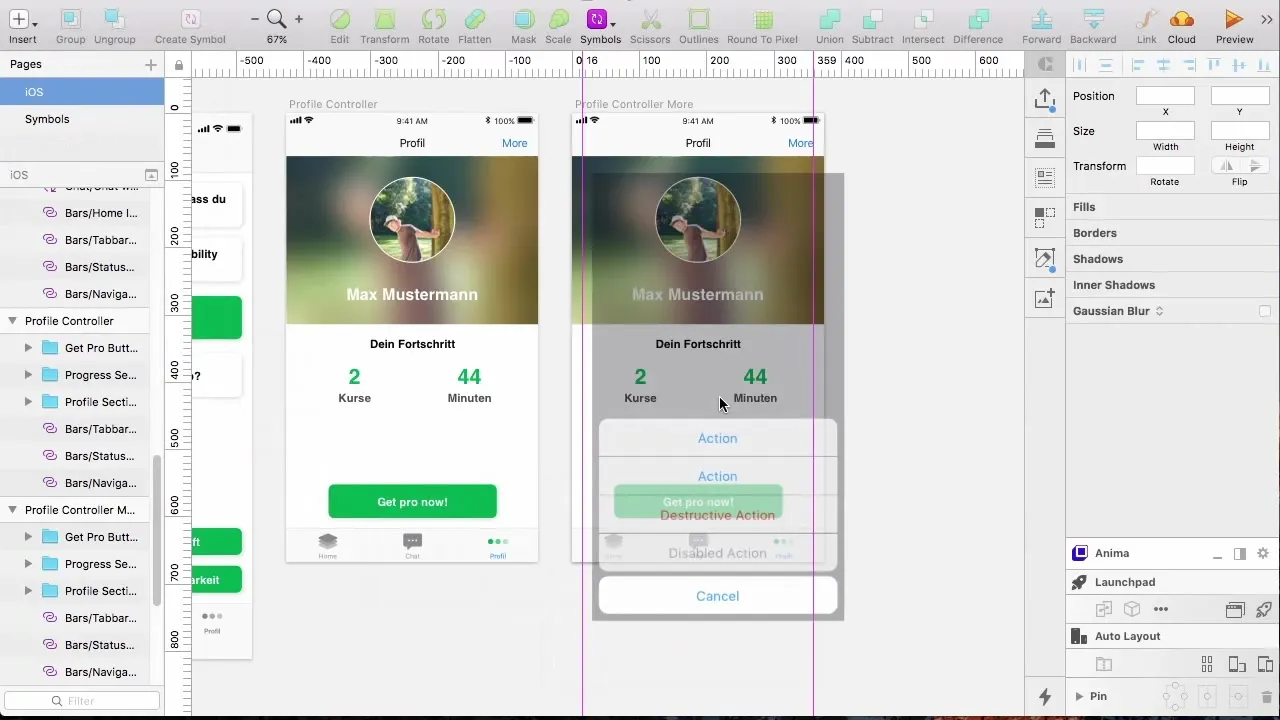
Instead of designing your own menu, use the existing templates to create your action sheet. Check the options in the iOS library and choose a simple action sheet that already has the desired dark background.
7. Adjust buttons in the action sheet
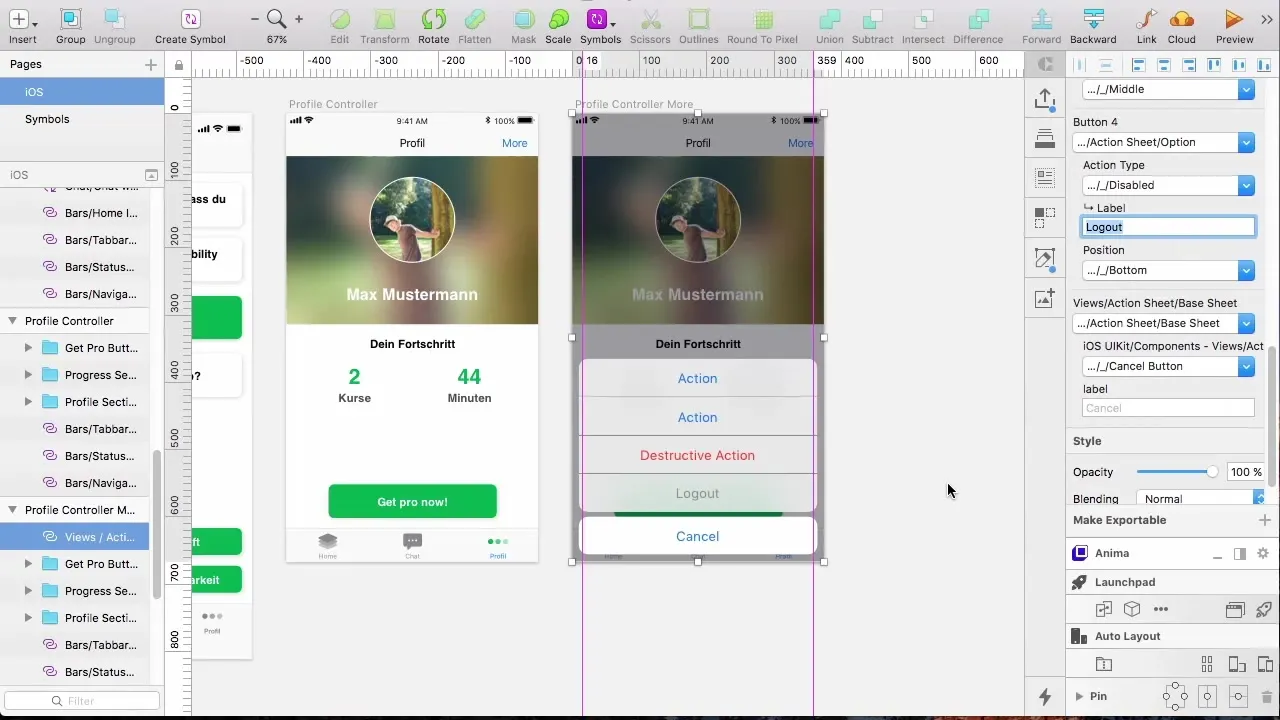
Start customizing the actions in the action sheet. Keep the “Cancel” button and add a logout button directly above it to provide users with an easy logout option.
8. Use button design options
Enhance the design of the logout button by setting it as “destructive.” This gives the button a red color that highlights it and prompts users to carry out this action thoughtfully.
9. Add additional actions
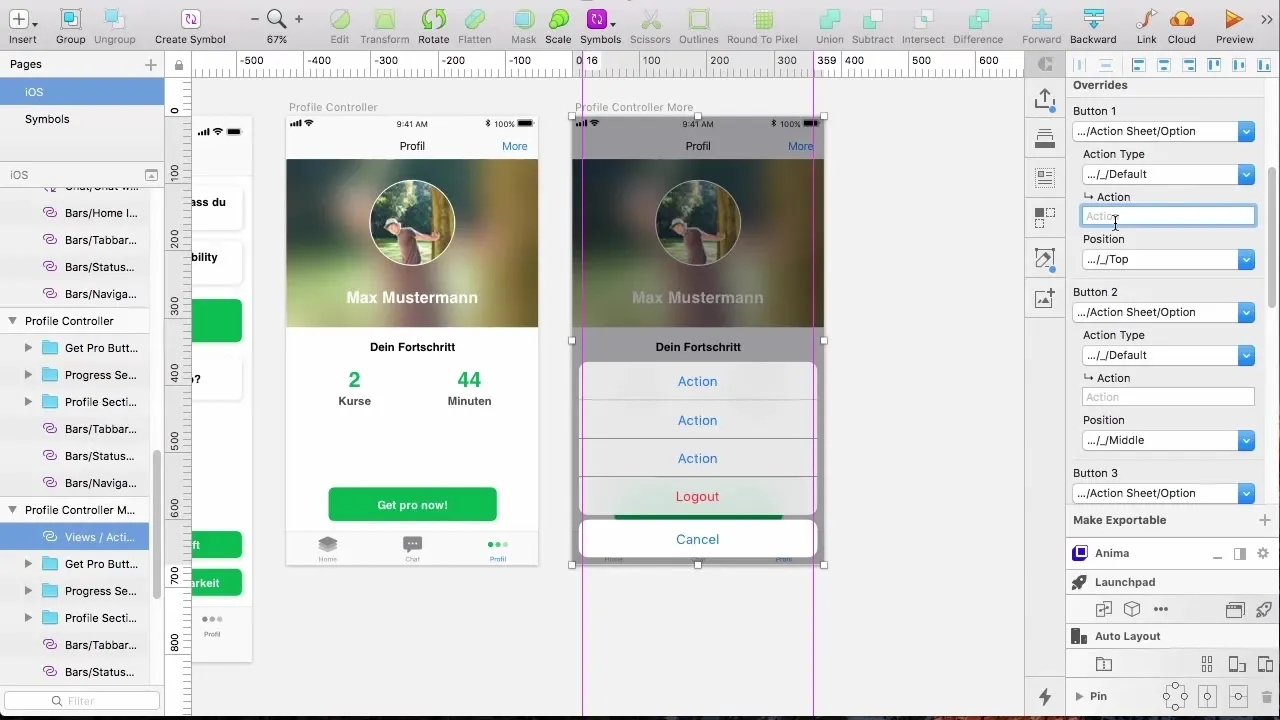
Once the basic functions are created, you can add more options. Consider what information would be useful for users, such as frequently asked questions, notification settings, or links to terms and conditions and privacy policies.
10. Finalizing the menu
Finally, check whether all the functions and options you planned are present in the action sheet. With a clear listing of the options, you help the developer efficiently design the app and meet all legal requirements.
Summary – Creating action sheets in Sketch
In this guide, you learned how to create an action sheet in Sketch for effective use in an app. The action sheet provides not only diverse options for user interaction but also fulfills essential legal requirements.
Frequently asked questions
How do I create an action sheet in Sketch?You can create an action sheet in Sketch by using the existing templates in the iOS library and adding buttons.
What happens if I do not customize the design?An unsuitable design can negatively affect the user experience and lead to confusion.
Are action sheets useful for every app?Yes, they are especially useful when you want to present multiple options or legal information.
How do I optimize the visibility of buttons?Use eye-catching colors and well-recognizable labels to increase visibility and user-friendliness.
Are action sheets also available on Android?Yes, however, the design may differ and should be adjusted to the specific requirements of the Android platform.


