When working with Cinema 4D, it is crucial to tailor the software to your needs. Here, you will learn how to efficiently utilize the display options in Cinema 4D and optimize the units for your modeling.
Key Insights
- The representation of 3D objects can be adapted to the specific modeling task.
- The orange outline for object visualization can be replaced by a wireframe view.
- Units of measurement such as centimeters can be switched to various units, which is particularly important for precise work.
Settings for Displaying Your Scenes
To make your work in Cinema 4D easier, let's first look at the basic display settings. Start by creating a cube, as this model will serve as our example for the following steps.

Select the cube by tapping on it with your mouse or stylus. This opens a menu from which you can select the cube. By selecting the cube, you can later check its attributes in the attribute manager.
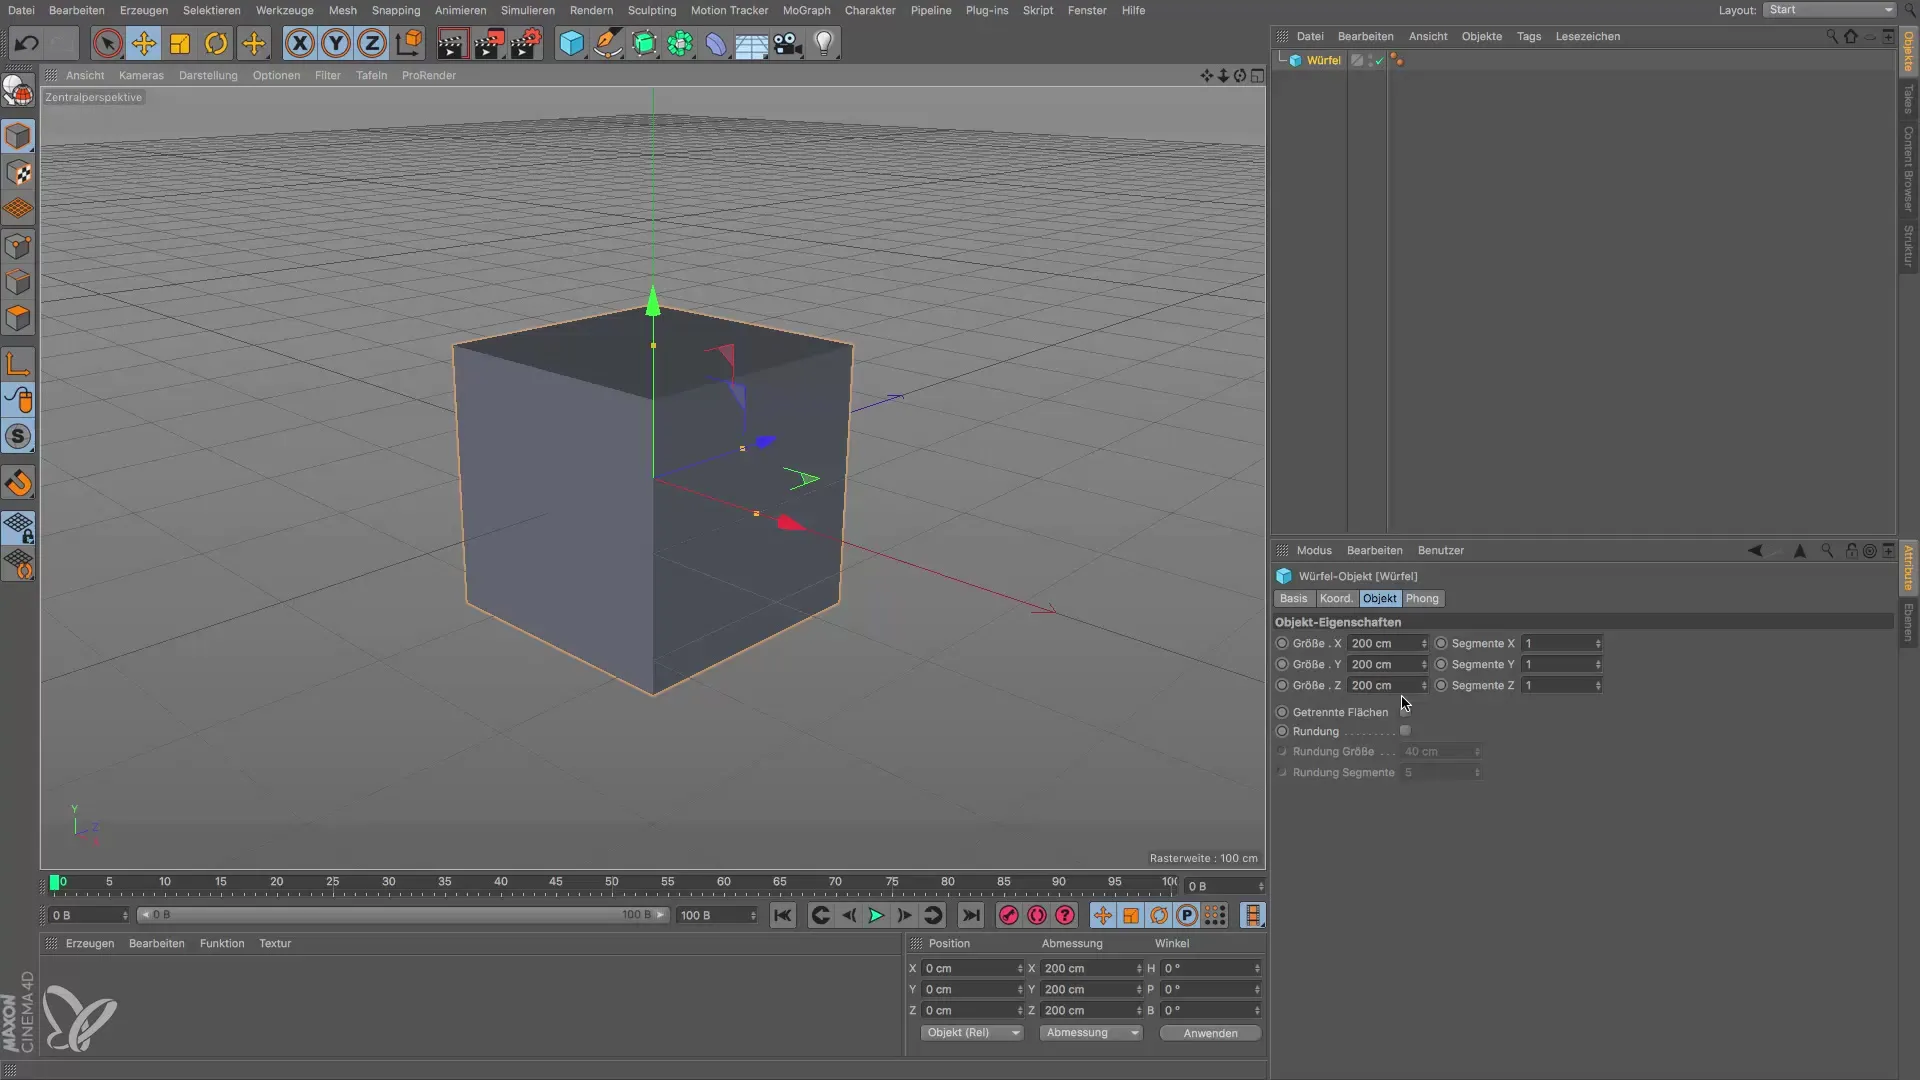
Once you have selected the cube, you will see the properties of the object in the attribute manager, such as the edge length. Here, the outline of the object is orange, which has been the case since version 14 or 15 of Cinema 4D. However, this orange outline can be confusing as it does not sufficiently highlight the details of the model.
Activate Wireframe View
To replace the orange outline with a more detailed view, navigate to the display settings:
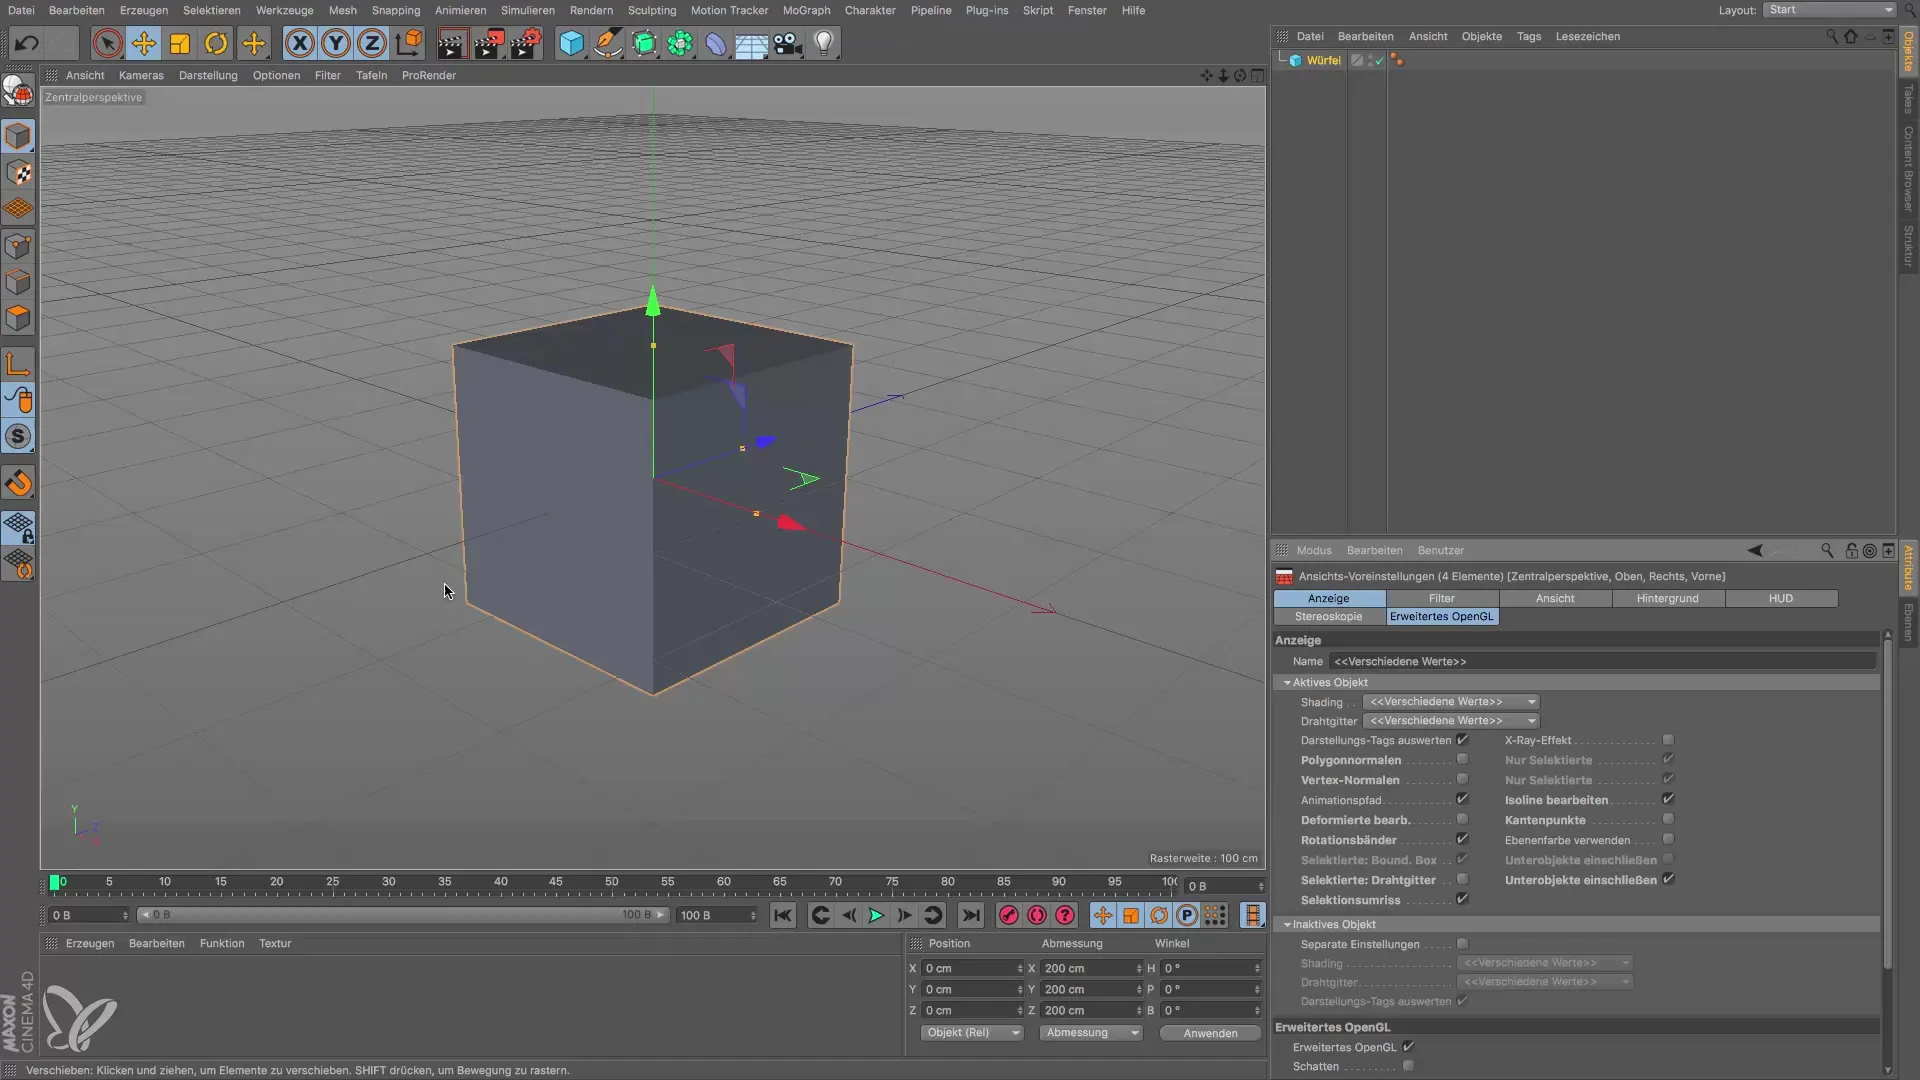
Go to Options, select "View Settings," and click on it. Under the "Display" section, you will find the option for the selection outline. Disable this option to hide the default orange outline.
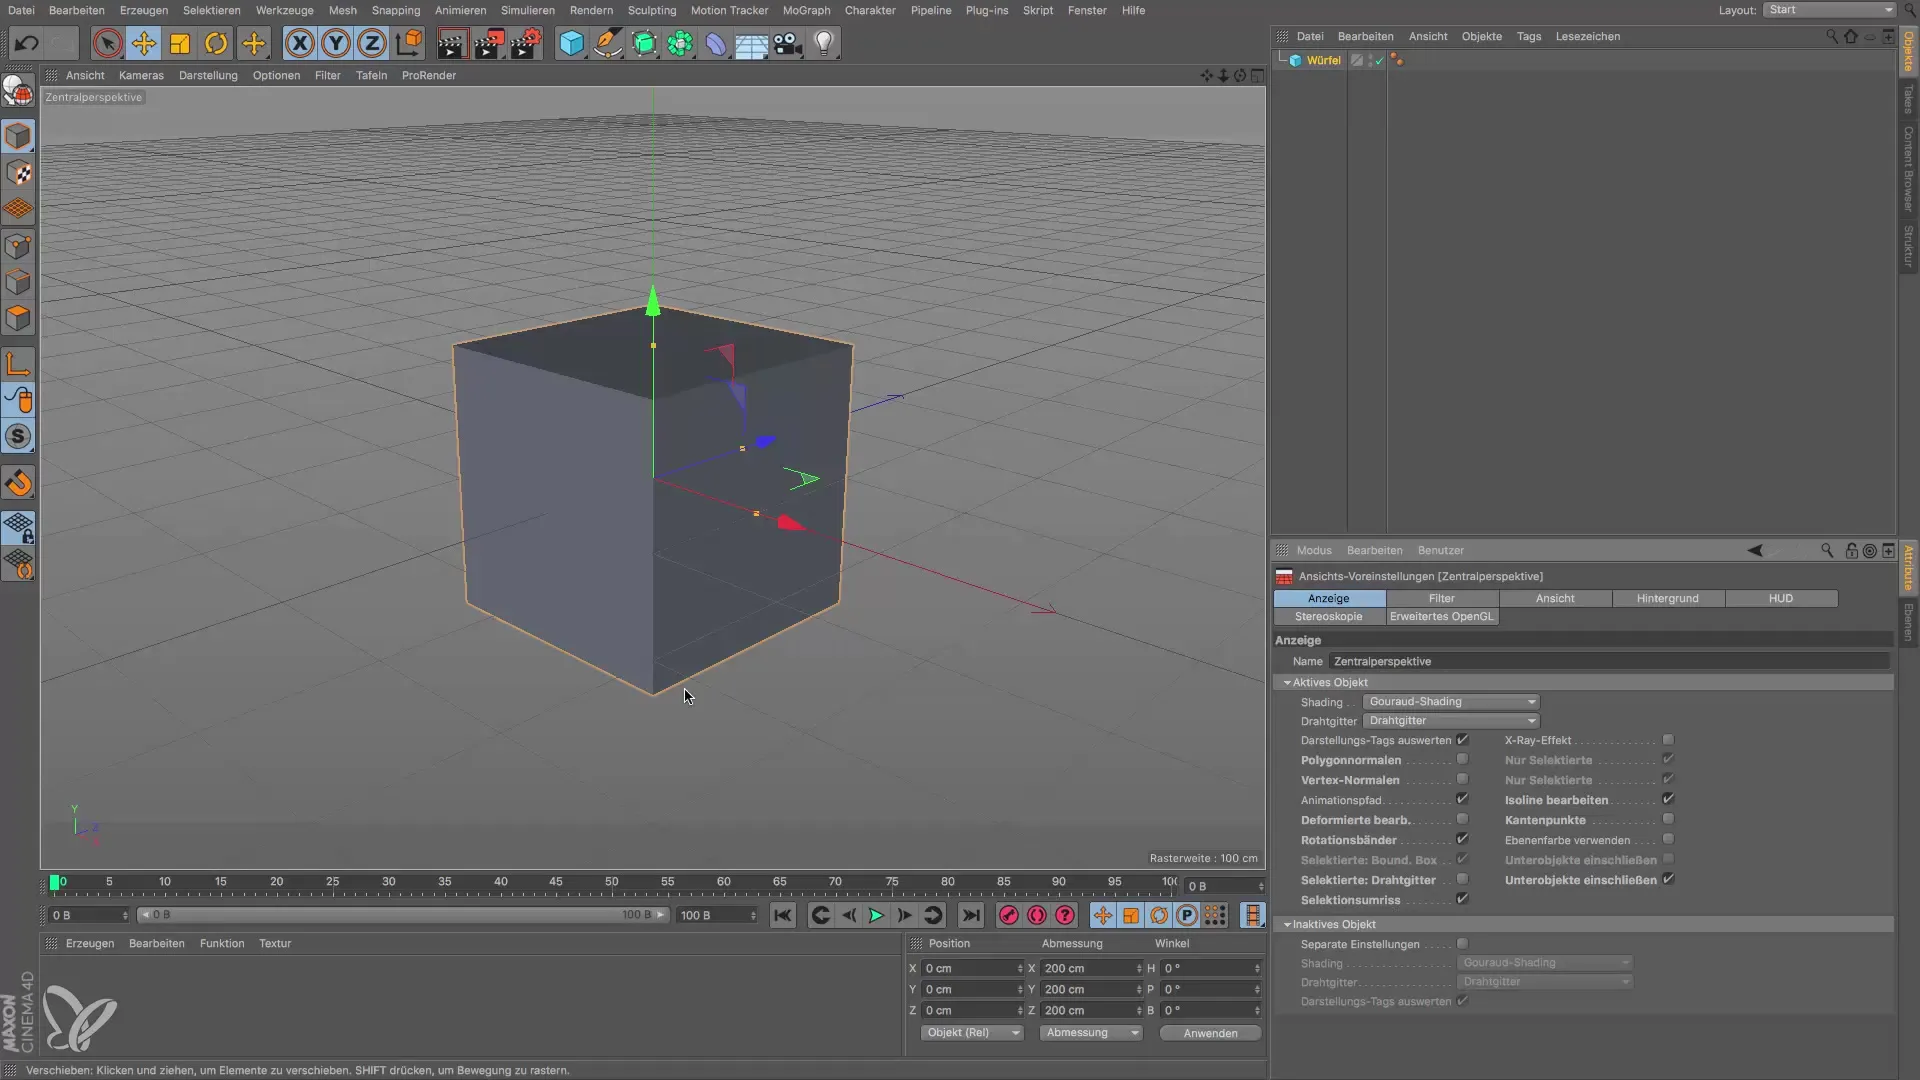
Now enable the wireframe view for the selected model. To do this, check the box for wireframe display. This will show you the edges and polygons of the model precisely, which is particularly valuable for modeling.
You can now immediately notice how the view changes. Instead of the orange outline, you now see a detailed wireframe view of the cube, giving you a better idea of the structure of your model.
Adjust Units of Measurement
Another important point in Cinema 4D is the adjustment of the units of measurement. Your cube currently has an edge length of 200 cm, which may not be optimal for your project. Here you will learn how to change the unit of measurement.
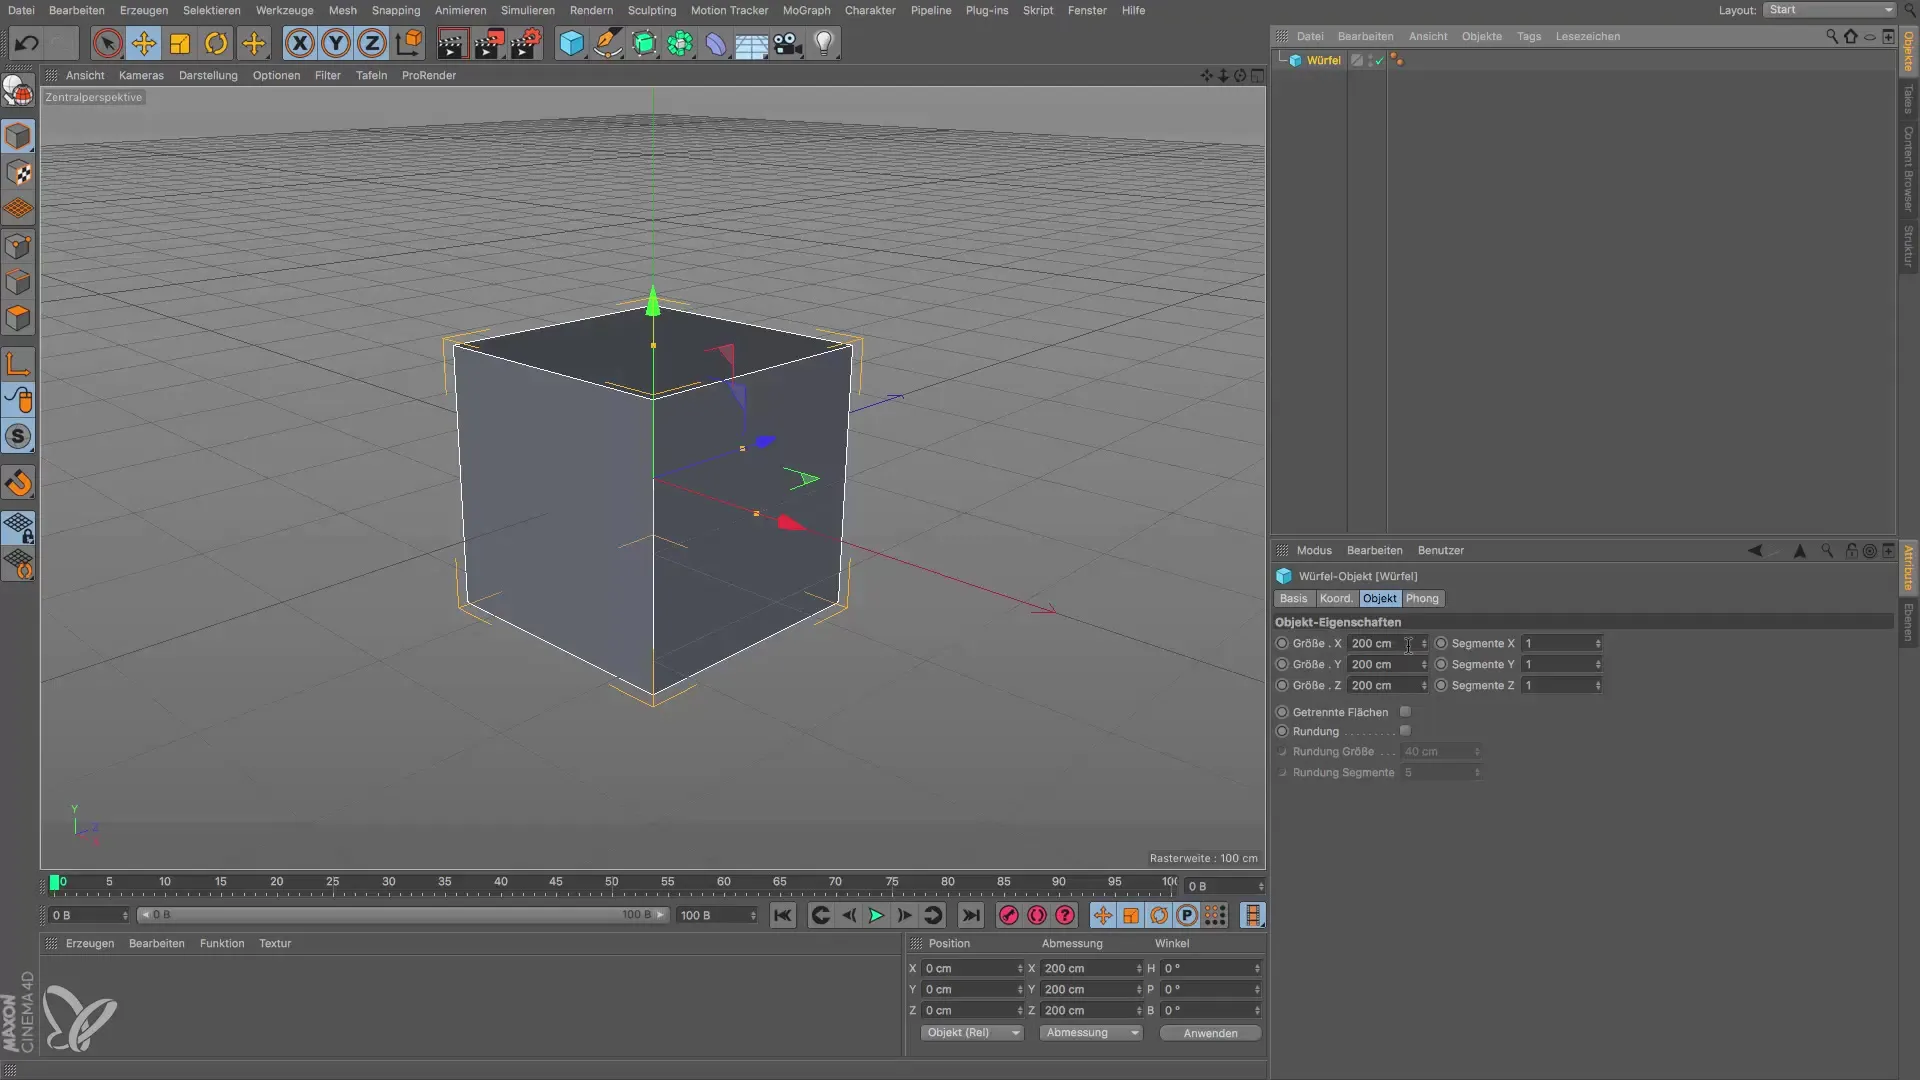
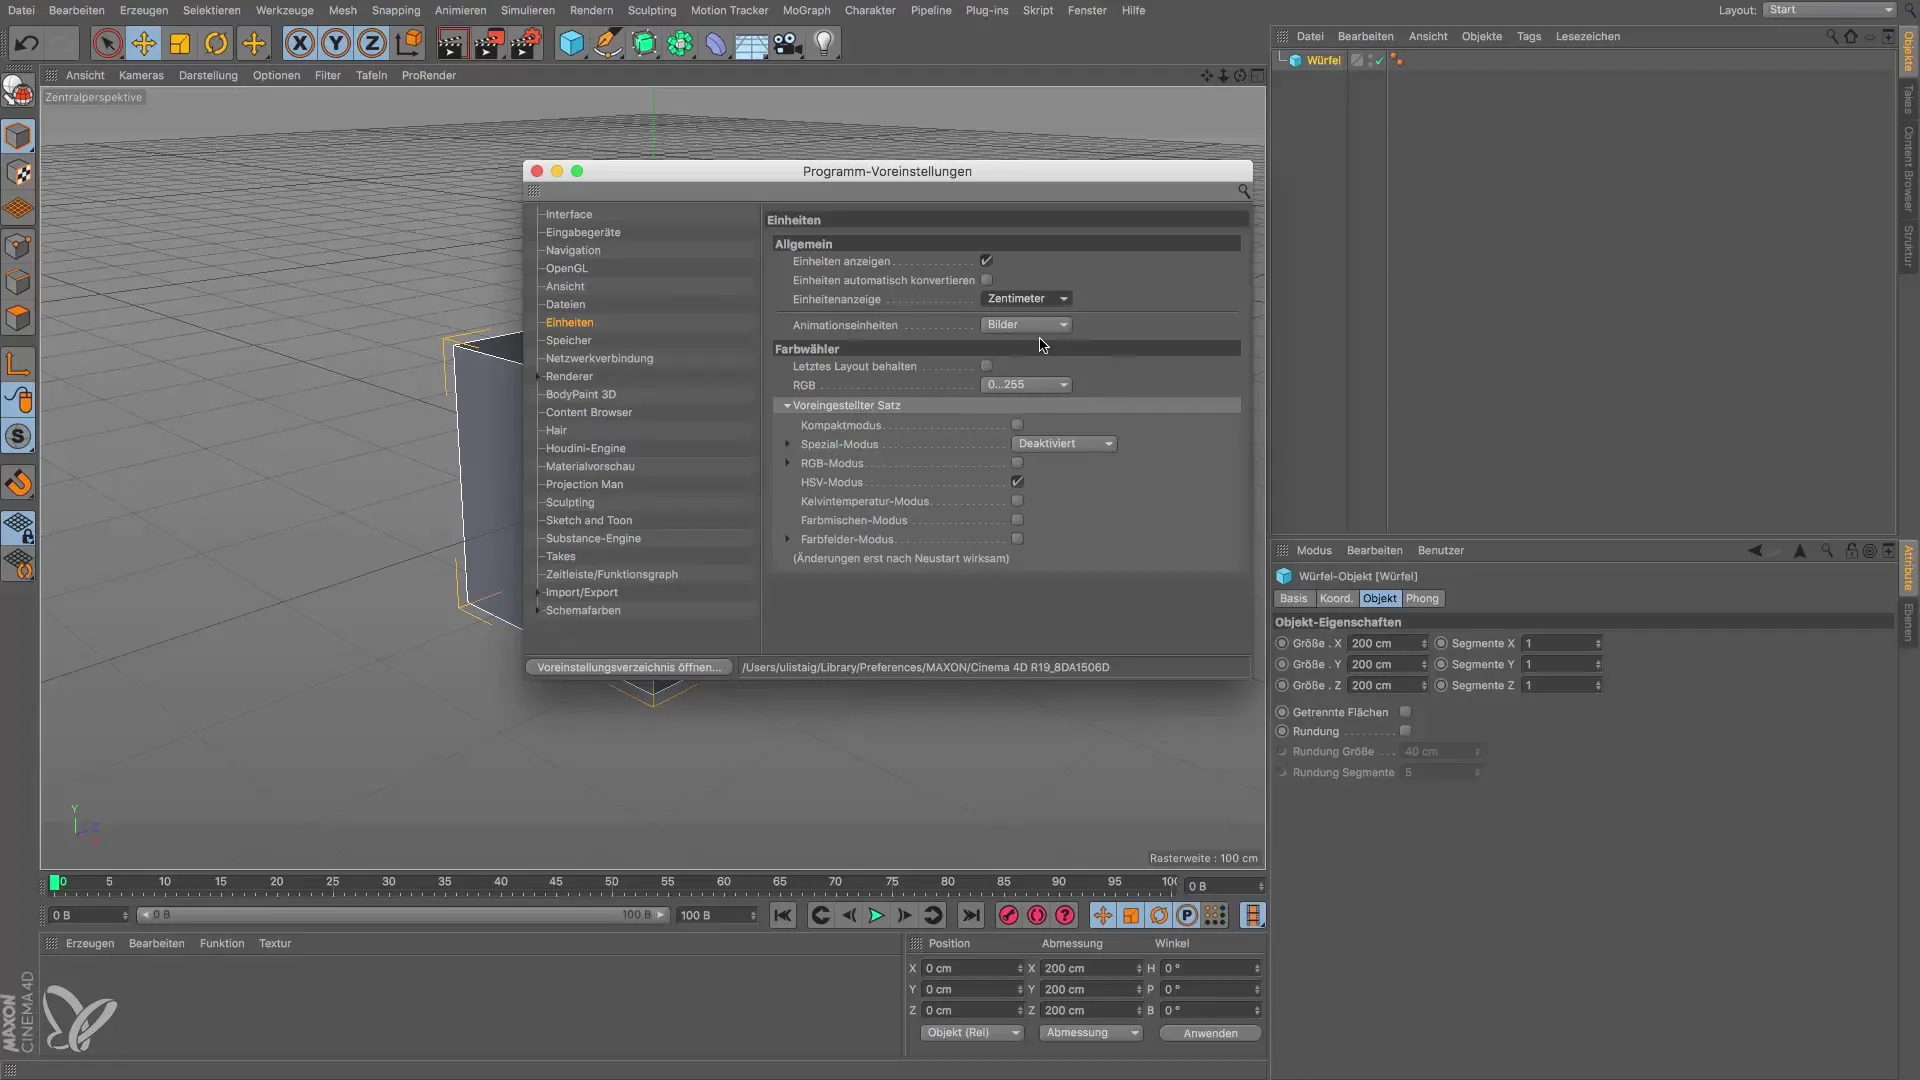
The unit of measurement "centimeter" can be changed to "meter," "kilometer," or even "millimeter" as needed. You can find these settings in the program preferences. Go to Options and look for the section "Units."
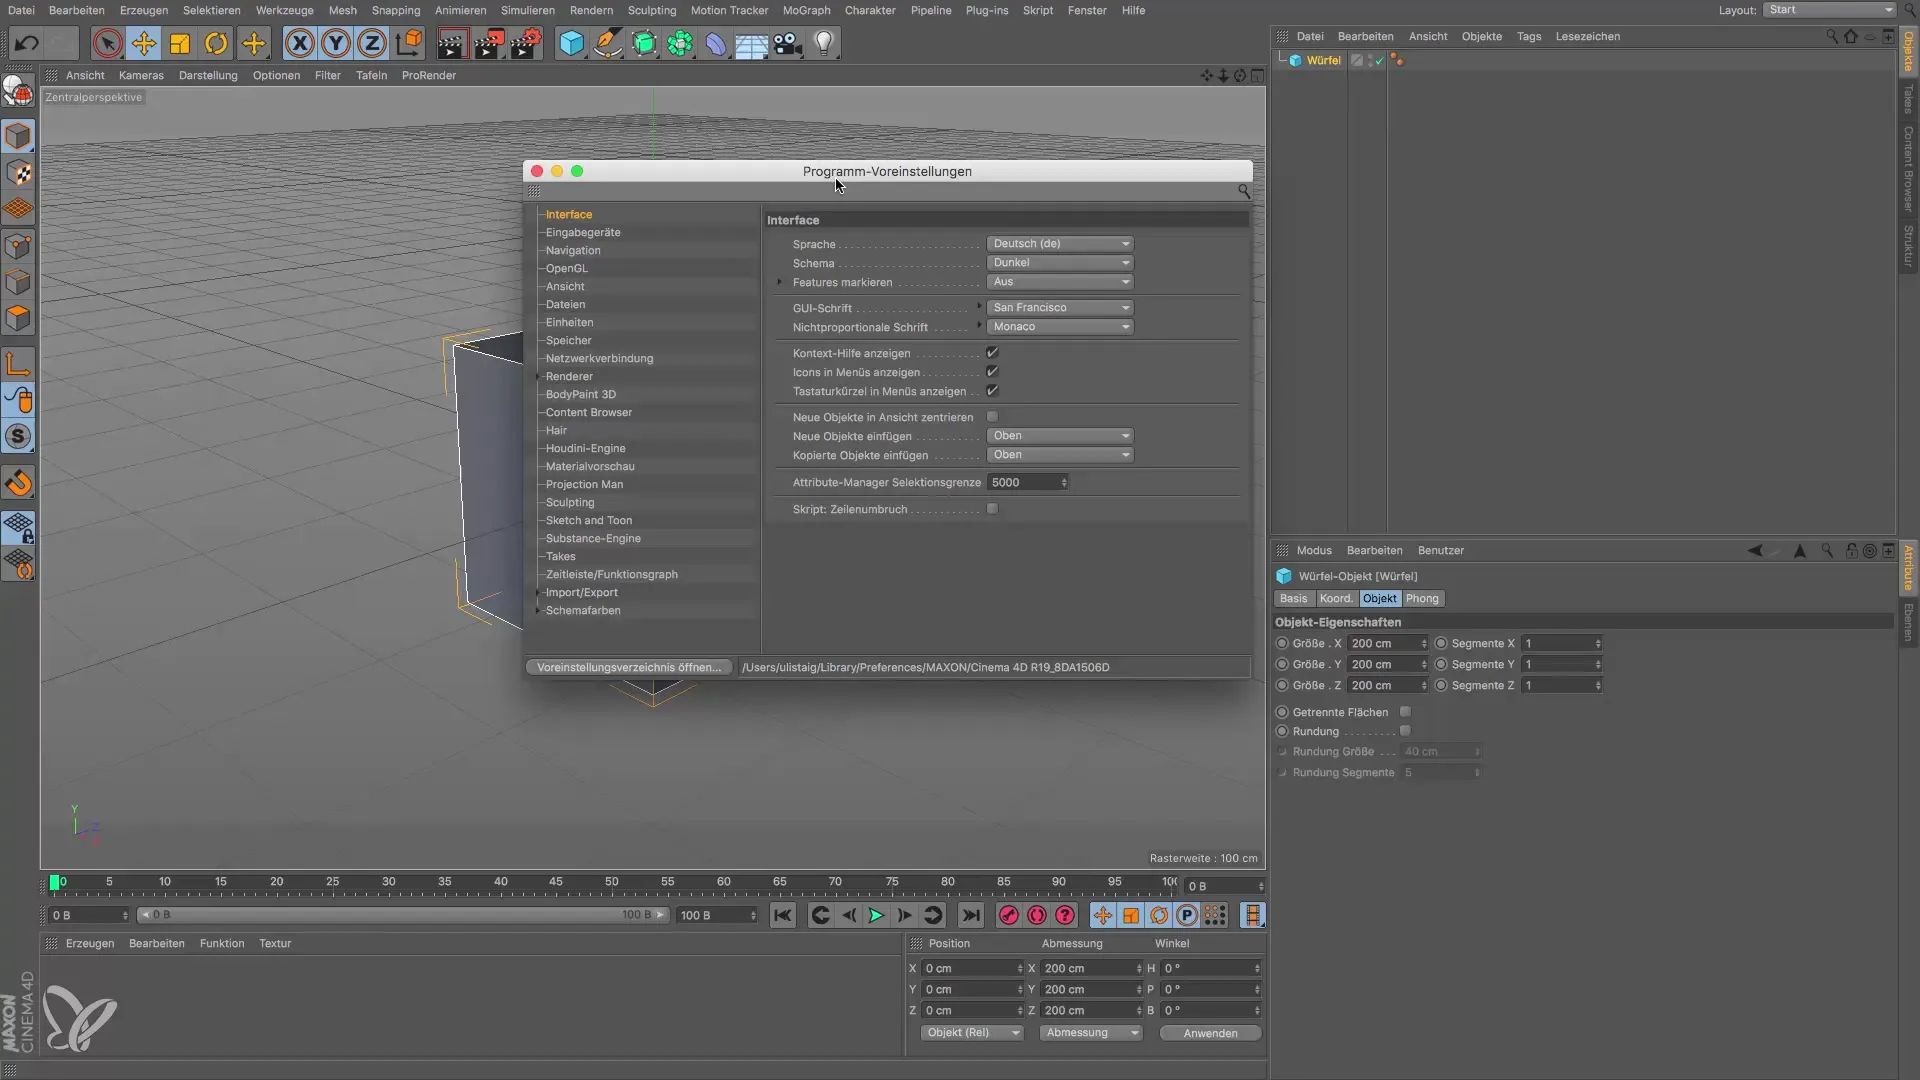
Here, you can conveniently change the default unit of measurement. It is advisable to choose a unit of measurement that is most sensible for your projects. For many applications, the centimeter setting is a good choice.
After adjusting the unit of measurement, you are ready for the next step. You can now begin creating your first models in Cinema 4D. With the right display options and units, you can work more effectively and purposefully.
Summary – Cinema 4D: Efficient Settings for Your 3D Projects
In this guide, you learned how to adjust the representation of your 3D models and effectively set the units of measurement in Cinema 4D. These basic steps will help you keep track of your projects and work more efficiently.
Frequently Asked Questions
How do I change the display options in Cinema 4D?Go to Options, then to View Settings, and set the desired display.
How do I adjust the unit of measurement in Cinema 4D?In the program preferences, you can change the unit of measurement under the "Units" section.
Is the wireframe view better than the orange outline?Yes, the wireframe view displays the details of a model much better.
