Gmail has no folders. Instead, it offers the ability to use labels, which is often much more flexible and practical. Labels allow you to organize your emails individually, so you always stay on top of things. In this guide, I'll show you how to work effectively with labels and how you can tailor them to your needs to optimally organize your inbox.
Key Insights
- Labels offer more flexibility than folders.
- You can use multiple labels for one email.
- With colors, you can visually distinguish your labels.
- Filters help automate organization.
Step-by-Step Guide
1. Understand and Create Labels
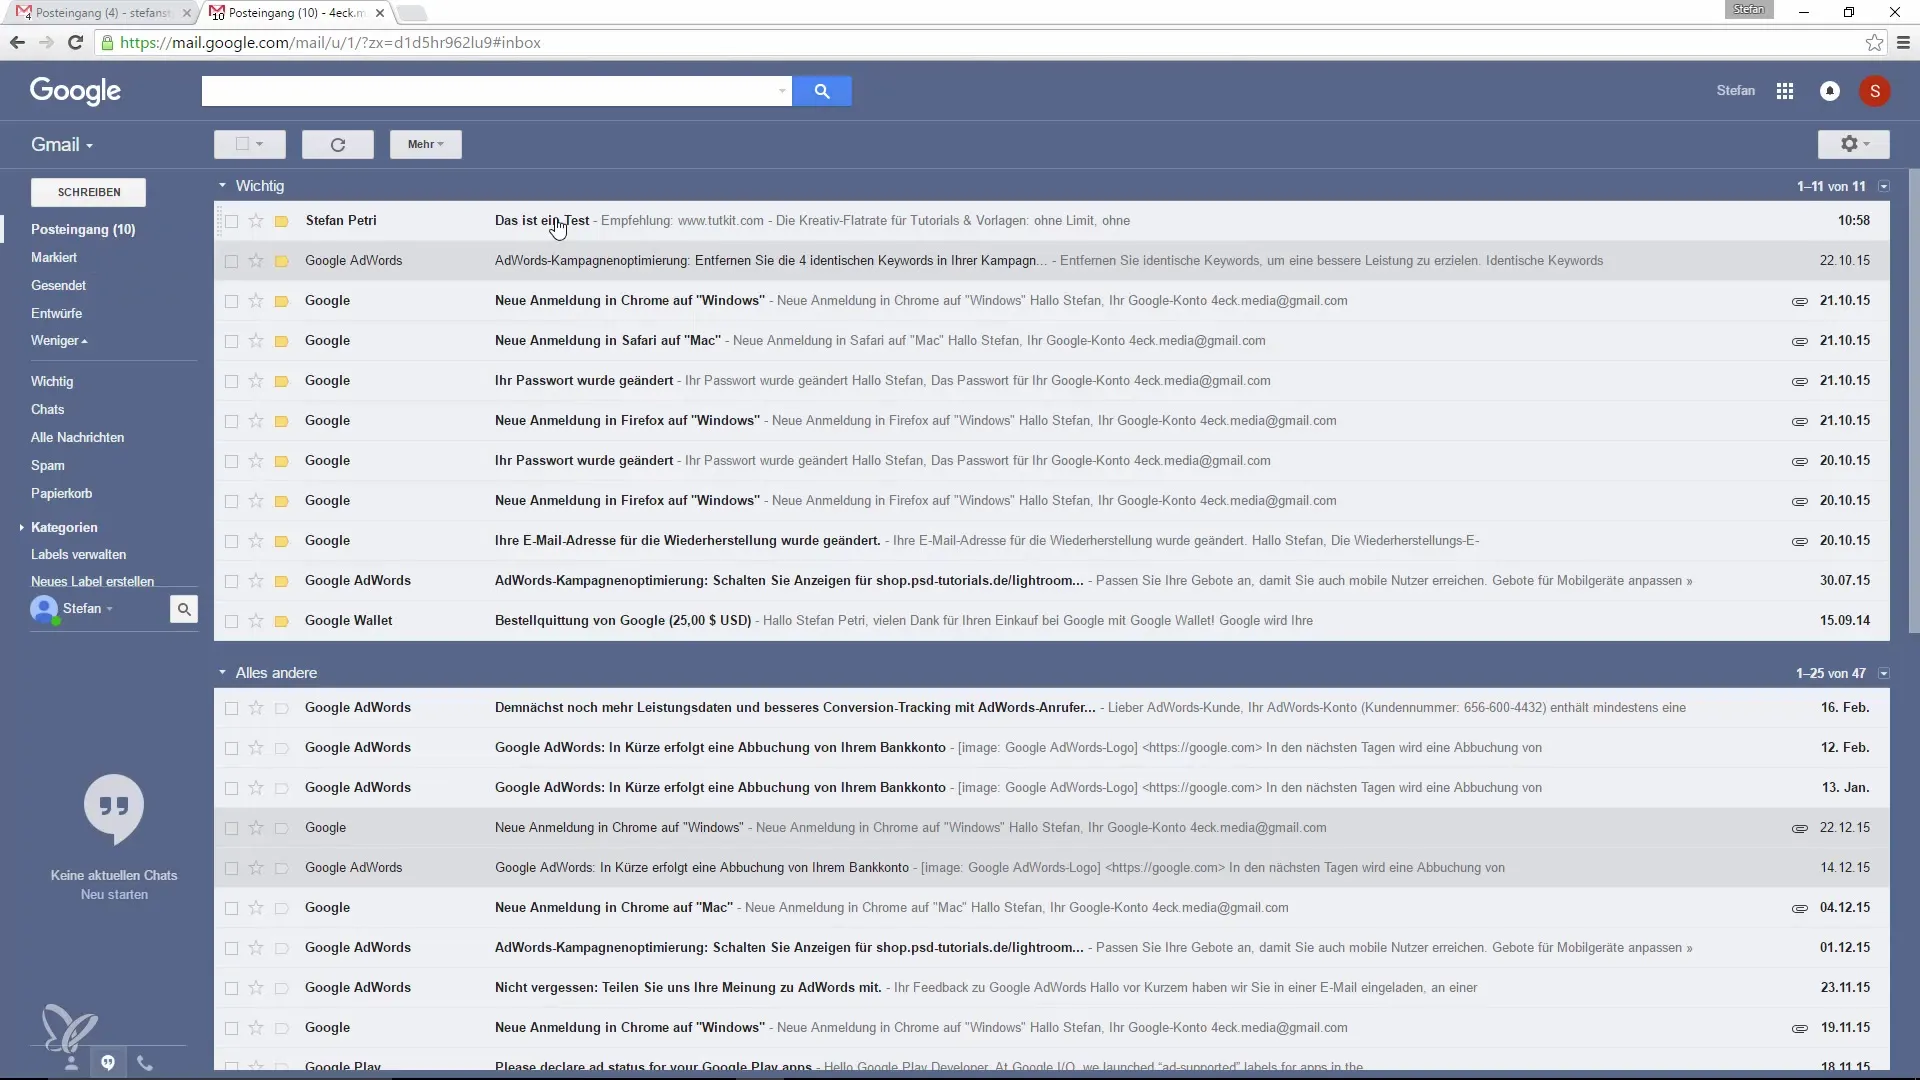
One of the biggest advantages of Gmail is the ability to create labels. While other email services have folders, labels provide you with a more flexible solution. If you want to create a new label, go to your Gmail inbox and click on the label icon.
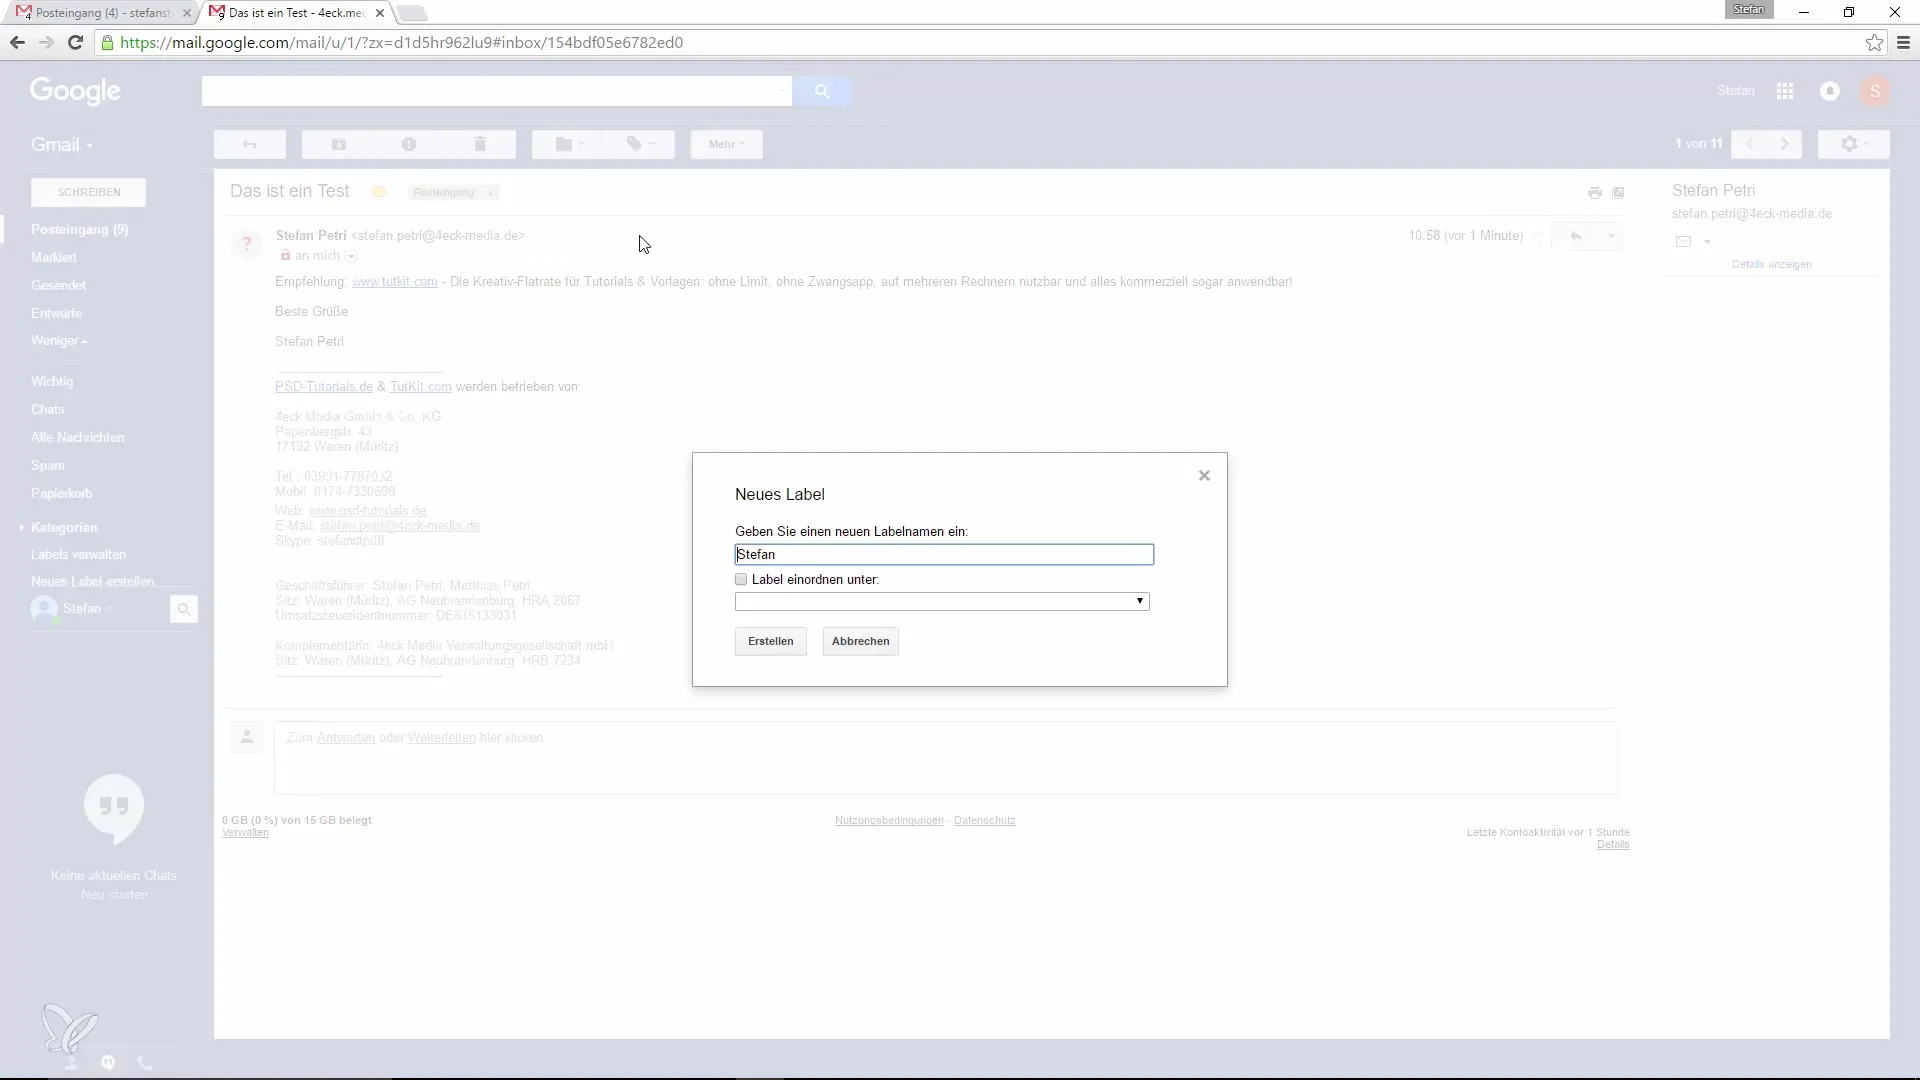
Here, you can either select an existing label or create a new one. When you create a new label, name it something like “Orders” and then click “Create” and confirm.
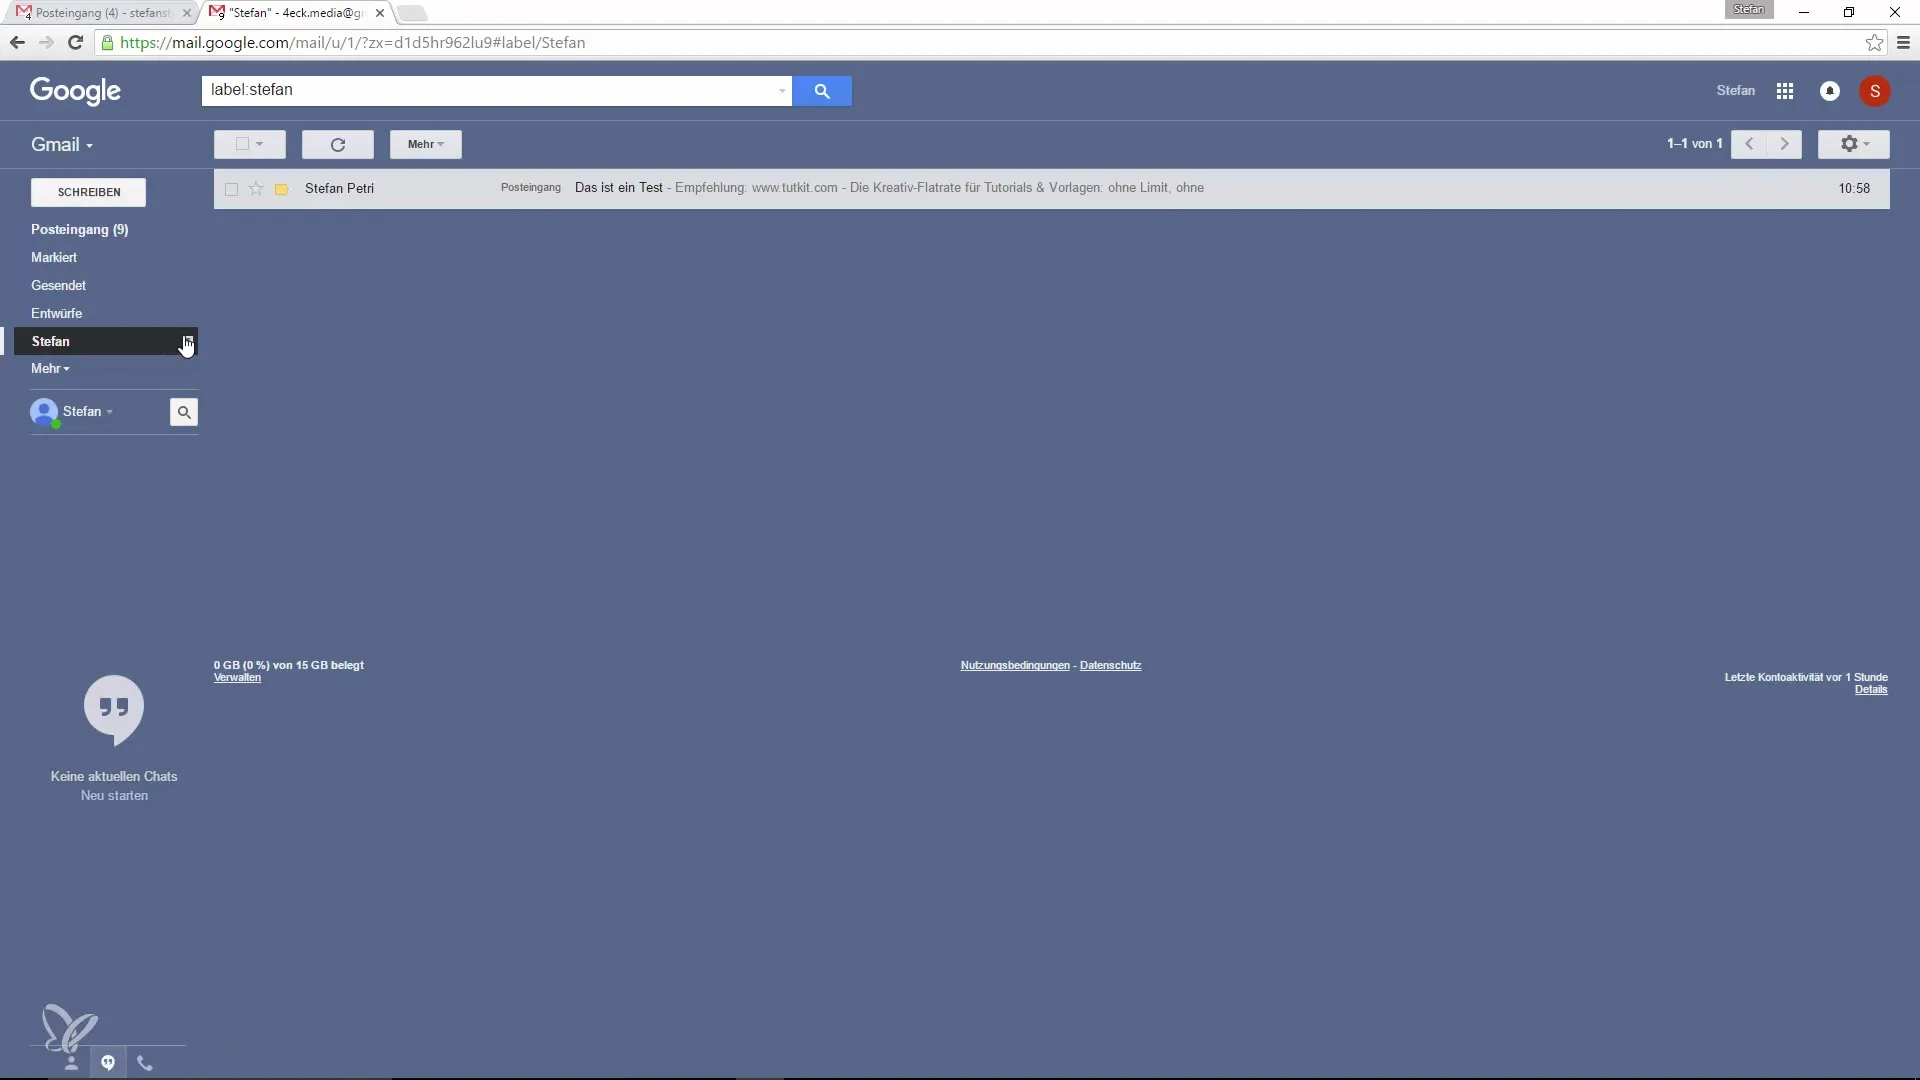
The label will now appear in your list, and once you click on it, all emails under that label will be displayed.
2. Set Colors for Labels
To organize your emails even better, you can set colors for your labels. For example, you might want to choose the color green for orders so you can see at a glance that it’s an order.
To change the color of your label, go back to the label settings and select the desired color. This improves clarity and makes your work easier.
3. Manage Labels
After creating your labels, you may also want to hide or change a label. In the label management settings, you can specify which labels should be displayed by default and which should not.
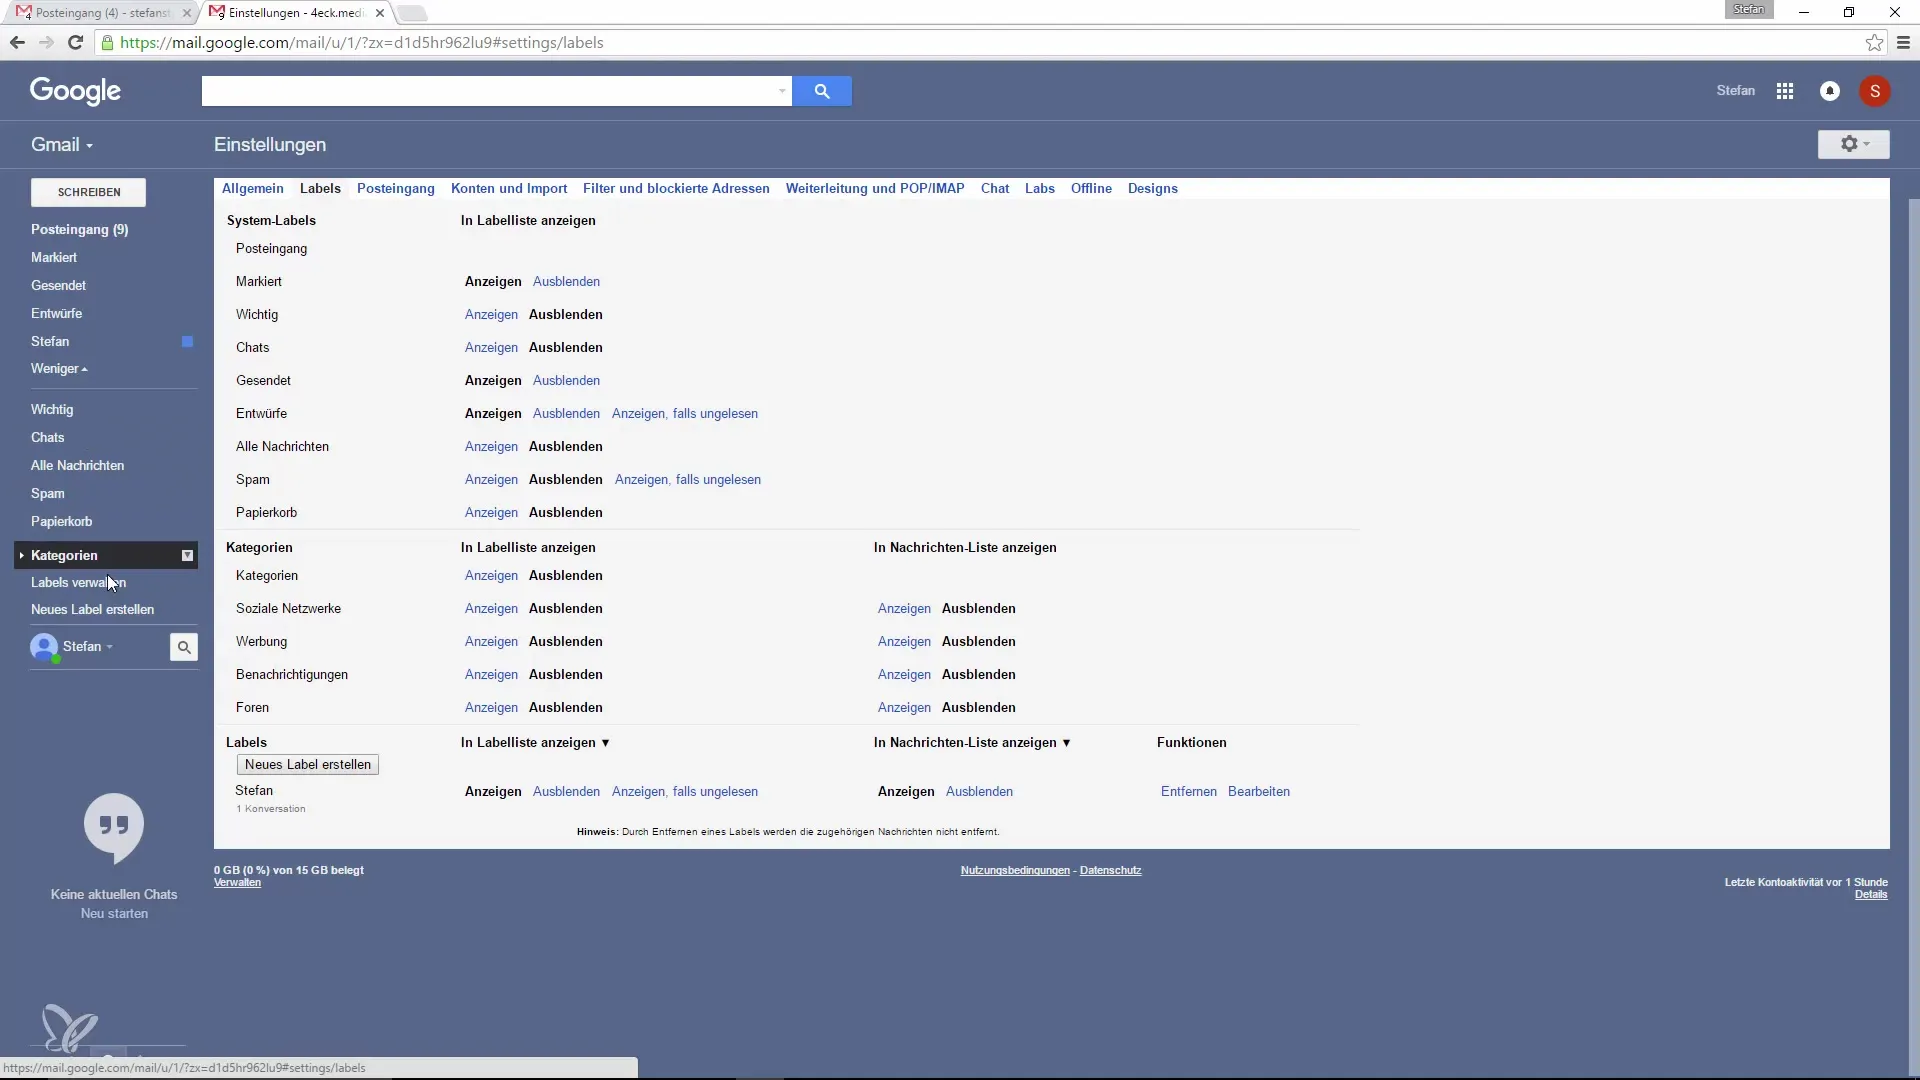
For example, if you have a label named “Stefan” for less important emails, you can set it to be hidden by default. This keeps your inbox less cluttered.
4. Add Additional Labels
A helpful additional label could be “Unfinished”. To add a new label, simply go to label management and click “Create New Label”. You can also choose a color for this label, for example, red for unfinished tasks.
This way, you always have a quick overview of which emails are still pending, allowing you to prioritize your tasks.
5. Set Up Filters for Labels
To further optimize your organization, you should consider creating filters. Filters allow you to automatically label emails with a specific label as soon as they arrive in your inbox.
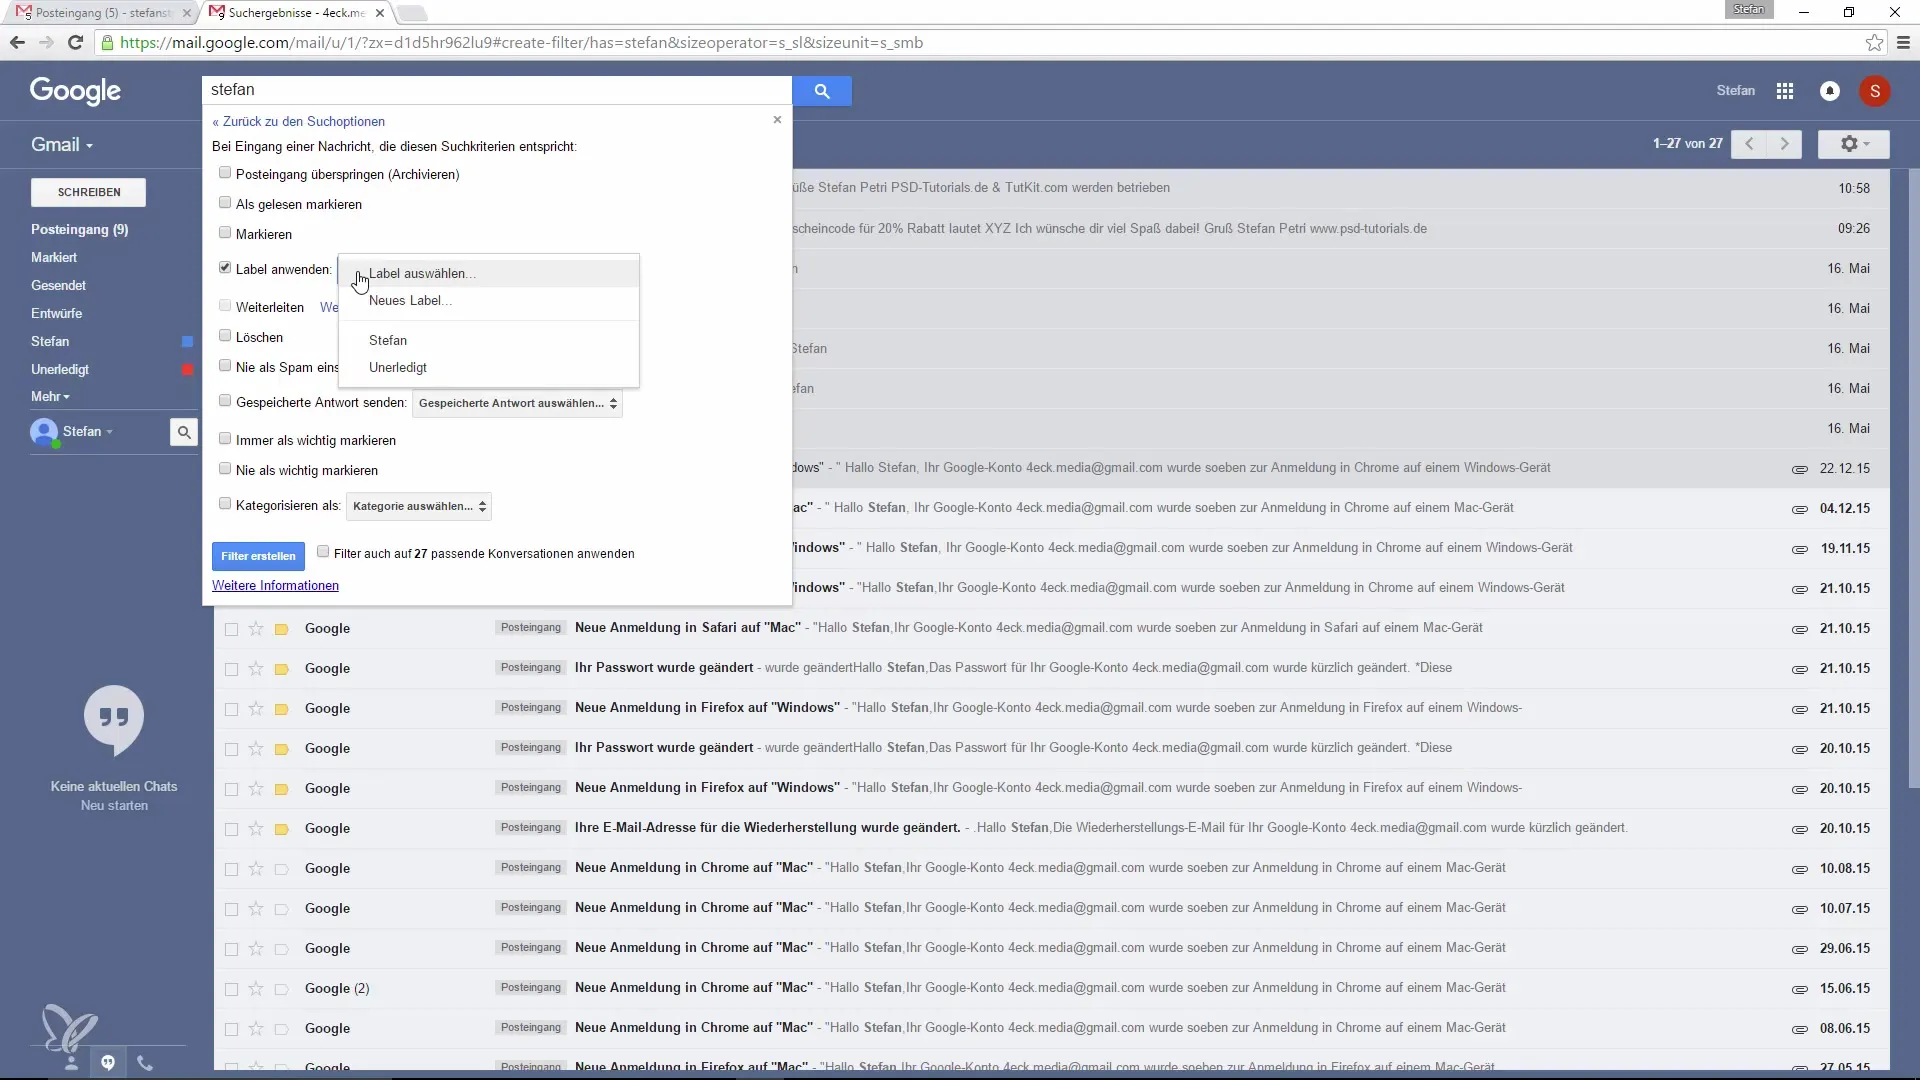
To do this, go to the filter settings. You can create filters that, for example, automatically label emails from specific senders with your “Orders” label.
6. Combine Labels in the Search Field
A great feature of Gmail is the search bar. Here, you can specifically search for emails and combine labels. If you only want to see the unfinished emails from a specific sender, for example, Stefan, you can do so by typing “Stefan + unfinished” in the search field.
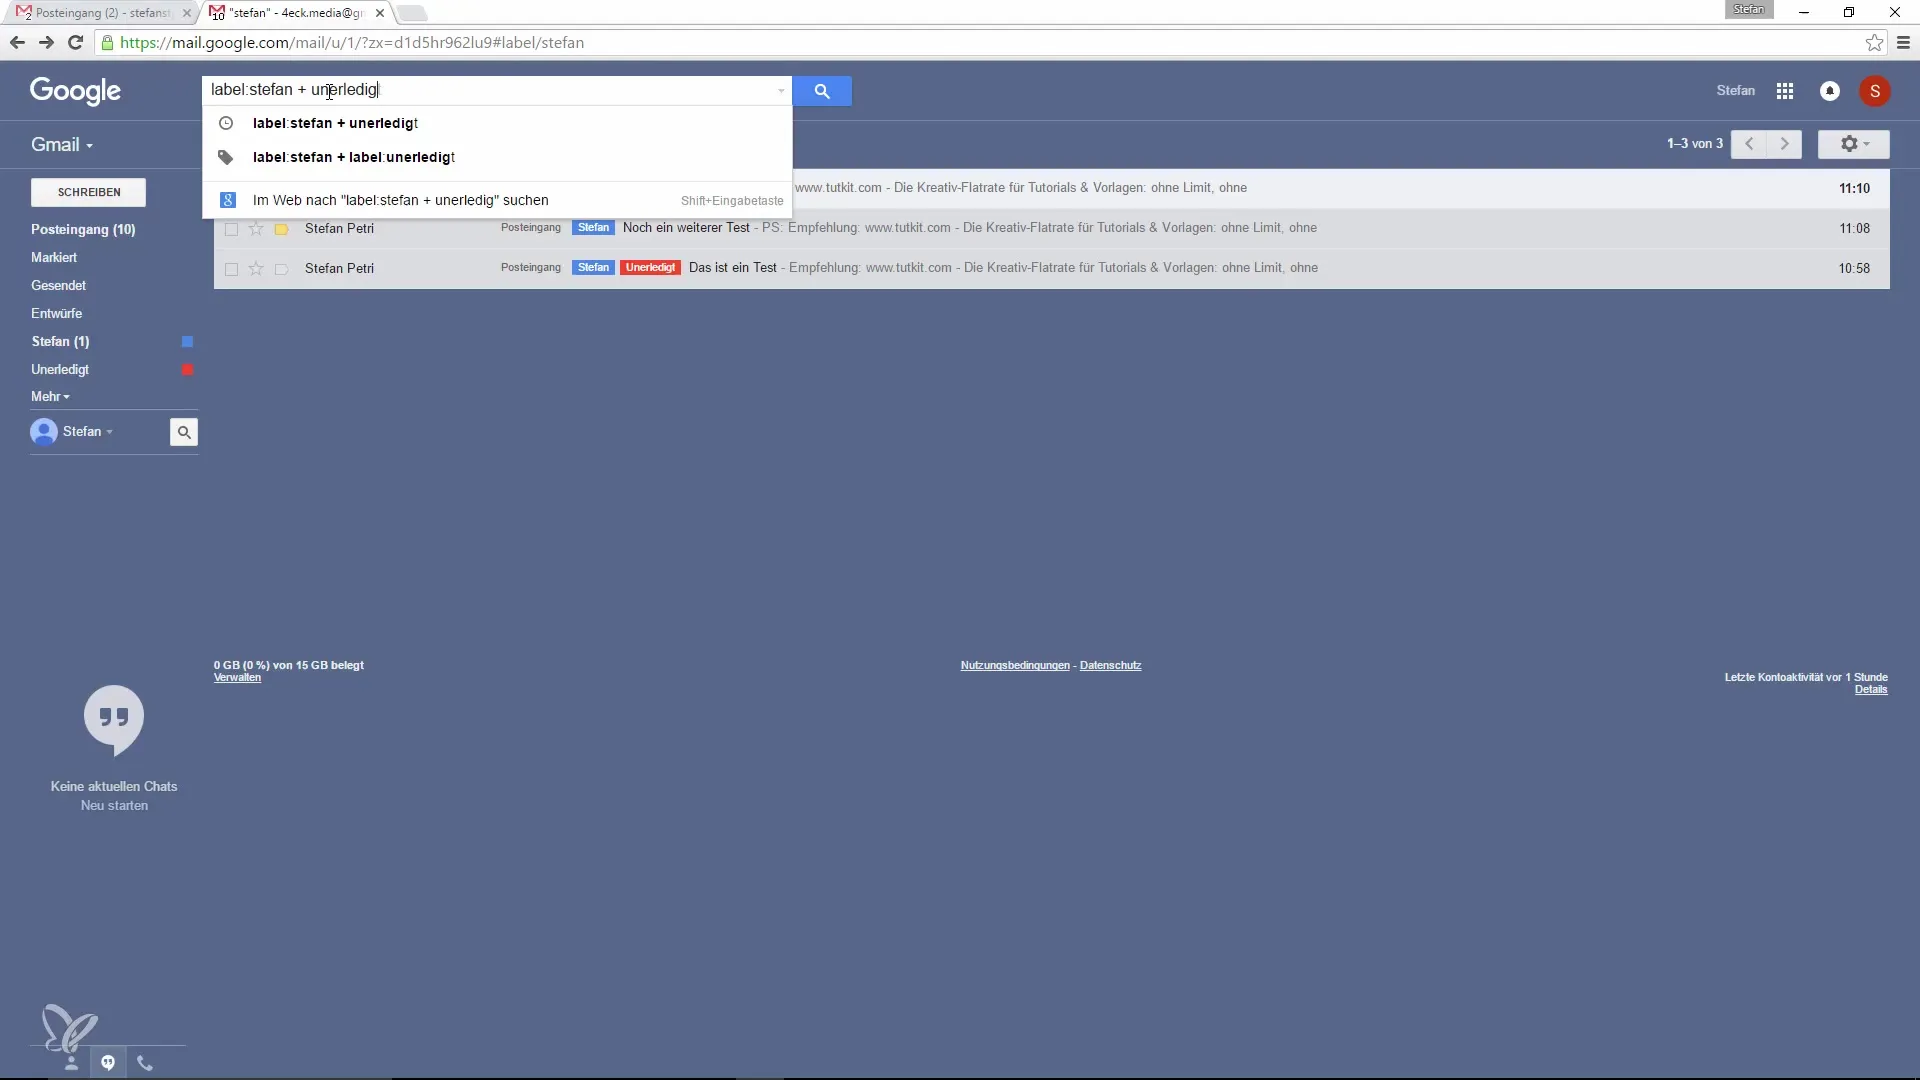
By combining the search in this way, you get exactly the emails that are relevant to you and avoid an excess of information.
Summary – How to Bring Order to Gmail – Work Faster and More Clearly with Labels
Gmail offers an excellent way to organize your emails through labels, which are more flexible than traditional folders. By taking the time to create and properly manage labels, you'll quickly notice how easy it is to stay organized. Use colors, filters, and the search function to make your work more efficient and keep your inbox under control.
Frequently Asked Questions
How do I create a label in Gmail?Click on the label icon and select “Create New Label”.
How can I set colors for labels?Go to the label management and select the desired color.
Can I use multiple labels for one email?Yes, you can assign multiple labels to one email.
How do I enable filters in Gmail?Go to the filter settings and create a new filter for the desired email.
How do I combine labels in search?Type in the search field "Label:Name + Label:Name" to filter emails.
