
Almost every lens leaves a slight shadow at the edges of the image, and often it distorts straight lines as well. Lightroom offers a simple solution for this: You remove the shadow with just a few clicks, and you can also use vignetting deliberately as a creative tool. This guide walks you through both options step by step.
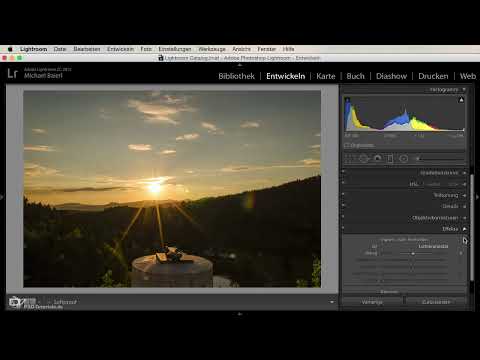
The video is only loaded from YouTube when you play it – data (including your IP address) is then transmitted to YouTube/Google. More in the privacy policy
Key Takeaways
- Lenses almost always produce slight vignetting, meaning a darkening of the corners, and often distortion as well.
- You can find the correction in the Lens Corrections section. With profile correction, Lightroom recognizes your lens and automatically adjusts the image.
- With the vignetting slider, you can fine-tune the automatic correction, even beyond the default value of 100.
- The "Post-Crop Vignetting" effect allows you to create a deliberately dark vignette with a soft edge, midpoint, and roundness.
Step-by-Step Guide
Step 1: Open the Lens Corrections
Open your photo in the Develop module. Then switch to the Lens Corrections. There you will find all the tools that Lightroom provides for correcting lens errors.

Step 2: Activate the Profile Correction
Activate the profile correction. Lightroom now reads the metadata of your image and shows you which camera and which lens you used. In this example, it is a Nikon 17–50 mm at aperture 2.8. Only now can you see how strong the effect of the correction actually is.
Step 3: Check the Lens and the Effects
Check whether the camera and lens were detected correctly. Pay particular attention to the corners of the image, because that is exactly where lenses tend to distort and the darkening is most noticeable. Compare the image before and after activation, and you will see the difference immediately.
Step 4: Use the Automatic Correction
Click the automatic switch for the lens correction. Lightroom then simultaneously balances the brightness at the corners and corrects the distortion. For most photos, this step is already enough. If you want more control, you can adjust manually in the next step.
Step 5: Adjust the Vignetting Slider Manually
Below the automatic settings, you will find the slider for vignetting. The default value is 100 and corresponds to the automatic correction. If you drag the slider to the right, you brighten the corners further. If you drag the correction into the negative, you intensify the darkening of the corners, which can make sense in certain situations. It is best to move the slider slowly and watch the image as you do so.

Step 6: Quickly Restore the Default Value
A double-click on the slider resets the value to the middle. This way you can experiment as much as you like without losing track.
Step 7: Fine-Tune the Vignetting
The slider for the vignetting works similarly. If you drag it upward, the edges are brightened minimally. If you drag it downward, you slightly intensify the vignette. With these two options, you can readjust the automatic correction if it still seems too weak to you. In my example, I set the vignetting to the value 2 in order to adjust the dark corners a little more precisely.

Step 8: Find the Post-Crop Vignetting
If you do not want to correct the darkening but use it deliberately, Lightroom offers its own effect for this. You will find it in the Effects section under the entry "Post-Crop Vignetting". Here you can create a deliberately strong vignette.
Step 9: Determine the Strength of the Vignette
Drag the amount slider far down if you want a distinct framing effect. The effect is reminiscent of old photo shops and shop windows, but today it looks especially atmospheric in landscape shots with a central subject. It is fine for it to get really dark. If you overdo the slider, only black corners remain, but this can also create a gloomy, almost surreal look.

Step 10: Set the Feather and the Midpoint
You usually pull the feather up to 100 so that the transition into the image is as smooth as possible. With the midpoint, you determine how far the darkening extends into the image. This lets you control precisely how much of your subject stays in the bright area.


Step 11: Adjust the Roundness of the Vignette
Finally, you define the shape. Negative values result in more angular shapes, which have a charm of their own. Positive values produce a round vignette. In the example, I pulled the slider to +100, and with that the deliberate vignetting as a creative effect is done.

Summary – Correcting or Deliberately Enhancing Vignetting in Lightroom
You have seen that Lightroom offers you two ways. The profile correction with the automatic switch reliably removes vignetting and distortion, and the slider allows you to fine-tune precisely. If, on the other hand, you want to use the darkening deliberately, the "Post-Crop Vignetting" effect helps you. There you control amount, feather, midpoint, and roundness. Try out both variants on your own photos, and you will quickly develop a feel for when a subtle correction is enough and when a strong vignette supports your subject.
FAQ
Why do I see vignetting at all if my lens is good?Even very good lenses usually have a slight darkening at the corners due to physical reasons, which is especially noticeable at wide-open apertures.
Do I always have to activate the profile correction manually?No, in many cases Lightroom recognizes the lens automatically, but you should still check the setting.
What does double-clicking the slider do?A double-click immediately resets the slider to the default value, so you can return to the original setting at any time.
Can I also deliberately enhance a vignette?Yes, in the Effects section you can create a deliberate darkening with "Post-Crop Vignetting" and freely determine amount, feather, midpoint, and roundness.
What does negative roundness do?Negative values produce an angular vignette shape, which, depending on the subject, can give a special look.


