Facebook offers you numerous opportunities to improve your customer acquisition. A central role is played by conversions, which help you measure and optimize the success of your campaigns. In this tutorial, I will show you how to create custom conversions in Facebook to specifically track the interactions and purchases of your target audience.
Key Insights
- Custom conversions help to measure specific actions of users.
- You can create targeted conversions to track the success of specific elements on your website.
- Creating a custom conversion requires the use of a pixel and the definition of specific events.
Step-by-Step Guide
1. Find the Ad and Open the Example
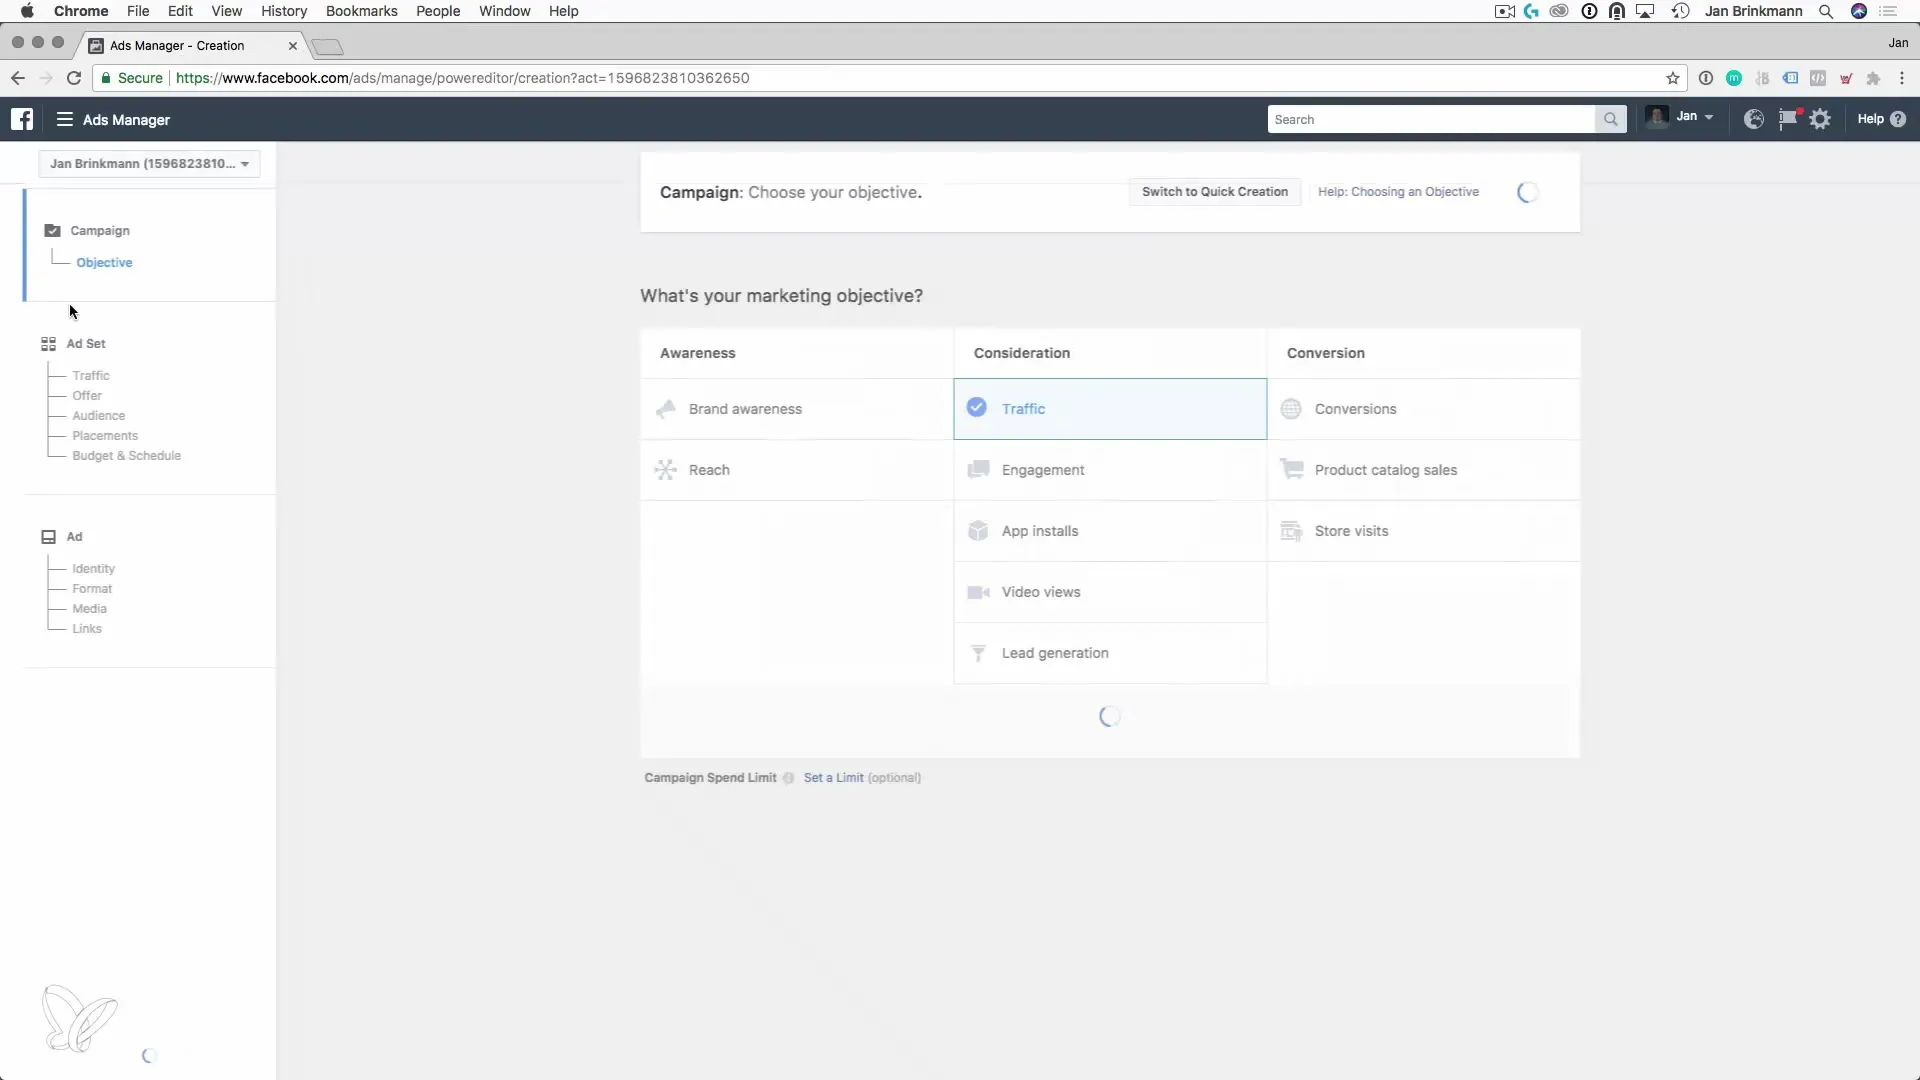
To create a custom conversion, you should first return to the ad you have already created. Search for your campaign and open the example. This will give you access to the necessary functions to start creating your conversion.
2. Select Conversion Objective
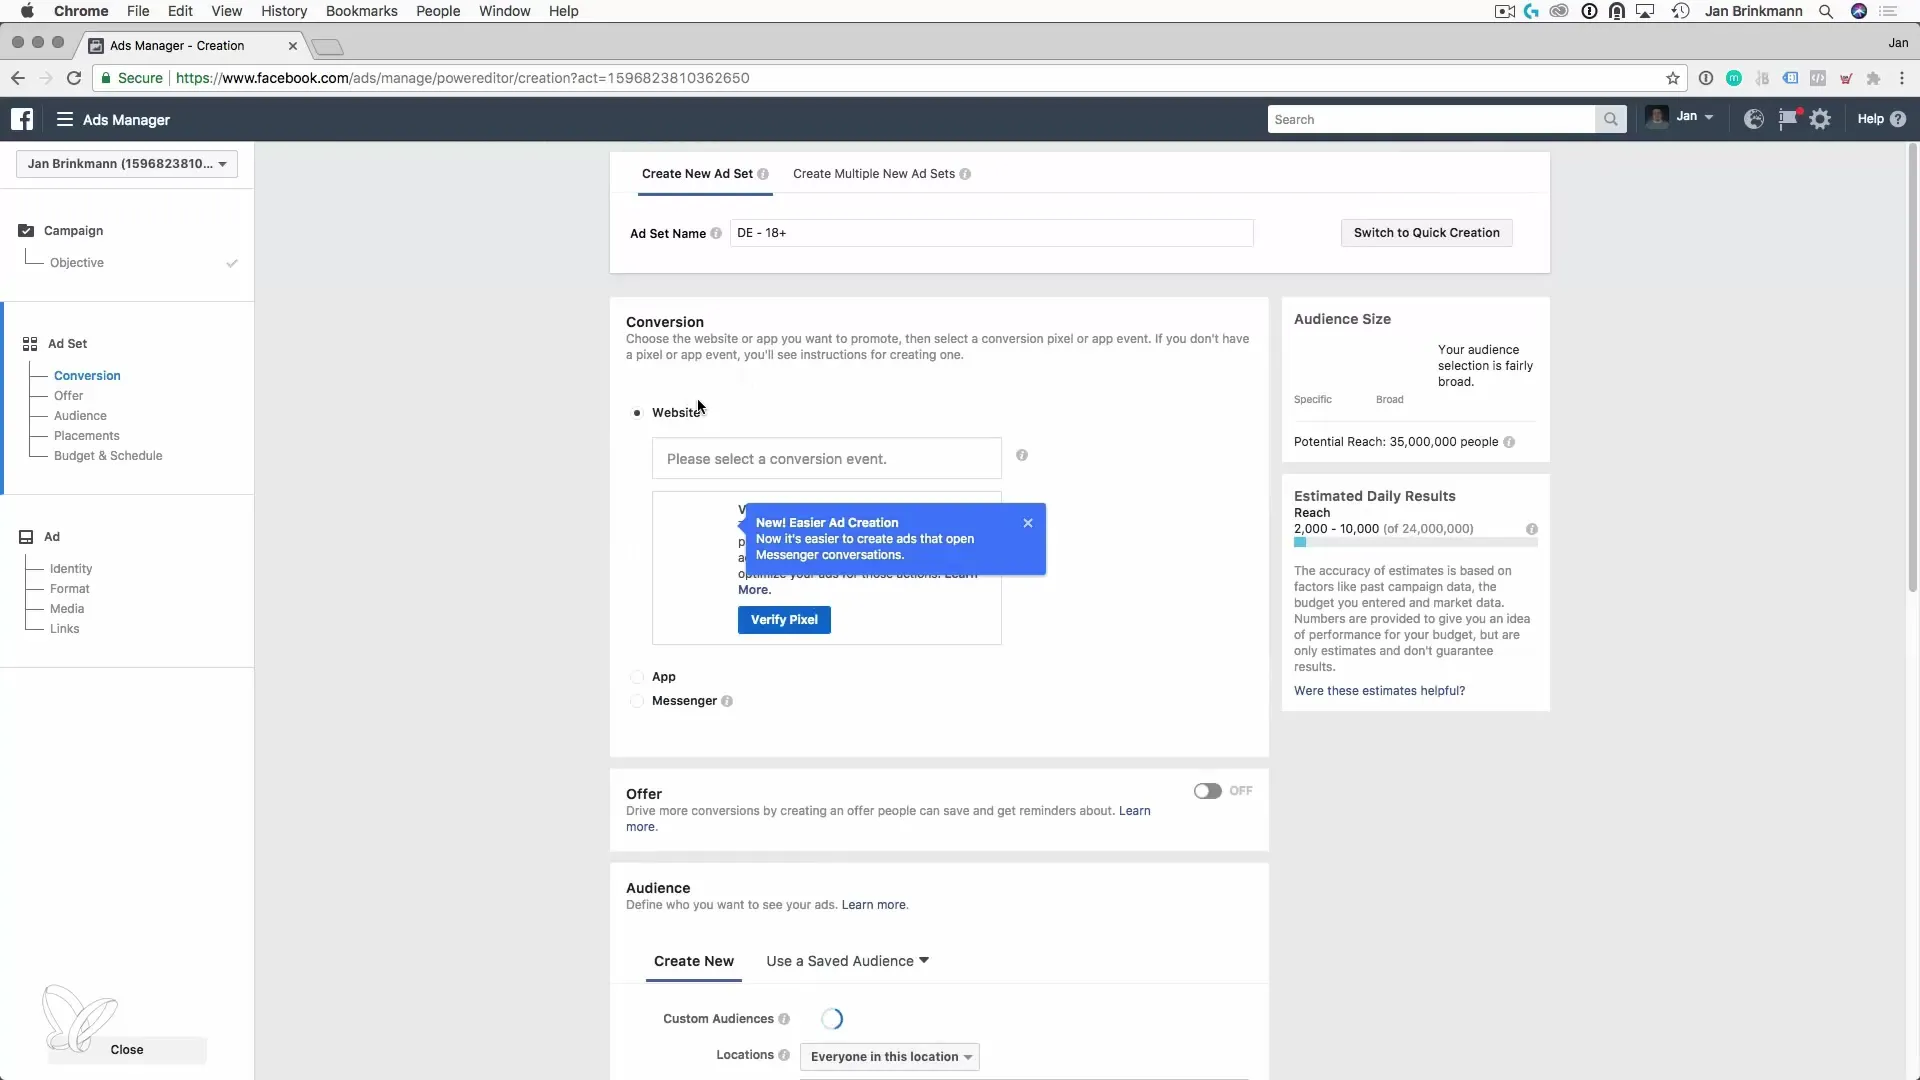
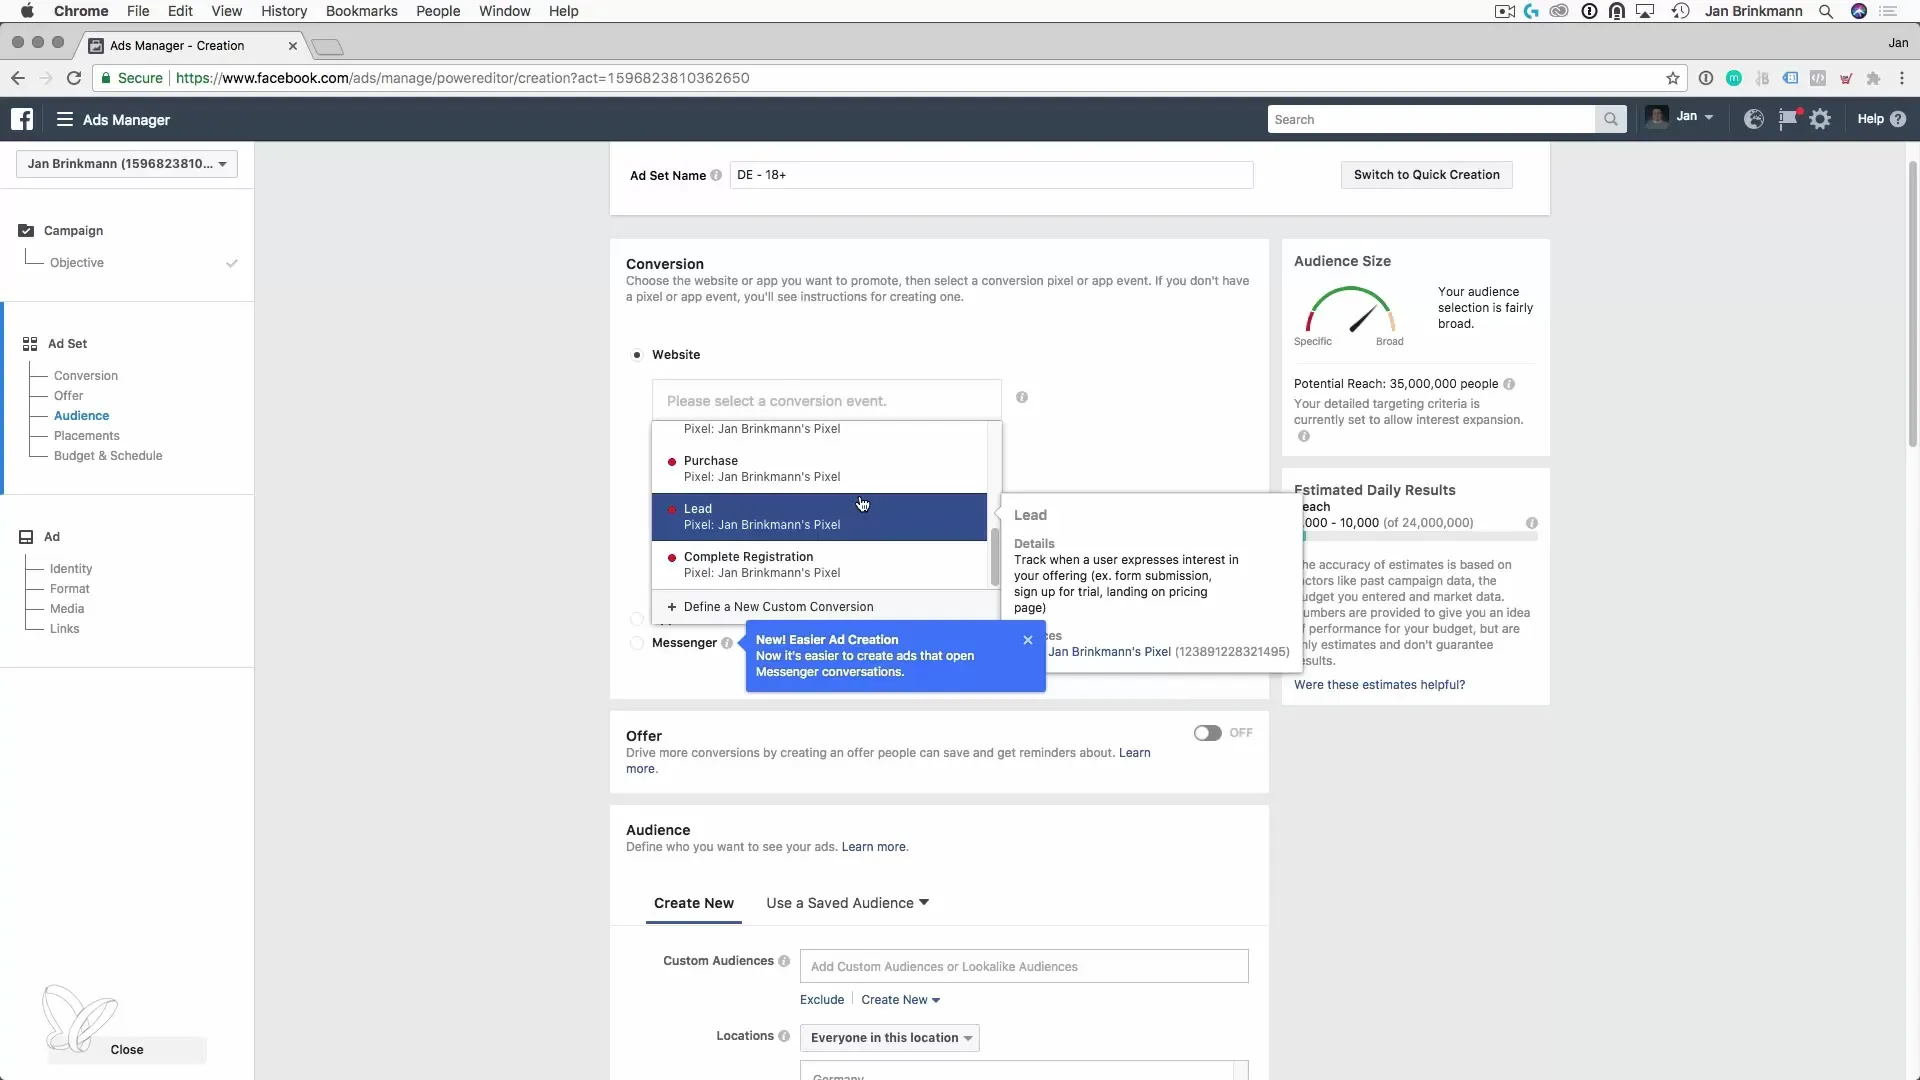
Click on the "Continue" button. Here you have the option to choose from various conversion events that are relevant to your campaign. You will see a drop-down menu where you can define the type of conversion you want to measure.
3. Understand Standard Events and Specific Events
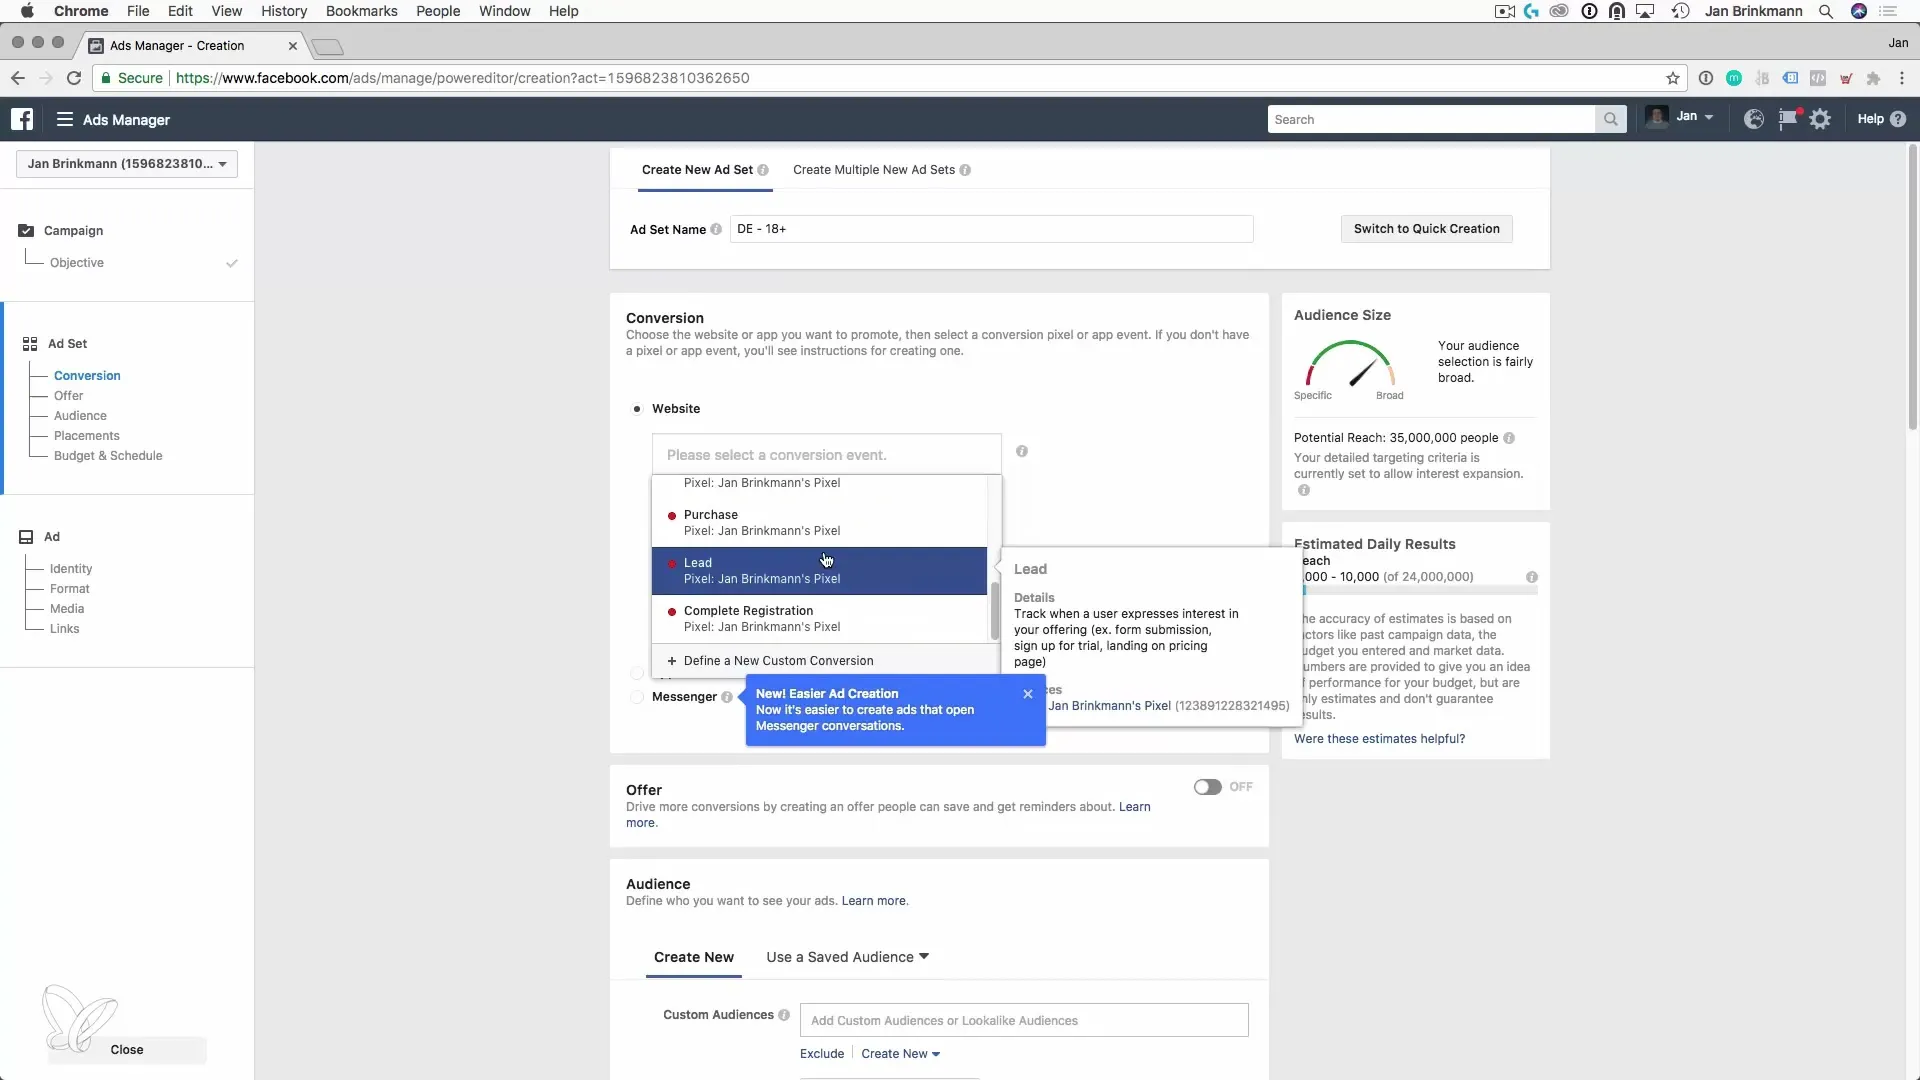
In the next step, you will see a list of standard events such as "Page View" or "Add to Cart". You can review the available events and consider which one best fits your goals. For example, if your main goal is for your user to download an eBook, this information will require a custom conversion to be created.
4. Define the Target Audience
Now you can determine which users you want to count as conversions. For example, if you use an eBook as a lead magnet and want to categorize all users who downloaded it into a specific group, you should save this event as a custom conversion.
5. Create Custom Conversion
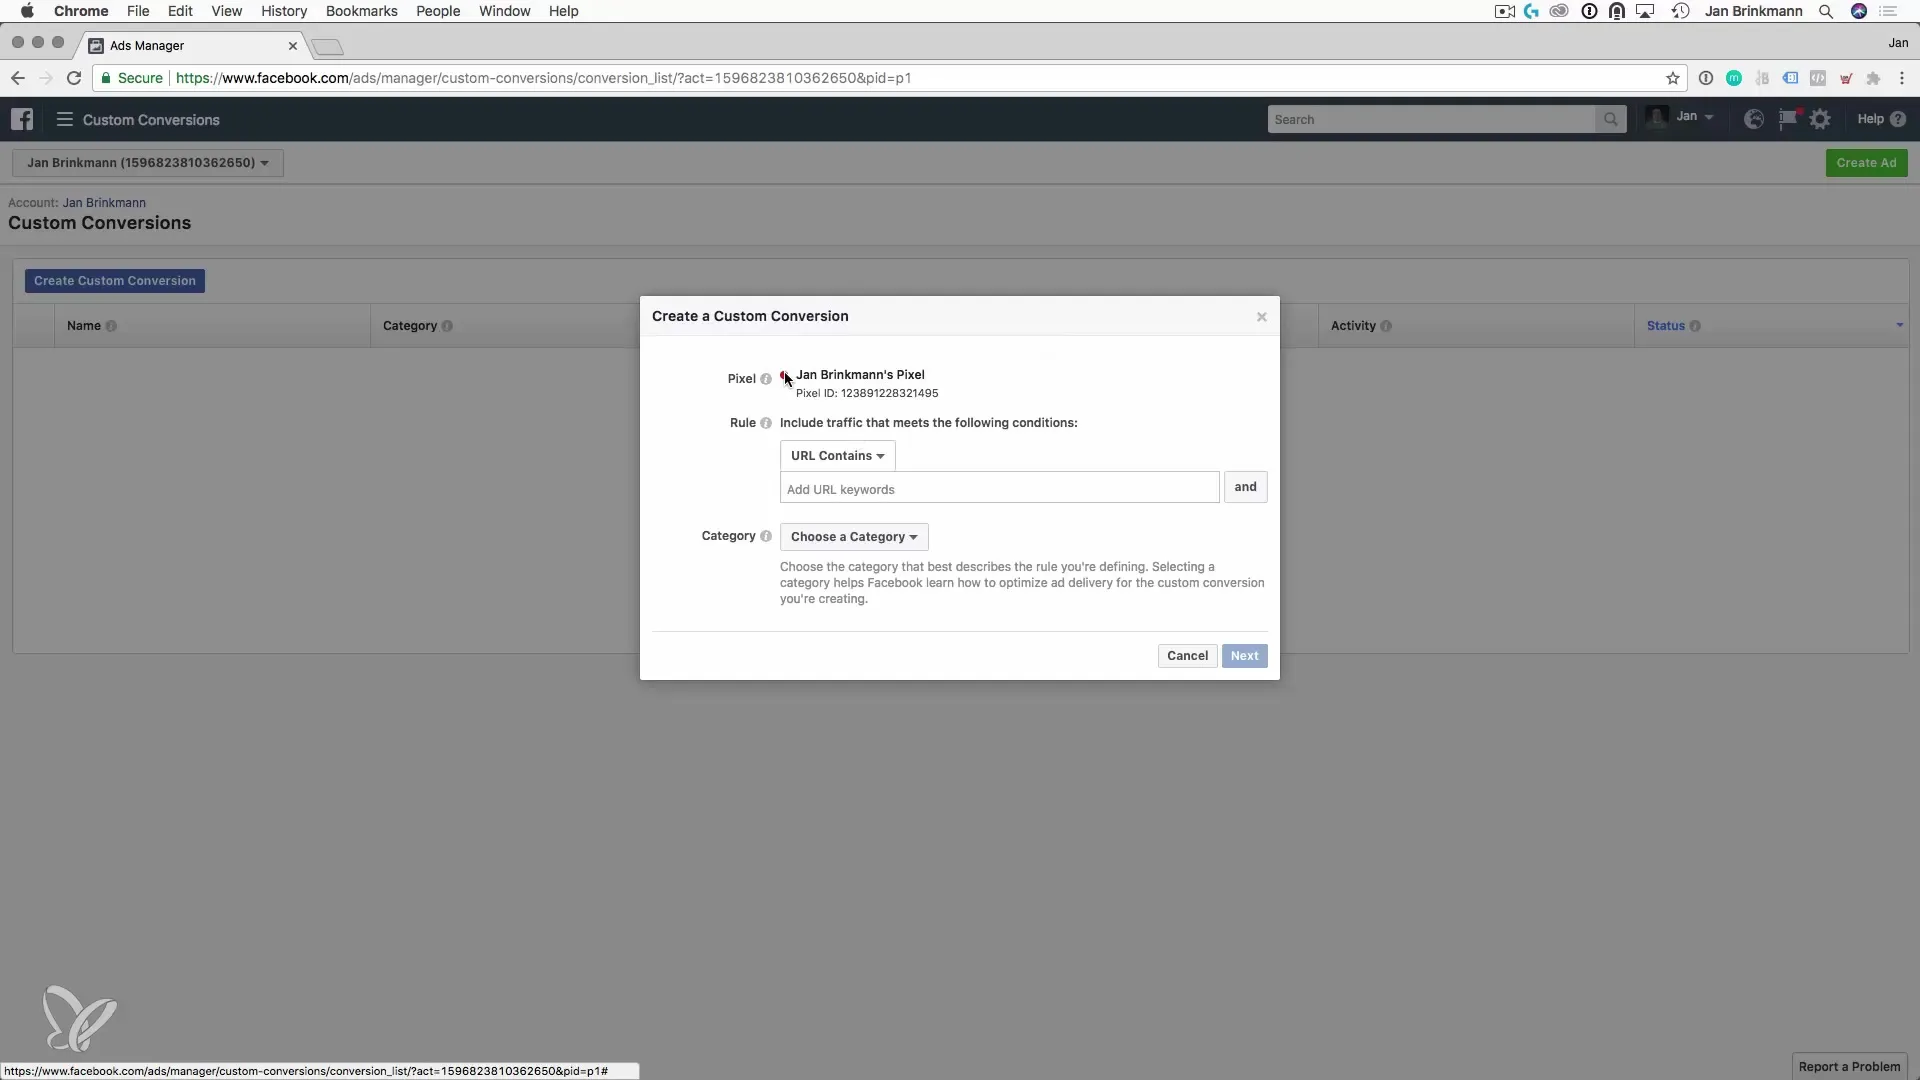
Go to the tools and select "Custom Conversions". Here you can start creating your conversion. You will be prompted to define a URL that must be reached for this conversion to count. Typically, this is the thank-you page that appears after a download.
6. Define URL for the Custom Conversion
Enter the URL of the page that users arrive at after downloading the eBook. This URL indicates that the conversion was successful. When users visit this page, the conversion will be counted.
7. Add Category and Details
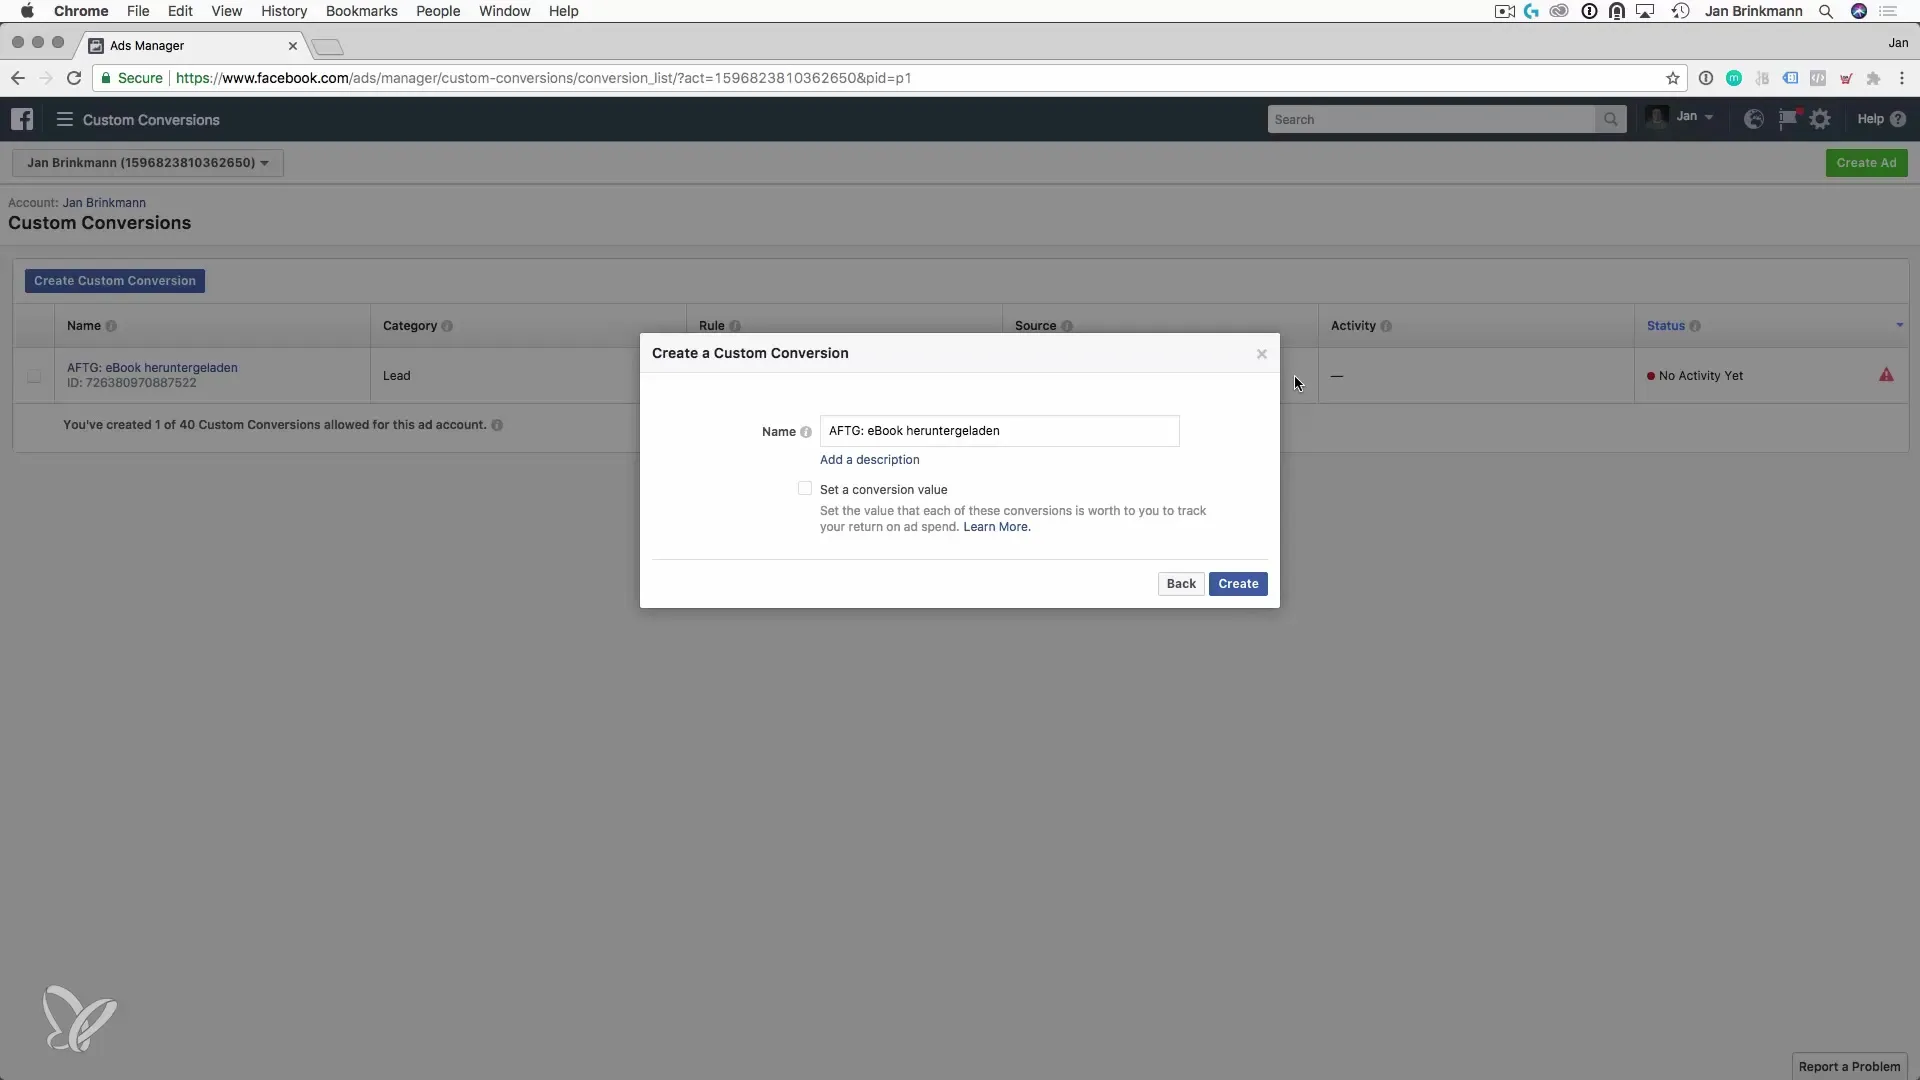
Select a category for your conversion, such as “Lead”. Now name your custom conversion precisely, for example "E-Book Downloaded". It is always helpful to add a prefix until you have complete clarity about your setup.
8. Set Conversion Value (optional)
If you want to express the value of this conversion in monetary terms, you can enter the corresponding amount. For an eBook offered at a price of €27, you could enter this value here.
9. Save Conversion
After entering the details, it is time to save the custom conversion. You need to ensure that the pages with the corresponding URL are now actually being visited, so that the conversion can also be counted.
10. Use Custom Conversion in Ads
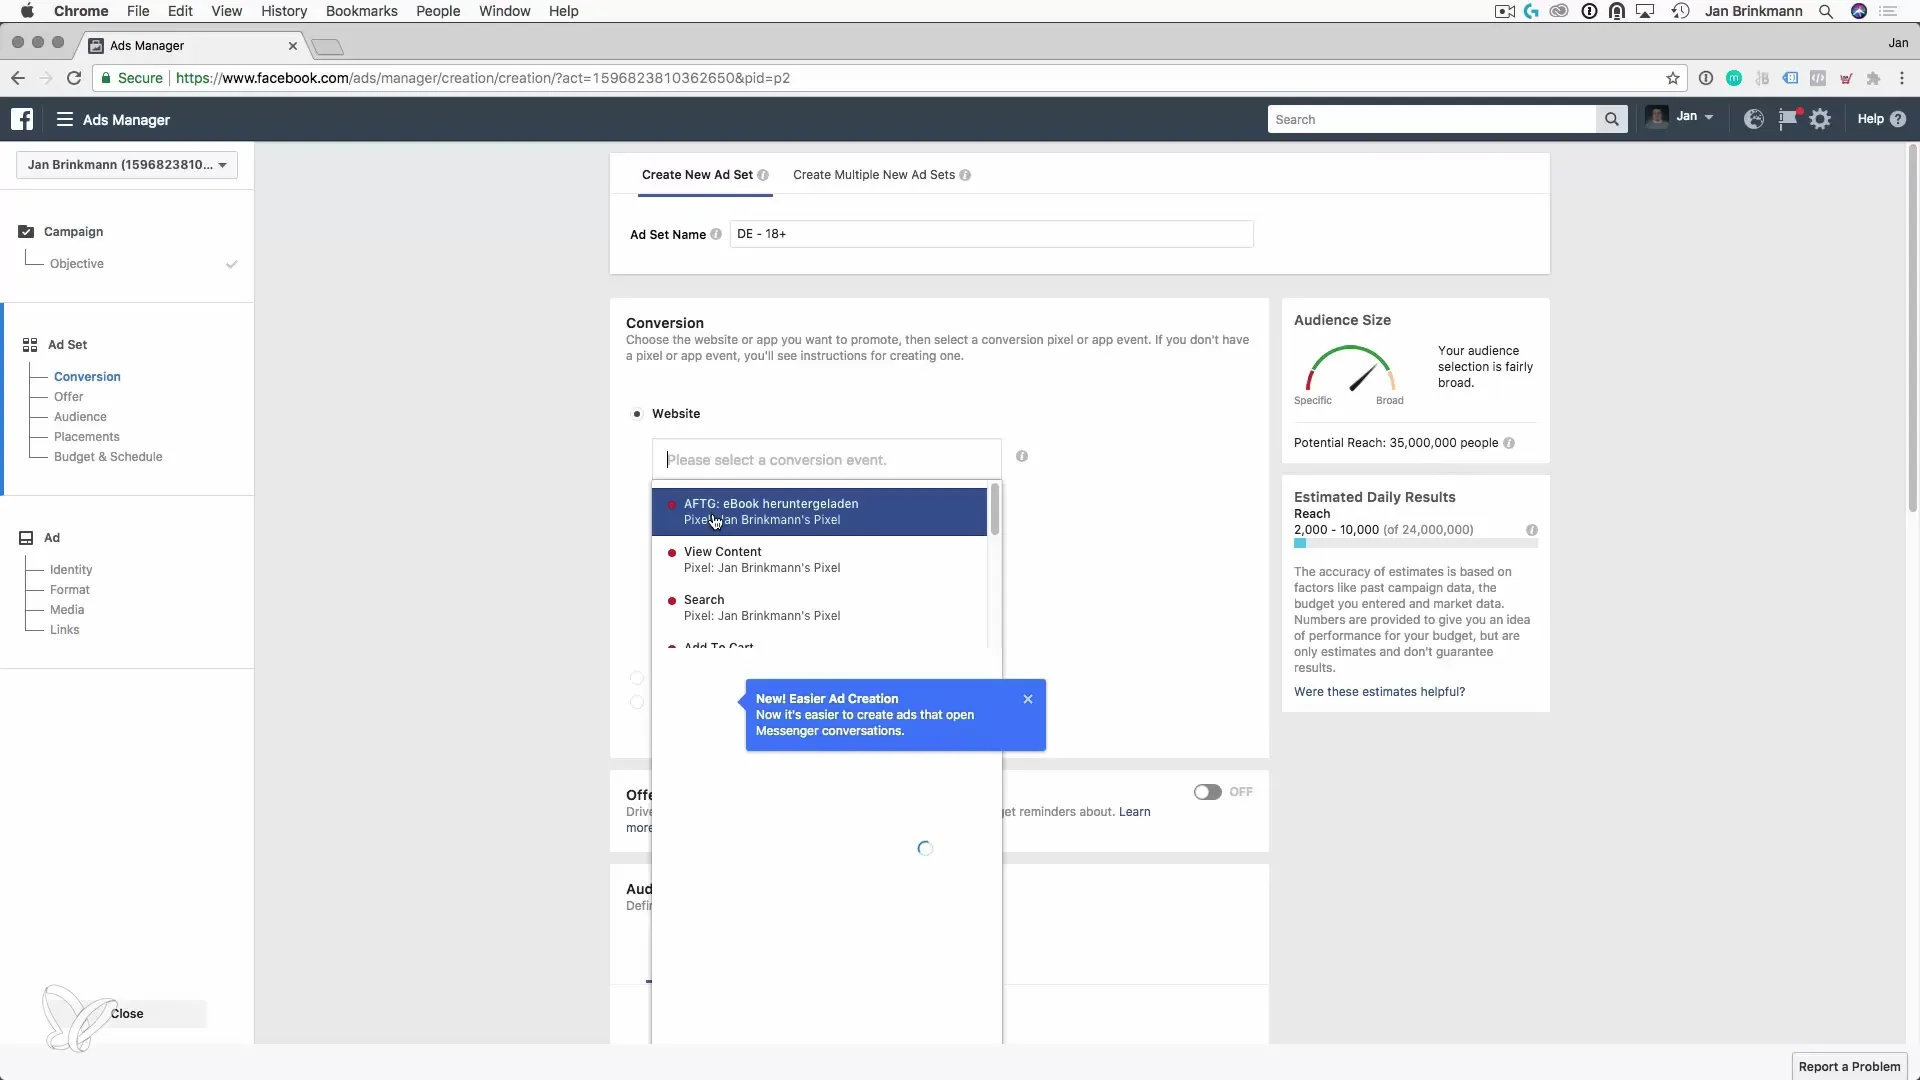
If you want to create a new ad now, you can select the event you just created as the goal of your ad. With this selection, every successful lead to the defined URLs will be counted as a conversion when users subsequently visit those pages.
Summary – Optimizing Customer Acquisition: Creating Custom Conversions in Facebook
Creating custom conversions in Facebook is an essential step towards optimizing your customer acquisition. By tracking specific user actions, you can better measure the success of your campaigns and strategically adjust them. Think carefully about which events are relevant to your business model and implement the necessary steps to create your conversions.
