The setup of an effective customer acquisition system through platforms like Facebook and Google Ads can be decisively optimized by precise target audience definitions. In this tutorial, we focus on creating “Custom Audiences” to specifically target interested parties and maximize conversions. You will learn how to generate specific target groups based on your website traffic and use them strategically for your marketing campaigns. Let’s get straight to the practical steps.
Main insights
- “Custom Audiences” allow you to target users who have already shown interest in your offering.
- By segmenting based on visitor behavior, you can target your ads more effectively.
- Properly naming the “Audiences” makes it easier for you to manage and retarget them later.
Step-by-Step Guide to Creating Custom Audiences
Step 1: Creating a Custom Audience
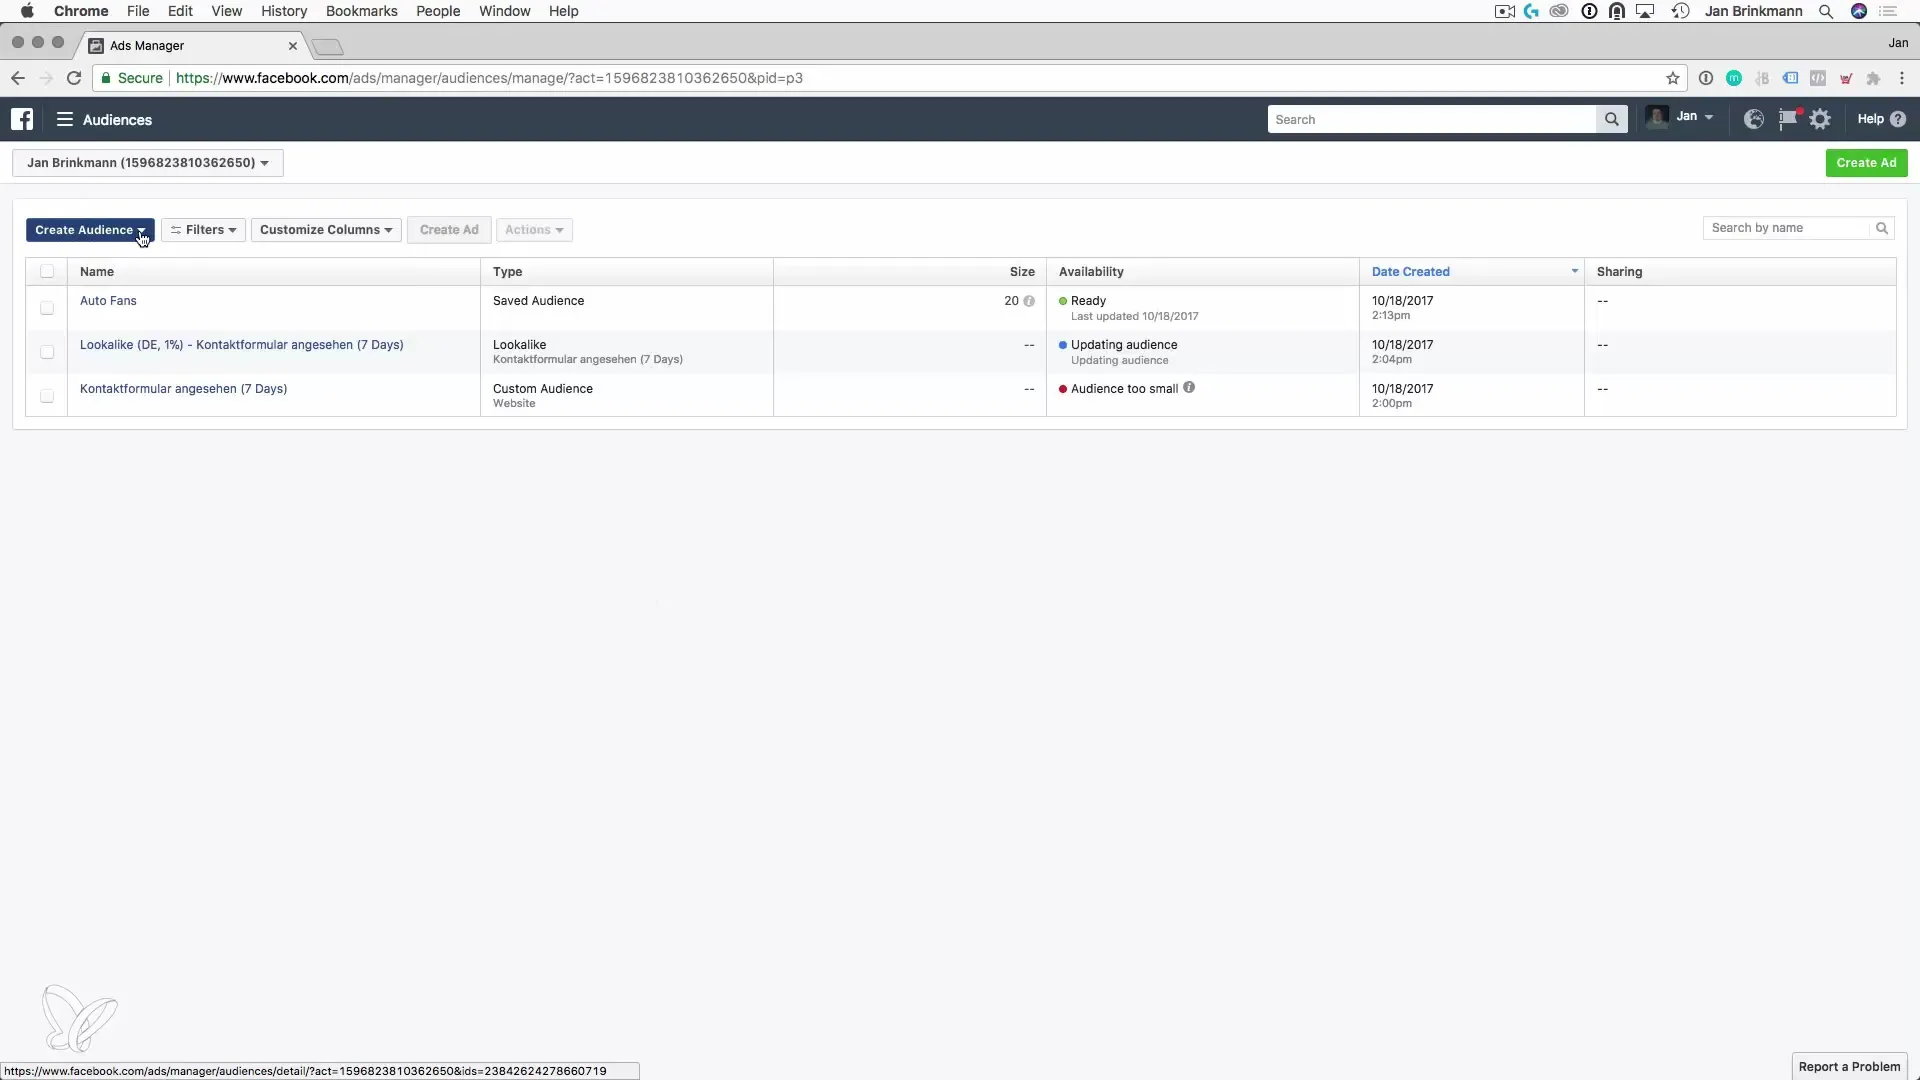
To create a “Custom Audience,” first navigate to the “Create Audience” menu item. The goal is to target users who are already interested. For example, we will assume that you have already created a “Saved Audience” that you will use as a basis.

Step 2: Selecting the Type
In the next step, select “Website Traffic.” Here, we focus on targeting users who have already visited specific pages on your website. This could include blog posts, for example.
Step 3: Determining the Traffic
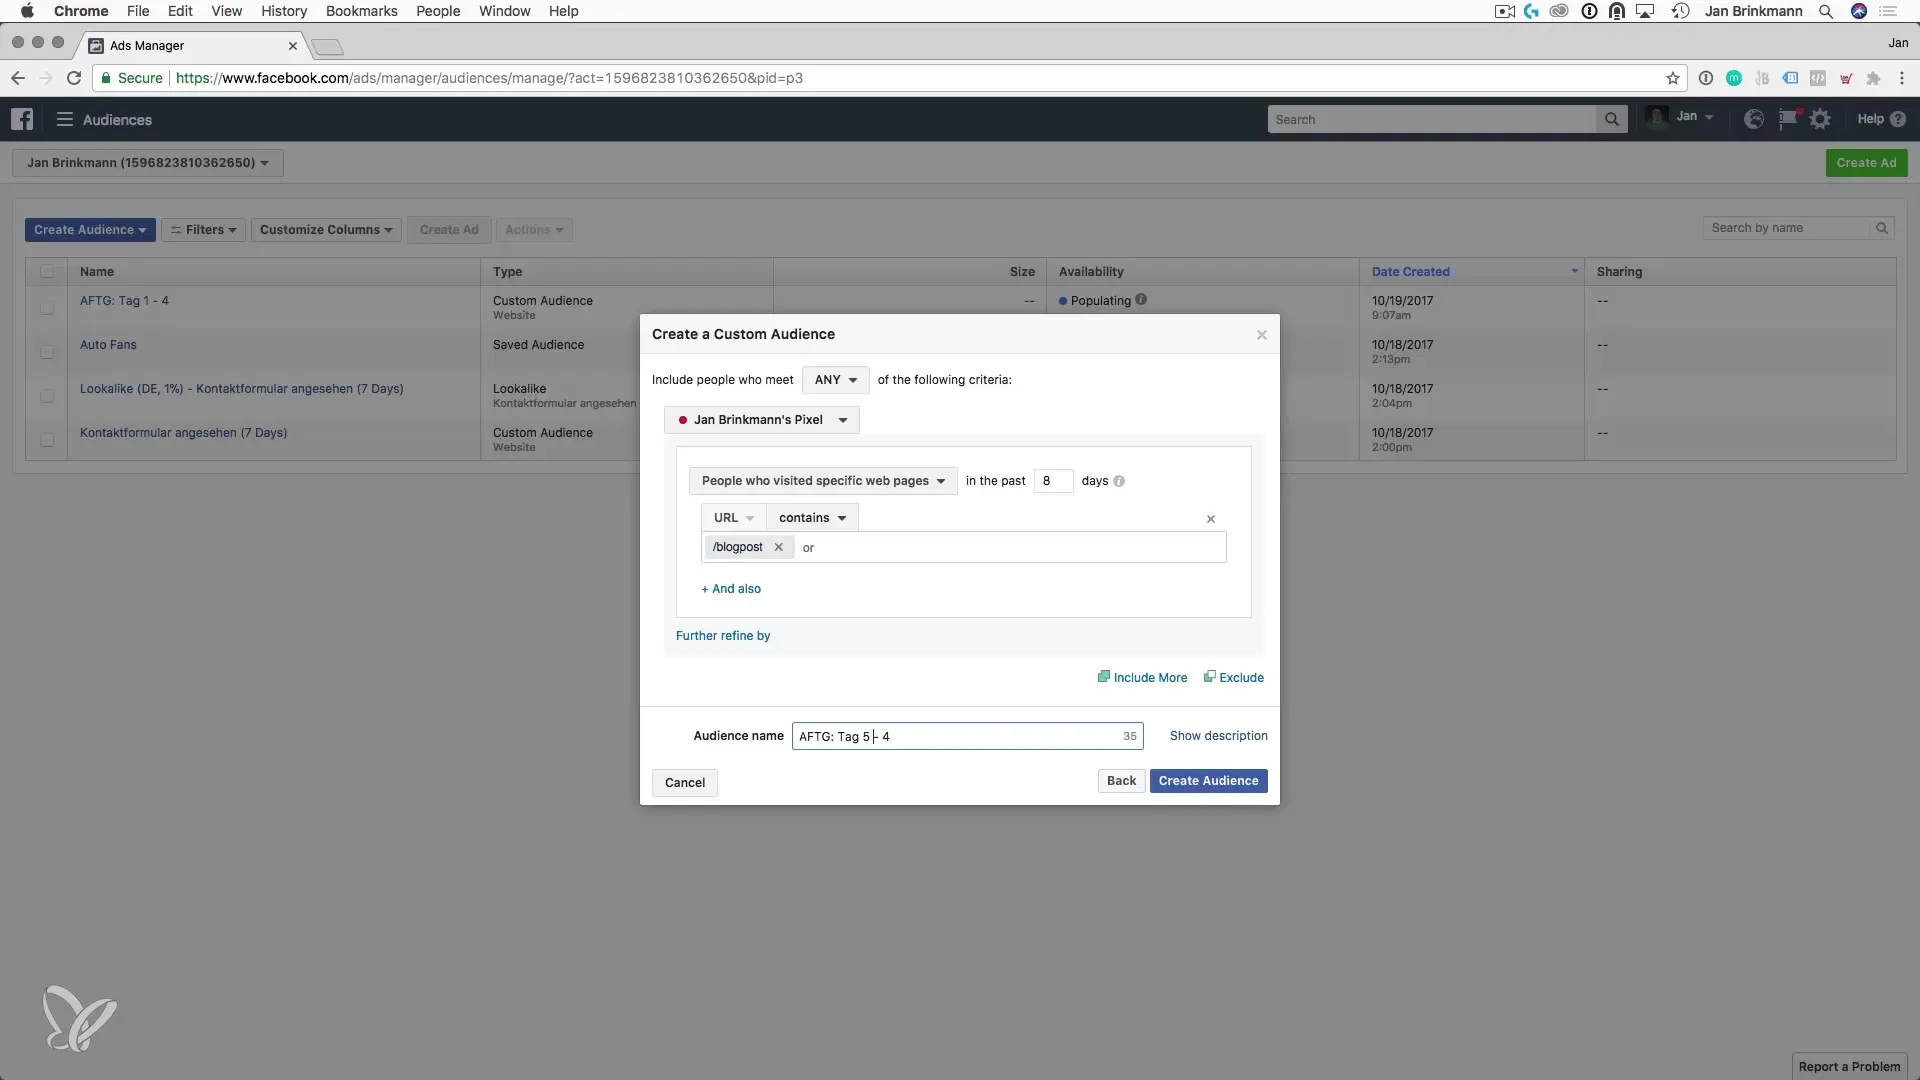
Now you have the option to choose whether you want to target “All website visitors” or “People who visited specific web pages.” In our case, we will target the visitors of specific pages. You specify the URL parameters here to filter the relevant pages, such as “contains Blog Post.”
Step 4: Setting Duration
Here you can set the time span for which the visitors to your site are considered. Start with a duration of 4 days, ensuring that everything is set up correctly. The prefix for your audience should provide clear information about the content and the target group.
Step 5: Creating the First Audience
After defining the parameters, click “Create” to create your first audience. Name it appropriately, for example, “Clients Day 1 to 4.” This ensures that you keep track even with a variety of target groups.
Step 6: Creating Additional Audiences
Repeat the process for other relevant time periods, such as “Day 5 to 8” or “Day 9 to 12.” Each audience should be clearly labeled so that you can easily use them later in the retargeting process.

Step 7: Segmentation and Exclusions
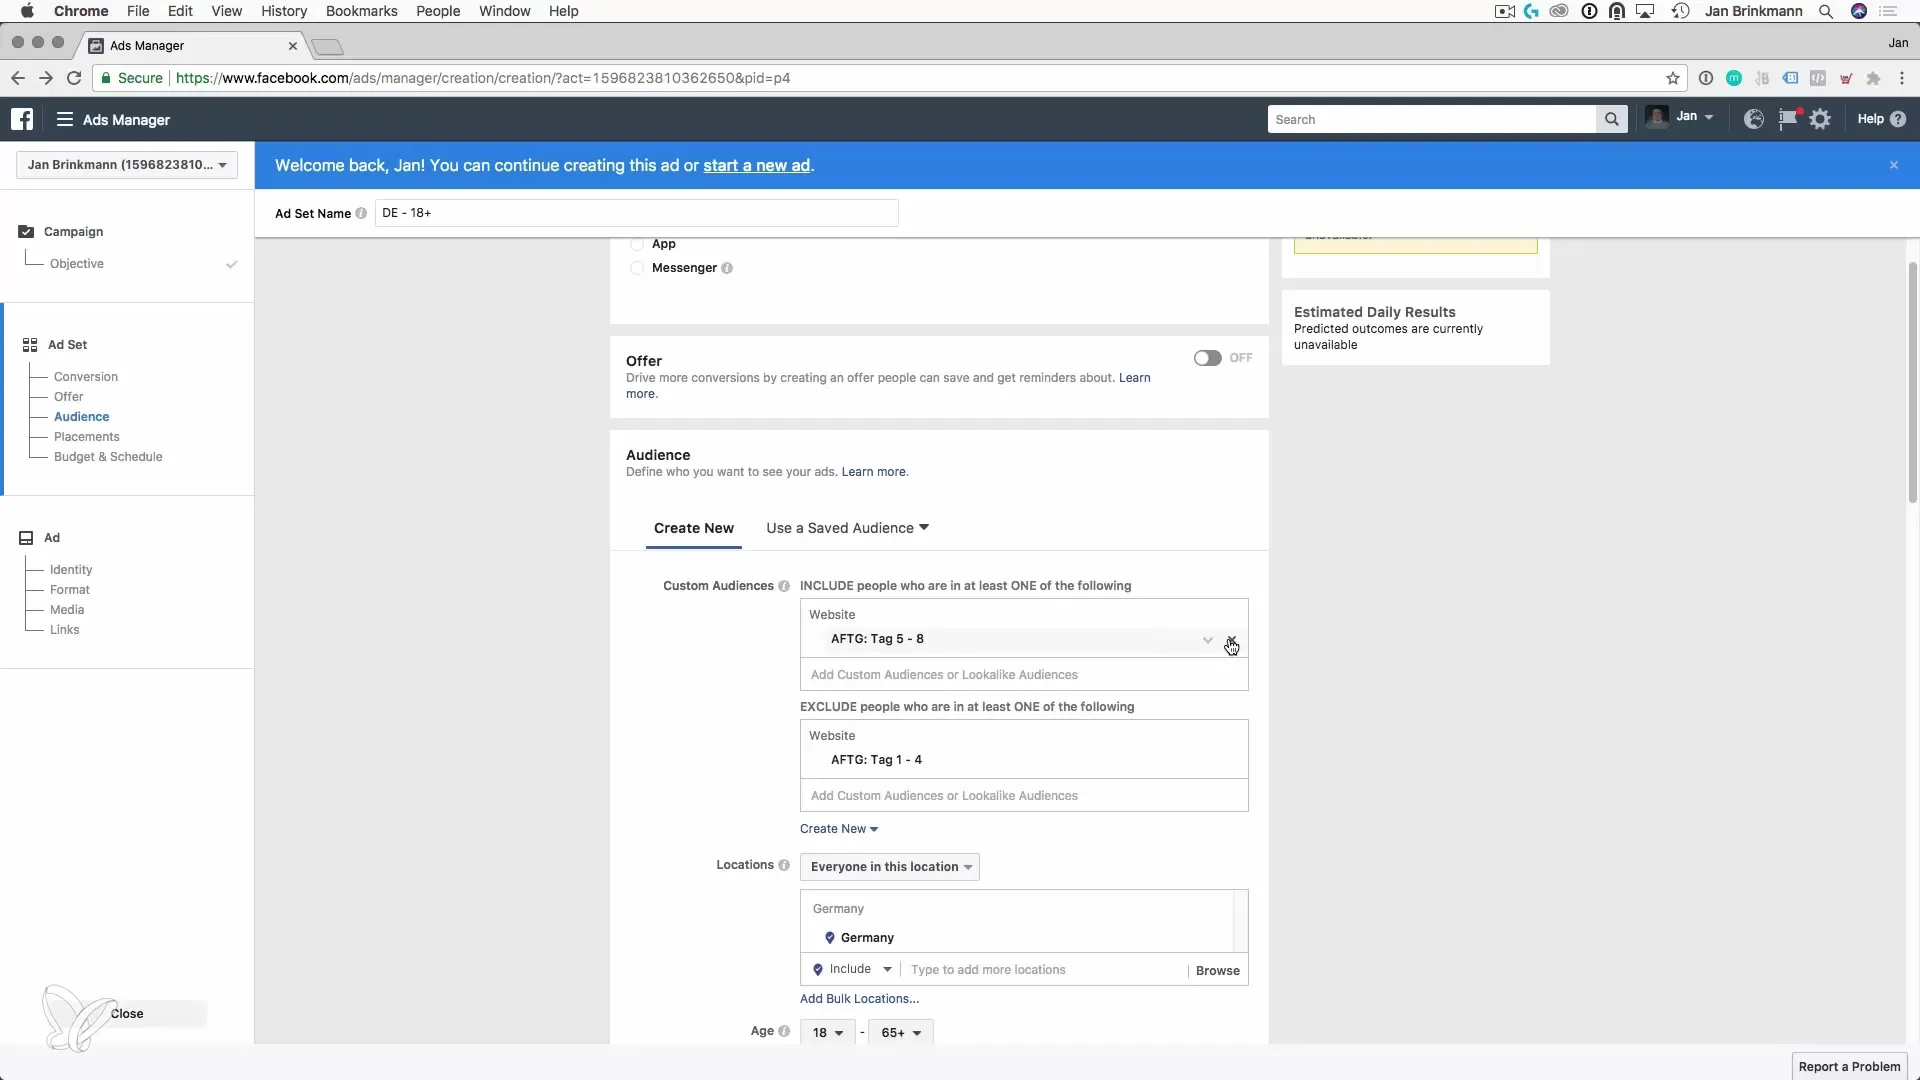
When you create a new audience that covers users from an entire period, ensure that you exclude the previous periods. This means that for the audience “Day 5 to 8,” you exclude all users who were active in the first 4 days. The same applies to “Day 9 to 12.”

Step 8: Using the Custom Audiences
Once all audiences are created and appropriately named, you can use them specifically for advertising. Utilize the audience for retargeting campaigns to target those users who have already shown interest without alarming those who are new.
Step 9: Checking Tracking Options
Before you start advertising, I will explain how to ensure that your Facebook Pixel is integrated into Google Tag Manager. This gives you access to data and allows you to check and optimize the performance of your target groups.
Summary – Customer Acquisition via Facebook and Google AdWords: Creating Custom Audiences
By creating “Custom Audiences,” you can significantly refine your marketing strategies and specifically target interested parties. With the correct setup of Custom Audiences and exclusion features, you ensure that your advertising reaches the right target audience and increases the conversion rate. You now have all the necessary steps at hand to implement Custom Audiences according to your marketing goals.


