Did you take a photo of your artwork and now want to present it optimally? In this guide, you will learn how to get the best out of your image with a few simple steps. We will focus on tone correction and stamp-based retouching, so your artworks appear in the best light.
Key Insights
- The tone correction is crucial for adjusting contrasts and brightness.
- The cropping tool helps to quickly remove unwanted areas.
- With the clone stamp, you can optimize backgrounds and structures.
Step-by-Step Guide
1. Open Photo and Remove Unwanted Areas
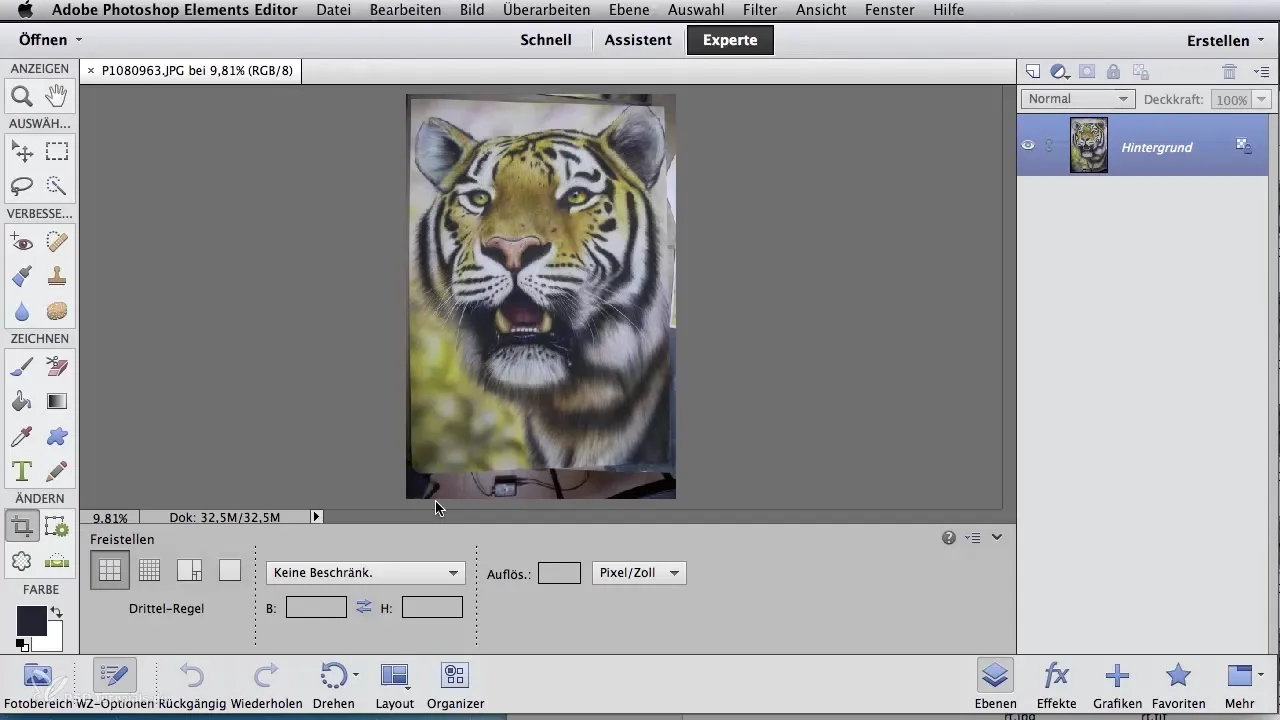
First, open the photo of your artwork. At first glance, the image may appear a bit too dark or cluttered. No need to worry! Start by removing unnecessary areas to focus your image. Use the cropping tool from the toolbar for this. Select only the desired area of the image with the tool. Squares will appear at the corners, allowing you to adjust your selection. Once everything fits, confirm your selection with the Enter key or the small green checkmark that appears in Photoshop Elements.
2. Make Tone Corrections
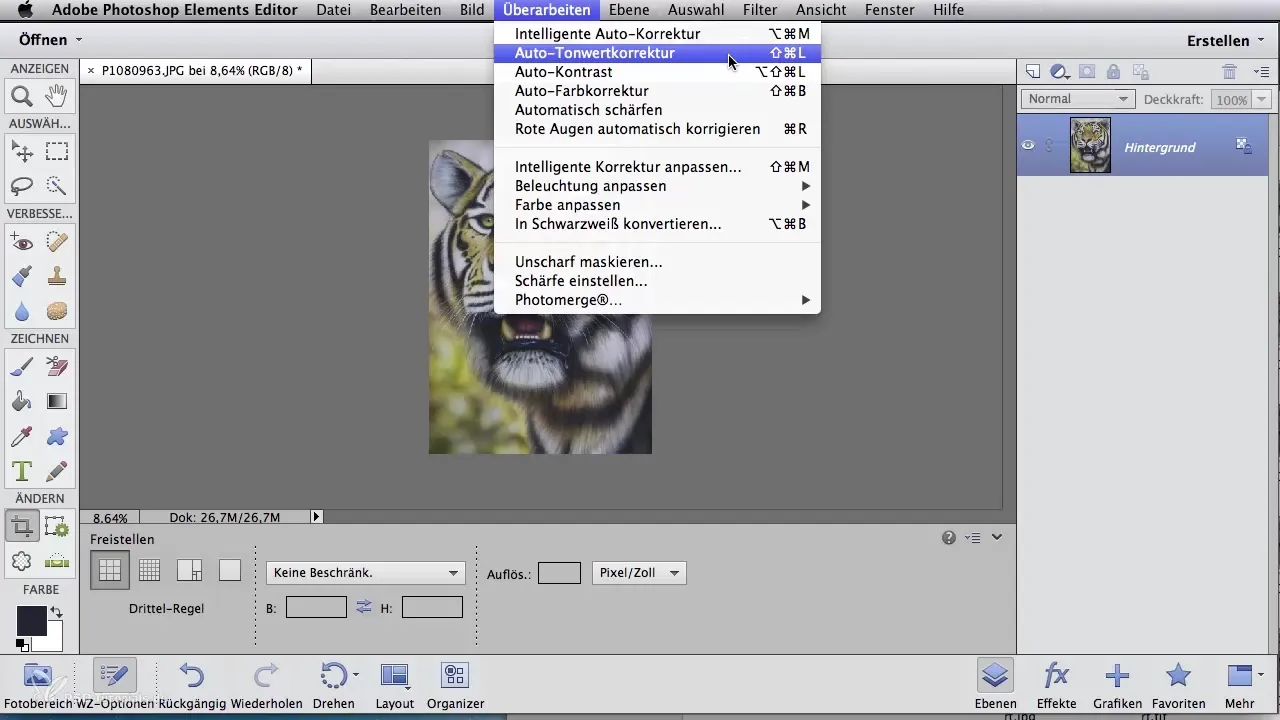
To effectively correct the tones, you have various options at your disposal. One of the quickest ways is the automatic tone correction. You can access this through the "Enhance" menu and then "Auto Tone." Photoshop will automatically adjust and correct the light and dark areas of your image, which often brings a remarkable improvement already.
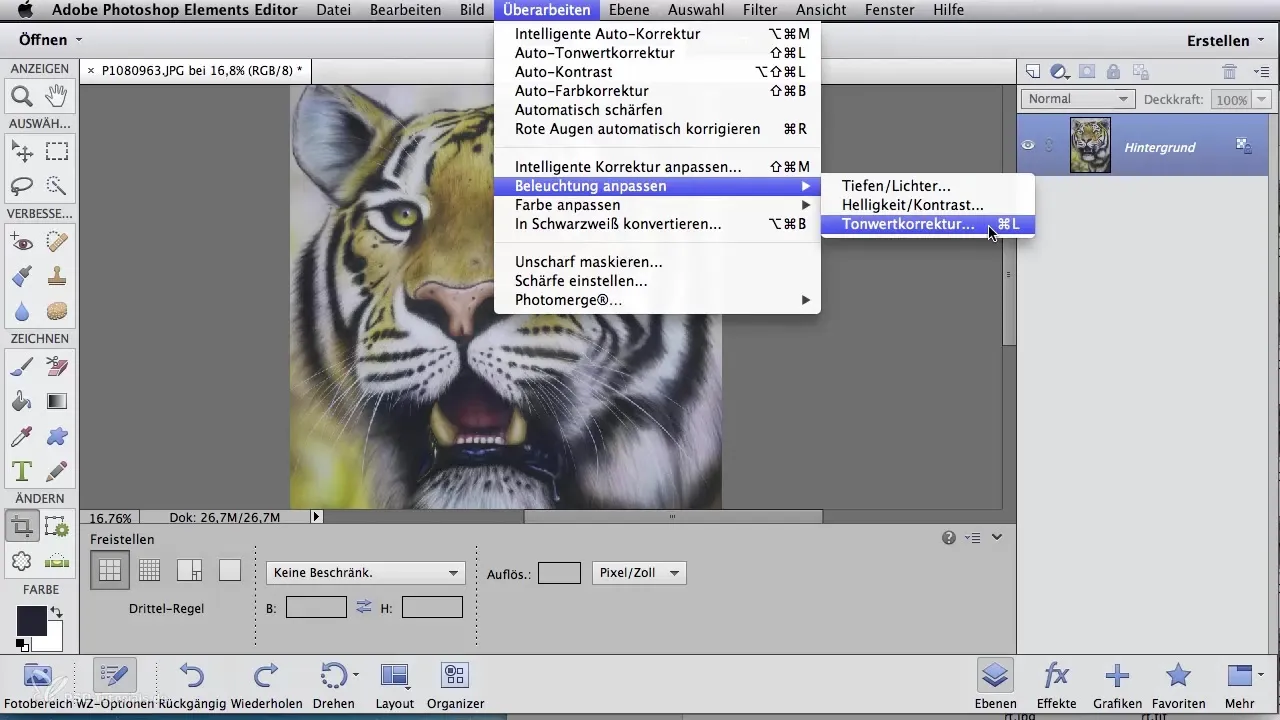
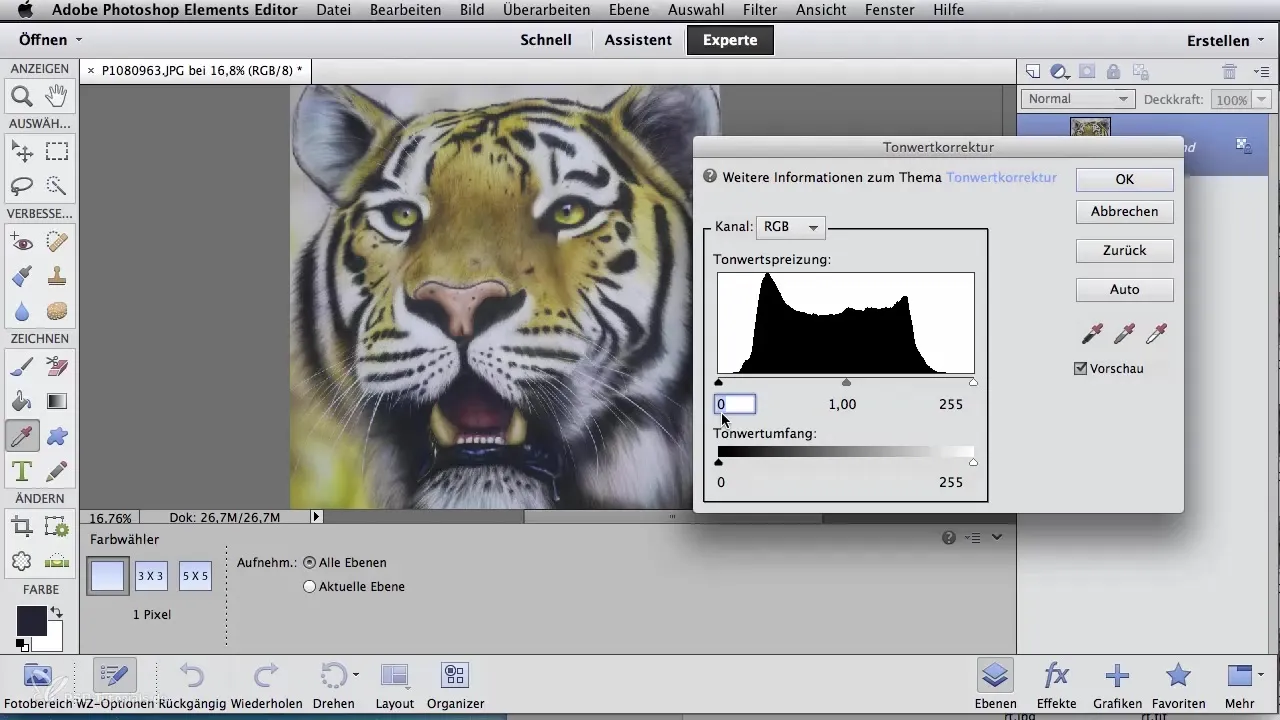
If you want more control over the adjustments, you can make tone corrections manually. You can access this with the keyboard shortcut "Ctrl + L" (on Mac, "Cmd + L"). You will see a curve that you can adjust according to the black triangles. Move the left slider to correct the black point and the right slider to set the white point. Small changes often achieve big effects.
3. Restore Original Values
If you are unhappy with the changes during your adjustments, there is no need to worry. In Photoshop Elements, you can use the undo button or (Alt+Click) in Photoshop CS6 to reset all changes and start over. This gives you the chance to find the best tones for your original work.
4. Use Adjustment Layers
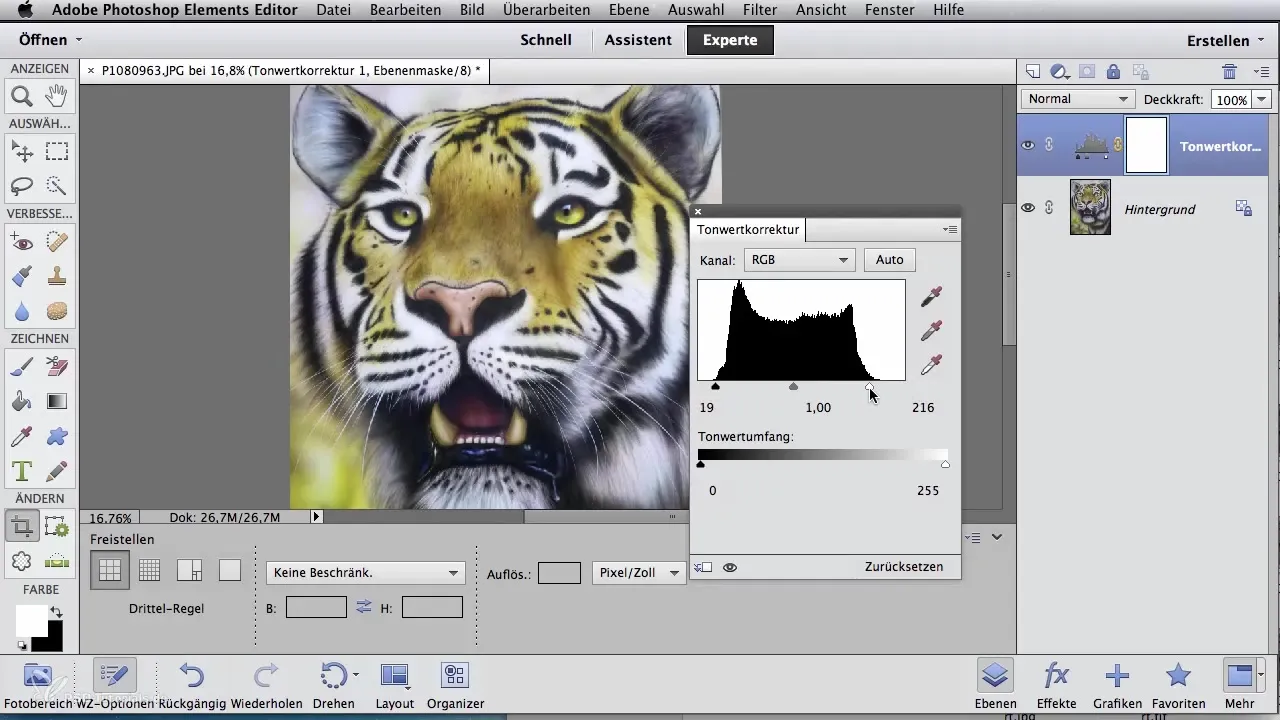
If you want to maintain control over your tones, it is advisable to use adjustment layers in the layers panel of Photoshop. Click on the circle icon and select tone correction. This will open a window where you can make your adjustments. These settings will be saved on the layer, allowing you to toggle them on or off at any time. A double click on the layer will reopen the tone dialog to make changes.
5. Determine Image Crop and Communicate with Other Functions
Now take the cropping tool again to choose the right crop for your image. Confirm the selection frame with the Enter key to apply the adjustments. Then you can perform the tone correction and adjust the values as you wish.

6. Optimize Background with the Clone Stamp
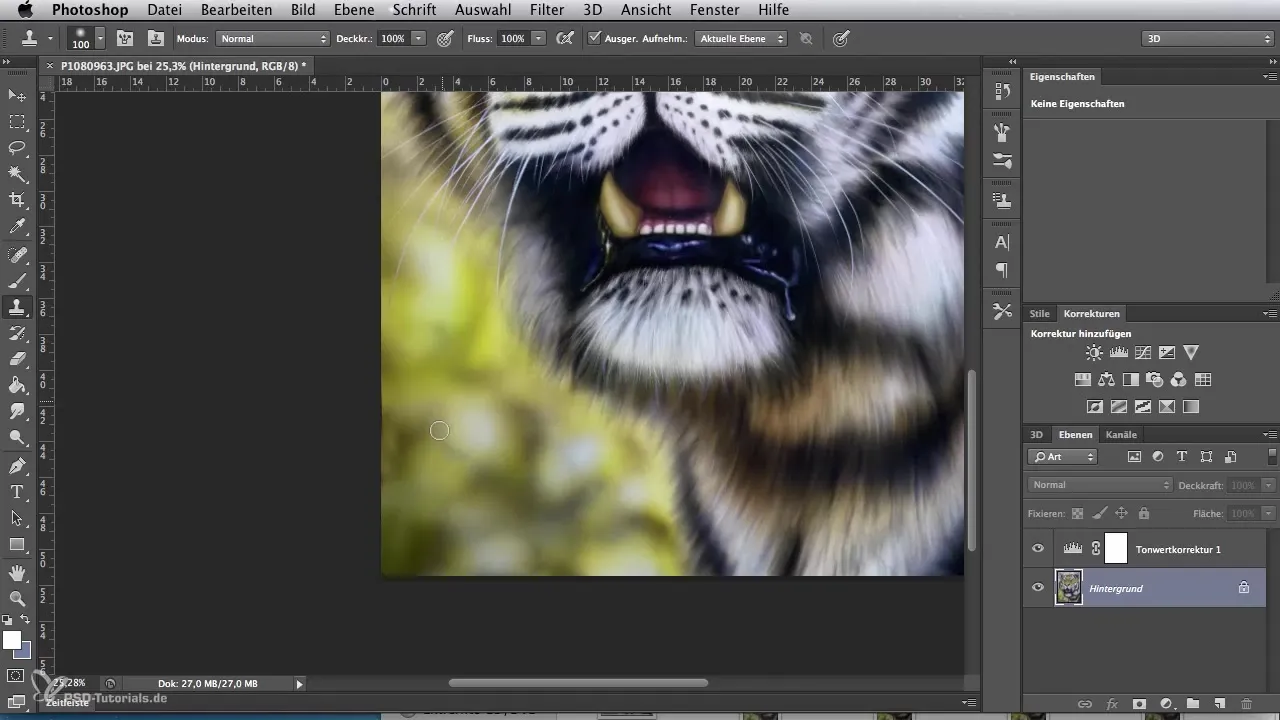
To improve any flawed areas or a busy background, use the clone stamp. This can be found in both Photoshop CS6 and Photoshop Elements. To do this, choose a suitable source by holding down the Alt key and marking the desired area. Use the brush to transfer the color tone from the source to the area that still does not look optimal. You can apply this technique several times to create a harmonious overall background.
Summary - Digital Image Editing for Airbrush Artists: Tone Correction and the Stamp Tool
In this guide, you have learned how to significantly enhance the quality of your photos through targeted tone corrections and the use of the clone stamp. With these techniques, you can ensure that your artworks are presented in the best possible way.
Frequently Asked Questions
How can I open an image in Photoshop?You can open an image by going to "File" in the menu and then "Open."
How can I remove unwanted areas from my image?Use the cropping tool to select the desired area of the image and confirm your selection.
What is automated tone correction?It is a feature that automatically adjusts your image brightness and darkness to achieve better contrasts.
How can I undo my adjustments in Photoshop?Use the undo button (Ctrl + Z) or the "Reset" option in the settings.
Can I make a temporary adjustment in Photoshop?Yes, by using adjustment layers, you can make adjustments without altering the original image.
