

An object can only be painted in BodyPaint 3D once a material with a texture has been assigned to it. You can create this material afterwards, but the Paint Wizard does the work directly while you paint. It guides you step by step through texture creation, creates the material and assigns it to the selected object. Using a lampshade as an example, I will show you how to choose the settings sensibly, create the first paint layer and then fine-tune the material for the look.
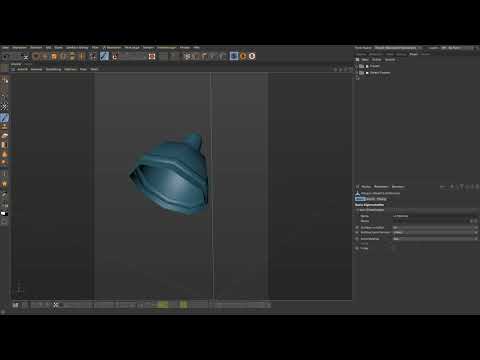
The video is only loaded from YouTube when you play it – data (including your IP address) is then transmitted to YouTube/Google. More in the privacy policy
Key Takeaways
An object needs a material with a texture before you can paint it. The Paint Wizard creates both in one go. Use only the desired object for the geometry, do not recalculate the UVs, choose a suitable texture size and create a separate layer for interior areas. Finally, you adjust the reflectivity in the Material Editor.
Step 1: Switch from the UV Editor to BodyPaint 3D
After you have unwrapped the object in the UV Editor, you leave this area and switch to BodyPaint 3D. You will find the area in the menu under the name BodyPaint 3D. This is where the paint mode is located, which lets you work directly on the 3D model.

Step 2: Understand why the map disappears
If you now try to paint, the map disappears immediately, and the brush has no effect. This is not an error. The object simply lacks a material with a texture that could be painted on. A brush always needs a target texture, similar to a canvas. This is exactly where the Paint Wizard comes in.
Step 3: Open the Paint Wizard
You will find the Paint Wizard directly in the paint area. Click on it and the assistant opens. In German it is called Wizard-Assistent and accompanies you through all the necessary windows.

Step 4: Select the geometry
In the first step, you decide which surface you want to paint on. Here, select the geometry, that is, the object itself, and not the texture. In the lamp example, this is the lampshade. You should proceed carefully with the selection: by default, materials are created for all objects in the scene. Therefore, first deselect everything and then select only the object you really want to paint. In this case, that is the light format.

Make sure that parent elements such as the scene or the Bull object can also be selected. You can switch them on and off later. If anything is unclear, it is worth taking a look at the Object Manager.
Step 5: Create the material and leave the UVs untouched
Click Next to get to the next dialog. The wizard now asks you whether it may recalculate the UVs. Do not tick the box here. You have already created the UVs cleanly in the UV Editor, and recalculating would discard your work. Go straight to Next.

Step 6: Name the texture and set the background color
Now you create the texture. By default, it receives a neutral gray. You can change the color at any time. However, you can also set it right away as the base color by selecting the desired color in the color picker. For the lampshade, a slightly muted pigeon blue is suitable, reminiscent of vintage lamps from the flea market. But you can just as well choose a cool or warm gray. Confirm the selection with OK.

Step 7: Leave the scaling option enabled
In the next dialog, you will find the option to scale existing textures. Be sure to leave this box ticked. It is important later in case you import a texture from the internet that has a different size. The wizard then automatically adapts it to the size you have chosen.
Step 8: Choose the right texture size
You set the texture size in this window. As a rule of thumb: for a piece of work that will later be scaled in a render to a resolution of around 5000 to 7000 pixels on the long side, 8K textures make sense. For this example, a 2K texture with 2048 x 2048 pixels is completely sufficient. The number 2048 is a power of two, which many graphics programs and engines prefer. You don't necessarily have to stick to it, but many textures sold commercially have exactly this size.
Then click Finish.
Step 9: Interpreting the message correctly
After completion, a display may appear pointing to a missing material or a missing texture. Don't let it bother you. The message is just information that can appear during rendering if something is missing. Click Close.

Step 10: Checking the assignment in the material area
In the material area, open the view of the colors and materials. There you can see that the texture has already been assigned to the material. The existing gray material belongs to the gooseneck of the lamp. You can recognize the new material by the white symbol next to it. This symbol shows you that you can work on it directly.
In the Object Manager you can also see that the correct material has been assigned to the light format.
Step 11: Choosing the foreground color
You need a color to paint. In the color area you see the foreground color, which is white by default, and the background color, which is black. With the small arrow between the two fields, you swap the colors. For the interior of the lampshade, a warm white is ideal because it reflects the light pleasantly.
Step 12: Creating your own layer
If you paint directly on the background layer, you will later lose track of things when you want to make changes. Therefore, use the function for new layers to create your own layer. This works exactly as in Photoshop. Name the layer clearly, for example Inside. That way you will immediately know later which layer you need to edit.

You now paint the inside on this new layer. Incidentally, the brushes already available in BodyPaint 3D can also be supplemented with your own. These preset brushes cover everything for the beginning.
Step 13: Opening the layer in the texture
Go back to the materials and expand the layer list. There you will find your new layer, which was created with 2048 pixels like the texture.
Step 14: Setting up the brush and painting in the texture
Select the brush and set the size generously so that you make quick progress. A hardness of 100 percent is also recommended. Then you paint more purposefully because the edges stay sharp.

Painting directly on the 3D object is cumbersome because you constantly have to rotate the model to reach the inside. Therefore, switch to the texture view and paint there. You can safely paint beyond the edge of the lines, since there is no geometry at these places that would be visible. However, proceed carefully in the edge areas.

For large, uniform areas, you can also use the rectangular selection and then fill the area with the fill tool. The fill tool works exactly as in Photoshop.

Step 15: Checking the result on the 3D model
Switch back to the 3D object and reactivate the previously disabled objects so that you can see the holes in the lampshade. Check whether the inside is evenly warm white and the outside appears in the desired pigeon blue.

Step 16: Adjusting the reflectivity in the Material Editor
The material still looks a bit dull. To fix this, open the Material Editor by double-clicking the material. In the Reflectivity section, you remove the default specular and add a GGX specular instead. The result then looks very mirror-like because the material looks chrome-plated. Then switch the Fresnel mode from Metal to Dielectric. This gives the surface the familiar behavior of a non-metal, and the reflections look much finer.


Set the roughness to about 15 percent and the specular strength to zero, because you don't need these values at the moment.

Note that this material is not yet a PBR material. For physically based rendering, you will need to rebuild it later. For painting, however, it is already fully functional.
Summary ??? BodyPaint 3D Paint Wizard: Easily Create Material and Texture
The Paint Wizard is the fastest way to make an object paintable. You choose the right geometry, leave the UVs untouched, set a suitable texture size, and immediately get a material with a texture. A separate layer keeps your work organized, and the texture view makes painting much easier. Finally, you adjust the reflectivity in the Material Editor so that the surface gets the look you want.
FAQ
Why does my map disappear as soon as I start painting?The object is missing a material with a texture. The Paint Wizard creates both and solves the problem.
Should I let the Paint Wizard recalculate the UVs?No. If you have already created the UVs in the UV Editor, you should not check the box, so that your work is preserved.
Which texture size makes sense to start with?For many projects, a 2K texture with 2048 x 2048 pixels is enough. For high render resolutions, 8K textures are suitable.
Why should I create a separate layer?A separate layer prevents you from painting directly on the background and makes later changes much easier.
Why should the option for scaling textures stay enabled?If you import a texture with a different size, the wizard automatically adjusts it to the selected size.
What is the best way to paint on the inside of the lampshade?Switch to the texture view instead of painting on the 3D model. This saves you from constantly rotating the object.
How do I change the gloss of my material?Open the Material Editor by double-clicking, replace the default specular with GGX, set the Fresnel mode to Dielectric, and adjust the roughness.

