

Do you know the feeling? The texture sits almost perfectly on the object, and then a single edge reveals that two image areas meet here. This is exactly the problem I will show you in this BodyPaint 3D tutorial. You will learn why such seams occur and how to make them disappear with the Projection Painting tool on a temporary layer.
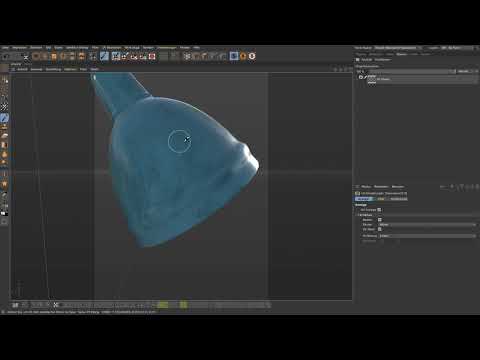
The video is only loaded from YouTube when you play it – data (including your IP address) is then transmitted to YouTube/Google. More in the privacy policy
Introduction
Many textures can be repeated without it being noticeable. You place one piece of the image next to the next, and the transitions look seamless. But as soon as an image no longer connects at its actual edges, for example because the UV islands are cut irregularly, a visible cut edge appears. In BodyPaint 3D, this spot is called a seam. The Clone Stamp alone only helps to a limited extent there, because it only copies material within the texture. The solution is to lay a kind of 3D patch over the object and work directly on the surface.
Key Takeaways
Seams occur where the edges of the UVs meet and the image edges do not match up.
The Clone Stamp only works on the texture, not on the 3D surface.
A temporary seam correction layer with Projection Painting allows you to stamp directly over the seam.
All visible layers must be enabled so that the tool picks up and paints correctly.
The Projection Painting layer can be shown and hidden at any time, so you can check your result.
Step-by-Step Guide
Step 1: Identifying the Seam Problem
First, take a close look at where the seam runs. With irregular edges and image areas that do not correspond to the actual image borders, the texture cannot be repeated cleanly. The material itself is tileable, but at this spot two areas meet that do not match each other. If you understand why the edge occurs, it is easier for you to choose the right countermeasure.

Step 2: Understanding the Cause in the Texture Area
Switch to the textures and look at the left and right edges of the image. If they theoretically fit together, the material is suitable for tiling. With a reflector or similar components, however, the edges are often irregular and do not lie at the true image borders. This is exactly why the transition here does not look tileable, even though the texture can be repeated without problems elsewhere.

Step 3: Understanding the Idea of the 3D Patch
The Clone Stamp copies within the texture, regardless of the shape of the object. So it only stamps on the image surface. But you need a tool that works directly on the surface of the 3D model and can paint across the seam. For this, you place a layer over the object, with which you work as if you were putting a patch directly on the spot.

Step 4: Creating a New Seam Correction Layer
First, create a separate layer so that your correction stays cleanly separated. To do this, go to Function in the menu and select New Layer. Name it, for example, "Seam Correction". The advantage of this approach is that you can remove the changes at any time without damaging the existing layers. Everything you now work into this layer remains in it.
Step 5: Selecting the Projection Painting Tool
Now select the Projection Painting tool. It paints directly onto the 3D object from the camera's perspective. So that the brush lands exactly where you need it, that is, on the left and right sides of the seam, you should set the view so that both areas are clearly visible. As soon as you activate the tool, you can work directly over the surface.
Step 6: Activating the Projection Painting Layer
With the stamp, a temporary Projection Painting layer, or PP layer for short, appears at the top. It is only visible as long as the Projection Painting icon is activated. If you click the icon again, the layer disappears. So you can switch between working mode and normal view at any time to check your result.

Step 7: Include All Visible Layers
An important point is the layer setting. Be sure to click all visible layers at the bottom. Only then will the entire content of the diffusion channel be taken into account when painting. The same applies to picking up the material: the tool needs a source that it can sample. If you forget this setting, you may end up stamping with the wrong material.
Step 8: Pick Up a Source and Stamp the Seam
Unlike in Photoshop, where you pick up a source by holding down the Alt key, here you simply click, without a modifier key, on the spot in the image that you want to use as the source. The stamp then appears. Place it directly over the seam. The edge disappears completely, because you are rebuilding the material from the surface rather than just copying from one texture to another.
Step 9: Touch Up Further Areas
Not every seam is fixed with a single stamp stroke. Work your way forward bit by bit. When you need a new source, press the Command key on a Mac or the Control key on a PC and click on the desired spot. Sometimes you have to wait briefly until the layer reappears. Only then can you continue working with the stamp.

Step 10: Refine with the Classic Clone Stamp
If areas still don't look perfect after Projection Painting, you can additionally use the classic Clone Stamp. Paint over the remaining spots with it. It is sometimes worth reworking even areas where the seam is barely noticeable, especially where you can see irregularities on close inspection.
Step 11: Finish the Projection Painting Layer
When you are satisfied with the result, turn the Projection Painting layer off again by clicking the icon once more. Everything you painted from the projected view then ends up in the seam correction layer. If you don't like the result, you can delete the layer or repeat the entire process. In this way, even stubborn seams in images and textures can be reliably removed.

Step 12: Check the Result
Finally, view the object from different angles. Pay particular attention to places where the seam used to be clearly visible. If everything is seamless, you have successfully completed the correction.
Summary – Removing Seams in BodyPaint 3D with Projection Painting
Seams occur when UV edges meet that do not match each other as image edges. The Clone Stamp works only on the texture and is therefore often not enough. With a temporary seam correction layer and the Projection Painting tool, you can stamp directly on the surface. Make sure to activate all visible layers, and use the Command or Control key to pick up new sources. In addition, you can use the classic Clone Stamp. Since everything ends up in a separate layer, your work stays flexible and can be adjusted at any time.
FAQ
Why does a seam occur in the first place?A seam occurs when the edges of the UV islands meet, but the image edges do not match. The material then cannot be repeated seamlessly.
Why is the Clone Stamp alone not enough?The Clone Stamp only copies within the texture. It does not take the shape of the 3D object into account and therefore cannot work directly across the seam on the surface.
Why should I create a separate layer?A separate seam correction layer keeps your changes separate from the other layers. This way you can remove it at any time without altering the original texture.
What do I need to keep in mind regarding the layers?Be sure to activate all visible layers at the bottom. Only then will the entire content of the diffusion channel be taken into account when painting and picking up the material.
How do I pick up a new source?On a Mac, hold down the Command key; on Windows, the Control key, and click on the desired spot. Sometimes you have to wait briefly until the layer reappears.
How do I discard the Projection Painting layer?Click the Projection Painting icon again to hide the temporary layer. If you don't like the result, you can delete the seam correction layer and repeat the process.

