
Imagine you open a scene with fifty animated objects and find yourself among countless keyframe bars without knowing what is currently happening. This is exactly where the timeline in Cinema 4D comes in. It is the central tool of every animator, and anyone who understands it works faster and more clearly. In this guide, you will learn how to tidy up the timeline and the Dope Sheet editor, use them sensibly, and adapt them to your way of working.
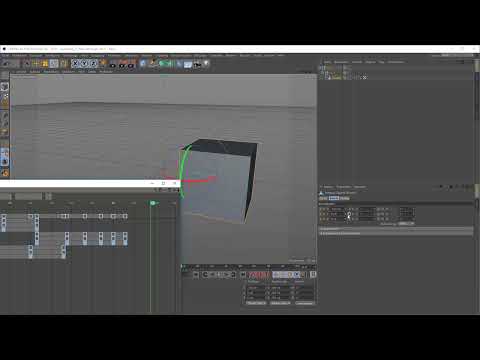
The video is only loaded from YouTube when you play it – data (including your IP address) is then transmitted to YouTube/Google. More in the privacy policy
First, I will show you how to set and remove keyframes. After that, we will look at navigating in the Dope Sheet, organizing your tracks, and the linking options that let you see only the objects you are currently working on.
Key Takeaways
A keyframe is set in the Attributes panel or in the object by clicking the circle, the timeline is intended for navigation and overview, and the Dope Sheet is suited for the actual timing. Filled dots show real keyframes, outlined dots only summaries. The automatic mode creates clutter and should be turned off. Objects without a hierarchy can be edited more clearly. With the filter and selection options, you display only what you currently need. A custom startup layout saves you time on every project.
Step 1: Setting and Removing Keyframes
You can recognize a property that is animated by the red circles. These circles represent the attributes of your object. Clicking a circle sets a keyframe at the current time position. With the Shift key held down, click to remove it again. In older Cinema 4D versions, the key combination is Ctrl-click or Ctrl+Shift-click.

With this basic principle, you set every animation. It is important that you choose the point in time correctly beforehand, because the keyframe always lands wherever the time marker currently is.
Step 2: Navigating Through Time
You move the time marker using the time ruler at the top. With the playback buttons, you start and stop the animation. You can also select keyframes in the timeline to move them together. The timeline is therefore well suited for running through a scene and keeping an overview. However, it is not very suitable for the actual animating.
Step 3: Opening the Timeline and Getting to Know the Dope Sheet
You bring up the timeline with the keyboard shortcut Shift+F3 or via the menu. In the Dope Sheet, you see all keyframes in one overview, displayed as blue boxes. These boxes are not always clear, so it is worth taking a closer look at the structure.
Step 4: Navigating in the Dope Sheet
You operate the Dope Sheet similarly to the viewport. With the Alt key held down and a right-click, you zoom; with the middle mouse button, you shift the view. You should internalize this behavior early, because long scenes can only be read well with a clean zoom.
Step 5: Understanding the Summary Track and Keyframe Display
The top row in the Dope Sheet is the summary track. It combines all keyframes of all objects. Filled dots represent real keyframes. Outlined dots, on the other hand, are merely summaries that indicate that there are keyframes beneath them. So pay close attention to which symbols you see before making decisions.
Step 6: Turning Off the Automatic Mode and Arranging Objects Flat
The automatic mode displays the hierarchy of your scene with all levels. This creates many redundant entries that overlap. Therefore, turn it off via the button in the timeline or via Alt+A. After that, you drag the objects into the timeline individually. The hierarchy is then ignored, and each object appears only once with its own keyframes.

Step 7: Organizing Tracks and Deleting Empty Groups
Cinema 4D groups tracks, such as Position, Angle, and Size. Tracks marked in yellow contain a track but no keyframes. Groups display a summary of their keyframes. If you want to remove empty tracks, you select them and delete them with Ctrl+Shift-click or via the Remove command. This way, only the tracks in which animation is actually happening remain visible.


Step 8: Synchronizing the Selection in the Timeline and Object Manager
By default, the selection in the Object Manager and in the timeline is independent of each other. This is convenient, but it can quickly lead to confusion, especially if objects have the same name. Therefore, give each object a unique name before you build larger scenes.

Step 9: Using Linking Options Purposefully
In the View menu, you will find the module for links. The option Link Timeline with Object Manager, or TL-OM selection for short, ensures that when you select an object, its keyframes are also highlighted. The unidirectional selection link works in one direction: What you select in the timeline is selected in the Object Manager, but not the other way around. The option Link View with Object Manager works more like a filter. It only shows the keyframes of the objects you have selected in the Object Manager. This filter function is especially helpful when you want to edit only a few objects in a large scene.


Step 10: Saving a Custom Layout and Startup Layout
If you need these three options regularly, a custom layout is worthwhile. To do this, open the Window menu and choose Customize, then Customize Commands. There, drag the commands for filters, group separators, and selection links into the timeline's toolbar. Afterwards, save the layout as a startup layout via the Window menu so that the timeline appears directly in your configuration the next time you start. With Shift+F3, you can bring it back at any time, and you can see at a glance which options are active.


Summary – Dope Sheet in Cinema 4D: Setting Up and Using the Timeline Correctly
The timeline and the Dope Sheet are the foundation of every clean animation in Cinema 4D. You set keyframes purposefully, navigate confidently through the scene, and keep an overview with a flat object structure, without hierarchy duplications. With the linking options, you filter large scenes down to the essentials, and a custom startup layout speeds up your daily work. The next step takes you into the F-Curves, where you can control movements even more precisely.
FAQ
What does a filled dot in the Dope Sheet mean?A filled dot indicates a real keyframe, while a framed dot only represents a summary of several keyframes.
Why should I turn off the timeline's automatic mode?The automatic mode displays the entire object hierarchy, which creates many duplicate keyframes and impairs the overview.
How do I remove a keyframe again?You click on the keyframe while holding the Shift key, in older versions with Ctrl+Shift-click.
How do I navigate in the Dope Sheet?With Alt and right-click you zoom, with the middle mouse button you move the view, similar to the viewport.
What is the difference between TL-OM selection and Link View with Object Manager?The TL-OM selection highlights keyframes together with the objects, while the filter function only shows the keyframes of selected objects.
How do I save a custom startup layout for the timeline?You adjust the commands under Window and Customize Commands and save the layout as a startup layout via Window.


