The ability to effectively remove or deliberately add color casts in your images is crucial for image editing. The “White Neutralizer” filter in Color Efex Pro 4 offers you a powerful tool to do exactly that. With just a few clicks, you can artistically intervene and adjust your images to your liking. This guide walks you through the application of the White Neutralizer step by step and shows how to optimize your image.
Key Insights
- The “White Neutralizer” filter helps to effectively remove or add color casts.
- You can selectively adjust which colors should be neutralized.
- By using the eyedropper tool, you can precisely extract and adjust colors from the image.
Step-by-Step Guide
1. Applying the Filter
Start Color Efex Pro 4 and open the image you want to edit. To apply the “White Neutralizer” filter, navigate to the filters and select it. You will immediately notice a change in your image.

2. Color Cast Slider
In the filter area, you will find a slider for removing the overall color cast. If you set this slider to 100%, all unwanted blue tint in your image will be removed. Make sure to keep an eye on the changes to avoid affecting the quality of your image.

3. Selecting the Color to Neutralize
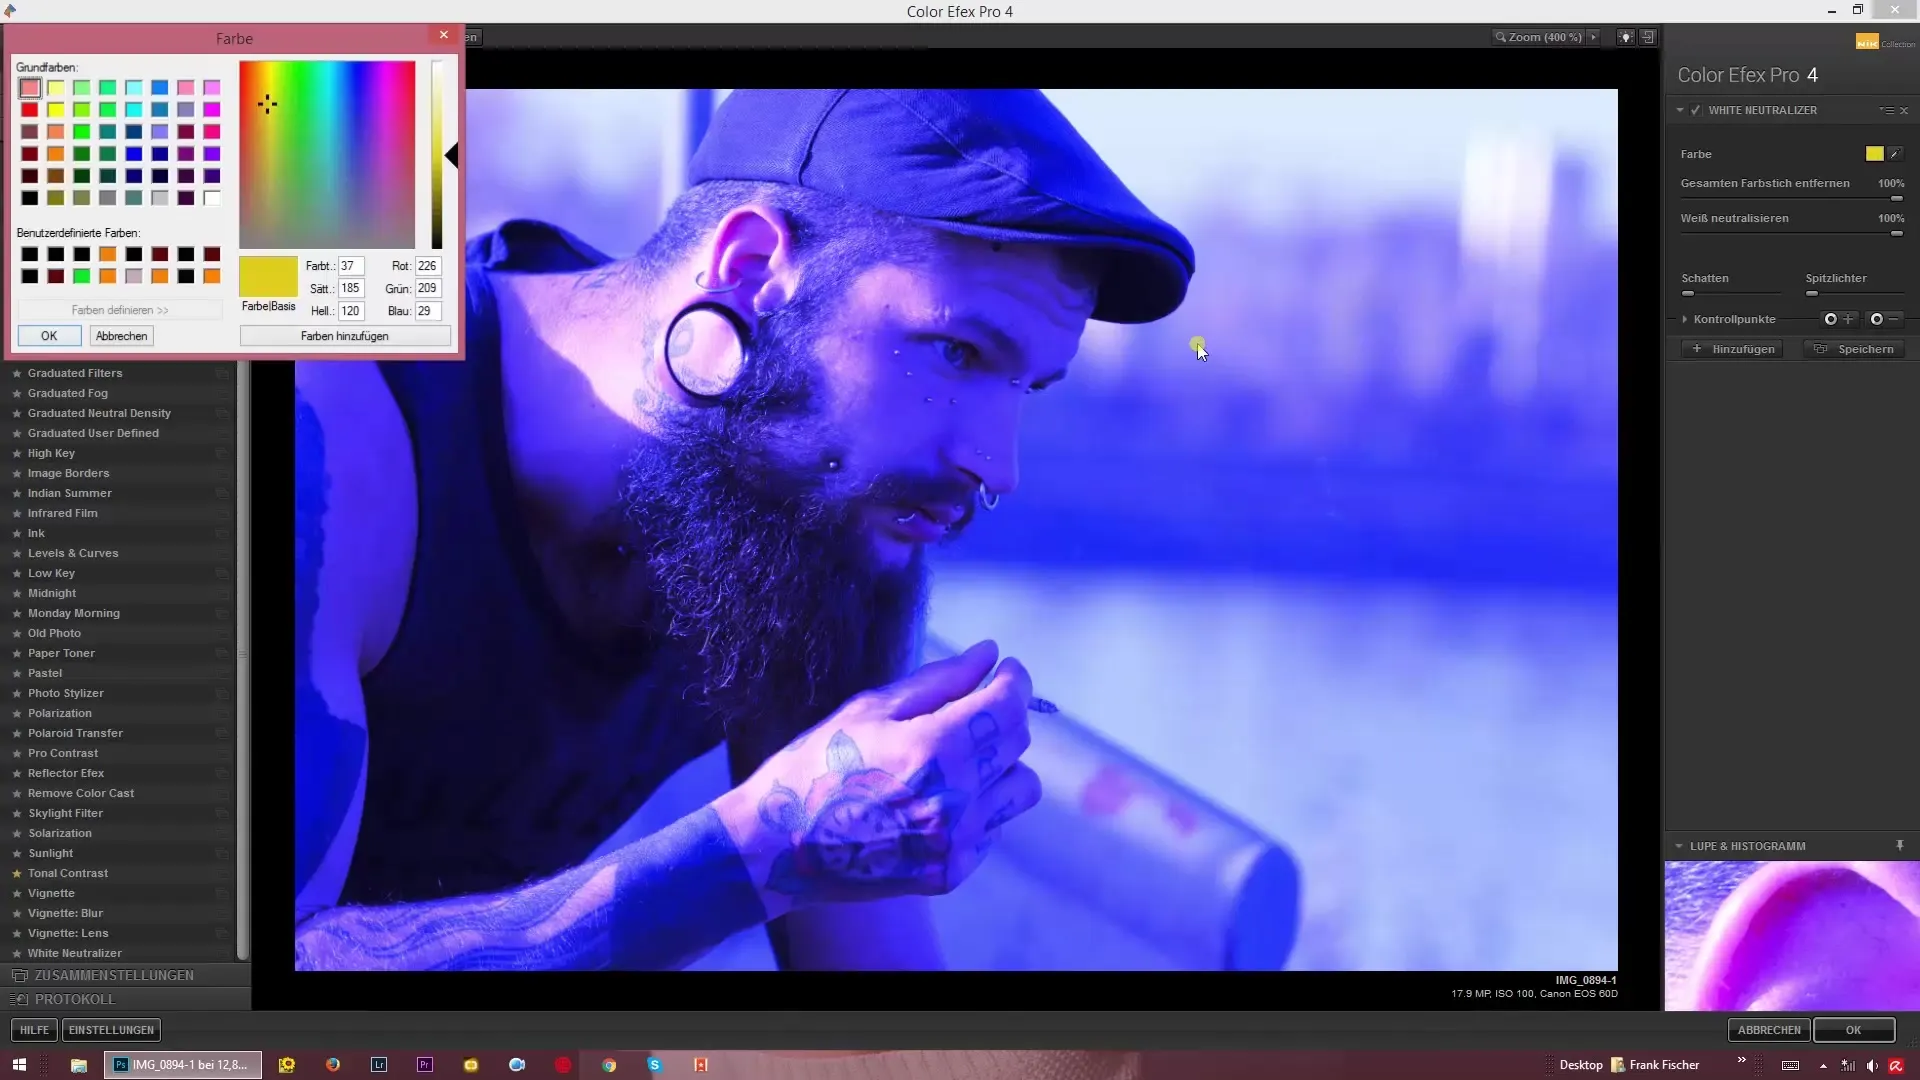
The “White Neutralizer” allows you to neutralize specific colors. By default, yellow is often selected, but you can specify another color. Use the color selection to choose, for example, a strong blue to neutralize the corresponding blue tones in the image.
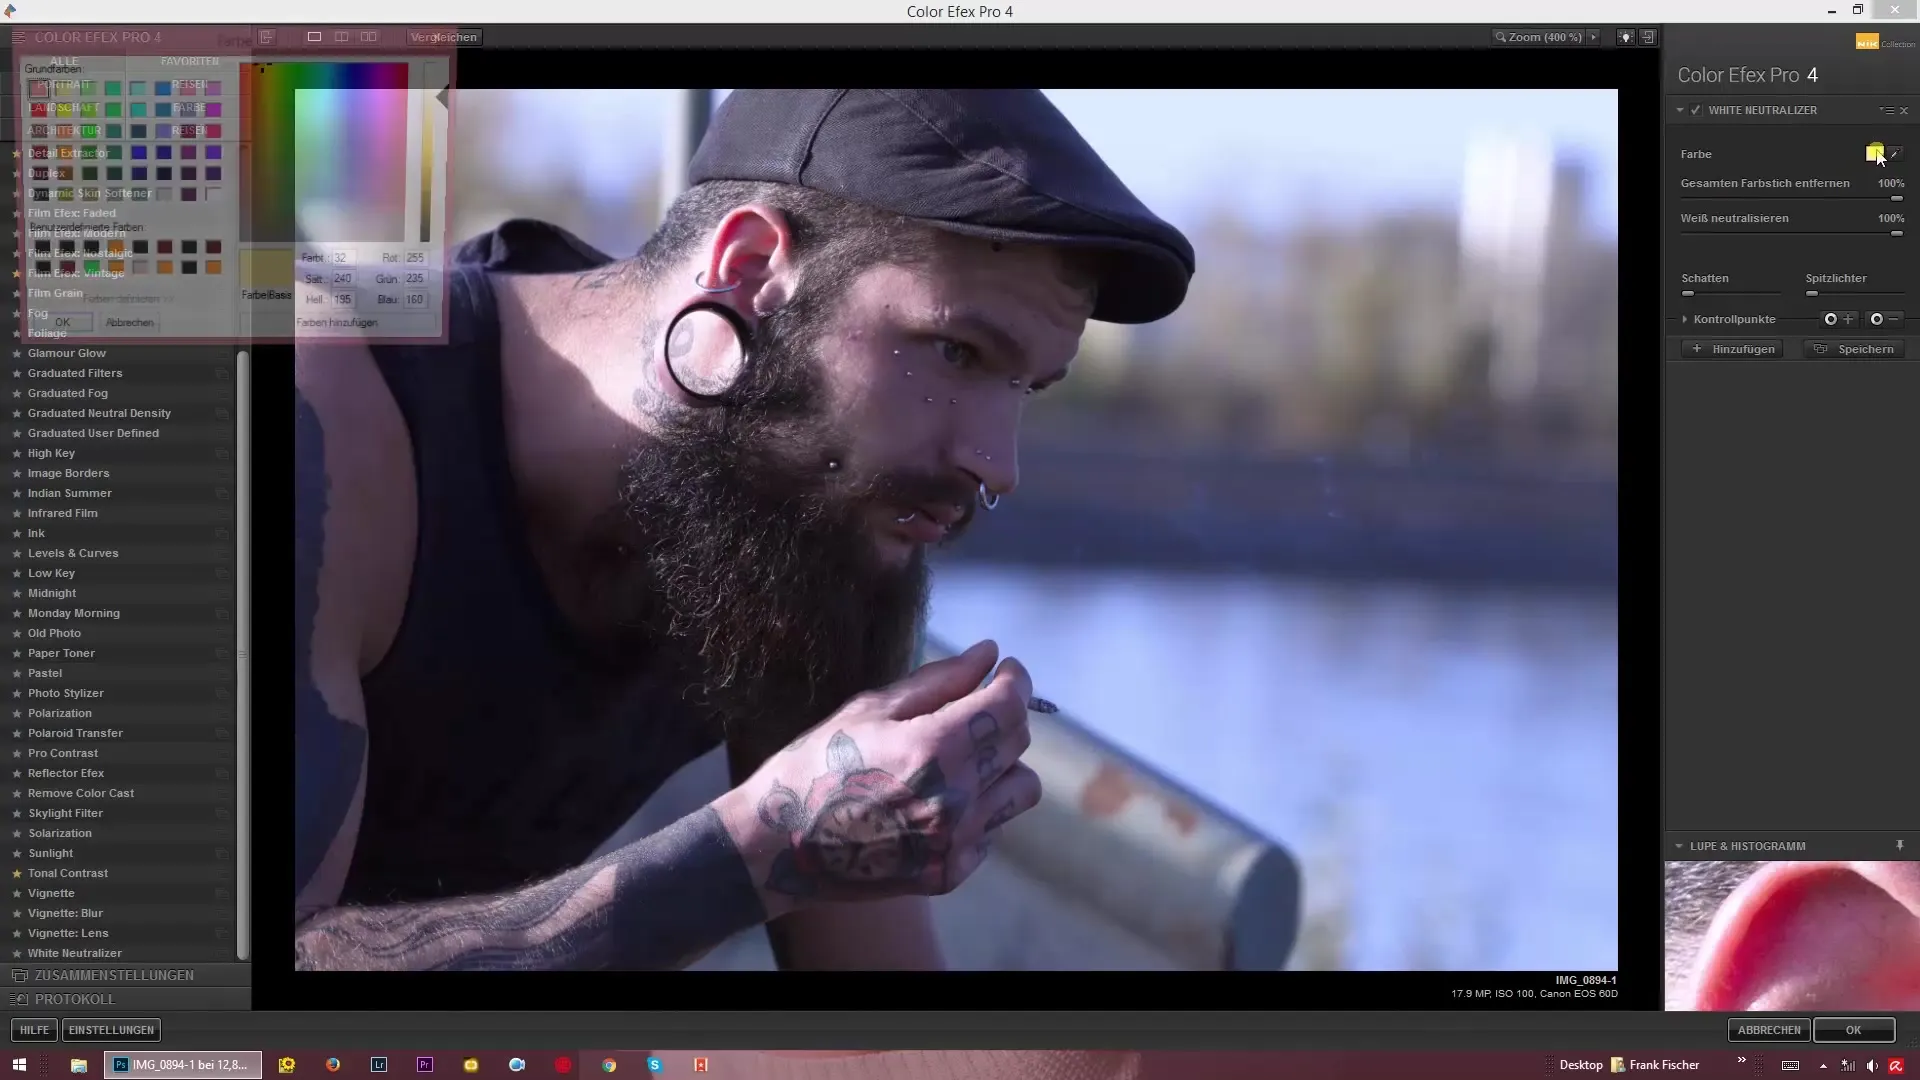
4. Using the Eyedropper
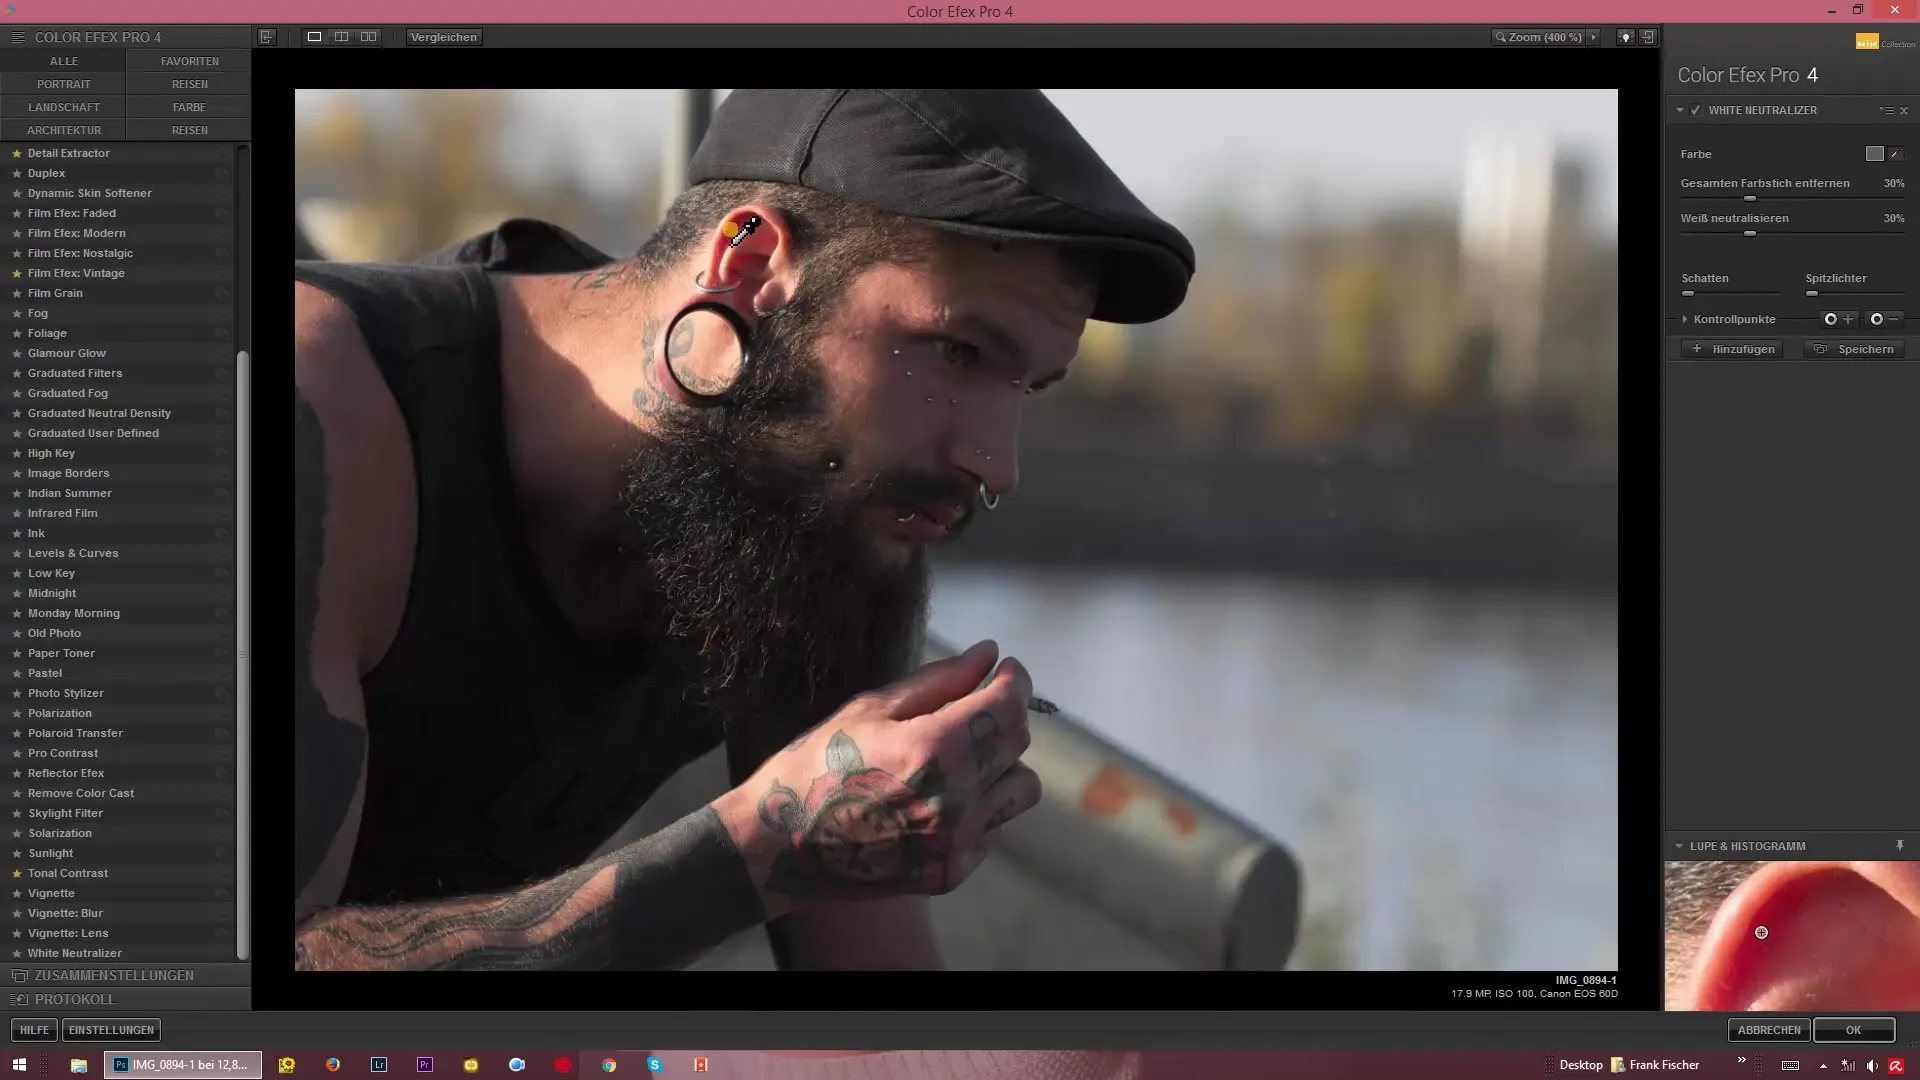
A particularly useful tool is the eyedropper. This feature allows you to directly select the gray or a specific color in the image that you want to neutralize. Simply click on the desired color point in your image, and the filter will automatically adjust the settings.
5. Fine Adjustments
You can further adjust the intensity of the neutralization using the sliders. If your image has a red tint, specifically target this area and use the sliders to counteract it. Experiment with the settings until you achieve the desired look for your image.
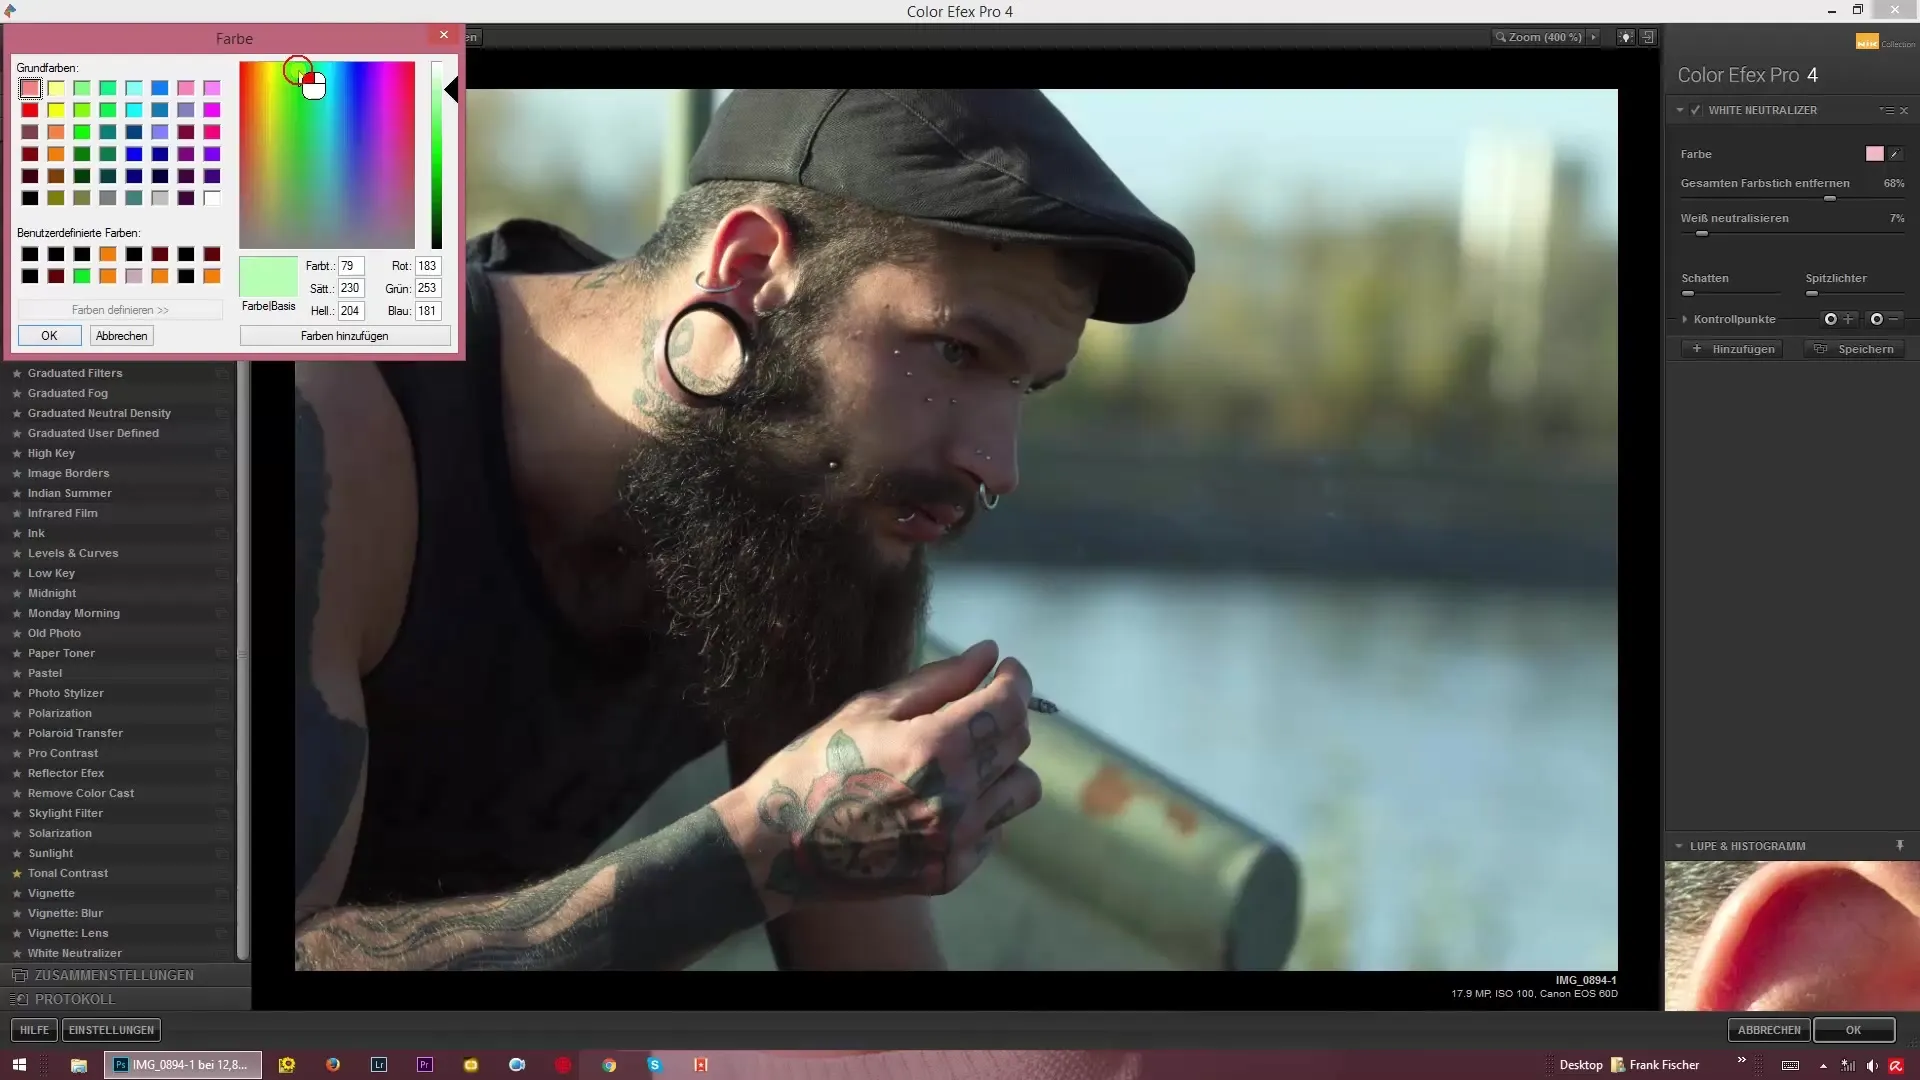
6. Adding Color Tones
A major advantage of the filter is not only removing color casts but also adding targeted color tones. Consider what mood you want to create – adding a slight green or reddish tint can give your image a special touch.
7. Optimizing Skin Tones
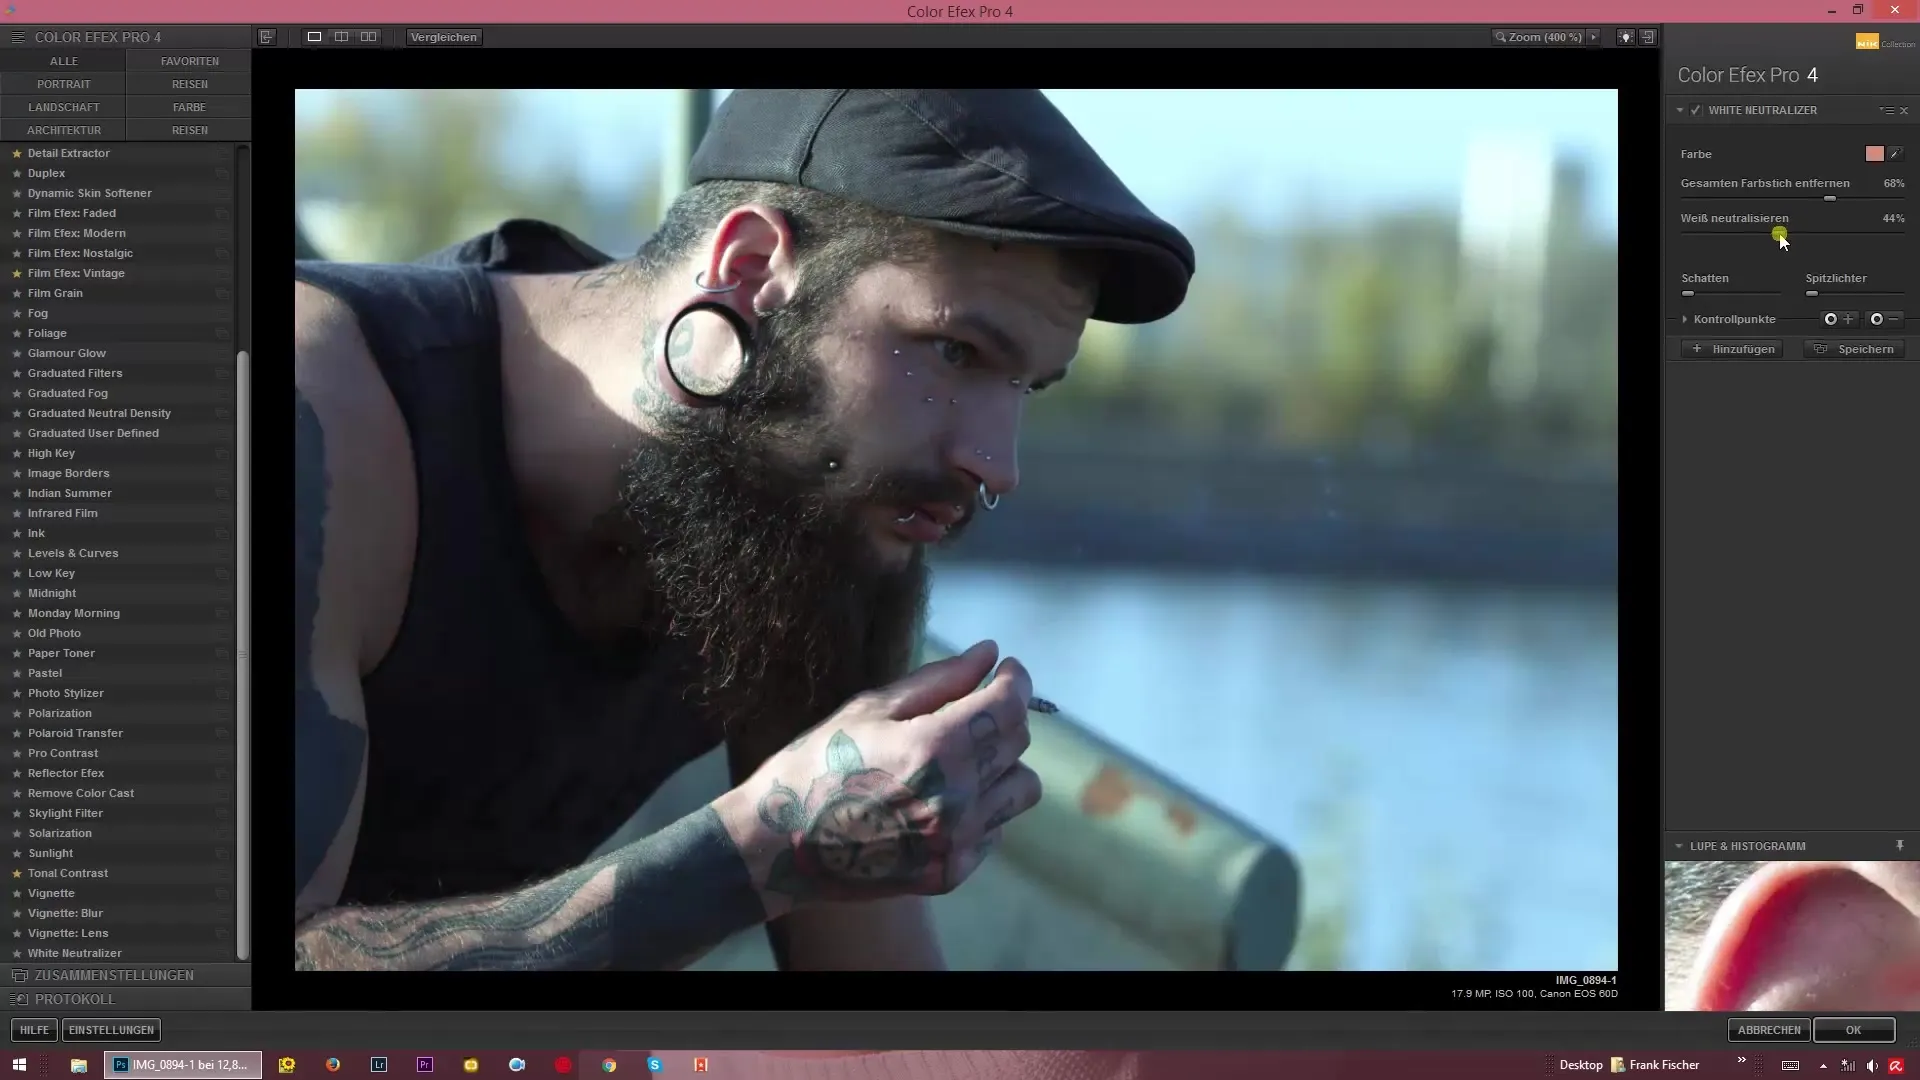
When working with portraits, it can be important to adjust skin tones. Use the eyedropper on the skin color and then set the white neutralization slider to 100%. This step helps make skin tones appear clearer and more natural.
8. Final Adjustments
After you have made all the desired adjustments, take a look at the overall result. With the sliders, you can largely revert the neutralization to restore a natural color image or emphasize your desired color scheme.

Summary – Guide to Color Adjustment with Color Efex Pro 4: White Neutralizer
With the White Neutralizer filter from Color Efex Pro 4, you are able to remove color casts specifically or creatively add them. This process is simple and efficient, allowing you to perfect even the last detail of your image. Working with this filter and the various sliders will help elevate your image editing to the next level.
Frequently Asked Questions
What is the “White Neutralizer” filter?The “White Neutralizer” filter helps to remove or regulate color casts in images.
How can I neutralize specific colors?You can select a color to be neutralized, such as blue or yellow.
Do I need a calibrated monitor?A calibrated monitor is helpful for accurately displaying colors but is not strictly necessary.
Can I also add color casts?Yes, with the filter you can deliberately add color tones that give your image a special look.
What should I consider when working with skin tones?Be careful not to over-process skin tones to maintain a natural appearance.


