

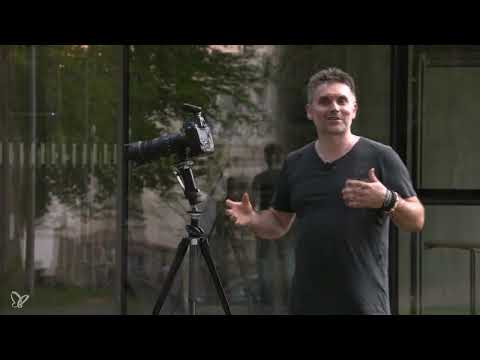
A business portrait doesn't have to be shot in a studio. If you find a suitable outdoor location with a modern façade, you get depth, atmosphere, and a professional look without setting up a lot of equipment. Above all, you need a good sense for the background, the light, and the position of your subject. In this guide, you accompany a photographer on a shoot in front of a school building with modern architecture. You'll learn how the location is chosen, how the camera is set up, and how a single flash supports the natural light.
The video is only loaded from YouTube when you play it – data (including your IP address) is then transmitted to YouTube/Google. More in the privacy policy
Key Takeaways
- A quiet location with a modern façade is ideal as a blurred background for business portraits.
- Diffuse, even shade light flatters faces and avoids harsh contrasts.
- A wide aperture (around f/3.5) separates the subject from the background and creates a soft blur.
- A manual white balance with a gray card ensures consistent colors when the light changes.
- A flash serves only as fill light. The main light remains daylight.
- The foreground and background should be in the same light so that no distracting differences in brightness arise.
Step 1: Finding the Right Location
Before you unpack your camera, it's worth taking a close look at the place. In this example, a modern school building was chosen, with its façade serving as the backdrop. What matters is that the background suits the business look but doesn't distract from the subject. Also make sure there is little foot traffic, because a quiet place allows you to work in a focused way with your model.

Step 2: Checking the Time of Day and the Light
The light determines the impact of the portrait. Ideal is a situation with shade and diffuse, even light. Direct sun creates harsh shadows on the face that are difficult to correct later. In the shade of a building's edge, on the other hand, you get a soft light that softens skin blemishes and illuminates the face evenly. This light is not always good, but in this case it is fitting, because you want to show the person more attractively and smoothly, without emphasizing distinctive features.

Step 3: Planning for the Option of a Second Flash
Before you get started, you should consider whether you need additional light. Having a second flash in your bag gives you the flexibility to brighten shadows if needed. Whether you use it is something you decide only after a test shot. Many beginners reach for the flash right away, even though the available light is often entirely sufficient.

Step 4: Setting the Camera for Blur
The background should look blurred so that the façade serves only as a backdrop and not as the subject. To achieve this, you open the aperture almost to the maximum opening of your lens. In the example, f/3.5 was chosen. With a wide aperture, the depth of field decreases and the background blurs. The ISO stays at 200, since no higher sensitivity is needed in daylight. Make sure the person stays in focus, especially if they are standing at a distance from the façade.

Step 5: Setting the White Balance Manually
In places with unfamiliar mixed lighting, the camera's automatic color setting can be way off. That's why you use a manual white balance on a gray card. Hold the card in the light, let the camera meter off it, and save the setting. As long as the light doesn't change, the color rendition stays constant. If the light changes, you simply set the white balance again.

Step 6: Testing the Light Without the Model
Before the person steps in front of the camera, you do a test run with only the ambient light. For now, leave the shutter button alone and look at the light on the display. Only when the brightness, shadows, and background are right do you move on. This step saves you a lot of time later, because you spot mistakes before the model has been styled and positioned.

Step 7: Check the test photo and readjust
Now you take your first test photo of the person. Zoom in slightly and check whether the eyes are well lit and whether the background blurs as desired. In the example, the photo was already very good, but we still checked whether a flash could help. This check is important, because not every situation needs additional light.

Step 8: Using the flash as fill light
The flash should not take over as the main light, but only soften the shadows and brighten the eyes. The daylight character is preserved. There are no power outlets outdoors, so a battery-powered lamp is used. Alternatively, a combination of a generator and a flash head works if you have a power connection nearby. The lamp is only aimed slightly and works at low power. The result is noticeably brighter, the eyes look more lively, and the cast shadow from above becomes weaker.

Step 9: Checking the model's appearance
Before you take the shots, take care of clothing and skin. Straighten the tie, shirt collar and jacket, and powder shiny spots. On men, the forehead, nose and chin are often especially shiny. Also make sure that the corners of the face are evenly covered, especially under the eyes. Deliberately take your time for this step, because small details are immediately noticeable in a portrait.

Step 10: Guiding body posture and pose
Give the model clear instructions. A slightly forward-leaning posture, upright shoulders and a relaxed gaze into the camera look confident. The arms are positioned loosely so that no tension arises. If you are not capturing the subject in full, concentrate on a good positioning of the shoulders and upper body. Check on the display from time to time whether the pose works. Small corrections to the head, such as a minimal turn, noticeably change the image.

Step 11: Creating ease for natural expressions
Long shoots are tiring, and a strained smile quickly looks staged. Tell little jokes, talk about personal topics, or simply let the model take a breather for a moment. Often the best photos are created precisely when the person laughs again. In the example, a short joke was enough, and the model laughed on their own. You should photograph such moments immediately.

Step 12: Selecting the images on the computer
After the shoot, you review the photos on a larger screen. Pay attention to sharpness in the eyes, clean contours, even skin tones and a harmonious background. Here, too, it becomes apparent whether the white balance and exposure are right. You will usually find the perfect shot in the series that was taken during the natural moments.

Step 13: Matching foreground and background in the same light
A common mistake lies in the brightness difference between the person and the background. If the person stands in the shade but the background is in the sun, the background quickly looks too bright. Conversely, it becomes too dark if the person stands in sunlight. Therefore make sure that the person and the façade are in the same light. This saves post-processing and ensures a coherent overall image. Outdoors in nature this often succeeds more easily than in complicated studio setups, because the ambient light illuminates all elements evenly.

Summary – Outdoor business portraits: step by step in front of modern architecture
A good business portrait often comes about simply through the right location and the suitable daylight. You choose a quiet spot with modern architecture, use diffuse shade light and set up the camera with a wide aperture and manual white balance. A flash serves only as fill light, while the surroundings provide the main light. Pay attention to styling, body posture and a relaxed atmosphere, and check foreground and background for equal lighting conditions. With this approach you achieve high-quality portraits that look professional and present your model with confidence.
FAQ
Do I absolutely need a flash for a business portrait outdoors?No, with diffuse shade light, daylight is often sufficient. A flash is mainly suitable for brightening the eyes and softening shadows.
Why should I open the aperture so wide?A wide aperture such as f/3.5 reduces the depth of field. As a result, the background blurs and the person remains in focus.
What does a gray card do for white balance?The gray card gives the camera a neutral reference value. As a result, skin tones and colors are reproduced correctly even in unusual light.
How do I know whether a flash is necessary?First take a test photo without a flash. If the eyes look dark or there are harsh shadows on the face, you can add a flash as fill light.
How do I prevent shiny spots on the face?Powder the skin before the shoot, especially the forehead, nose and chin. Check from time to time whether new shiny spots appear.
What do I do if the person looks tense during the shoot?Create a relaxed mood with little jokes or conversation. The most natural expressions often occur when the model laughs in a relaxed way.

