

After the shoot, the really tricky work begins: filtering out of a series of many similar shots the few that convince in the final result. In this tutorial, you will see how an experienced photographer reviews his images from the on-location set, rates his favorites, and then develops two shots in Camera Raw. In doing so, he explains every slider he moves and gives reasons for why he uses it.
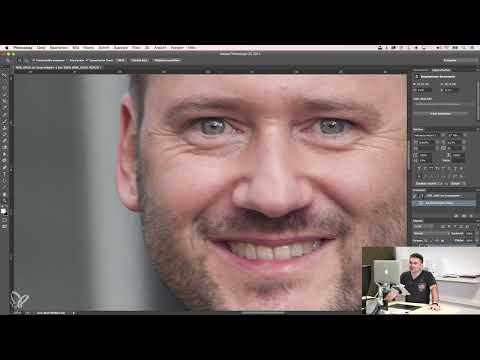
The video is only loaded from YouTube when you play it – data (including your IP address) is then transmitted to YouTube/Google. More in the privacy policy
The example comes from a shoot with two backgrounds: a glass facade and a wall. Both shots show how light, colors, and line of sight affect the overall impression of a business portrait. The guide follows the flow of the video, from reviewing the raw data to the finished crop.
Key Takeaways
- First assign rough ratings with stars before you fine-tune individual images.
- Evaluate facial expression, line of sight, and overall impression together, not just the technical quality.
- Develop in Camera Raw with a few targeted sliders instead of many small changes.
- Use the HSL section to specifically tone down distracting colors such as green or aquamarine tones.
- Check the white balance on neutral surfaces such as a gray wall.
- It is better to shoot with a bit more surroundings so that you can crop flexibly later.
Step-by-Step Guide
Step 1: Make the Preselection with Stars
Do not start with retouching, but with reviewing. After the import, you assign stars to all images that seem generally usable. The instructor goes through the shots of both setups one after another and marks only the candidates. Rejects remain without a rating. This creates a shortlist that you can quickly find again in every further pass.

Step 2: Observe Expression and Gaze Over the Course of the Series
While reviewing, pay attention to how the model's presence changes over the course of the shoot. In the video, it becomes clear that the shots look somewhat stiff at first and become more lively later, as soon as the photographer gets into conversation. An image with a likable, not-too-broad smile is often more valuable than a technically perfect but expressionless shot. Here too, assign stars to favorites without immediately finalizing them.

Step 3: Consistently Sort Out Technical Misfires and Disturbances
Every series contains misfires. In the video, several shots stand out in which the flash did not fire because the trigger did not respond. You recognize such images by a clearly different brightness and sort them out immediately. Likewise, you discard photos in which the gaze wanders or the shirt wrinkles fall unflatteringly. Retouching such wrinkles would be possible, but very time-consuming. Therefore, decide early on whether an image is worth the effort.

Step 4: Make the Final Selection Among the Favorites
Show your favorites together so you can compare them directly side by side. In the example, two good shots remain per setup. The decision is often made only in comparison: The instructor chooses in each case the image that appeals to him more, because the expression looks more likable and the model does not look directly into the camera. You give the chosen image three stars so that it stands out immediately when filtering.

Step 5: Open the Raw Image in Camera Raw and Start the Basic Development
Open the selected image in Camera Raw. In the video, a custom preset is used for this, which the instructor carried over from earlier projects. Presets are a good starting point if you regularly edit similar shots. In the example, the preset brightens the glass facade significantly, making it look airy. So that the highlights do not blow out, you then pull them back down. Make sure that bright areas retain their detail.

Step 6: Shift Shadows Slightly Toward Blue in the Blue Channel
First check the tone curve. In the example, it remains unchanged because the contrasts are already right. Then, in the Blue channel, you shift the shadows slightly toward blue. This step gives the image a business-like, cool base tone. The instructor emphasizes restraint here: there should only be a hint of blue in the dark areas, not a strong color cast.

Step 7: Selectively Tone Down Distracting Colors in the HSL Panel
In the HSL panel, you adjust hues that appear strongly in the glass façade due to the reflection of the green meadow and the trees. The instructor raises the luminance of the green and aqua tones to make them brighter, and compares the effect by dialing the sliders back. He reduces the saturation of the greens only far enough that the image doesn't tip into black and white. He darkens the jacket and tie via the blue tones so that the model separates better from the background.

Step 8: Retouch the Image in Photoshop
Open the developed image in Photoshop. Create a separate retouching layer so that your edits can be undone at any time. With the Clone Stamp tool, you remove blemishes on the forehead and soften the dark circles under the eyes without removing them completely, so that the result doesn't look artificial. On a gray layer, you emphasize the smile and the teeth with dodging and burning. With the Liquify filter, you straighten the shoulders. The instructor stresses that the person should remain recognizable. He estimates about ten to twelve minutes for this retouching.

Step 9: Correct the White Balance on a Gray Wall
The second shot was taken in front of a gray wall and looks strongly blue-tinted after applying the preset. White balance helps here: choose the eyedropper and click on a neutral, mid-gray area of the wall. The blue cast disappears immediately. Afterwards, you can fine-tune the temperature and tint, since the wall may look slightly yellowish or greenish. At the end, check the skin tones in particular, because they should look natural and fresh.

Step 10: Create Multiple Crops for Different Uses
Crop the finished image in different variants. The instructor usually works with three crops: a classic head shot, a slightly tilted version for more dynamism, and a cover-page crop in which the head and body proportions look harmonious. In portraits where the arms are bent, wrinkles in the jacket can be removed with a tighter crop. Make sure that hands and elbows are not distracting. Therefore, it's better to shoot with a bit more surroundings so that you have the necessary freedom when cropping.

Summary – Post-Processing Business Portraits: Selection and Camera Raw Development
Post-processing a business portrait begins with a structured selection. Stars help you mark favorites, and a side-by-side comparison leads to a clear decision. In Camera Raw, you work with a few targeted sliders: highlights and curves for brightness and contrast, the blue channel for a subtle business look, and the HSL panel to tone down distracting colors from the surroundings. Photoshop handles the targeted retouching on separate layers so that the model remains recognizable. You correct the white balance on neutral areas, and multiple crops make the image usable for different purposes.
FAQ
How many images should I keep after reviewing?In the video, two good shots remain per subject, from which you then choose the final one.
Why do I develop in Camera Raw first and only then in Photoshop?Camera Raw is suited for the basic development of brightness, color, and contrast, while Photoshop is intended for targeted retouching on individual layers.
What do I do if a preset looks too strong?Reduce the effect using the sliders and adjust highlights, hues, and white balance individually until the result looks natural.
Why should I deliberately shoot with more surroundings?The extra room allows the image to be cropped more flexibly later, for example for a cover page or a classic head crop.
Is an outdoor portrait feasible in winter?According to the instructor, this is difficult in winter because cold, wetness, and visible breath are disruptive. The shoot works best on warm, dry days.

