

Imagine your client applies with their photo and doesn't recognize themselves at the job interview. That is exactly what you want to avoid. A good business portrait shows a person the way they appear in real life, just in the best light. Too much retouching quickly turns a likeable face into a smooth mask.
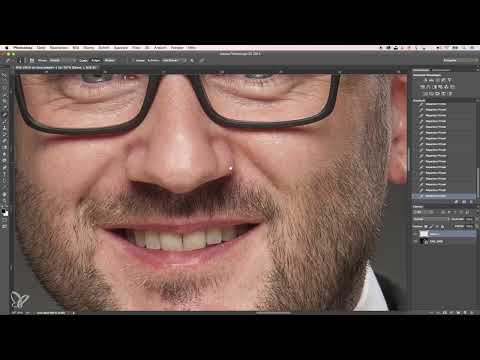
The video is only loaded from YouTube when you play it – data (including your IP address) is then transmitted to YouTube/Google. More in the privacy policy
In this workflow, Arek shows you how he does the basic retouching of his studio shots, what he pays attention to, and where he deliberately stops. For this you need Photoshop, a clean shot, and a bit of patience.
Key Takeaways
- Retouching begins with the shot. Lighting, white balance, and sharpness can only be repaired to a limited extent later.
- Work non-destructively with a Smart Object and Smart Filters so you can readjust at any time.
- Remove temporary blemishes such as pimples, razor burn, or flaking skin. Personal features such as moles, wrinkles, and laugh lines are retained.
- Dodge & Burn works best on a separate layer in "Soft Light" mode with very low opacity.
- Use the Liquify tool sparingly, to straighten clothing and hair, not to change the face.
- The resolution is sufficient for several crops. Therefore, deliver different crops to the client.
Step-by-Step Guide
Step 1: Check the Original Image
Before you even start retouching, take a calm look at the image. Arek first checks the lighting. The main light should model the face, a rim light gives structure, and in the background a cone of light provides depth. The white balance was also already set during the shoot so that the skin tones are right. If the light is coherent, the post-processing stays pleasantly short. Then zoom into the image to assess details such as shadows, light reflections in the eyes, and stray hairs.

Step 2: Sharpen and Secure as a Smart Object
Arek checks the sharpness and, if necessary, applies slight resharpening. In the "Unsharp Mask" filter, the amount is around 70, the radius stays low, and the detail slider is set to about 25. Everything else remains untouched, because over-sharpening emphasizes skin pores and unevenness unnaturally. The highlights on the forehead are also slightly reduced so that the reflection doesn't shine too strongly.
Then you convert the layer into a Smart Object. All filters are thereby applied as Smart Filters. You can change or hide them at any time later without losing the original image. Arek also recommends keeping the background and the image edges in reserve. The resolution of 24 megapixels offers enough room for this.

Step 3: Basic Cleaning of the Face
Now it's time for the actual retouching. Arek uses the Healing Brush and the Clone Stamp, using the Clone Stamp mainly under the eyes. Choose a brush size that is just slightly larger than the structure you want to remove. Hold down the Alt key (on Windows) or the Option key (on Mac) and click on a healthy area of skin in the immediate vicinity, then place the brush on the blemish.
Work spot by spot and avoid retouching large areas, as this quickly creates blotchy transitions. Pimples, individual impurities, and small freckles or pigmentation irregularities can be removed without problems. In the end, the skin should look groomed and clean without looking plastic.

Step 4: Deliberately Leave Personal Features
This step decides the impact of the portrait. Arek emphasizes that a business portrait should make the person recognizable. Therefore, do not remove moles, characteristic facial features, or laugh lines. A dimple or a distinctive eyebrow also belongs to the person. With scars, you decide case by case whether they belong to the person or whether it's a fresh injury that one doesn't want to show.
Ask yourself with every intervention: Would the person still recognize themselves in the photo? If the answer is yes, you're on the right track.

Step 5: Clean Skin Areas and Clothing
After the face has been edited, you tackle the rest of the image. Arek takes care of flaking skin, individual beard hairs, and razor burn, which often appears on men. He also removes lint and dust on the jacket as well as small spots that come from the sensor or the background. These little things can be handled well with the Spot Healing or Patch tool.
Next, check the tie knot. With a narrow, slim knot, a quick check is enough. A thick, double knot where you can see the windings, on the other hand, quickly looks untidy. The point here is not to be perfect, but to create a well-groomed overall impression.

Step 6: Gently Adjust the Eye Area
The dark circles and shadows under the eyes are often the point where retouching starts to feel artificial most quickly. Arek first brightens the area with a lightening tool and then repeats the process with the clone stamp. To do this, you set a soft edge and an opacity of about 19 percent. Gently stamp from lighter areas on the forehead into the darker zones under the eye, and keep picking up fresh sources so that no pattern emerges.
Laugh lines and crow's feet, on the other hand, are retained. They are part of the person's natural expression and make the portrait come alive.

Step 7: Dodge & Burn for Light and Shape
With Dodge & Burn, in German also called "Aufhellen und Abdunkeln" (lightening and darkening), you specifically sculpt the face. To do this, create a new layer and fill it with 50 percent gray. Set the layer mode to "Soft Light". This creates a neutral layer that records your brightness corrections without changing the colors.
Work with a soft brush and an opacity of about 7 to 9 percent. These values are only guidelines, because every shot requires something different. For larger areas such as the bridge of the nose, choose a wider brush tip, and for fine areas such as the eyebrows, a smaller one. With the X key you swap the foreground and background colors. Black darkens, white lightens. Keep the corrections subtle, and the face will remain believable.

Step 8: Accentuate Eyebrows, Eyes, and Teeth
Dark eyebrows with a bit more definition look clearer and give the face expression. Therefore, darken them slightly with black in the Dodge & Burn brush. For the eyes, check whether they need brightening. With light eyes like those of this model, that is often not necessary.
The teeth, on the other hand, quickly look fresh and well-kept when they are lightly brightened. For this, Arek runs a very soft, low-opacity brush over the row of teeth. The result should look like after a visit to the dentist, not like brightened tiles. Since the gaze in a portrait automatically wanders to the smile, this fine work is worthwhile.

Step 9: Balance the Forehead and Hairline
Sometimes the shape of the skull creates a darker area on the forehead surrounded by lighter edges. Here you carefully brighten the center with white in the Dodge & Burn brush. The hairline, on the other hand, you can darken slightly. This makes the head look a little narrower and draws attention more strongly to the face.
Here, too, the rule applies: better to work subtly twice than too strongly once.

Step 10: Straighten with the Liquify Tool
Before you use the Liquify tool, create a copy of all visible layers. The keyboard shortcut is Shift, Alt, Command, and E on a Mac or Ctrl, Alt, Shift, and E on Windows. Then continue working on this top layer.
Arek uses the Push tool to smooth small indentations and soften wrinkles in the jacket. You place the brush tip next to the edge and drag it in the desired direction. The tool shifts the material, depending on the drag direction, to the left, right, up, or down. With the brush size you determine how large an area the effect covers. The shoulder can be lowered slightly this way, a cheek looks narrower, and a strand of hair lies more neatly.
Restraint is important. Only straighten what benefits the person, and do not change the shape of the face. The tool takes practice, so it is worth doing a few test runs.

Step 11: Remove the Background and Last Distractions
Finally, check the overall image for spots and distractions that have been overlooked so far. Arek discovers a spot that probably comes from the camera sensor. With the Spot Healing or Patch tool, you remove it directly in the image without creating an additional layer. Make sure the background remains even and that no new patterns emerge.

Step 12: Creating Crops for the Client
You leave the resolution unchanged at this stage. Then you crop the image into the desired formats. Arek usually offers a classic head crop, like the ones known from job application photos or passport photos. In addition, there is a crop down to roughly below the chest, which the client can use on their own. When cropping, make sure there is a balanced proportion between head and body. A large head requires slightly more body in the image, a small head slightly less.
Save each variant as a JPEG with its own file name. That way you keep the original image in the history and can re-crop at any time.

Step 13: Landscape Format and Overall Overview
Landscape shots are especially popular with Arek. What matters here is to position the person so that a bit more space remains on one side. This space can later be used for text or logos. There is no fixed formula; you decide by feel and visual impact.
In the end, this results in three files: the classic crop, the extended crop, and the landscape format. This overall overview allows the client flexible use, and at the same time the original image remains unchanged.

Summary ??? Retouching a Business Portrait: Natural-Looking Results in Photoshop
Good business portrait retouching starts at the shoot and improves the image with restraint. You remove temporary blemishes, secure the editing via Smart Filters, model light and form with Dodge & Burn, and straighten clothing and hair with the Liquify tool. The most important rule is: the person must recognize themselves in the finished photo. Laugh lines, moles, and personal features are part of that and are preserved. Finally, you create suitable crops so that the client has the right image for every situation.
FAQ
How high should the opacity be for Dodge & Burn?Arek usually works with about 7 to 9 percent. You need to adjust the exact values to each shot and your own style.
Is it okay to remove laugh lines?Arek advises against it. Laugh lines are part of the person's natural expression, and removing them quickly looks artificial.
Why should I work with a Smart Object?A Smart Object ensures that all filters are applied as Smart Filters. This way you can change settings at any time later without destroying the original image.
Which tools are suitable for skin blemishes?The Healing Brush and the Clone Stamp are ideal. Work in small steps and always choose the source in the immediate vicinity so that the transition remains inconspicuous.
What does the Push tool do in the Liquify filter?It shifts pixels in the direction in which you drag. With it, you can smooth small wrinkles, lower shoulders, or straighten hair. Practice using it on test images first.
How many crops should I deliver to the client?Arek recommends at least three variants: a classic head crop, a crop down to below the chest, and a landscape format.

