

Imagine you're standing in front of a dark background, and your client is waiting. Whether he looks confident or tired after the shoot depends heavily on how you set the light. That's exactly what Arek shows in this tutorial. He doesn't build his setup in advance, but light by light right before your eyes, and explains at each step what task the respective light takes on.
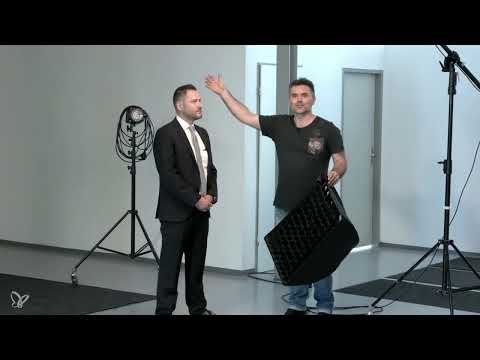
The video is only loaded from YouTube when you play it – data (including your IP address) is then transmitted to YouTube/Google. More in the privacy policy
This guide takes you through the entire setup: from the main light through the rim light and the background light to the fill light and the final light test. You'll learn not only where the equipment stands, but also why it stands there.
Key Takeaways
A business portrait is created from three lights with clearly separated tasks: main light, rim light, and background light. Each light fulfills its own function, and only their interplay produces a coherent image.
The main light provides soft, flattering light on the face. An umbrella with a diffuser is well suited for this because it doesn't harshly emphasize skin imperfections.
The rim light separates the person from the dark background. A honeycomb grid focuses it so that it only reaches the hair and shoulder and doesn't light up the entire room.
The background light creates a round spot of light behind the model. Here too, a honeycomb grid focuses the light so that it hits the background in a targeted way.
A fill light brings life into the eyes. A small reflector on a stand brightens shadows under the eyes and nose and creates catchlights.
Extension cables belong neatly at the edge of the work area. Loose cables at walking height are a serious source of accidents.
Step-by-Step Guide
Preparation and Positioning
Arek first places the model at the mark on the floor. Normally, you set up the light before the client arrives so that the shoot can start quickly. In the tutorial, however, he shows every step, so he works in front of the running camera. Lay out the equipment in the order in which you will set it up: main light, rim light, background light, fill light.

The Main Light on the Boom Stand
The main light is the starting point of every portrait. For this, Arek uses a boom stand that stands to the side of the lamp. The stand isn't strictly necessary, but it makes positioning easier because you can align the lamp above the model without the stand getting in the picture.
First, align the lamp roughly. Make sure it is above the model, and check how much light reaches the eyes. If the eyes are set rather deep in the skull, you need to lower the lamp a little so that the eyes get nice catchlights.

Laying Extension Cables Properly
Before you continue, take care of the cables. Arek explicitly emphasizes that loose cables must not hang in the air where someone could trip over them. It's better to extend generously and lay the cables neatly at the edge of the work area. This way you avoid accidents in the studio and damaged equipment.

Using the Umbrella with Diffuser
As the main light modifier, Arek uses an umbrella with a diffuser placed in front of it. The result is a soft, translucent light that lies between a softbox and an umbrella. For business portraits this is ideal, because you don't want to emphasize wrinkles and imperfections, but make the face look flattering. The umbrella is also more compact and easier to handle than a large softbox.

Setting the Rim Light with a Honeycomb Grid
Now the second light is added. It should separate the model's hair and shoulders from the dark background. This is especially important when the background and hair are dark, because otherwise they merge with each other. The rim light provides contours and makes the model appear more three-dimensional.
Arek uses a small softbox with a honeycomb grid. The grid focuses the light and prevents it from spreading all over the room. You can compare the result yourself: without the grid, the light looks diffuse; with the grid, it can be aimed precisely at the model. The grid is therefore not an accessory for aesthetics, but a tool for control.


Aligning the rim light on the model
Switch on the light and aim it at the model. Let your model help you: have them step onto the marker once more and turn slightly toward the direction of the light. Arek shows that you should set the light to an angle of about 98 percent to the model before you assess the result from the camera's point of view.
Pay attention to the cables here as well. An extension cable ensures that nothing is left dangling in the air.

Setting up the background light
You aim the third light at the background behind the model. It creates a bright, round spot of light that gives the image depth and additionally separates the model from the background.
Here, too, Arek works with a honeycomb grid, this time a coarser version. The light is shaped as a reflector with a grid. A smaller reflector placed closer to the background would also work. However, Arek chooses a large light spot, which is why he uses a coarse grid. Feel free to try different distances and decide based on your impression of the image.


Checking distances and assessing the overall setup
Before you fine-tune the lights, check the overall setup. Make sure you have enough distance between the lamps, the model, and the background. In a small studio, you may have to squeeze in a bit or move closer to the background. In this example, Arek has enough space, so he can position all the lights freely.
Also keep in mind that in this case the background will not be replaced afterwards in Photoshop. It stays as it is photographed. If you want to replace the background later, you need a different approach.

Fine-tuning the main light
Now it's time for the fine work. Arek checks the main light once more and evaluates whether the eyes are well lit. The catchlights should be clearly visible. At the same time, he observes the shadows: soft cast shadows appear under the nose, on the chin, and above the eyes.
With some models, these shadows can emphasize dark circles under the eyes or signs of tiredness. This is exactly what the next step is meant for.


Using the fill reflector as a reflector
To soften dark circles and wrinkles, Arek uses a fill reflector. The so-called Sound Bouncer has the property of producing a strong reflection on a small surface. Photographers often use it outdoors when shooting against the sun, but it works just as well in the studio.
Since no assistant is available in the example, Arek attaches the reflector to the stand with a holder. This holder is available as an accessory. You position the fill reflector so that it directs light back into the eyes and under the eyes. The result is clear: wrinkles and the shadow under the nose become weaker, and the eyes look more awake.


Checking the holder and doing the first light test
Arek also shows at this point that a holder doesn't always feel good right away. It has to be tightened firmly before it holds stably. Therefore, check before the shoot that the reflector is seated firmly. The client should under no circumstances have to hold the reflector by hand themselves.
Once all the lights are in place, the setup is complete. You now have the main light with a reflector from the front, the rim light for the contours, and the background light for the spot of light. Now you can do the first light test and assess the result on the camera image.


Summary ??? Business Portrait with a Dark Background: Lighting Setup Step by Step
You have seen how a business portrait with a dark background is created from three lights and a reflector. The main light shapes the face softly, the rim light separates the model from the background, and the background light places a round spot of light behind them. The reflector softens shadows and adds sparkle to the eyes. When setting up, make sure cables are laid neatly, there is enough distance, and the holder is stable. With this approach, you create a solid foundation for every further portrait.
FAQ
Why does Arek use an umbrella instead of a softbox for the main light?The umbrella with a diffuser delivers soft light, is more compact, and is easier to handle. It is suitable for business portraits because it does not harshly emphasize skin imperfections.
What is the honeycomb grid used for with the rim light?The honeycomb grid focuses the light. This way it hits the hair and shoulders in a targeted manner and does not spread throughout the room.
Does the boom stand have to be used?No, it is not strictly necessary. However, it makes positioning easier because the stand is positioned to the side and is not in the frame.
Why should you be particularly careful with extension cables?Loose cables in the air can cause tripping. It's better to extend generously and lay the cables neatly along the edge of the work area.
What does the reflector do in the portrait?The reflector bounces light into the eyes and under the eyes. This softens shadows, dark circles, and tiredness lines, and the eyes receive catchlights.
Can I replace the background later in Photoshop?That is possible, but in this example the background is photographed exactly as it should appear later.

