In the creative workflow, it plays an essential role to integrate your own ideas and concepts into digital designs. The Greebler-plugin is an effective tool that allows you to not only use existing shapes but also create your own, unique designs. In this guide, you will learn step by step how to use the Greebler plugin to generate your own shapes and integrate them into digital projects.
Key insights
- The Greebler plugin offers numerous customization options for creating shapes.
- You can set the maximum number of Gribbles per polygon and experiment with various settings.
- Your own shapes can be easily imported into the Greebler library and used.
Step-by-Step Guide
To fully leverage the potential of the Greebler plugin, follow these steps:
1. Open Greebler and Edit Basic Shapes
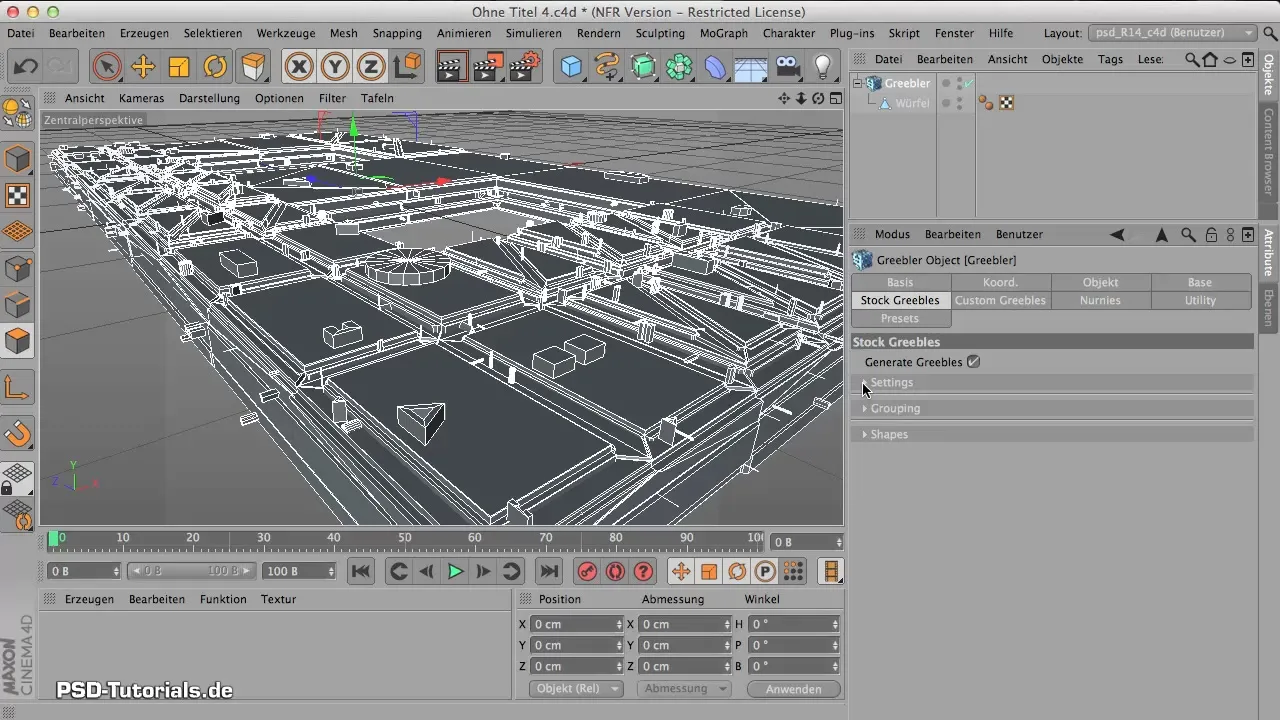
After launching the Greebler plugin, you will encounter the interface that provides various submenus. First, go to the "Settings" tab, as this is where you will find the most important settings. A central slider is "Max Gribbles per Polygon". Set this value to 15 to see the maximum number of Gribbles per polygon. This will show you how diverse and detailed your creations can be.
2. Offset and Height Adjustments
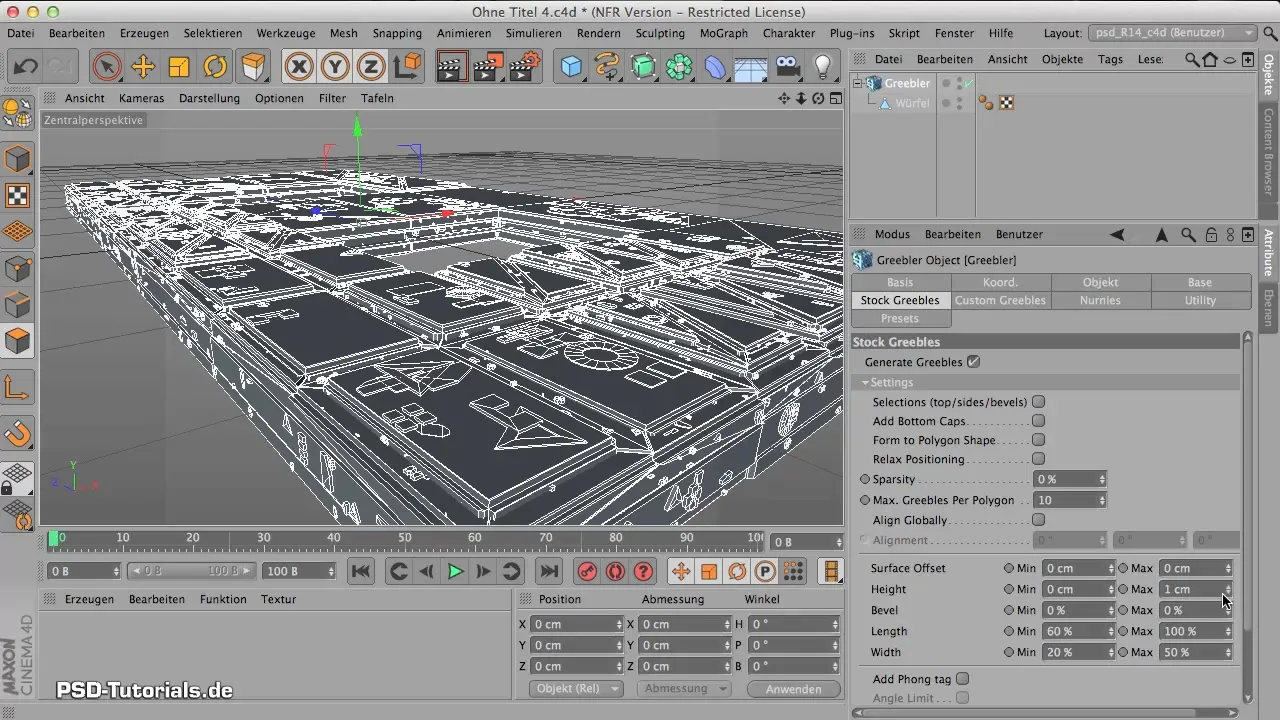
An interesting feature is the "Surface Offset". With this value, you can influence the spacing between the objects. Experiment with small height values to create fine textures. Reduce the minimum value to 0.1 to achieve subtle details. This often makes the surface appear more interesting without distracting from the main shapes. Adjust the surface settings to intuitively display the desired look.
3. Beveling Gribbles
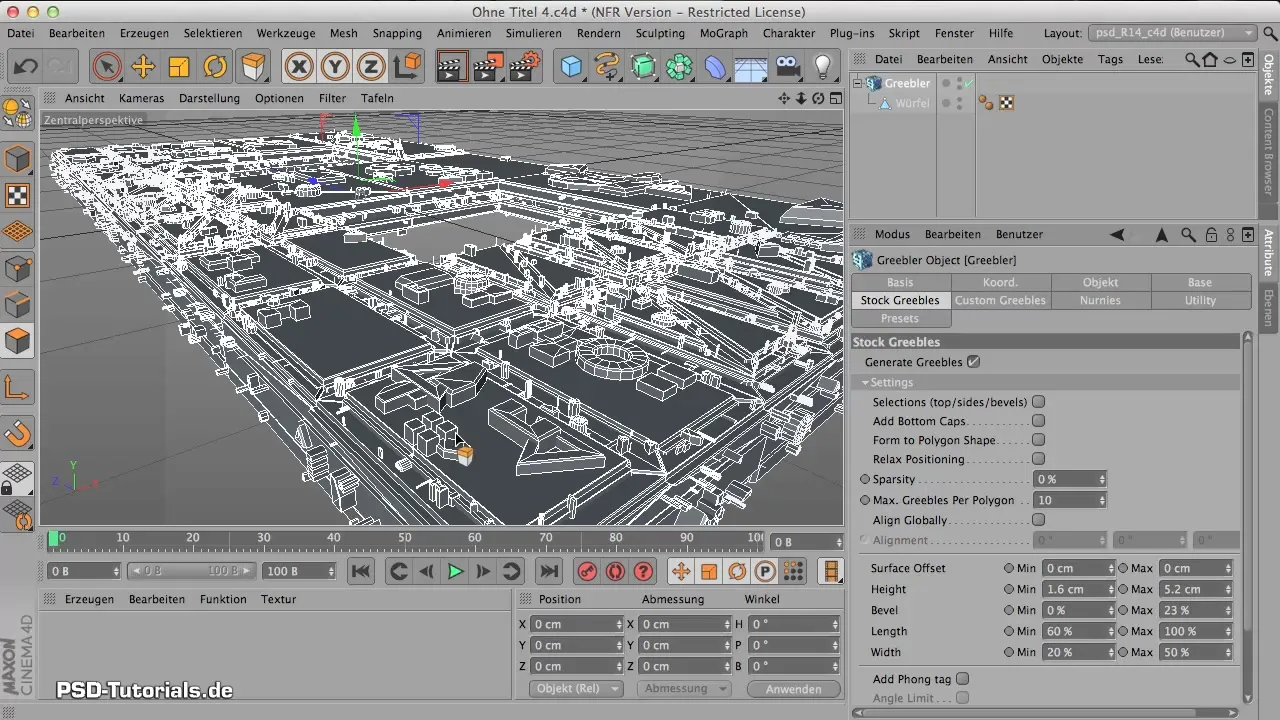
Another step is to bevel the Gribbles. You can bevel not only the base plates but also the Gribbles themselves. Be aware that this also increases the polygon count. So, if you want sharper edges, increase the bevel value, but be careful—a number that's too high can demand significant computational power.
4. Using Groupings and Arrays
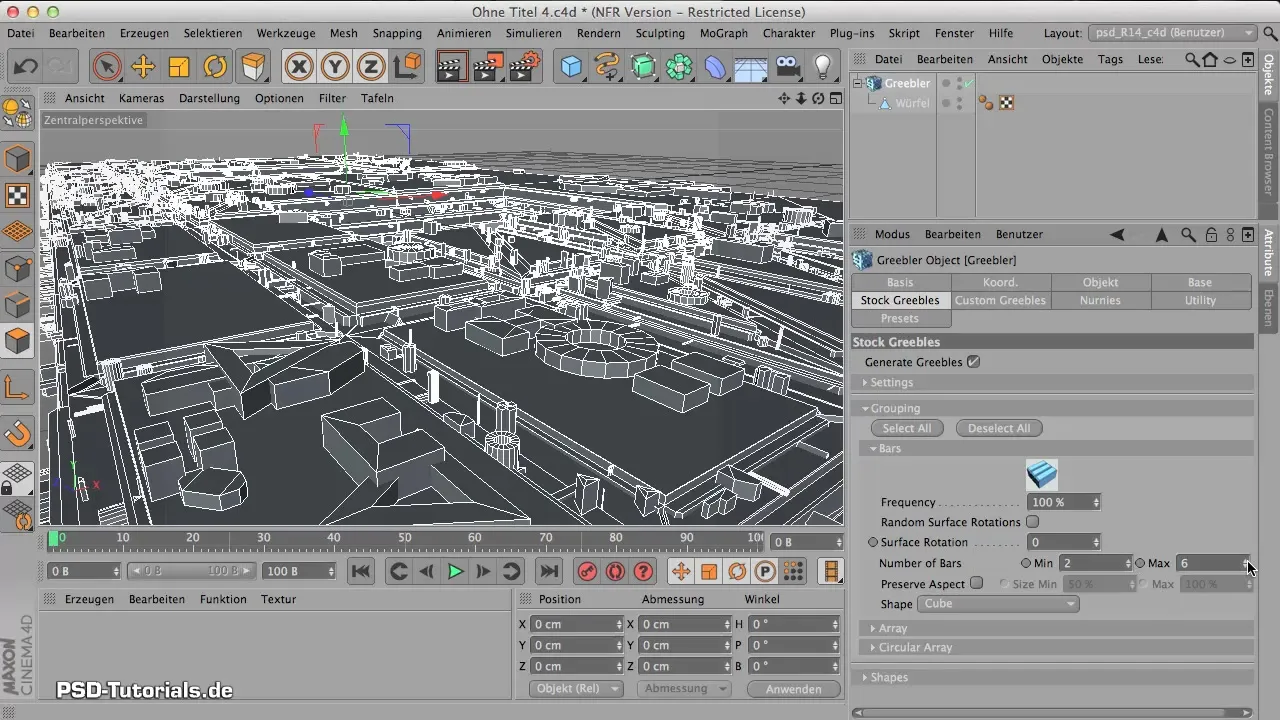
To create a structured arrangement, there is an option to group Gribbles in "Bars" or "Arrays". These allow you to create a concise, regular structure for your scenes. You can adjust the number of elements per group to achieve the desired regularity. For example, increase the number of Gribbles in an array from 6 to 10 to create interesting patterns.
5. Create and Import Custom Shapes
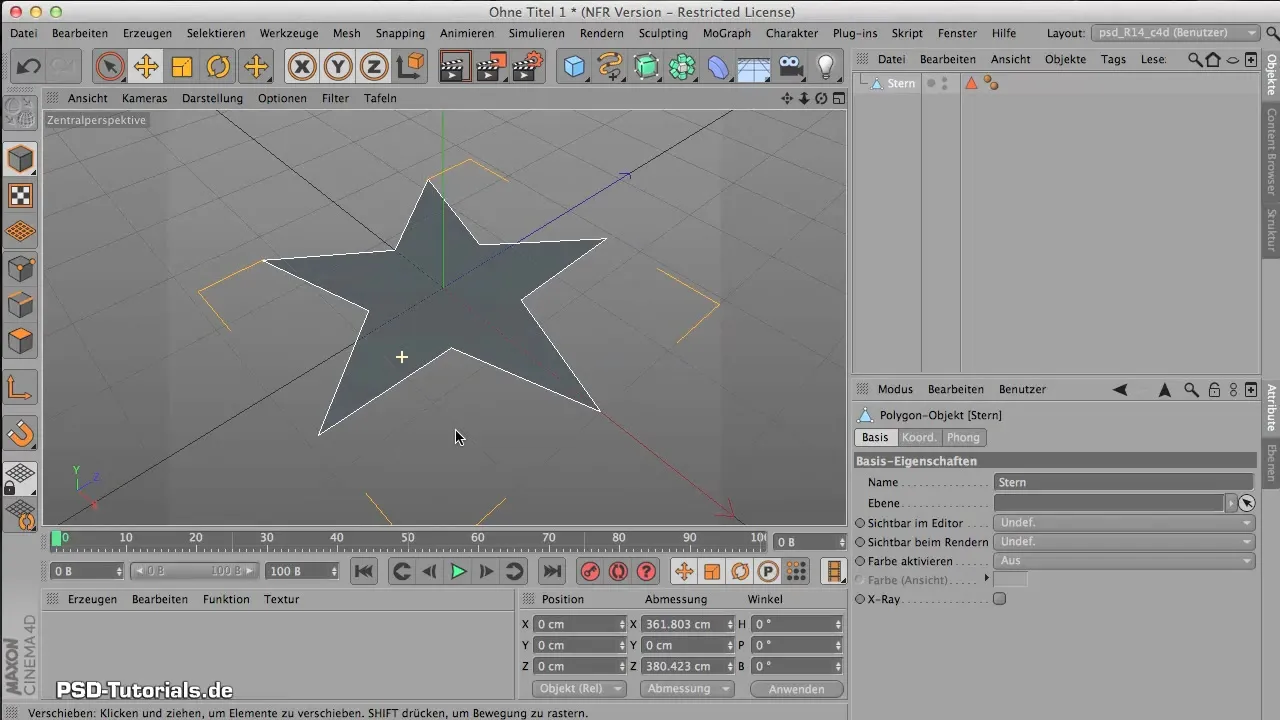
Now it gets interesting: You can design your own shapes and then import them into the Greebler library. For example, create a star with five points and transform it into a base shape using the extrusion function. Delete the unnecessary end faces to keep only the shape you want to use for Greebler. This is also the first step to adapting your software workflow and filling the library meaningfully.
6. Utilize the Library
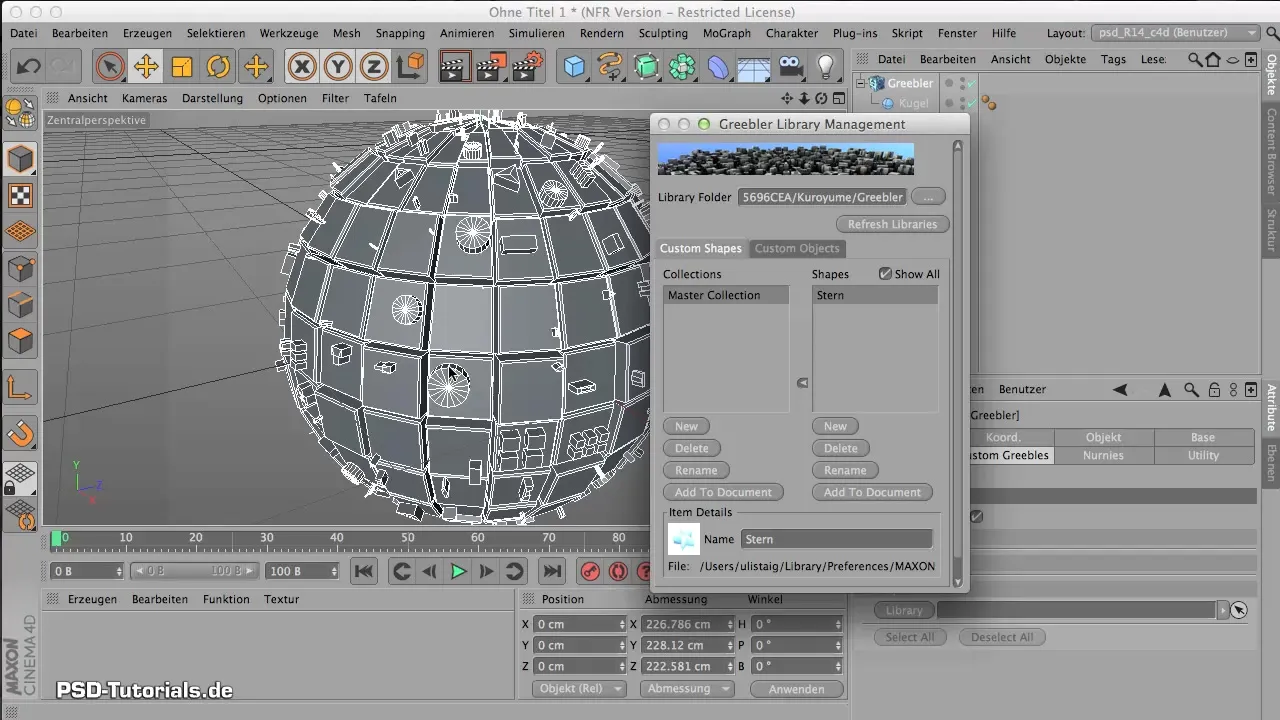
In Greebler, you can now use the shapes from your library. Go to the "Custom Gribbles" section and drag your previously created shape into the project. Make sure to click on the desired shape and activate it. This way, you can see it instantly in your current project.
7. Finalization and Adjustments
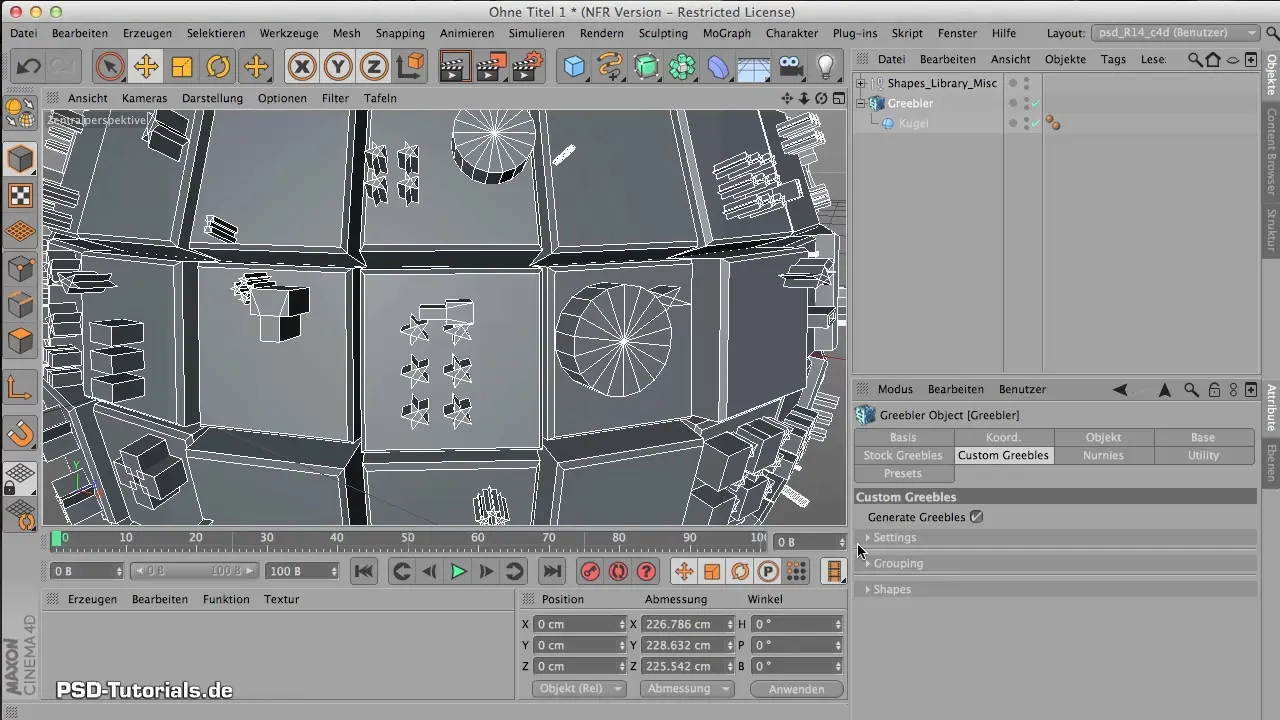
Once your shape is in the project, you can experiment with the Greebler's default settings. For example, add additional Gribbles or adjust the existing ones to come closer to your design vision. Ensure that the newly created shapes harmoniously fit into the overall picture and are visually appealing if necessary.
Summary - Designing Custom Shapes with Greebler
In this workshop, you learned how to create and effectively use your own shapes with the Greebler plugin. From the basic settings to importing your own designs, the Greebler plugin is a valuable extension for creative projects. Utilize these features to fully unleash your digital creativity.
Frequently Asked Questions
What is the Greebler plugin?It is a plugin that allows for the creation and customization of detailed engravings and structures in 3D models.
How can I create my own shapes in Greebler?You can import custom-drawn shapes to use them as Custom Gribbles in Greebler.
What settings are the most important in Greebler?The most important settings include the maximum number of Gribbles per polygon and the Surface Offset for the spacing.
How does beveling affect the Gribbles?Beveling increases the polygon count and can enhance the visual quality of the edges of objects.
