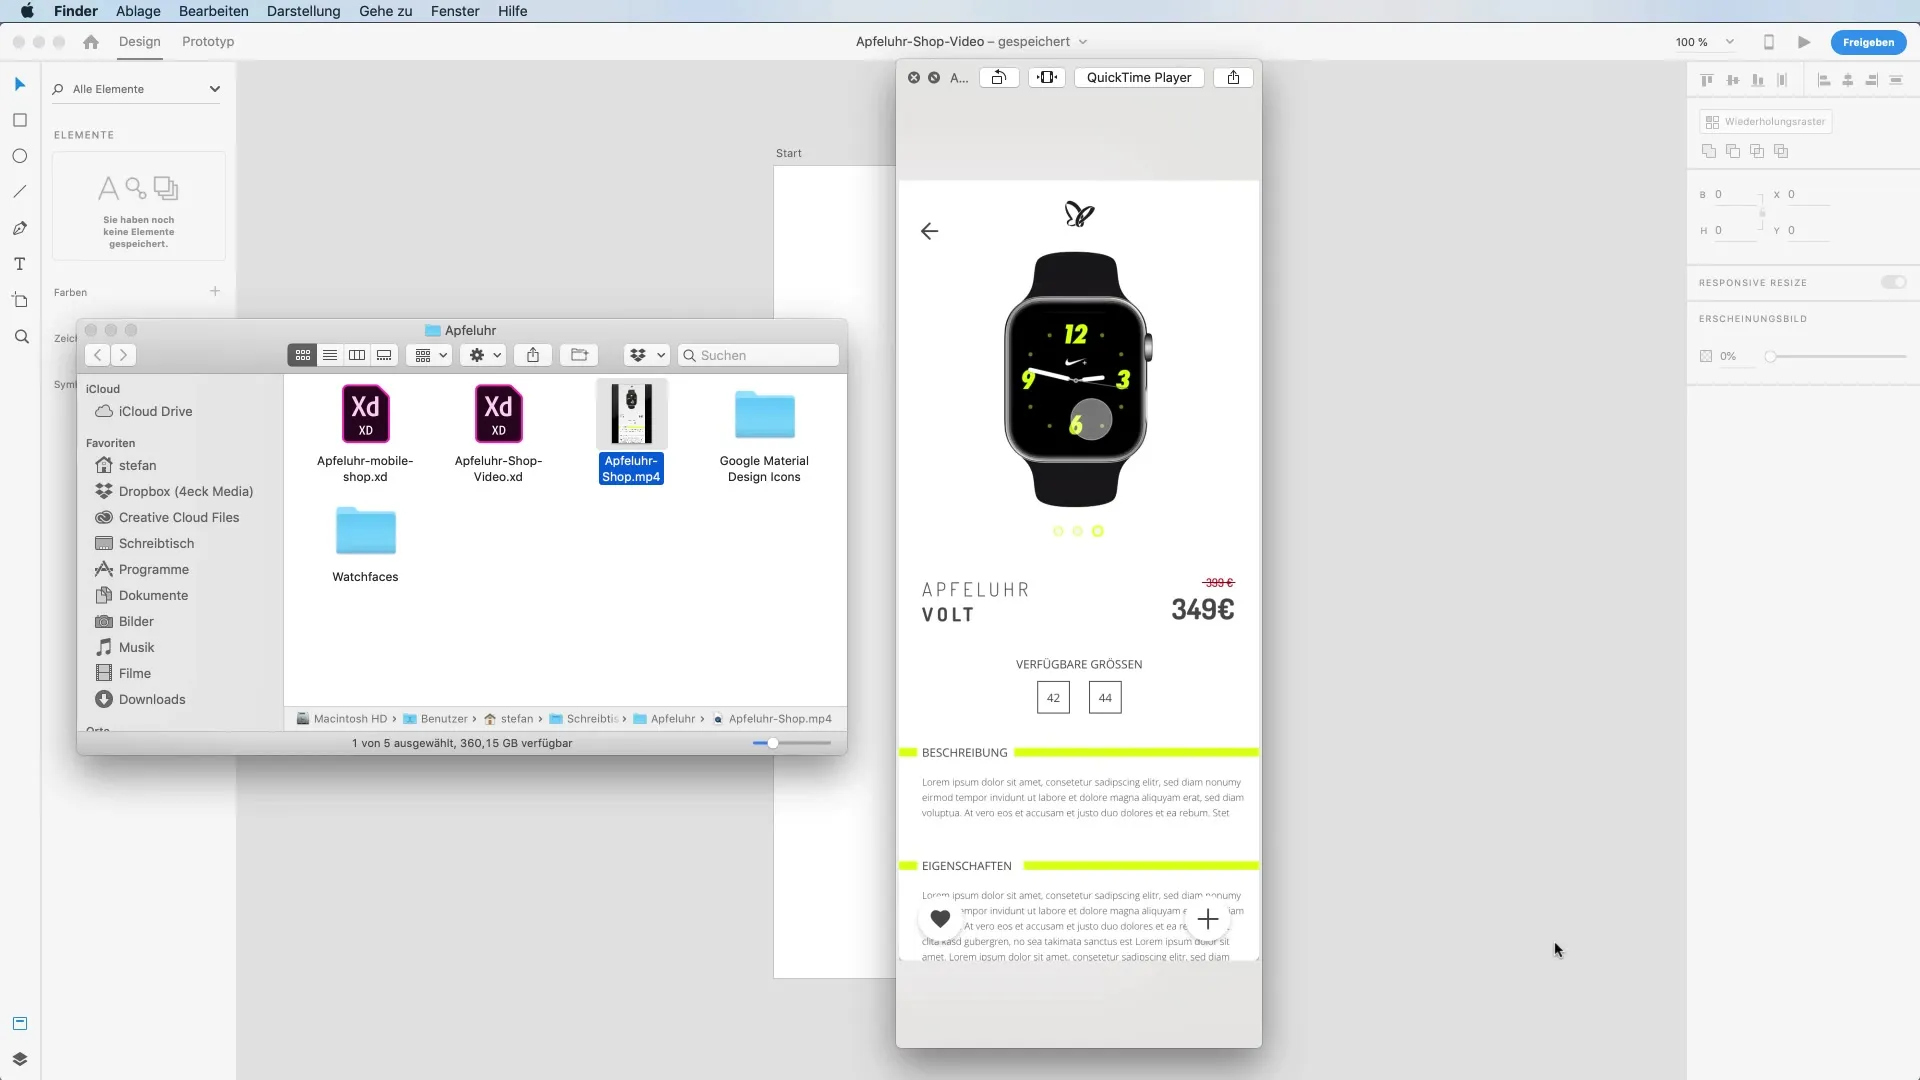
It is time to elevate your design skills to a new level. In this tutorial, you will learn how to create a high-quality prototype for an online-shop in Adobe XD. Whether you already have experience or are a newcomer; here you will receive the crisp tips and techniques you need to bring your ideas to life. We will go through various steps of the design process that will allow you to create an engaging and functional layout. Let’s move directly from the conceptual phase to your first design.
Key Insights
- Creating a high-quality prototype requires thoughtful planning and precise execution.
- The design is optimized through the use of suitable colors, fonts, and layouts.
- The use of icons and images plays a crucial role in visual communication.
Step-by-step Guide
Step 1: Create a rectangle and basic styling
Start your design with the rectangle tool. Hold down the Shift key while drawing a rectangle and position it in the center of your artboard. Hide the stroke and change the color to a dark placeholder. Set the corners to a value of 30 to achieve rounded corners. This is the first step to giving your user interface a modern and sleek look.

Step 2: Adjust color and optimize contrast
Change the color of your rectangle to a soft gray to improve contrasts. This step allows you to visualize the text and images placed on it better. Once you are happy with the color, create another frame inside the first rectangle. This frame will later serve as a boundary for the images you want to insert.
Step 3: Add images and mockups
Now it's time to add images. Go to File -> Creative Cloud Libraries and select an appropriate image from your collection. You can also use freely available images from the internet. Drag the image into your frame and scale it while holding down the Alt key. This function enables you to maintain the proportions of the image while adjusting it to your design requirements.
Step 4: Working with the text tool
Use the text tool to add your product name. Set the font to "Dosis" in size 20 and the weight "Light." For example, write "Apfeluhr." Highlight the text and change the letter spacing to 200 to increase the spacing between the letters. This ensures appealing readability and a good visual design.

Step 5: Pricing and visual accents
Add the price for your product. Use a simple text field and position it appropriately below the product name. Experiment with different font sizes and colors to highlight the price. A red tone that suggests significant reduction could work well here. Ensure that the pricing information is visually appealing and clearly recognizable.

Step 6: Adding icons
To enhance the user experience, we will add interactive elements such as icons. Go to flaticon.com and search for Material Design Icons. Download the needed icons and incorporate them into your design. Ensure that these icons harmonize with the color scheme of your overall design.
Step 7: Further improve layout
Use the repeat grid to further refine your layout. Pay attention to consistent spacing and a uniform design. This helps your prototype appear engaging and ensures that the user interface is clearly structured.
Step 8: Processing your design layers
Organize your layers to keep track. Label and name groups like "Navigation Icons" or "Product Photos." This will make future editing easier and ensure that everything remains orderly and clear.
Step 9: Final polish
Review your layout before the final presentation. Ensure that the colors, fonts, and spacing are consistent. Experiment with transparencies and shadows to give the design depth. Each element must be carefully reviewed to ensure an attractive and professional end product.

Step 10: Presenting the prototype
Finally, you can present your design in Adobe XD. Ensure that all interactive elements work correctly and that your prototype is easily scrollable. This finalized prototype represents the result of hard work and should now be ready to present your concept to support the online shop.
Summary – Creating a high-quality prototype for an online shop in Adobe XD
In this first part of the tutorial, you have learned how to create a high-quality prototype for an online shop in Adobe XD. From basic design with rectangles to pricing and icons, you have gone through all the necessary steps to develop an engaging and functional layout. These skills not only assist you in creating prototypes but also enhance your understanding of visual design.
Frequently Asked Questions
How do I choose the right font?The right font should fit the brand identity and be easy to read.
Can I use my own images?Yes, you can upload your own images or use freely available images.
How do I save my prototype in Adobe XD?Go to "File" and select "Save" or "Share" to secure your prototype.
What color scheme should I use?Choose colors that match the brand and create a harmoniously contrasting arrangement.
Which icons are best for my UI design?Use icons that are consistent with your design style and easily understandable for the user.


