
Adobe XD Tutorial - Experience Design and Prototyping

- From idea to prototype: How to create interactive designs with Adobe XD
- For an easy start: learn how to use artboards, colors, UI kits and more.
- Prototyping and wireframing: How to combine your artboards into a user experience
- Practical application: Put what you have learned into practice using two sample projects
- For smooth collaboration: How to comment and share your prototypes with others
- Working with Adobe XD, brought to the point by Stefan Riedl in 5 goal-oriented hours
- Bonus: Everything you need to know about what's new with the Adobe XD 19 update
Show how your app and website should work! - Learn how to use Adobe XD with the tutorial, and your designs will be clickable right away!
27 Videos, 314 minutes
Adobe XD Tutorial: Experience Design and Prototyping
Adobe XD-Tutorial: 01 | Intro
Welcome to the big Adobe XD tutorial. In this intro, I introduce myself as your trainer.
Adobe XD-Tutorial: 02 | UI & UX and different level designs
What is the difference between user experience (UX) and user interface (UI)? What types of level design are there and what is Adobe XD best used for? The answer is here!
Adobe XD Tutorial: 03 | Getting started, splash screen and available functions
Open Adobe XD for the first time - and there are already numerous options to choose from. This video gives you a short warm-up for Adobe XD, an overview of the program and an introduction to the splash screen of XD and its functions.
Adobe XD-Tutorial: 04 | Create artboards with different resolutions
Artboards (artboards) can be created in Adobe XD for different resolutions and devices in no time at all. In this tutorial, you will find out which peculiarities need to be taken into account.
Adobe XD Tutorial: 05 | Grid settings for columns and rectangular grids
Different grid settings make it easier for us to arrange elements and objects neatly one below the other. A rectangular grid and a column layout for columns are available for this purpose.
Adobe XD-Tutorial: 06 | Helpful presets with UI-Kits
Google, Apple and Microsoft provide practical UI kits for a quick start. These ready-made artboards help us enormously in the later design of prototypes for different platforms.
Adobe XD-Tutorial: 07 | Working with colors
Colors play an extremely important role in almost every design - in this video you will learn how to work with colors in Adobe XD, how to import them and what practical sources are available to collect ready-made color harmonies.
Adobe XD Tutorial: 08 | Importing Assets
There are numerous methods to import assets such as images, files, text documents, etc. into Adobe XD. In this video, I present a few methods. However, since XD is part of Adobe's Creative Cloud, it is of course extremely convenient and comfortable to work with the libraries.
Adobe XD-Tutorial: 09 | Fonts and Typography
The topic of fonts and typography is a big part of our journey through Adobe XD. In this video, you will learn how to use fonts correctly and efficiently.
Adobe XD Tutorial: 10 | Shapes and Symbols
Shapes can either be easily imported into Adobe XD or created using the path tool. If an object is used more than twice, it is also advisable to add it to the assets list as a symbol.
Adobe XD Tutorial: 11 | Inspiration for designers
Designing has a lot to do with inspiration and input from outside. This includes the analog environment as well as the digital world. Here I present some portals that I like to visit.
Adobe XD-Tutorial: 12 | Create Onepager, Part 1 - Learn techniques
Let's start with a small, fine practical project. In this tutorial and the next two videos, we will create a one-pager.
Adobe XD Tutorial: 13 | Create Onepager, Part 2 - Repetition Grid
The repeat grid is one of the most important features of Adobe XD. It helps us to scale and individually fill groups of objects once they have been created.
Adobe XD-Tutorial: 14 | Create Onepager, Part 3 - References and Footer
In the last part of the one-pager design, we will take care of the footer and an area for references. Here we use practical SVG files and get to know other design techniques.
Adobe XD Tutorial: 15 | Basics in prototyping and wireframing
In this lesson, we look at the question of how individual artboards can be connected interactively. We will clarify the options for choosing the transition and what other modifications we can make to the prototype.
Adobe XD-Tutorial: 16 | Build menu for desktops interactively
Every website needs an anchor point for navigation. In this video, we focus exclusively on the creation of a main navigation in the header area and the interactive connection to each other.
Adobe XD-Tutorial: 17 | Build menu for smartphones interactively
This training builds on the previous chapter and shows how we adapt the created desktop menu for a smartphone. The hamburger icon and the menu items are enhanced with interesting animations.
Adobe XD Tutorial: 18 | The Auto-Animate feature for interactive prototyping
One of the most powerful tools for the best possible visualization is the Auto-Animate function of Adobe XD. In this example, I explain how you can adapt the principle of the Auto-Animate function for every conceivable scenario.
Adobe XD Tutorial: 19 | Creating a High-Fidelity Prototype, Part 1 - Mobile Online Shop
In the following videos, we will learn how to create a prototype for an online store. We will learn ways to create visually appealing high-fidelity prototypes from simple artboards. Part 1 of 4.
Adobe XD Tutorial: 20 | Creating a High-Fidelity Prototype, Part 2 - Product Details
In the second part, we take care of the presentation of the detailed descriptions, add sliders for the images and link the artboards to each other.
Adobe XD Tutorial: 21 | Creating a High-Fidelity Prototype, Part 3 - Overlay Function
The overlay function for interactive prototyping offers us exciting possibilities for showing and hiding information directly.
Adobe XD Tutorial: 22 | Creating a High-Fidelity Prototype, Part 4 - Final Animation
Good usability design always gives the user feedback on the system status. We will incorporate this feedback into a nice animation at the end of the project.
Adobe XD tutorial: 23 | Voice control
Adobe XD also masters interaction by voice command in its prototyping process. Verbal commands therefore lead to system actions that we can define ourselves. I will show you how this works in this tutorial.
Adobe XD Tutorial: 24 | Audio annotation of previews
When collaborating with other departments and people involved, audio commentary is a valuable feature for explaining the project status in an understandable way.
Adobe XD Tutorial: 25 | Device Preview on end devices via app
Testing a prototype in a virtual environment is one thing - presenting it live on an end device is quite another. And that's exactly what Adobe XD makes it easy to do, either via USB or via a Creative Cloud connection. We use the Adobe XD app from the app store for this.
Adobe XD Tutorial: 26 | Publish project with design specifications
During the collaboration, it is essential to exchange information about the project status with other departments. The prototype can be released via the publish function so that reviewers, developers and clients can get a visual impression of the project. At this point, the processing cycle between the specialist departments begins in order to bring the project to maturity.
Adobe XD Tutorial: 19 | Creating a High-Fidelity Prototype, Part 1 - Mobile Online Shop
19 min OpenAdobe XD Tutorial: 20 | Creating a High-Fidelity Prototype, Part 2 - Product Details
17 min OpenAdobe XD Tutorial: 21 | Creating a High-Fidelity Prototype, Part 3 - Overlay Function
9 min OpenAdobe XD Tutorial: 22 | Creating a High-Fidelity Prototype, Part 4 - Final Animation
19 min OpenNew features in Adobe XD 19
Adobe XD Tutorial: 27 | New features in version 19
Adobe XD is still a very young program and is changing more and more with each update: In this video, I explain what new features have been added in the jump from version 18 to version 19, how the features are used and in which situations they are helpful. These include: Components instead of symbols, Responsive Resize, guides, polygon tool, more options for text formatting and much more. Have fun!
Examples of use
-
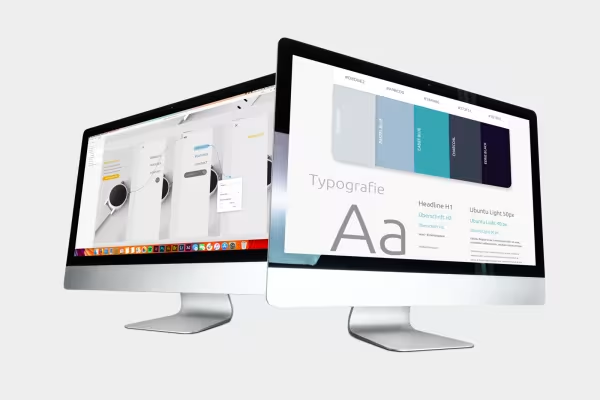 Example: Learn how to create UI designs and link them to interactive prototypes.
 -
 Example: Learn how to create user interfaces for smartphone displays and desktop views in Adobe XD.
 -
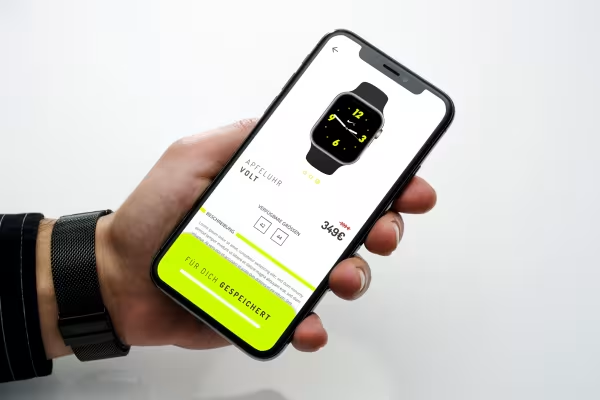 Example: Get into the concrete application of Adobe XD in two sample projects.
You might also like

Save time with artificial intelligence

Live your layout now!

Full power, more inspirations, maximum WOW effect!

More style, more power, more templates!
Comment now „Adobe XD Tutorial - Experience Design and Prototyping“