

Your colleague's birthday is already over before you notice it in the calendar? That happens easily when appointments get lost between meetings and project deadlines. With conditional formatting in Outlook, you make sure that birthdays and holidays catch your eye immediately. You set up the rules once, and Outlook then automatically colors the matching entries. In this guide, I'll show you step by step how to create a rule for birthdays in green and one for holidays in orange.
The video is only loaded from YouTube when you play it – data (including your IP address) is then transmitted to YouTube/Google. More in the privacy policy
Key Takeaways
- Conditional formatting automatically colors appointments as soon as a certain word appears in the subject.
- You reach the rules via the view settings, which you can open by right-clicking an empty field in the calendar.
- A rule applies globally, meaning equally in the day, week, and month views.
- You create new birthdays by writing the keyword "Geburtstag" in the subject. The color then appears by itself.
Step-by-Step Guide
Step 1: Return to the current date
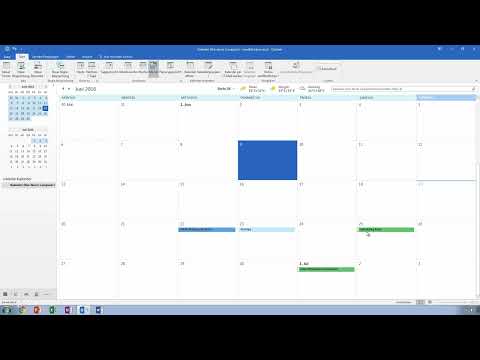
Open your Outlook calendar. With the "Today" button at the top of the calendar bar, you can jump back to the current date at any time. From there, you can switch to other months with one click, for example to December or June. In June, I'll show you two birthdays on the 25th and on July 1st. They are in the grid but hardly stand out. That's exactly what we want to change.

Step 2: Open the view settings
Right-click any empty field in the calendar. In the context menu, select "View Settings". Here you define how your calendar looks: which appointments are displayed, how the start and end of entries are shown, which filters are active, and which fonts are used. Conditional formatting is part of these settings.
Step 3: Access conditional formatting
In the dialog window, you will find the "Conditional Formatting" section. If you have worked with Excel before, you know the principle: Certain entries receive a defined design as soon as a condition is met. Before you create anything new, take a quick look to see whether rules already exist for this view. I already have some, and we are now going to extend exactly this list.

Step 4: Create a new rule
Click "Add New Rule". Outlook then opens a new window in which you define the rule completely. You only need a few details, namely a name, a color, and the condition under which the formatting should apply.
Step 5: Set the name and color
Give your rule a descriptive name, for example "Birthday rule". A clear name helps you quickly find the rules in the list later when you add more categories. Then you choose the background color. For birthdays, a strong green is a good choice because it stands out well from the other appointments.
Step 6: Define the condition
Now you determine when the rule should apply. In the selection field, you can specify where Outlook should search: only in the subject, in the notes, or in all frequently used text fields. For birthdays, the subject is completely sufficient. So select the "Subject" option in the search field and enter the word Outlook should search for.

Step 7: Enter the keyword and confirm
Enter "Geburtstag" as the search term. The rule is thus: If the word Geburtstag appears in the subject, the appointment should be highlighted in green. Confirm the entries with "OK". Make sure you also close the view settings dialog with "OK" so that the change is applied.
Step 8: Check the result in the calendar
Return to the calendar. The birthdays you have already entered are now colored green. You can see at a glance that there are two birthdays coming up in June. With that, you have already implemented the most important rule, and one glance is enough to see the appointments.
Step 9: Create the rule for holidays
Holidays can be set up in exactly the same way. Open conditional formatting again and create a new rule. This time you choose orange as the color and set the condition to "Feiertag" in the subject. Holidays are thus just as visible as birthdays, but can be clearly distinguished by the different color.
Step 10: Check the holidays in the calendar
Once you have confirmed the rule, all appointments with the word "Feiertag" in the subject appear in orange. This also applies to entries that you create later. The best way to check this is directly, by creating a test appointment with the subject "Feiertag". If it appears in orange, the rule is working correctly.
Step 11: Enter new birthdays
Now it gets practical. Create a new appointment and enter "Geburtstag von Betina" in the subject. As soon as you save the appointment, it automatically appears in green. So you no longer have to color anything manually. You can see right away that a birthday is coming up soon.
Step 12: Pay attention to the keyword
An important note: The rule only responds to the word Geburtstag in the subject. If you leave out the word, the appointment remains uncolored. In the video, I remove the word "Geburtstag" from the subject and only write the name. The entry is highlighted in blue because the condition is no longer met. So be sure to consistently use the keyword when creating entries.
Step 13: Check the formatting in all views
Finally, take a look at the week and month views. The birthday also appears in green there. This is because the rule doesn't apply to just a single view, but globally to all views in your calendar. So you only have to make the setting once.

Summary – Outlook Calendar: Highlight birthdays and holidays with conditional formatting
With conditional formatting in Outlook, you make birthdays and holidays visible at a glance. You open the view settings by right-clicking an empty field, create a rule for the keyword "Geburtstag" in the subject, and add a second rule for "Feiertag". Birthdays then appear in green, holidays in orange. Since the rules apply globally, the display works in all views. Just make sure to always use the keyword in the subject.
FAQ
Do I have to set up the rule separately for each calendar view?No, conditional formatting applies globally to all views, that is, to the day, week, and month views.
Can I also apply the rule to notes or other text fields?Yes, in the selection field, besides the subject, you can also specify the notes or all commonly used text fields as the search area.
Which colors are best suited for birthdays and holidays?Green for birthdays and orange for holidays are a good choice because the two colors are easy to tell apart.
What happens if the keyword is missing from the subject?Then the appointment does not meet the condition, and it remains uncolored or receives the default color.
Can I change existing rules later?Yes, to do so, open the view settings again and edit the desired rule in the list.

