

Imagine you start your Monday morning with a glance at your calendar and immediately know what the week will bring. That is exactly what the calendar function in Microsoft Outlook is designed for. Alongside email sending and contact management, it is firmly integrated into the program and is quicker to understand than you might think.
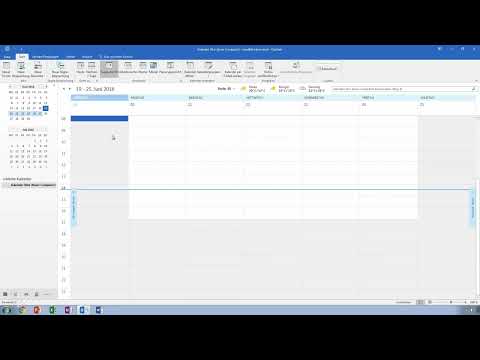
The video is only loaded from YouTube when you play it – data (including your IP address) is then transmitted to YouTube/Google. More in the privacy policy
In this guide, you will learn the basics. You will find out how to create an appointment or a meeting, how the two differ, how to switch between views, and how to enter reminders, recurring appointments, and birthdays. By the end, you will be able to fill your calendar on your own and use it sensibly.
Key Takeaways
- You open the calendar view in Outlook via the calendar icon and get an overview of days, weeks, and months.
- An appointment is an entry just for you; for a meeting, you invite other people.
- The "Show as" setting (busy, free, away) determines what colleagues in an Exchange environment can see of your calendar.
- You can move entries with the mouse, create them as all-day events, or quickly create them in the month view with a double-click.
- You set reminders, importance, and confidentiality (private) directly in the appointment window.
Step 1: Open the Calendar View
The entry point is the navigation bar at the bottom of the window. Click on the calendar icon there, and Outlook shows you the calendar view. There you see an overview of the next two months, a large month view, and the current weather forecast for the location you have set. You change the location by clicking "Add location" in the weather display. The current day is always highlighted so that you can orient yourself at a glance.

Step 2: Create a New Appointment or Meeting
At the top left you will find the "New Appointment" button. It opens an input window in which you enter all the details of your entry. You can choose between two variants, which are distinguished in the window by the participant fields. Without any additional people, a pure calendar entry is created. As soon as you add participants, it becomes a meeting.

Step 3: Distinguish Between Appointment and Meeting
The difference is quickly explained in everyday terms. An appointment belongs only to you. You enter, for example, a doctor's appointment, a lunch break, or a public holiday. A meeting, on the other hand, involves several people. You arrange to meet with colleagues, enter their names in the participants field, and Outlook sends an invitation. You can then see the invitees' responses directly in the calendar.
Meetings additionally offer a connection to other functions. Using the elements in the window, you can, for example, jump back to the related emails. If the Skype plugin for Office 2016 is installed, you can start a Skype meeting directly from the window. The plugin must also be available to the participants for this.
Step 4: Switch Between Views
Outlook offers several views, which you switch at the top in the calendar bar. The day view shows you individual days with hours. The work week view hides Saturday and Sunday and shows only Monday through Friday. The week view shows you all seven days. The month view gives you the entire month at a glance. The schedule view clearly combines days and times side by side. With the "Today" button, you can jump back to the current day at any time.
Via the folder structure, you can also open several calendars and sort them into groups. One group for work and one for your private life keep the two neatly separated. You can also send a calendar to other people by email or publish it online, provided a WebDAV service is set up on the server. This is especially relevant in companies and is often already preconfigured automatically.

Step 5: Set Location, Time Period, and All-Day Events
In the appointment window, you first enter a subject, for example "Doctor's visit". In the "Location" field, you enter the location, such as an address in Berlin. Outlook suggests existing locations if you often have appointments there. Then you set the start and end. If you choose a Wednesday as the start, Outlook automatically takes the same day for the end. Afterwards you only need to set the times, for example 9:00 to 10:30 a.m.
If an entry covers the whole day, you activate the "All-day event" checkbox. This is suitable for birthdays or public holidays.

Step 6: Set notes, importance, and reminder
In the large text field of the appointment window, you can note what you need to bring, such as a diagnosis sheet for the doctor. Below that, you set the importance, that is, high, normal, or low.
You set the reminder via the selection in the "Reminder" field. By default, a reminder is often already set, which you should adjust. If you want to be reminded one day in advance, you select "1 day". If you would rather be notified 18 hours in advance, you enter the value in hours. The notification then does not appear at 9:00 AM the day before, but around midday.
Step 7: Define availability, recurrences, time zone, and confidentiality
The "Show as" option determines how your status appears in the calendar. You can mark yourself as busy, free, away, or at another location. This information is particularly important if you work in a company environment with Exchange. Colleagues can then see when you have time and when you don't, and can plan meetings accordingly.
Via "Recurrence type" you set up regular repetitions. If you go to physiotherapy every week, you select a weekly rhythm there. If you work in different time zones, you can additionally set the time zone in the appointment window.
With the "Private" switch, you mark an entry as confidential. The icon in the calendar then indicates that it is a private appointment, and other people see no details about it. However, this function requires an Exchange environment.
Step 8: Save and move an appointment
Click "Save and close" to accept the entry. The appointment then appears in your calendar. If an appointment is rescheduled, you don't have to create it again. Click the entry, hold down the mouse button, and drag it up or down. Each box corresponds to half an hour. If you push a doctor's visit back by one hour, you simply drag it down by two boxes.
If you hover the mouse over the entry, you see the new time as a preview. This method is much faster than opening the appointment window again each time.

Step 9: Quickly add entries in the month view
In the month view, you can capture appointments particularly quickly. A double-click on a day opens a quick window, and an entry is already created. For a public holiday, this is ideal because the whole day is automatically marked as busy and no reminder is set. The appointments appear in the month view as small colored lines, so you can see at a glance what is coming up.
A double-click on the quick entry opens the full appointment window. There you can subsequently change the location, date, or reminder.
Step 10: Maintain birthdays and recurring events
The easiest way to enter birthdays is as all-day events. Enter the person's name, for example "Birthday Max Mustermann", and select the day. By default, the entry is set as free, because people usually still go to work on a birthday. With a reminder one to two days in advance, you have enough time to get a gift.
A later chapter of this series explains the yearly repetition of such entries. It also covers further details on recurring appointments and on inviting participants to meetings.
Summary – Outlook Calendar: Creating appointments and meetings correctly
You have now learned the basics of the Outlook calendar. You know how to open the calendar view, create appointments and meetings, and switch between day, week, and month views. You also know the settings for location, reminder, availability, recurrences, and confidentiality. With a bit of practice, you will enter your appointments in seconds and keep an overview of your week.
FAQ
What is the difference between an appointment and a meeting?An appointment is a calendar entry that only you can see. For a meeting, you invite other people via the participant fields, and Outlook sends an invitation for it.
How do I set a reminder 18 hours before an appointment?In the appointment window, select the option in hours in the "Reminder" field and enter the value 18.
How do I move an appointment without creating it again?Click the appointment, hold down the mouse button, and drag it to the desired time. Each box corresponds to half an hour.
What does the "Show as" option mean?It determines whether you appear in the calendar as busy, free, away, or at another location. Colleagues see this status when a shared calendar is used.
How do I quickly enter birthdays or public holidays?In the month view, double-click the desired day and select the all-day option. The entry is created without additional settings.
When can't the details of a private appointment be seen?If you mark an appointment as private, no details are displayed to other people in an Exchange environment.

