

Have you already used Outlook for emails, calendar, address book and tasks and are wondering what is hidden behind the "Options" menu item? Then you've come to the right place. The options contain numerous settings that determine how the program behaves, and many of them can be adapted to your habits with just a few clicks. This guide takes you through the most important areas, explains what they are for, and shows you which settings you should know. You don't have to try out every option individually. An overview is enough to later find the right one in a targeted way.
The video is only loaded from YouTube when you play it – data (including your IP address) is then transmitted to YouTube/Google. More in the privacy policy
Key Takeaways
- You can find the Outlook options via "File" and then "Options".
- You can set Outlook as the default program for emails, contacts and calendar.
- Username, initials, theme and message format can be customized centrally.
- Spell check, signatures and fonts are among the settings you use every day when writing.
- In the "Advanced" area, you control, among other things, the startup behavior, sending and receiving, hardware acceleration, the ribbon and the Quick Access Toolbar.
- The Trust Center regulates security features such as automatic downloads and macros. You should make changes here with caution.
Step-by-Step Guide
Step 1: Open the Outlook Options
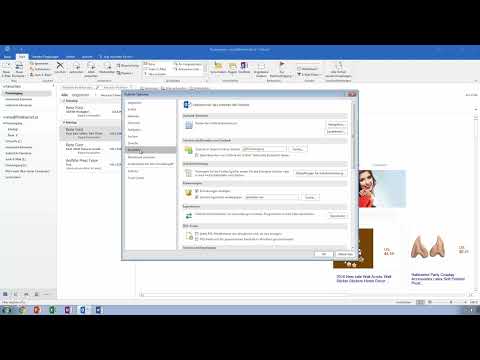
Getting started is quick. In Outlook, click the "File" tab at the top left and then select "Options" at the bottom. A window opens with a clear list of various categories through which you can reach all the settings. On the left side you will find the areas, and on the right the corresponding content is shown.

Step 2: Set Outlook as the Default Program
In the "General" area, you specify that Outlook is the default program for emails, contacts and calendar. This has a practical advantage: if you click an email address on a web page, Outlook opens automatically with a new message to that address. You can then send the email directly via Outlook without first having to open another program or a browser service.
Step 3: Set Username and Initials
Also in the "General" area, you store your username. This name later appears as the sender in the messages that others receive from you. You can also define your initials here. Make sure your name is spelled correctly, because it will be visible in every email.
Step 4: Choose the Office Theme
Also in the "General" area you will find the option for the Office theme. Here you can choose between the variants White, Dark or Default. The "Default" setting is a good starting point for most users. If you find the interface more comfortable during long working hours, try the dark theme. The change affects the entire Office appearance and can be reset at any time.
Step 5: Determine the Message Format
In the "Mail" area, you decide in which format your messages are composed. The choices are HTML, Rich Text and plain text. HTML is the standard today and allows the most extensive design with images, colors and fonts. Rich Text is an older alternative that has proven itself primarily in corporate networks. Plain text is suitable if you only want to send text without any formatting. If you want to make sure your message arrives correctly for every recipient, choose Rich Text or plain text.

Step 6: Configure the Spell Check
Also in the "Mail" area you will find the spell check options. You can specify that Outlook automatically performs a check before sending. In addition, you can set it so that the original message is ignored when replying or forwarding. Outlook then checks only the part you have just written yourself, and not the text that was already sent previously.
Step 7: Manage Signatures, Stationery and Fonts
In the same area, you can also create and edit signatures. A signature is a fixed text block at the end of your emails, for example with name, position and contact details. Using the buttons, you can additionally set stationery and default fonts for new messages and replies. If you regularly send the same information, a well-configured signature saves you a lot of time.
Step 8: Adjust Calendar Settings
The "Calendar" area offers you several useful options. Here you can add more calendars and store your working hours. This information is important when you plan appointments, because Outlook displays the availability of other people accordingly. You also set default colors and determine which scheduling views are displayed. You also turn the weather display on or off here and choose between Celsius and Fahrenheit. The default settings are entirely sufficient for most users.

Step 9: Configure People and Tasks
In the "People" section, you determine the order in which contacts are sorted. For example, you can have them sorted by first name or by last name. In the "Tasks" section, the most interesting option is automatically activating reminders for tasks. You can also set colors for overdue or completed tasks. That way, you can see at a glance what is urgent.
Step 10: Set Search Options and Language
Under "Search," you determine where Outlook searches by default. You can have it search the current folder or include all mailboxes. This is especially practical if you have multiple email addresses. In the "Language" section, you specify which languages you would like to use in addition to German, such as English or Japanese. These settings affect, among other things, the spell checker and the user interface.
Step 11: Use Advanced Settings for Startup and Sending
The "Advanced" section contains many options that control Outlook's behavior. Here you specify which folder is displayed at startup, for example the Inbox. You also determine whether messages are sent immediately when a connection is available, or whether Outlook waits for your confirmation until you have written all your emails. Most users leave these settings as they are by default.
Step 12: Disable Hardware Acceleration
Also under "Advanced," you will find the hardware acceleration option. You can disable it if the display has problems, for example if buttons suddenly appear black. This occurs mainly with certain graphics cards. Only change this option if you actually have display problems, because as a rule, acceleration offers advantages.

Step 13: Customize the Ribbon and Quick Access
Also under "Advanced," you can customize the ribbon, that is, the bar with commands at the top edge, to suit your wishes. You can move commands, remove sections you don't need, or create new ones. The Quick Access Toolbar is a small bar at the top left, where you place frequently used functions such as printing. The order of the icons can also be changed here.

Step 14: Get to Know Add-Ins and the Trust Center
In the "Add-Ins" section, you see additional extensions that are integrated into Outlook, and you can access their options. The Trust Center is the area for security and data protection. From there, you can access the email security settings and information about Office.com. You will also find the management of certificates for encrypted emails here. For private users, these certificates are usually not relevant; in a corporate environment, the system administrator often decides on this.
Step 15: Control Automatic Downloads and Macros
In the Trust Center, under "Automatic Downloads," you specify whether images and external content in emails are loaded automatically. It makes sense not to enable this option automatically, because some spam emails contain malicious code. The same applies to macros. Here you can determine whether they are allowed, and enable or disable programmatic access. Once you confirm your changes with "OK," you have finished the tour of the options.
Summary – Mastering Outlook Options: The Most Important Settings at a Glance
You now have an overview of the central Outlook options. You know where to find them, and you can set up Outlook as the default program, customize user name, design, and message format, and set signatures and spell checking. You also know the calendar, people, and task settings, the search function, the languages, and the advanced options for the ribbon and quick access. With the Trust Center, downloads, and macros, you have the knowledge to configure Outlook more securely. Most settings are already sensibly preset. Change them selectively when you have a specific need.
FAQ
Do I have to set all the options in Outlook individually?No, the default settings are sufficient for most users. Only adjust the items you really need.
How do I open the Outlook options?Click "File" at the top left and select "Options" at the bottom.
Why should I change the message format?With HTML, you can design messages. If you want to be sure that the recipient sees your email correctly, choose Rich Text or plain text.
What happens if I disable hardware acceleration?The display in Outlook may change. This helps mainly with display problems, such as black buttons.
Should I allow automatic downloads in emails?This is not recommended, as spam emails may contain malicious code. Images and content can be loaded manually.
