

Outlook can do more than manage emails and appointments. With the tasks function, you can also keep track of your to-dos, right in the program you're already working in. In this guide, you'll learn step by step how to create a task, set deadlines and priorities, set up reminders, document progress, and archive completed tasks in a traceable way.
The video is only loaded from YouTube when you play it – data (including your IP address) is then transmitted to YouTube/Google. More in the privacy policy
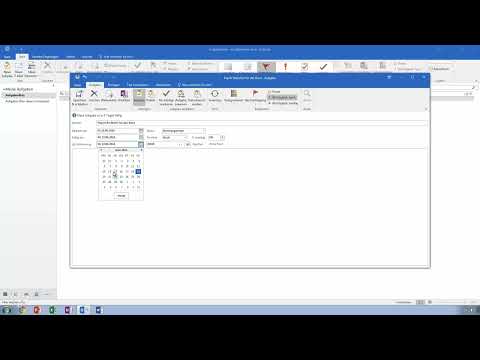
The everyday office task "Order paper" serves as an example. This task accompanies you through all the steps, so you get to know the individual functions in context.
Key Takeaways
- You'll find the task overview at the bottom left in Outlook and open it with a click.
- When creating a task, you set a subject, a start date, a due date, and a priority.
- A reminder ensures that you remember the task in time.
- Progress can be specified as a percentage. The status is adjusted automatically.
- With "Mark as completed," you set the status to 100 percent, and the task appears crossed out.
- You can display completed tasks at any time. This way, you can later prove what you completed and when.
Step-by-Step Guide
Step 1: Open the Task View
You start in the navigation bar at the bottom of Outlook. There, you switch to the task overview with a click on the tasks icon. As long as you haven't created any tasks yet, the view shows you that there are currently no tasks. From here, you start all further steps.

Step 2: Create a New Task
A click on "New Task" opens the input window. Here, you begin with a short description that will immediately remind you of the content later. For example, if you need to order paper for the office, you enter exactly that as the subject. But you can just as well create a shopping list or record any other tasks.

Step 3: Set Start and Due Date
In the next step, you specify when you start the task and by when it must be completed. In the example, the paper is to be ordered on Tuesday, and the order must be completed by Thursday at the latest. You select the appropriate days using the date fields. You also specify whether you have already started or whether the task has not yet been started. This information is important because it affects the status of the task.
Outlook then displays the due date clearly. In the example, you can see right away how many days remain until the deadline.
Step 4: Set Priority and Reminder
Not every task is equally important. If there is no paper left in the office, the order is highly urgent. That's why you select the priority "High" here. Then you activate the reminder so that Outlook notifies you at the right time. In the example, the reminder is set up on the day of assignment at 11 a.m. The "Owner" field remains set to yourself in this case.
Step 5: Use Notes, Details, and Forwarding
In the text field for notes, you can record all the information you need for the task. In the example, that would be, for instance, the name of the online shop where you want to order. With the forwarding function, you send the task to colleagues or acquaintances in case someone else is to take it over.
In the "Details" section, you can additionally enter the estimated total effort and the working time actually required. There is also a field for billing information, for example if you have traveled kilometers for a task. This information is particularly suitable for professional tasks, because it allows you to later prove what you have completed.
Step 6: Set Category, Importance, and Follow-up
For a better overview, you can assign a category to each task. If you color a category red, important tasks immediately catch your eye in the list. With follow-up, you flag tasks that you need to keep monitoring and add additional reminders if needed.
You set the importance to "High," "Low," or "Private." This way, you distinguish between urgent work tasks and personal errands.
Step 7: Save the Task and Use Views
With "Save and Close" you apply all the details and return to the overview. The new task appears there immediately with its subject and due date.
The task list can also be sorted. You can display the tasks by priority, by activity, or by completion status. This way you can see at a glance what is coming up next.
Step 8: Documenting Progress
When you continue working on a task, you open it again by double-clicking. In the detail view, you enter the progress as a percentage. In the example, you set the value to 50 percent. Outlook then automatically sets the status to "In Progress", because you have already started the task.
If you change the progress to 75 percent, the status remains "In Progress". Only at 100 percent does it automatically change to "Completed". This behavior ensures that the status and the progress always match each other.
Step 9: Marking a Task as Completed
There are two ways to complete a task. Either you set the progress to 100 percent in the detail view, or you click directly on "Mark as Complete". In both cases, the status is automatically set to "Completed". After saving, the task appears in the list with a strikethrough. This way you can see at first glance which items you have already completed.
Step 10: Displaying Completed Tasks Again
If you want to trace earlier completed items, you activate the display of all completed tasks. The completed items then appear in the task list. This is particularly useful in a professional environment, because you can use it to prove what you did and when. With many parallel tasks, you also keep an overview thanks to categories and sorting.
Summary – Outlook Tasks: Creating and Managing a To-Do List
You have seen how to create and structure to-do lists in Outlook. You set the subject, start date, due date, and priority, set up reminders, and document progress through to completion. With categories and views, you keep an overview even with many tasks. It is best to try out the functions right away with a task of your own, as this is the fastest way to internalize the process.
FAQ
Can I also pass tasks on to colleagues?Yes, you can forward a task or, if you use Exchange, assign it to a colleague. In addition, a status report can be sent to friends or colleagues.
What happens when I set the progress of a task to 100 percent?Outlook automatically sets the status to "Completed", and the task is displayed with a strikethrough in the list.
How does Outlook remind me of a task?You activate a reminder in the task details and specify when you want to be notified. In the example, this was the day of assignment at 11 a.m.
Can I view completed tasks again later?Yes, with the appropriate view option you display all completed tasks. This is helpful if you need to document or prove activities.

