

An email is far more than just text. Outlook allows you to insert images, shapes, SmartArt, charts, formulas and even Excel objects directly into the message. This guide shows you step by step which options you have, what you should pay attention to and where the limits lie.
The video is only loaded from YouTube when you play it – data (including your IP address) is then transmitted to YouTube/Google. More in the privacy policy
Key Takeaways
- You insert images, shapes, SmartArt, charts, tables and formulas into your email via the "Insert" tab.
- The total size of an email should not exceed about 10 MB. It is best to reduce large images beforehand.
- Many features, such as SmartArt, objects or calendar entries, are Outlook-specific and are not always displayed identically for the recipient.
- By testing in another email client or a webmail service, you can check how your message arrives for the recipient.
1. Start a new email with attachments
Create a new message and enter the recipient. In the "Message" tab, in the "Include" group, you will find the option to attach files. Here you can see which options Outlook offers you in general.

2. Add text and signature
Write your text as usual and then insert your signature. The signature should be at the end of the message so that the recipient can find your contact details right away.
3. Insert an image directly into the message body
You can embed an image as content of the email instead of sending it as an attachment. To do this, click "Pictures" in the "Insert" tab. Explorer opens, where you select the desired file. The image then appears directly in the text.

4. Adjust image size and rotate image
If the inserted image is too large, drag one of the corners until the desired size is reached. By clicking on the image, rotation options are also available to you. You can also specify whether the image should be in front of or behind the text.
5. Attach files and ZIP archives
Besides images, you can attach any files, such as PDF documents, spreadsheets or ZIP archives. Pay attention to the size: an email should generally not be larger than 10 MB. It is better to upload larger files to cloud storage and send the link instead.
6. Include business cards and calendar entries
Via the attachment area, you can send along a business card of your contact. A calendar entry can also be inserted. To do this, select the desired time period, such as tomorrow or the day after tomorrow, and confirm the selection. The recipient then sees whether you are available at that time and can respond directly to the appointment.
7. Add tables and online graphics
In the "Insert" tab, you can create tables of any size, for example a table with 2 x 1 or 2 x 2 cells. Via "Online Pictures" you start an image search, for example with the term "Koala". By clicking on the image found and "Insert", you add it directly to your email.

8. Use picture styles, borders and effects
If you select an inserted image, the Picture Tools appear at the top. Under "Format" you will find ready-made picture styles with drop shadow, reflection or border. You can also choose borders yourself and set the shadow specifically, for example from the right, from the left, outside or inside.

9. Use shapes as small graphics
Shapes are suitable for visually enhancing messages, such as a smiley graphic. Select the shape, drag it to the desired place in the text and then adjust colors and fill effects via the Format tools. To remove it, select the shape and press the Delete key.

10. Create and customize SmartArt
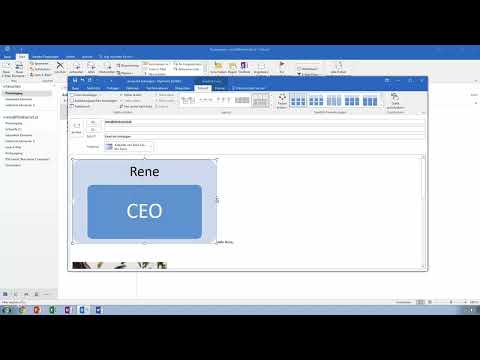
You may know SmartArt from Word or Excel. They are well suited for lists, block diagrams, and organization charts. Choose a template, for example an organization chart with CEO, CCO, or other positions, and replace the placeholder texts with your own content. With the "Reset" option, you can restore the original state if you have experimented too much.

11. Insert Charts
Via "Insert" and "Chart" you can create charts, for example for sales reports. In practice, however, charts are rarely used in emails. Users more often send an Excel file as an attachment because the data is easier to edit there.

12. Insert Screenshots Directly into the Email
With the screenshot function, you insert a current screen clipping. You select the desired area, such as part of an application or a window, and the image appears immediately in the message. Afterwards, you can style it like any other image with a border or shadow.

13. Set Links and Bookmarks
Via "Insert" and "Link" you link text to a web page or another email address. If you enter a web page, for example, and confirm with OK, the link is inserted automatically. Bookmarks are especially useful in long emails because you can jump between sections within the message. In practice, however, they are rarely used.
14. Use Quick Parts
Quick Parts are reusable text blocks. You save frequently used passages and insert them with a single click. This saves time when you regularly send similar messages.
15. Design Headings with WordArt
With WordArt, you create visually striking text. The templates are already formatted in bold, have an outline, and a slight shading. You can then customize the text or delete it again with the Delete key.
16. Insert a Text Box
A text box is a freely positionable container for text. Click "Text Box" and then "Draw Text Box". Drag the box to the desired location and type directly into it. You can then rotate and move it. However, text boxes cannot always be displayed cleanly in emails, so you should use them sparingly.
17. Insert Date and Time Automatically
Via "Insert" and "Date and Time" you select a desired format. The date is then inserted as normal text. Alternatively, you can also write the date manually.
18. Enable Drop Caps for Paragraphs
Drop caps are large initial letters at the beginning of a paragraph. Select the paragraph, open the "Drop Cap" option, and choose the desired variant. The first letter is then displayed enlarged. This styling is rather unusual in emails, but can be suitable for newsletters or formal communications.
19. Embed Objects
With "Object" you can embed an existing file, such as an Excel spreadsheet, or a new object into the email. The recipient can then open the object directly. However, the display only works reliably if the recipient also uses Outlook. Otherwise, they will receive the message but can do little with the object.

20. Create Mathematical Formulas
Via "Insert" and "Formula" you insert mathematical expressions. Under the formula tools, you can switch between professional and linear format, depending on whether you need a professional presentation or a simple notation. Existing sample formulas make it easier to get started.
21. Insert Symbols Such as Euro, Copyright, or Trademark
Via "Symbol" you find characters such as the euro sign, the pound symbol, the yen, the copyright or the trademark symbol. A click on the desired character inserts it directly into the text. If your keyboard layout does not offer the character, switch the input language to German in the Windows settings.
22. Use Horizontal Lines for Structuring
With a horizontal line, you separate individual sections of your email. For example, you can separate the date, the calculations, and the signature from one another with lines. This keeps the message clear and well organized.
23. Check Compatibility with the Recipient
Many Outlook features such as SmartArt, objects, or calendar items are not displayed identically in other programs. Older Outlook versions can also cause problems. Therefore, ask in advance which program the recipient uses, or test the message yourself. Webmail services such as Gmail or GMX are well suited for comparing how the message is displayed.
Summary ??? Outlook Email Attachments: Inserting Images, SmartArt, and Equations
Outlook offers you far more options than plain text. You can embed images, tables, shapes, SmartArt, charts, equations, symbols, and screenshots directly into your message. Keep an eye on the file size of about 10 MB and make sure that special features arrive correctly for the recipient. With a quick test in another email program, you make sure that your message looks the way you intended.
FAQ
What is the maximum size of an email in Outlook?As a rule, an email should not be larger than 10 MB. Reduce the size of large images before inserting them, or send very large files via cloud storage.
Why does my recipient not see my SmartArt correctly?SmartArt is an Outlook-specific feature. Other programs or older Outlook versions may display it differently or not at all. Ask which program is being used or use simpler design elements.
Can I have Excel files displayed directly in the email?Yes, this can be done via "Object". However, the display only works reliably if the recipient also uses Outlook.
How do I remove an inserted element again?Select the image, shape, table, or text box and press the Delete key. Alternatively, you can select the element with the mouse and delete it via the context menu.
How do I insert a euro sign if my keyboard doesn't have one?Use the "Symbol" button in the "Insert" tab. Alternatively, switch the keyboard layout to German in the Windows settings.

