

As soon as several objects are on the canvas, every movement quickly becomes a guessing game: you grab the lid instead of the cup, rotate the whole group instead of just one can, or distort an object because the wrong axis is active. In this tutorial, you will learn how to work precisely with the three basic tools Select, Move and Scale, as well as Rotate. I will also show you how the axis widget, the magic wand and the group function give you control back.
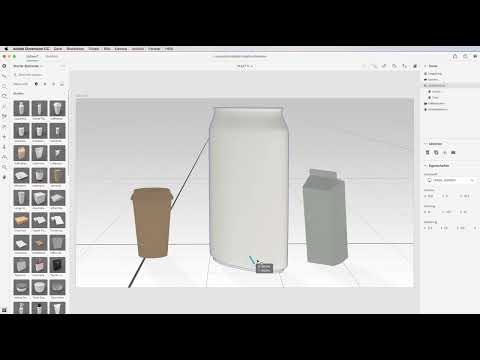
The video is only loaded from YouTube when you play it – data (including your IP address) is then transmitted to YouTube/Google. More in the privacy policy
Key Takeaways
- The three tools Select, Scale and Rotate can be found at the top of the toolbar and by default affect the entire group of an object.
- The axis widget allows you to move, rotate or scale only a specific axis.
- With the Control key or the Command key, you cancel the group selection and edit individual parts of an object.
- Via the panels, you can enter exact values for position, rotation and scale.
- The pivot point determines the point around which an object rotates. By default, it is the bottom center.
- The magic wand selects similar areas. With the intensity slider, you control how generous it is in doing so.
Step-by-Step Guide
Step 1: Getting to Know the Three Basic Tools
Before you get started, get an overview of the toolbar. There you will find the Select tool, the Move tool and the Scale tool. Each tool has a tooltip that explains its function and its own shortcut. You reach the Select tool with the V key, Scale with S and Rotate with R. If you use these keys consciously once, the tools will become much quicker to handle later on.

Step 2: Selecting Objects and Moving Them Freely in Space
First select the Select tool. Then click on a cup and drag it through the space while holding down the mouse button. This way you move the object freely without changing its size or orientation. Note that the selection always affects the complete group. If an object is composed of several parts, you therefore move all parts together.

Step 3: Scaling Proportionally
Sometimes you need to adjust the size relationships of objects to one another. To do this, click on the can and select the Scale tool. If you now drag while holding down the mouse button, the object gets larger or smaller. All proportions are retained because every axis changes in the same ratio. In this way, you can create, for example, an oversized can or a tiny model without it looking distorted.

Step 4: Rotating Objects
The Rotate tool is also located in the top toolbar. Select it and use it to turn, for example, a package until it reaches the desired position. This is especially handy if a product is to be shown lying down rather than standing. Keep in mind that the object may sink slightly into the ground during this rotation. You can correct this effect later with a function that I will show you in Step 11.
Step 5: Working Precisely with the Axis Widget
As soon as you select an object, a widget with individual axes appears. With it, you can address just one direction. For example, if you want an object to rotate only sideways, you click the appropriate axis and drag it. The object then moves exclusively along this axis. The same principle also works for scaling. A small helper field shows you how the value is currently changing, for example by a few pixels.
Step 6: Scaling Individual Dimensions
If you want to change a can not uniformly but only in width or height, you likewise use the axis widget. If you drag on a single axis, the object deforms accordingly. A note: with some models, this deformation affects two axes at the same time, for example with the combination of height and width. This is entirely intentional, but you should be aware of it so that the result does not turn out unexpectedly.
Step 7: Ungrouping and Editing Individual Parts
A coffee cup often consists of several individual objects, for example the cup itself and the lid. In the panel at the top, you see these components separately. By default, group selection is active, so that everything moves together. To edit only one element, hold down the Control key or the Command key and click on the desired part. Afterwards, you can, for example, take off the lid and customize it individually later.
Step 8: Enter precise values in the panel
When precision work is required, the mouse is often not enough. In that case, you enter the values directly in the corresponding panel. There you can set position, rotation, and scale for all three axes. If you want to tip a can over onto its side at an exact right angle, for example, you enter the value 90 for the rotation. If you then set the value back to 0, the can stands upright again. With scaling, you can deliberately keep the proportions intact.
Step 9: Understand and adjust the pivot point
Every object has a pivot point around which it rotates. In Adobe Dimension, you only have three positions at the top to choose from, unlike in Photoshop or InDesign, for example, which have nine points. By default, the bottom center is active. That is why a can swings outward when rotated if you do not change the pivot point. If you choose the centered middle instead, the object stays in its position when rotating and, for example, just hovers in the air. So choose the pivot point that you need for your editing.
Step 10: Deselect and work with the Magic Wand
If you want to deselect something, choose the Selection tool with V and simply click on the empty background. After that, nothing is active anymore. For similar selections, the Magic Wand is available to you. It offers the options New Selection, Add to Selection, and Subtract from Selection. With the intensity slider, you determine how large the area is that the Magic Wand captures. If the value is too low, it may find only the cup and not the lid that is farther away. In this case, you simply add the lid using the Add to Selection option, and both objects are selected.


Step 11: Delete, group, and duplicate objects
Using the action bar on each object, you can delete elements or combine them into groups. A group, for example named Can Pile, makes organization considerably easier. When you duplicate a can, a copy is created immediately. You can repeat this process as often as you like until you have built the pile you want.

Step 12: Reset objects to the ground plane
If you have stacked objects, they may float above the ground. There is a function for this that you access via the down arrow: Move to Ground Plane. One click on it puts the objects back on the ground. This function is particularly useful when you want to place cans or other products realistically on the surface.

Summary – Adobe Dimension: Precisely select, move, scale, and rotate objects
You now know the three basic tools and how to use the axis widget to edit individual directions in a targeted way. The Control or Command key helps you bypass group selection, and the panels allow exact values. The pivot point, the Magic Wand, and the Move to Ground Plane function round off your workflow. With these tools, you not only move objects in three-dimensional space, but also modify them in a targeted and traceable way.
FAQ
How do I quickly switch between Move, Scale, and Rotate?You use the toolbar at the top or the shortcuts: V for selection, S for scaling, and R for rotating.
Why does the whole group always move, even if I only click on one part?Group selection is active by default. Hold down the Control or Command key to edit individual elements independently.
How do I prevent an object from becoming distorted when scaling?Scale using the main surface of the object, not individual axes. This way, all proportions are kept in the same ratio.
What exactly does the axis widget do?It allows you to address only a specific axis, for example to rotate an object only sideways or to move it in only one direction.
Why does my object rotate around the wrong point?The default pivot point is at the bottom center. In the panel, choose the centered pivot point if the object should stay in place.
How do I deselect a selection?Choose the Selection tool with V and click on the empty background of the workspace.
When do I use the Magic Wand?The Magic Wand is suitable when you want to quickly select similar areas. With the intensity slider, you control how generously it selects.
How do I put floating objects back on the ground?Use the down arrow and choose Move to Ground Plane. The objects are then reset onto the surface.

