

Imagine you open a program and suddenly find yourself standing in an endless, airless space in which there seems to be neither up nor down. This is exactly the feeling you get when you start Adobe Dimension CC. The space has three axes, a depth that stretches into infinity, and no discernible beginning or end. Without orientation, you quickly lose yourself in it.
The video is only loaded from YouTube when you play it – data (including your IP address) is then transmitted to YouTube/Google. More in the privacy policy
This tutorial shows you how to set the canvas correctly, make sensible use of units of measurement and the grid, and move confidently through the scene with the most important navigation tools. Finally, you will learn to save camera views as bookmarks.
Key Takeaways
- You set the canvas right at the beginning. For a classic Full HD design, enter 1920 × 1080 pixels.
- The grid is your most important orientation aid in the endless 3D space and can be switched on and off at any time.
- With the tools Orbit Camera (key 1), Pan (key 2) and Dolly (key D), you move freely through the scene.
- With the F key, you zoom to the selected object if you have lost it in space.
- Saved camera views allow you to switch quickly between perspectives and render several views one after another.
Step-by-Step Guide
1. Understanding the 3D Space
Before you press the first key, it is worth taking a look at the properties of the space. It has three axes: height, width and depth. You recognize the depth by the vanishing horizon, which seemingly continues endlessly. Since the space is based purely on mathematical formulas, there is no fixed boundary. This is exactly what makes it flexible, but it also carries the risk of losing yourself in it.

2. Getting to Know the User Interface
When you start for the first time, you see a toolbar on the left, several panels on the right and the three-dimensional workspace in the middle. In the toolbar you will find the navigation tools that you will use shortly. The panels on the right side control properties and objects. That is also where the Scene panel is located, which you will need later for searching for objects.
3. Setting the Canvas
The most important question at the beginning is: How large should my canvas be? You can see the current dimensions at the top of the right panel, where you can enter them directly. For a classic Full HD format, enter 1920 in the width field and 1080 in the height field. You will later place your design on this surface.

4. Choosing Units of Measurement and Resolution
Next to the dimensions, you will find the units of measurement pixels, inches and centimeters. For digital design, it is best to stick with pixels; the other two units are mainly relevant for special use cases. You also set the resolution: 72 is suitable for desktop display, 300 for designs that are to be printed later.

5. Using the Grid as an Orientation Aid
Below the settings, you will find the checkbox for the grid. You could compare it to a lifeline: it gives your eye reference points to orient yourself by. If you deactivate it, all points of reference disappear, and you are standing in pure white without knowing where up and down are. So it is best to keep the grid activated permanently. If you do not like the line color, you can adjust it as well. Just make sure it remains clearly visible.
6. Fitting the Canvas into the Window
After you have changed the canvas, scroll bars may appear. This means that the surface no longer fits completely into the user interface. Then press Ctrl (Windows) or Command (macOS) and 0. The canvas is then fitted into the interface. You usually do not need to move it afterwards. If you would like to try anyway, hold down the space bar and drag with the mouse. Since you will move around in the space later anyway, moving it rarely brings any advantage, though.

7. Orbiting the Camera with the Twist Tool
The first important navigation tool is on the left in the toolbar. Adobe calls it Orbit Camera. After clicking, you can move around a central axis, in other words a pivot point. Orientation is easier if you place an object beforehand and click on it. Then it serves as a clear reference point. You can also activate the tool with the 1 key. If you are currently in the Selection tool, you can perform the same function by holding down the right mouse button.
8. Moving along an axis with the Pan tool
The second tool is called Pan and has the shortcut 2. As soon as you hold down the mouse button, you no longer move freely through space, but only along one axis. The camera glides from left to right or from top to bottom, without moving into the depth. This tool is especially helpful for precise, straight-line movements.

9. Zooming with the Dolly tool
The third tool is named Dolly and is activated with the D key. While you hold down the mouse button, you zoom in or out. Depending on which direction you move the mouse, you approach the object or move away from it. With these three tools, you basically move through space from the camera's perspective.

10. Controlling navigation with your left hand
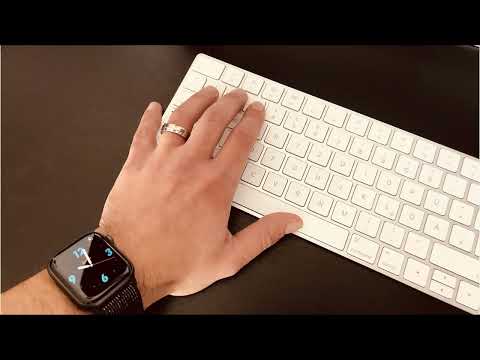
So that you can switch smoothly between the tools, place your left hand on the keyboard. Your ring finger rests on the 1, your middle finger on the 2, and your index finger on the D. Many gamers are already familiar with this posture. This way you execute navigation commands without constantly moving to the toolbar, and you keep your right hand free for the mouse.

11. Finding lost objects again with the F key
If it happens that you can no longer find your cube in the vast spheres of space, the Scene panel on the right helps. Click the object you are looking for there and then press the F key. The view zooms automatically and directly to that object. You should definitely remember this shortcut, because it saves you a lot of time in extensive scenes.

12. Viewing the scene from every perspective
The decisive difference from classic two-dimensional design lies in the camera. You can guide it freely around your objects and view any design from every imaginable perspective, even from below. This is enormously helpful later on for many design decisions, because you can check the effect of a motif directly from different angles.

13. Saving camera views as bookmarks
If you have found a particularly successful perspective, you can save it permanently. Click the icon with the star and the camera at the top of the interface. Then press the plus, assign a suitable name, such as "Side view", and confirm with the Enter key. The view is now saved and can be called up again at any time. In this way, you create a separate bookmark for every interesting perspective.

14. Rendering multiple camera views one after another
The real benefit of the bookmarks shows when rendering. If you select several saved views, the computer calculates the images one after another. You don't have to return to the computer after each run and set up the next perspective. Instead, you get all the desired views in one pass. This saves a lot of time, especially in extensive projects.
Summary – Adobe Dimension CC: Setting up the artboard and navigating in 3D space
You have learned how to create the artboard with the right dimensions, select units of measurement and resolution, and use the grid as an orientation aid. You also know the three navigation tools Orbit Camera, Pan, and Dolly, as well as the shortcuts with which you call them up quickly. With the F key, you find lost objects again, and with saved camera views, you keep your best perspectives at hand. In the next step, you will import models and take a closer look at their properties.
FAQ
How large should my artboard be?For a classic Full HD design, 1920 × 1080 pixels are suitable, which you enter in the right-hand panel.
Which resolution do I choose for print or screen?For desktop display you choose 72, for designs that are to be printed, 300.
Why do I suddenly see scroll bars?The artboard no longer fits completely into the interface. With Ctrl or Command and the 0 you fit it again.
What happens if I turn off the grid?Without the grid you lack reference points, and you easily lose your orientation in space.
How do Orbit Camera and Pan differ?Orbit Camera moves you around a pivot point, Pan only shifts the camera along one axis.
How do I find an object again if I have gotten lost in space?Select the object in the Scene panel and press the F key, then the view zooms to it automatically.
Can I render several perspectives at once?Yes, if you select several saved camera views, they are rendered one after another.

