

Sending a finished layout by email or via a cloud service often takes more time than you think. With the Publish Online function in InDesign CC 2015.2, you can create a web link directly from the program, under which your document is available as a flippable preview. You don't need an additional plug-in for this.
The video is only loaded from YouTube when you play it – data (including your IP address) is then transmitted to YouTube/Google. More in the privacy policy
This tutorial guides you through the entire process: from publishing and checking in the browser to the dashboard with the usage data. The time stamps in the screenshot placeholders refer to the corresponding points in the video.
Key Takeaways
Key Takeaways
- Publish Online makes InDesign documents available as a web link via Adobe's servers, without a plug-in.
- When publishing, you specify which pages appear and whether users may download or print the document as a PDF.
- The link can be shared directly on social networks, by email, or as an embed code on a website.
- You can republish updated documents under the same URL.
- In the dashboard, you can see when a document was published and get analytics on views, reading time, and devices.
Step-by-Step Guide
Step 1: Open Publish Online in the menu
Open your finished document in InDesign. At the top of the menu, you'll find the entry Publish Online, in German Online veröffentlichen. Clicking it opens the publishing dialog for the currently open document, which is then made available via Adobe's servers.

Step 2: Set the title and description
In the dialog, you first assign a title to your document. In the video, the project is called fotoreisespitzbergen.de. The title will later also appear in the recipient's view, so you should choose it clearly and unambiguously.
After that, you can enter a description text. If the text is already in your clipboard, simply paste it in. This way, your client or colleague knows right away what it's about.

Step 3: Choose the page range and export type
You don't always have to publish the complete document. In the example, you select pages 1 to 5, since this selection is enough for the preview. Make sure the range corresponds exactly to what your recipient should see.
Then you decide whether the document should be exported as single pages or as a print version. Since the example layout was set up as single pages, you choose this option.
Step 4: Set access rights for recipients
In the dialog, you'll find two checkboxes. With the first, you allow users to download the document as a PDF. With the second, you allow printing. Only activate the options you really want to release, because this way you keep control over what may be done with your layout.
Step 5: Check the advanced settings
Switch to the Advanced tab. Here you define the thumbnail cover, that is, the image that serves as the teaser for the publication. By default, the first page is used. If you prefer a different image, you specify an image path for it.
In the example, the first page is entirely sufficient, since it works as a cover image anyway. Below that, you'll find further settings for format and resolution. In the video, the JPEG format at 96 ppi was chosen, which is sufficient for display on the web.
Step 6: Start publishing
When all settings are right, click the blue Publish button. The upload starts, and first the document is prepared. The duration depends heavily on the number of pages. A brochure with a few pages is therefore usually online faster than an extensive catalog.
Step 7: Keep working during the upload
While the upload is running, you don't have to wait. Simply close the dialog, and the transfer continues in the background. You can work on other documents in InDesign in the meantime.

Step 8: Copy and share the link
Once the upload is complete, you will receive a URL. Copy it, because with this link your document can be accessed online. Directly from the dialog, you can also share the link via social networks such as Facebook or Twitter, or by email. This saves the detour through the browser.
Step 9: Check the result in the browser
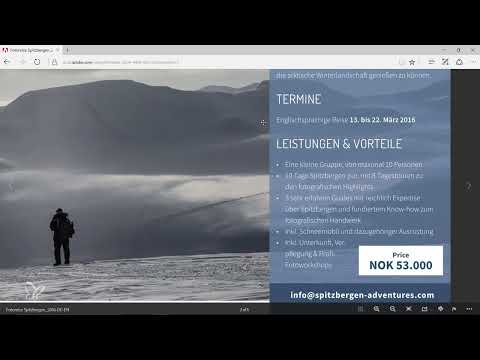
Open the copied URL in your browser. After a short loading time, you will see your document just as your recipients will see it. This check is important before you pass on the link, because it lets you immediately spot errors in the display or in the page selection.

Step 10: Use the view in the browser
In the browser, you flip through the pages with the arrow keys. Using the thumbnails, you can display a page overview and jump directly to a specific page. When you hover over the thumbnails with the mouse, a hover effect appears, which further enhances the presentation.
With a mouse click, you zoom into the design and back out again. You can also switch to full-screen view to present the layout without distraction. You exit this view again using the corresponding button.

Step 11: Control download and sharing
Using the download button, recipients can download the PDF, provided you enabled this option in step 4. Next to the download, you will find the share icon. With it, you send the link again to other people or share it on social networks. The link always stays the same.

Step 12: Report abuse and use the embed code
Via the three dots at the top right, you reach further options. There you can report abuse if needed, for example if a document is being reused without permission. You will also find the embed code here. With it, you embed your document into your own website. For interactive elements such as videos, you can also turn sound on and off.

Step 13: Find recently published documents again
After some time, you often no longer know exactly which documents you have already published. For this, there is the entry Recently Published in the File menu. There you see the last ten published projects and can open them again directly.

Step 14: Manage the dashboard
Via the entry Dashboard for Publish Online, you get to an overview of all publications. Here you see when a document was published. You can copy the link again, retrieve the embed code, or delete a document when it is no longer needed.

Step 15: Analyze usage data
In the dashboard, you will also find analytics for your documents. These include the number of views (Views) and readers (Readers), the average reading time, and the total reading time of all visitors. The analysis also shows you from which devices the document was accessed, such as desktop, smartphone, or tablet. This information helps you to design the follow-up review of your presentation in a meaningful way.

Summary – Publishing InDesign documents with Publish Online – step by step
With Publish Online, you publish InDesign documents as a web link without any additional plug-in. You determine the page selection, the rights for download and printing, and the thumbnail cover. Afterwards, you can check the link in the browser and share it directly or embed it into a website. The dashboard additionally provides you with usage data, so that you can see at any time how your document is being received. You publish updated versions again under the same URL.
FAQ
Do I need an additional plug-in for Publish Online?No, the function is included directly in InDesign and requires no plug-in.
Can I publish only individual pages of my document?Yes, in the publishing dialog you select a page range, for example pages 1 to 5.
Can a recipient download my document?Only if you enable the PDF download option in the dialog. Otherwise, the view remains in the browser.
What happens if I change my document later?You publish the updated version again, and it is available under the same URL.
How do I find a document again that I published weeks ago?Via File and Recently Published, you see up to ten recently published projects. The dashboard also helps.
Can I embed the document into my own website?Yes, via the three dots in the browser dialog you get the embed code.
Can I see how often my document has been viewed?Yes, the dashboard shows views, readers, reading time, and the devices used.

