

Before you export your final PDF, your client often wants to see the result already. This is exactly what the Publish Online function in InDesign is for. It uploads your document directly from the program to the Adobe Cloud and creates a link that your client can use to view the preview, with no email attachment and no in-person meeting. Using the example of the double-sided business card for a dentist from Neubrandenburg, I will show you how to publish the document, define the visible range, and share the link.
The video is only loaded from YouTube when you play it – data (including your IP address) is then transmitted to YouTube/Google. More in the privacy policy
Key Takeaways
- Publish Online can be found directly in the InDesign user interface and replaces the detour via PDF export for approval.
- In the dialog box, you define the title, description, and the page range your client should see.
- If you wish, you can allow the download as a PDF and choose a cover page for the approval.
- After uploading, you receive a URL that you can copy and share via email or social media.
- Test the link yourself before sending it, so you can be sure the preview matches your document.
Step-by-Step Guide
Accessing Publish Online
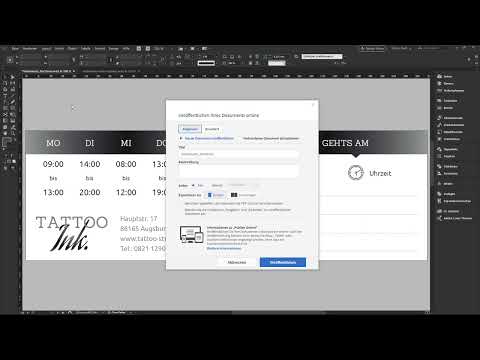
First, open your finished document, in this case the double-sided business card with front and back. At the top of the user interface, you will find the Publish Online button. Clicking it opens a dialog box. It has a light design that looks unfamiliar at first glance because the rest of InDesign is dark. Don't let that irritate you, because the layout of the dialog is clear.

Entering the Title and Description in the General Tab
In the General tab, you first assign a title for your publication. Also add a short description, such as the project name and the client. That way, the recipient immediately knows what it is about when they open the link.

Defining the Page Range
Now you determine which part of your document is actually shared. In this example, the dentist business card comprises four pages because the file still contains the inner pages of the project. For the client preview, however, you only need the first two pages, that is, the front and back. Therefore, enter the range 1 to 2 in the field for the pages. The client will then see exactly the pages you want to release, and nothing beyond that.
Allowing Download and Using the Advanced Tab
Next, decide whether your client may download the document as a PDF. To do this, activate the corresponding option if you want them to be able to save the file. In the Advanced tab, you define how the document looks when it is shared on social networks. There you can select a cover page, upload your own image, and set the resolution of the preview.
Publishing the Document
Now click the button to publish. InDesign uploads the file to an Adobe server. As soon as the message appears that the document was uploaded successfully, the preview is available online. You do not need to initiate a separate PDF export for this.

Copying the URL for Sharing
In the success dialog, you will find two options: view the document or copy the URL for sharing. Choose the link button to copy the address to the clipboard. As soon as the button lights up blue, the copy process is activated, and you can paste the link.
Opening the Preview in the Browser
Click on View Document to open the preview directly in the browser. There you will see your front and back. Using a toggle, you switch to the inner pages. This way you present the project to the client in the same order in which you created it.

Testing the Link Yourself
Before you send the link, check it yourself once. Open a new browser window, paste the copied link with Ctrl+V (Windows) or Cmd+V (Mac), and check whether the view matches your document. Especially if your client lives in another city, this saves you the trip to an in-person appointment.
Share the link with the client
In the dialog, you also have buttons for Facebook, Twitter, and other networks available. For communicating with clients, email is usually the most sensible way. Paste the link there, add a brief explanation about the release, and ask for feedback.
Summary – Publish Online in InDesign: Step by Step to the Client Preview
With Publish Online, you can upload your design directly from InDesign to the Adobe Cloud and make it available to your client as a preview. You determine the title, description, and page range, decide on the download, and copy the finished URL. Test the link before sending it, before you pass it on. The next part of the training covers automation in InDesign.
FAQ
Does my client need to have InDesign installed to see the preview?No, the preview opens in the browser via the link, without InDesign needing to be installed.
Can I release only some of the pages?Yes, in the pages field you define the desired range, for example 1 to 2.
Can my client download the document?Yes, provided you activate the option that allows users to download the document as a PDF.
Where do I find the link after uploading?In the success dialog, you select the option to copy the URL, after which the link is in your clipboard.
Can I set my own preview image?Yes, in the Advanced tab you can select a cover page or upload any image.
Should I test the link before sending it?Absolutely, because this way you make sure that the preview matches your document.

